
DIY | Mason Jar Trail Mix Favors
Weddings make me snacky. Do they do that to you too? I think it’s because they can be such long days… the drive there, the ceremony, the reception, the drive home, etc. Give your guests a practical, personal, and snack-worthy favor that they can enjoy – enter the DIY Mason Jar Trail Mix Favors. Use only your favorite ingredients, assemble up to one-month ahead of time, use our free printable labels or personalize your own… it’s just all so good. FYI: edible wedding favors that are actually delicious are always a hit. The most interesting part of this project are the labels, you’ll never guess what they are made from!

SUPPLIES:
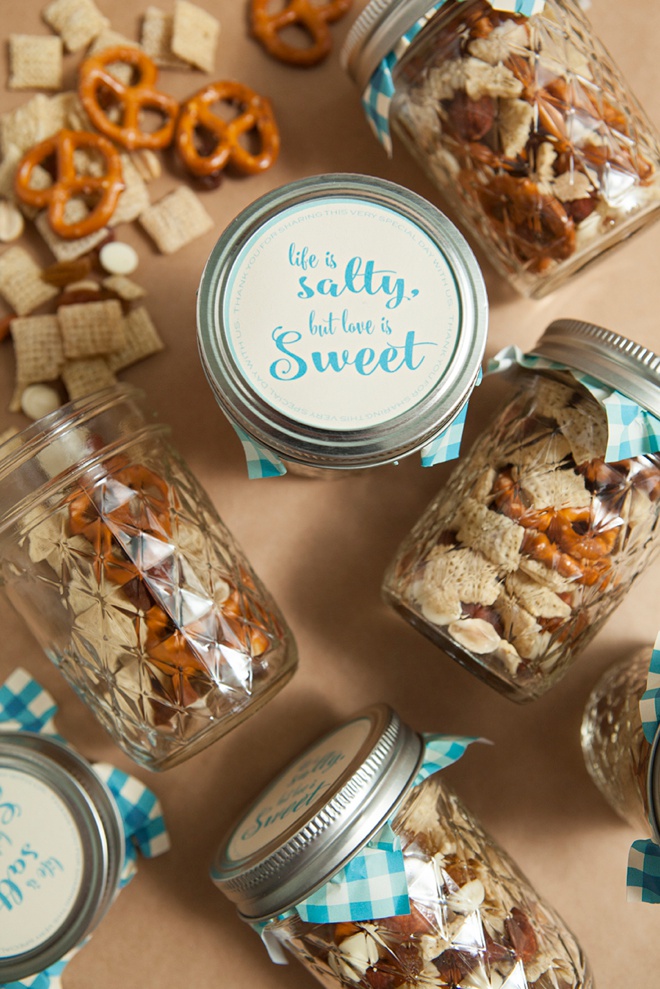
- 8oz Ball, Quilted Crystal Jelly Jars
- Trail Mix Ingredients
- Metal Ruler + Craft Knife + Cutting Mat (or paper trimmer, or scissors)
- Large Mixing Bowl
- 1 cup, measuring cup
- Regular Printer Paper
- My free design downloads at the end of the post!
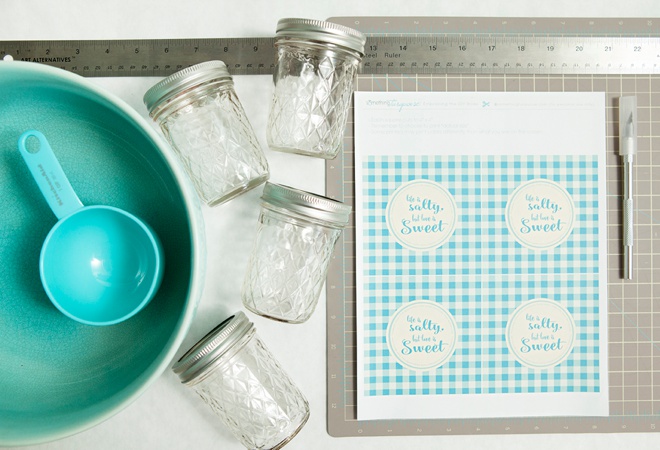
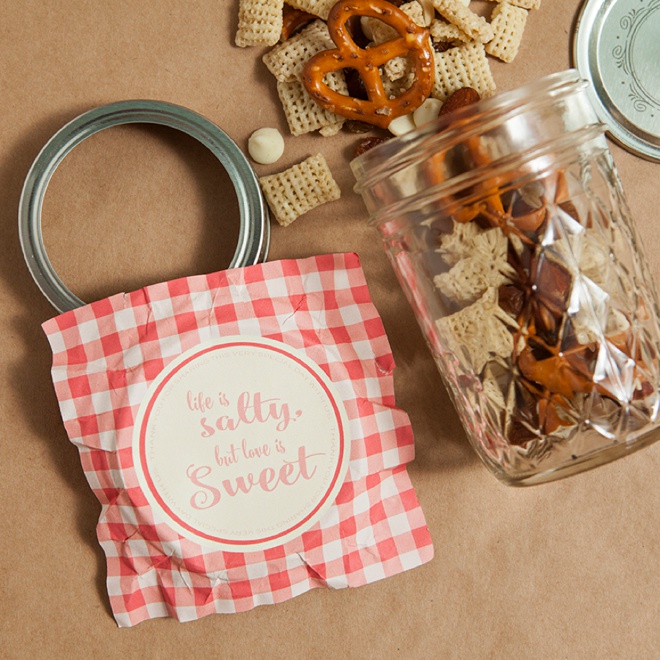
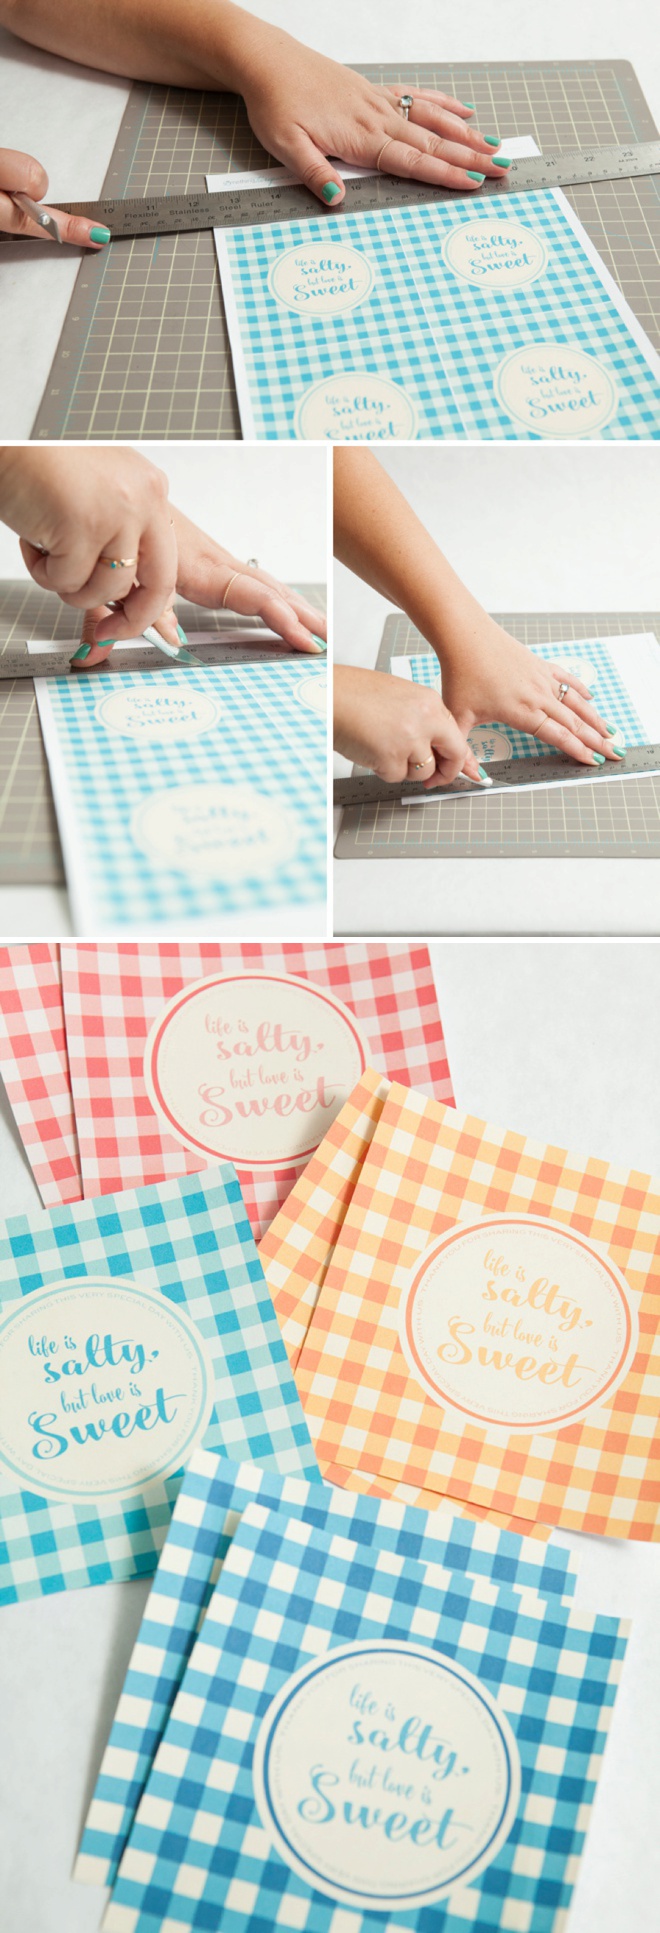
Print + Cut Your Labels
Download my “Life is Salty, but Love is Sweet” labels at the end of the post and print onto regular old, white printer paper – the thin stuff. Trim each 4″ square label, there are four on a sheet. Here I am using a craft knife, metal ruler and cutting mat to perfectly trim my labels – I love the precision of this technique. But feel free to use a paper trimmer or even scissors – totally your call.
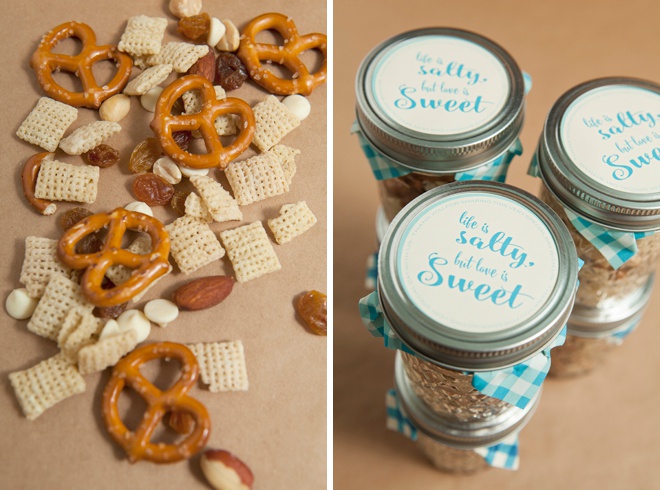
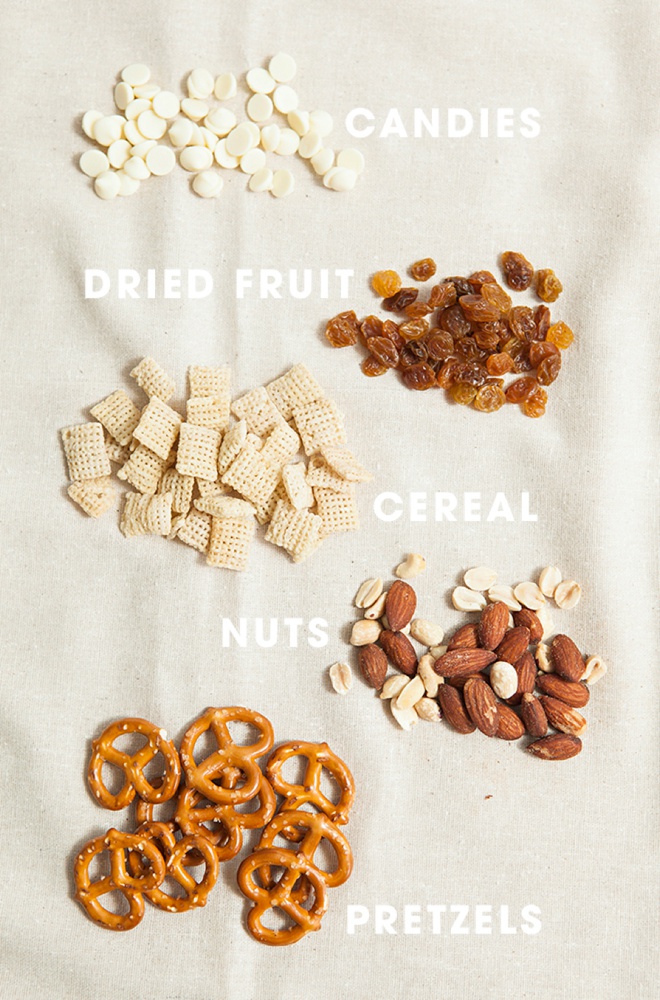
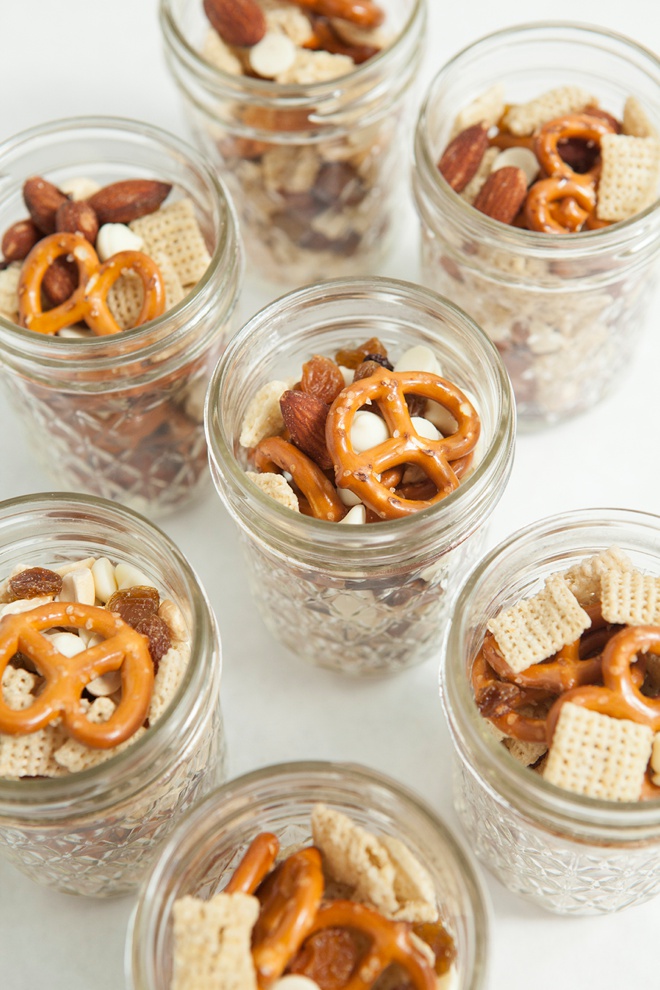
Trail Mix Ingredients
You have a lot of options when it comes to trail mix ingredients. For a wedding favor, I think you should only choose to include you and your fiancés favorite snacks. The more ingredients the better, but to start you should include at least 5 items. Think about candies, dried fruits, cereal, nuts and pretzels. Pretzels are great because everyone loves them and they take up a lot of space = cheaper, lol. You could also include colored candies to match your theme.
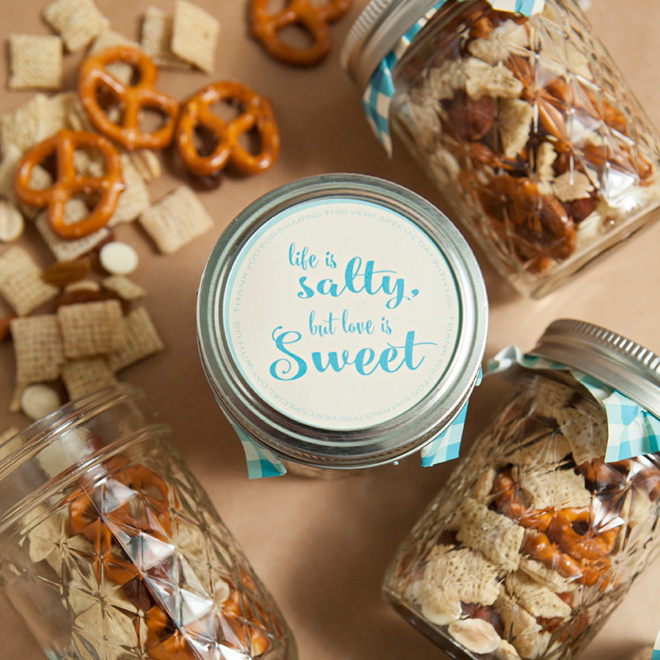
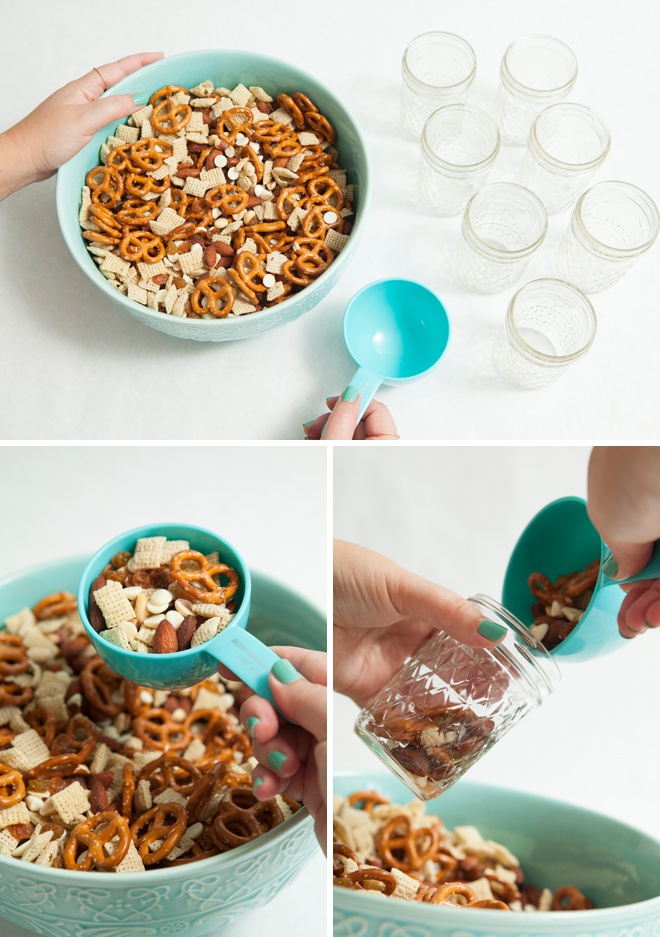
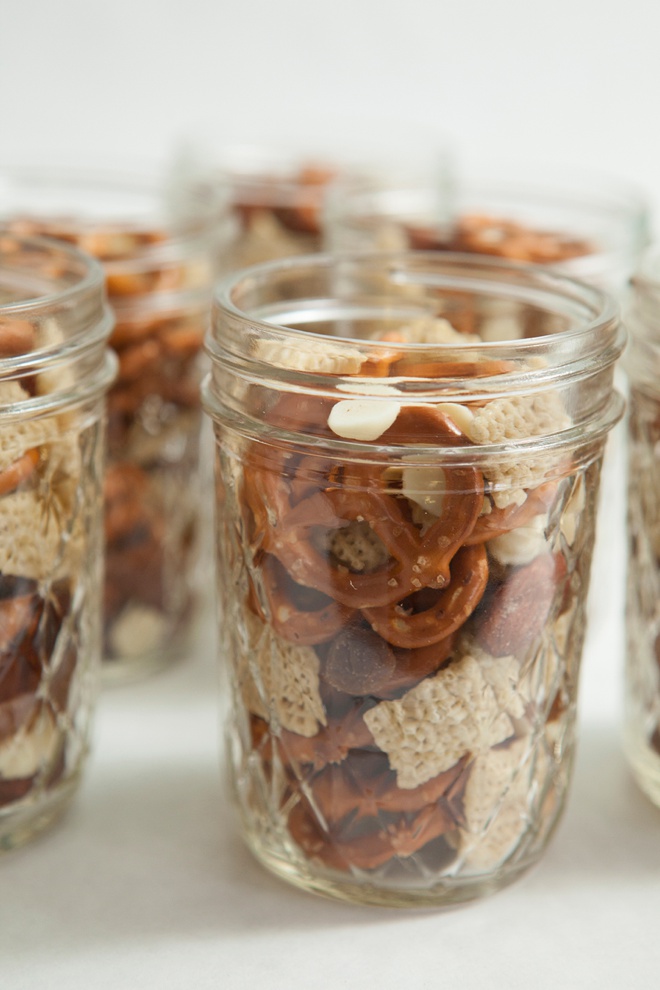
Fill Your Jars
These 8oz. jelly jars take right under 1 cup of mix. I wish I could tell you an exact weight as that would be easier to calculate supplies, but everyones trail mix will be a different weight.
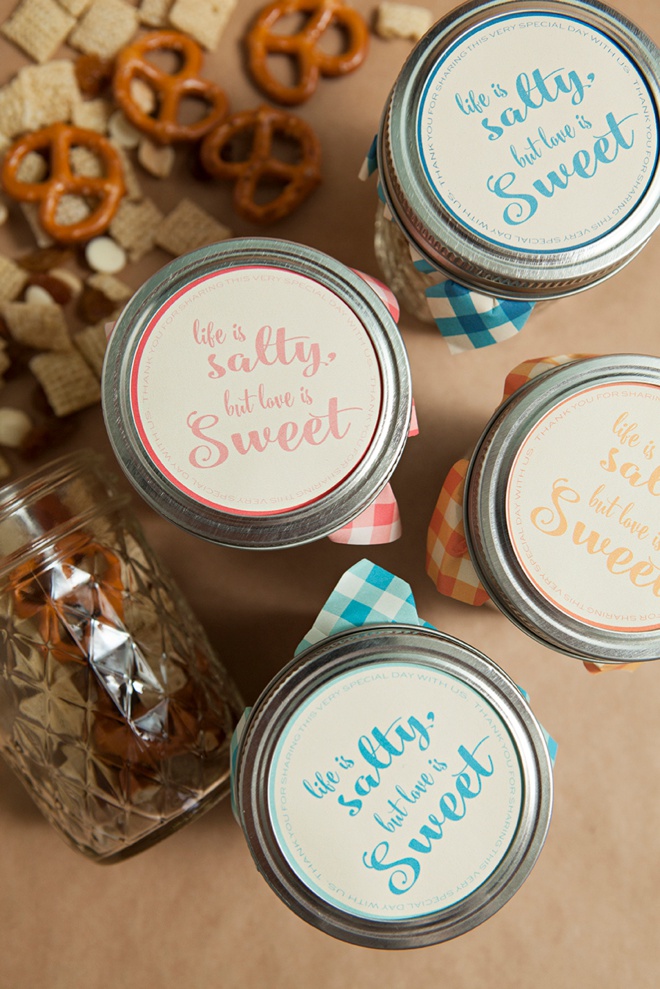
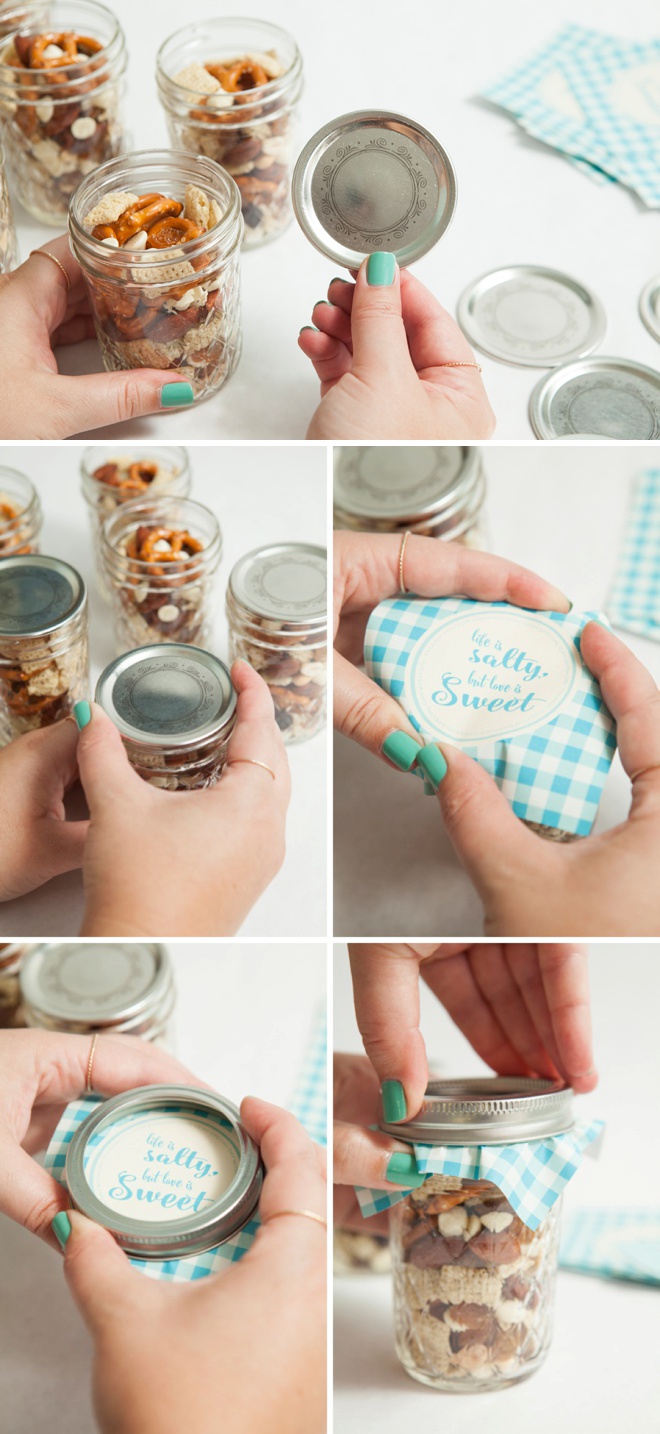
Lids + Labels
- Add the lid to the top of your jar
- Cover the lid with a paper label and center as best you can
- Screw the band onto the jar, over the paper
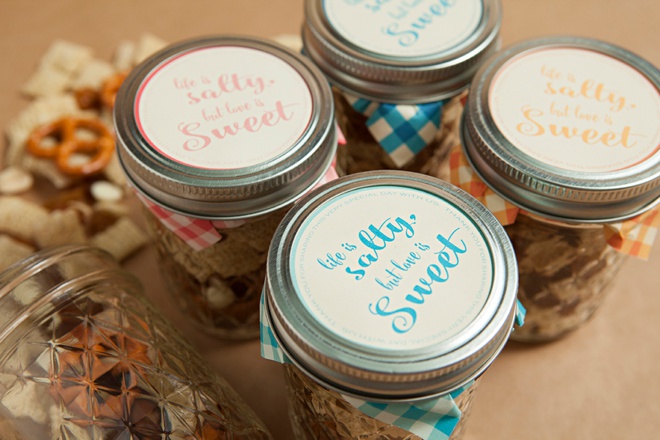
I absolutely LOVE how this looks and works! No joke, the paper is perfect and doesn’t inhibit the band from screwing on at all. The label looks cool and campy – perfect for your rustic event! I am recommending that you assemble these up to four weeks before your event, as the seal of the jar will keep your snacks fresh – although closer is always better. Store them in a cool place, away from sun and heat.
My free labels are designed to work with all mason jars that have the 2.5″ jar mouth.
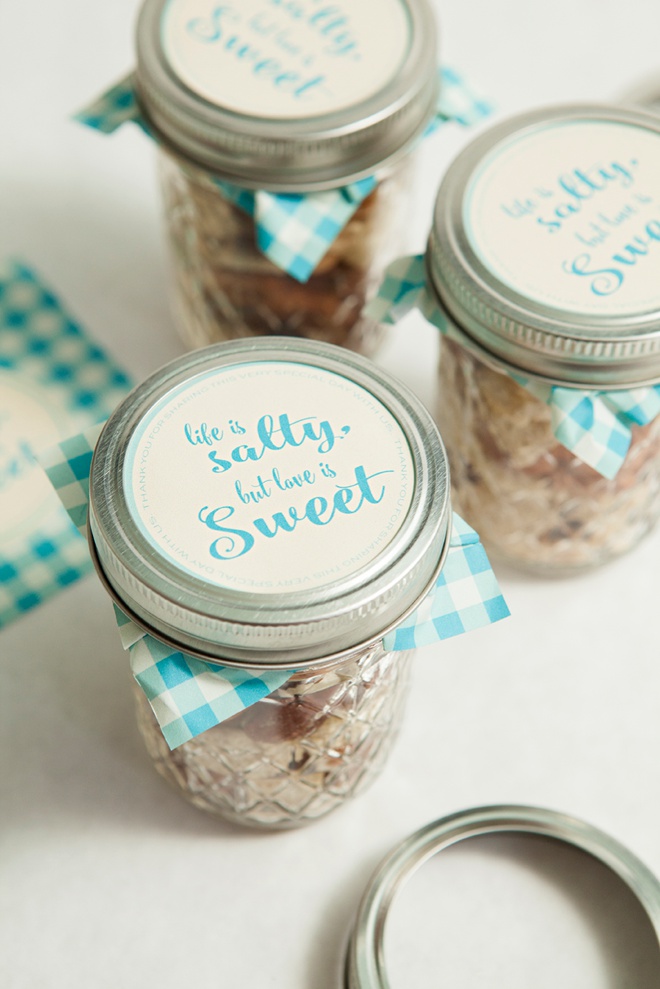
I created aqua, red, blue and orange label options for you… but if these don’t work for your theme – get creative and design your own labels at 4″ square!


As with all our DIY tutorials, if you create one of our projects please send us a picture – We Love Seeing Your Creativity! If you use Instagram or Twitter please use the hashtag #SomethingTurquoiseDIY and it will show up on our Get Social page. Happy Crafting!
DIY Tutorial Credits
Photography: Something Turquoise Photography for SomethingTurquoise.com // DIY tutorial: Jen | Something Turquoise // 8oz Ball Jelly Jars: Amazon // Metal Ruler: Amazon // Craft Knife courtesy of: Fiskars // Cutting Mat: Amazon // Snacks: Target // Font used: Steelheart // nail polish: OPI – Withstands the Test of Thyme
Shop The Supplies:
Find the supplies you’ll need for this project from our affiliate links below:

Comments