
#STcraftroom / Part Two / Painting
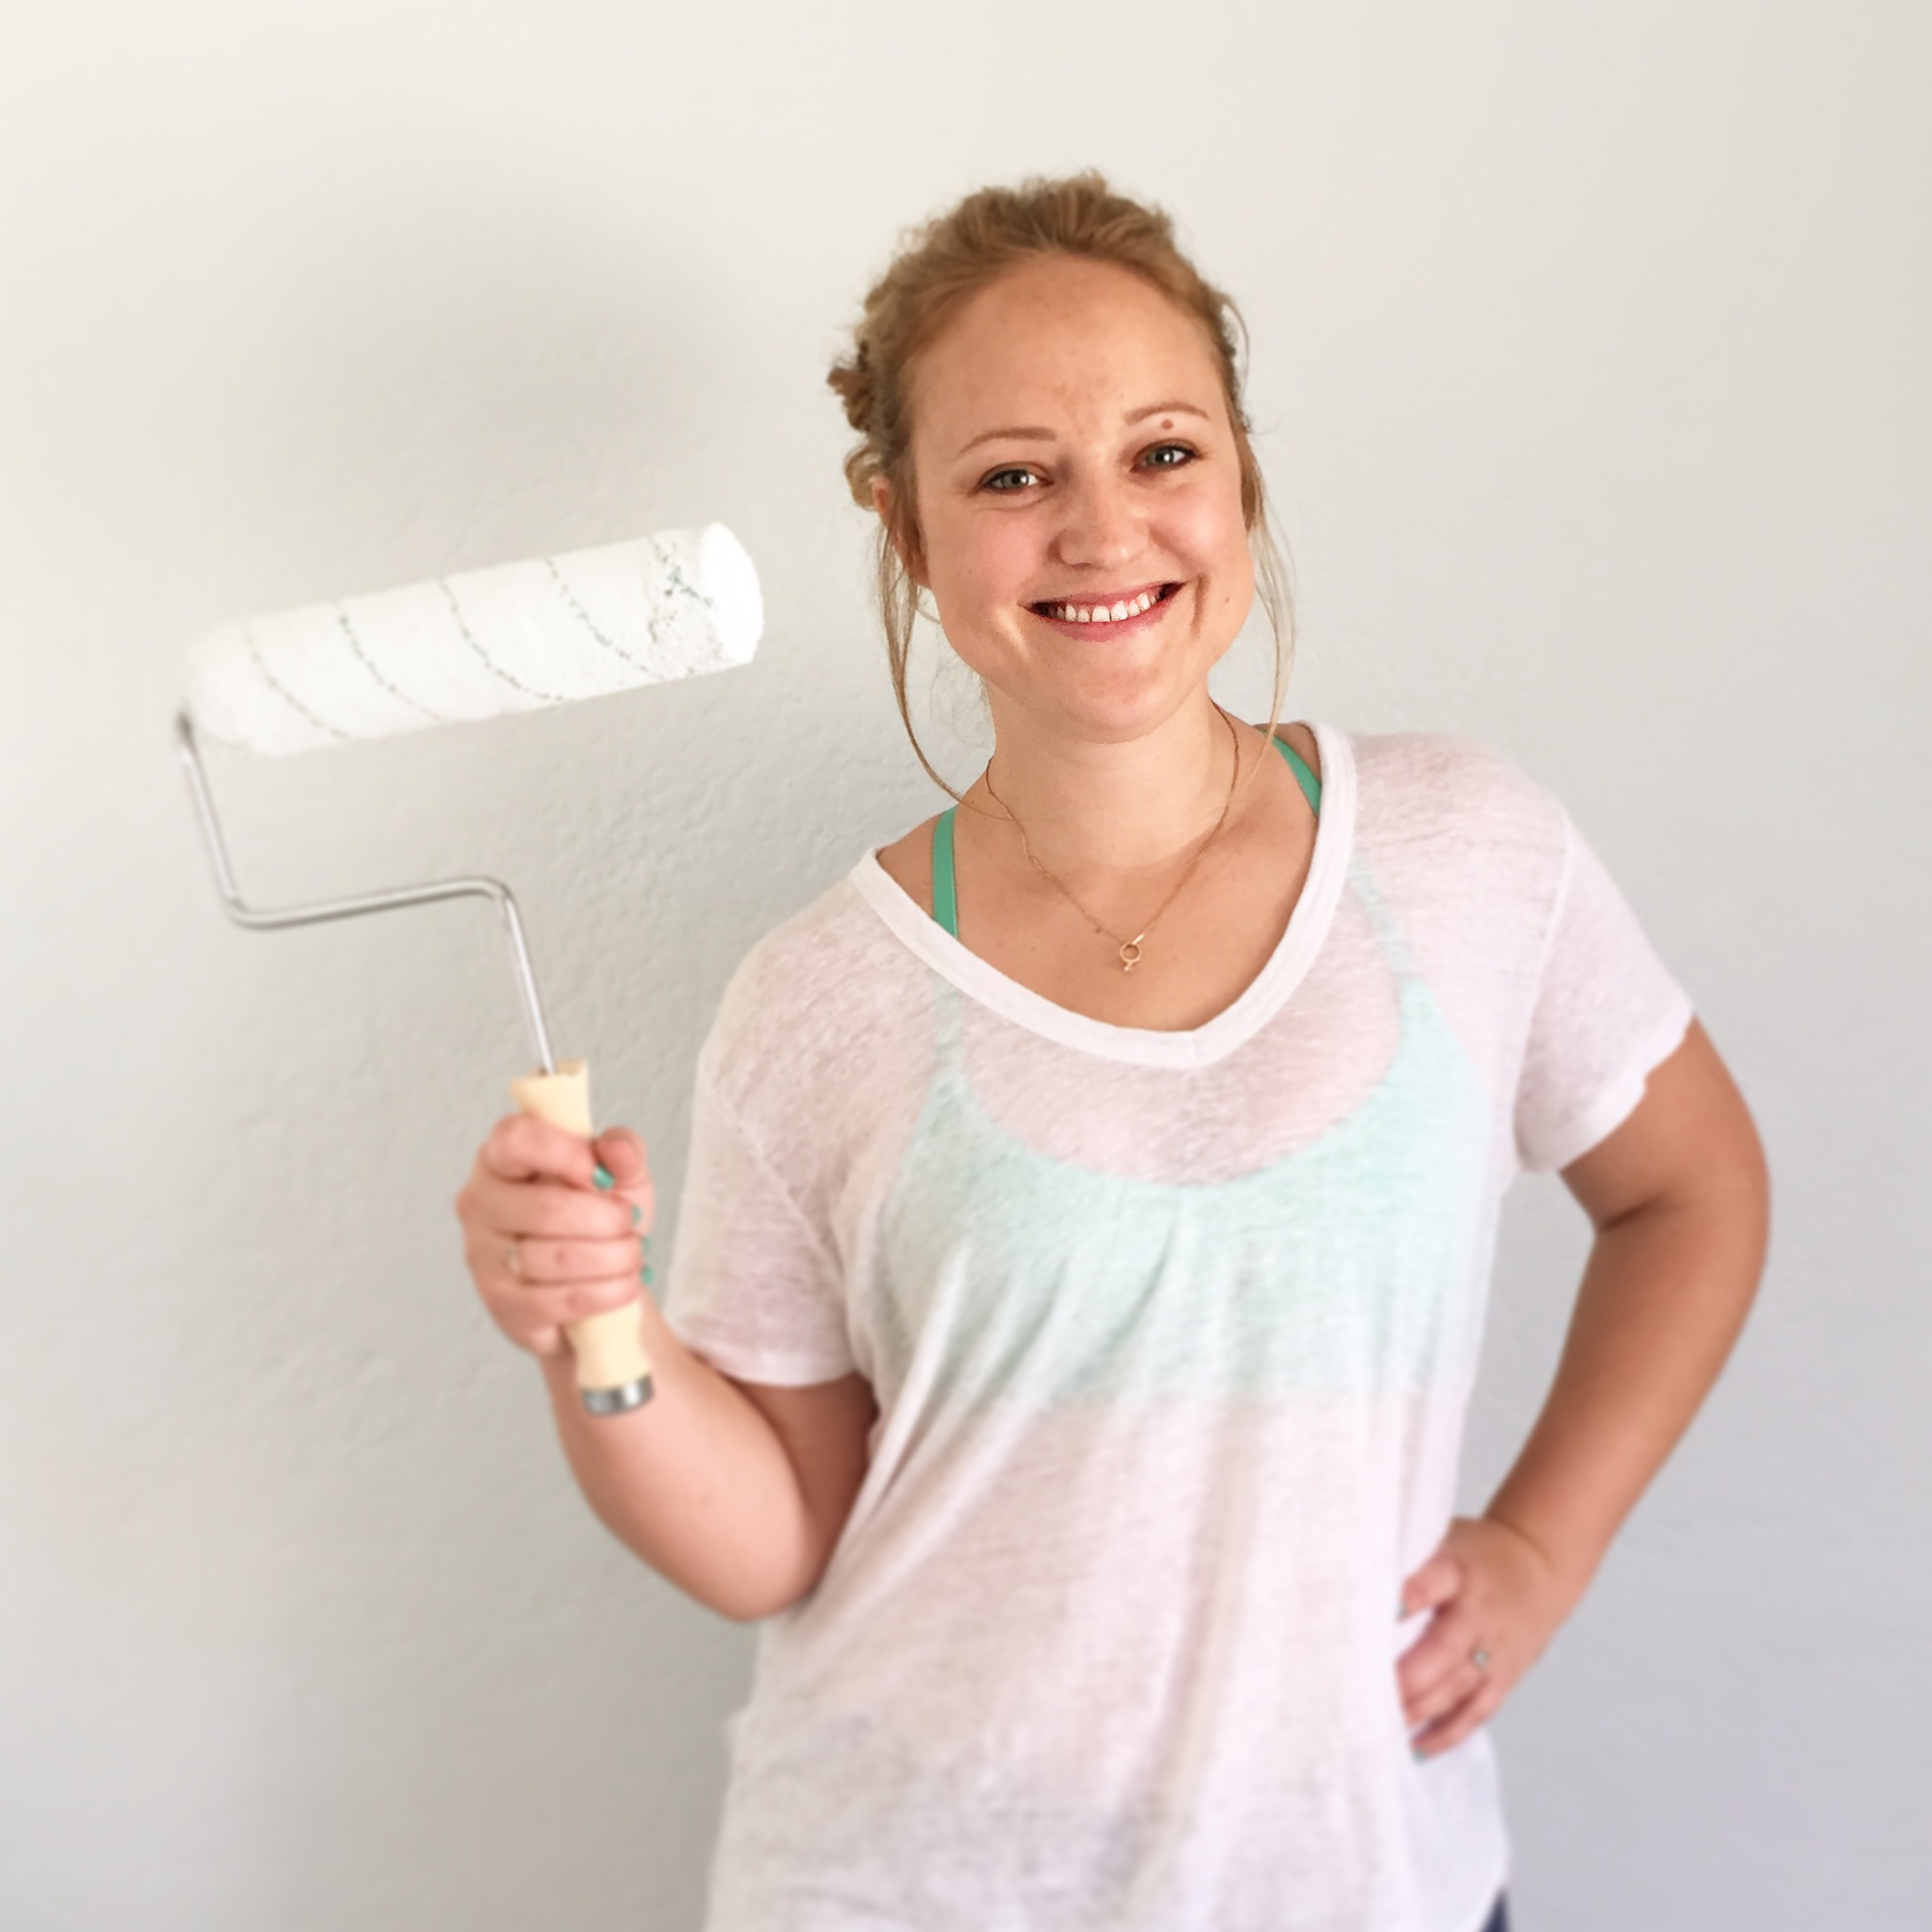
Hey there! I’m super excited that you’ve found your way to this post… as today I’m talking about the painting of my craft room walls, how I built my gas pipe shelving and how I created my gallery wall! Which were all very important elements to the design of my space. Make sure to scroll all the way to the end of the post because Behr Paint and Glue Dots® are sponsoring some awesome giveaway prizes that I know you are going to love! Get excited because tomorrow you will actually get to see my finished craft room!!!
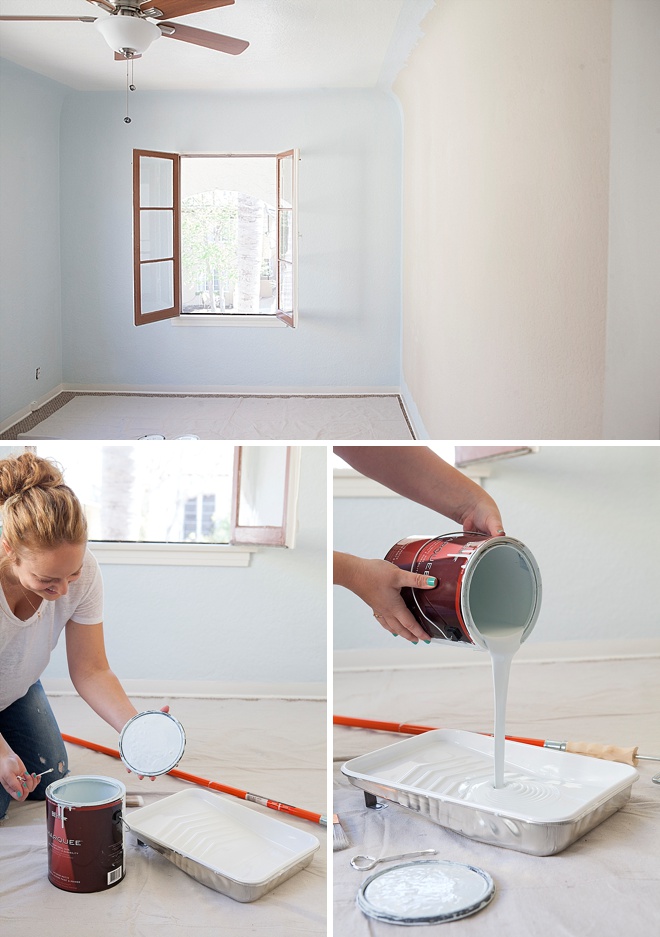
As I mentioned in yesterday’s post, I was looking for the lightest shade of turquoise paint that I could find to be the ideal backdrop for all my colorful room decor. I found that shade in the BEHR MARQUEE Interior paint which is BEHR’s newest an most advanced line of paint-and-primer in one – the shade is called Crystalline Falls.
As you can see, one coat of paint really does change everything… and when you use the BEHR MARQUEE Interior One-Coat Color Collection, you are guaranteed to achieve beautiful, lasting coverage with just one coat!
My Painting Tips:
By no means am I professional painter, but I have learned a thing or two about painting as I’ve painted quite a few rooms in my day that might help you:
- Make sure to calculate how much paint you will need for your project by using Behr’s paint calculator – it’s a great tool!
- Wear old clothes when painting and fully cover any carpet or trim that you don’t want to get paint on.
- After you pour paint into the paint tray, make sure to remove excess paint that gathers along the rim of your paint can so that you can fully seal your can of paint in the future.
- If painting with multiple colors in one room, start with the lightest color first – no matter what element you are painting. Dark paint will always cover lighter paint, but vise versa gets difficult.
- Wash your brushes immediately after use, using a wire bristle to remove all debris.
- If you need to take a break during your painting, do it only at a natural seam or break in your wall.
- Ladies! Watch your hair… paint splashes easily but doesn’t come out of hair easily so wear a bandana to protect your pretty hair. I have a turquoise one, but I must have lost it in the move, lol.
- Looking for more tips? Check out these great posts from Behr: How to Use Brushes & Rollers and How to Paint a Wall.

I’m most proud of my faux recessed ceiling and faux trim. If you check out my before pictures – there was no trim and no ceiling color. I didn’t actually “add” trim, I just painted it on and I love the definition. The ceiling was a bit more complicated and I stressed over it for weeks. Once I finally decided to do it, I got up on a ladder and very carefully taped off the entire ceiling. I painted the “recessed” rectangle by hand with both colors – white first then turquoise. I’m so glad that I took the extra time to do this step as it’s really my favorite aspect of the walls.
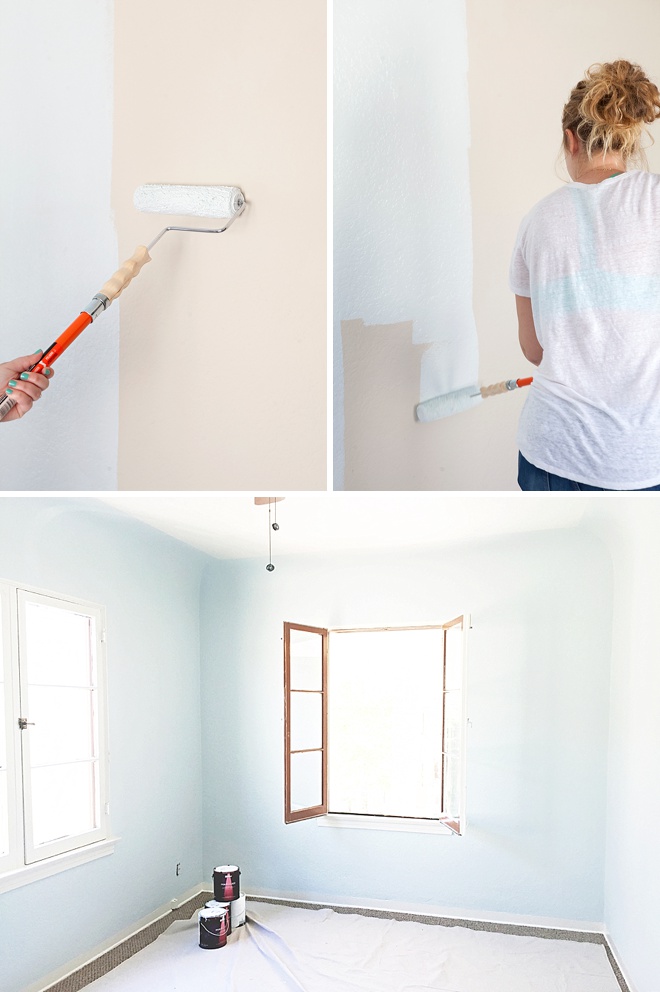
Yay!!! The painting is complete and now it feels so serene in my space!
DIY Gas Pipe Shelving!
Gas pipe shelving is all over Pinterest these days and I’d been dying to make some! As stunning as they are in real life, now that I’ve hung 4 shelves – I’m not sure that I’ll ever do it again. I’m seriously in LOVE these shelves but they took my Dad and I almost 10 hours to hang 4 – yes just 4 shelves took all that time. If it wasn’t for his patience and extreme attention to detail, these shelves would not be on the wall. We had a lot of things working against us and I feel that it is my duty to tell you the truth about this process:
- Gas pipes are not meant for these types of projects, they are not perfectly straight or exact in measurement.
- The threads aren’t straight and neither are the floor flanges they screw into.
- My walls aren’t even kind of straight, they are a plaster mess created circa 1930.
With those three elements combined you can image that getting these shelves level was an enormous pain in the ass, that I clearly didn’t anticipate. In all honesty, I wanted to make them so badly that even if I knew ahead of time that they were going to be a pain – I still would have attempted it. So yes, I am hard headed and you might be too… but now you can’t say I didn’t warn you. Of course when I look back, my Dad and I spent a great day together which I never regret, but now I’m pretty sure I’ll be on my own for all future pipe projects.
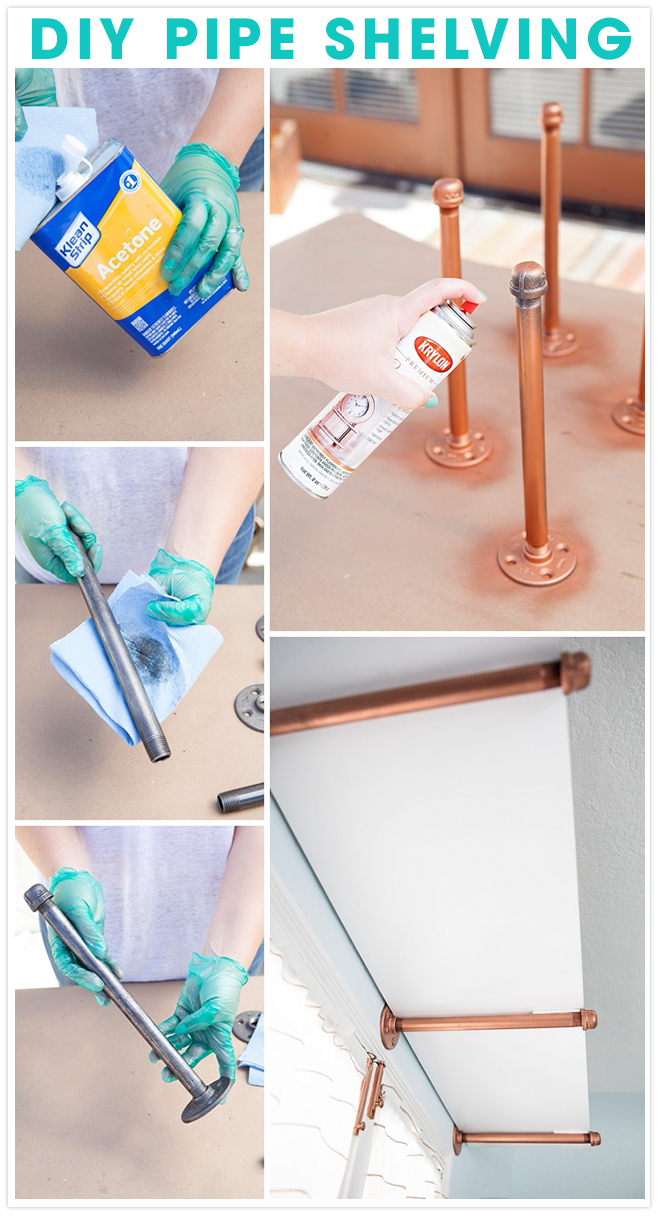
DIY Pipe Shelves How-to:
If you would like to tackle making gas pipe shelving yourself, here are the steps:
- Gas pipe comes oiled + dirty, clean the entire surface with acetone wearing protective gloves.
- Assemble the gas pipe nipple, cap and floor flange to create the shelve “bracket”.
- Evenly coat the assembled pipes with your choice of paint.
- Carefully measure and screw each flange to the wall using the appropriate anchors.
- Use earthquake putty to secure your shelves to the top of your pipes.
Using these inexpensive white shelves, I needed a pipe brace at least every 2 feet to support the weight of the items that are to be displayed on them. I used 3/4″, 12″ gas pipe for this project. To see an awesome DIY wedding escort card display that I created using a few of these extra pipes click here!

Here I am sitting in my freshly painted room… sewing my beachy curtains on my Martha Stewart Living Craft Space Collapsible Craft Table. Which I am completely obsessed with… and spoiler alert – I’m giving this exact table away tomorrow!!!
10 Steps To My Gallery Wall:
This gallery wall is right behind where my computer will sit, so that during my work day I can look up and get lost in my favorite things. If you follow me on Instagram, you probably know that I have a special love for sharks and so I knew this awesome decor piece I found had to be the focus. Building a gallery wall can be a bit difficult at times, so I’ve laid out the 10 steps I followed to result in the finished look:
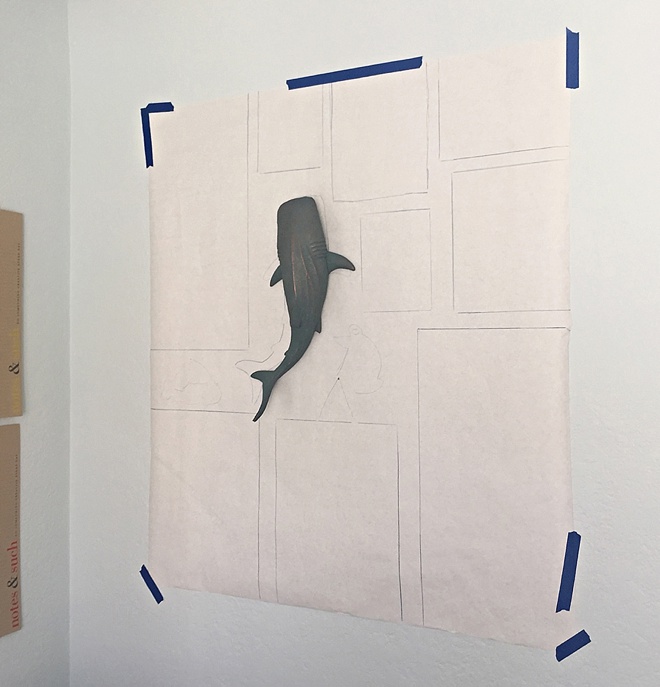
- I measured the exact space of my future gallery wall.
- I traced that measurement out onto butcher paper.
- Next I laid out all the frames and elements that I had purchased so far, on top of the butcher paper.
- With the shark as the focal point, I worked out from there keeping the edges of all the frames in perfect alignment.
- I left the butcher paper and frames laid out on my floor for a few days to continue to play with the arrangement.
- Once I was happy with the layout of the most important elements (ie. long photo frame, glitter wedding date sign, follow your heart print, seashell dictionary print and the bigfoot print) I purchased other frames to fit the remaining areas.
- Keeping my color palette in mind, I made sure to include frames of all different texture and color.
- When my layout was complete, I traced each element and hung the butcher paper on my wall. (pictured)
- From there I leveled the paper and started to mark the wall where each frame would hang.
- The last step was to hang all of my fun elements!
This was such a fun project to complete! I’ve been hanging onto some of these elements for years and it’s so good to finally see them have a wonderful home. I talked about how terrible it’s been to drill/nail into these super old walls and so I was actually really worried to tackle this part of the project. Excitedly, I was able to use the brand new Glue Dots® Repositionable Mounting Tape to adhere many of my lighter frames! It holds up to 2 pounds, removes without damage and works on almost any clean surface. Finding that product made hanging all my special items a million times easier than I assumed it was going to be!
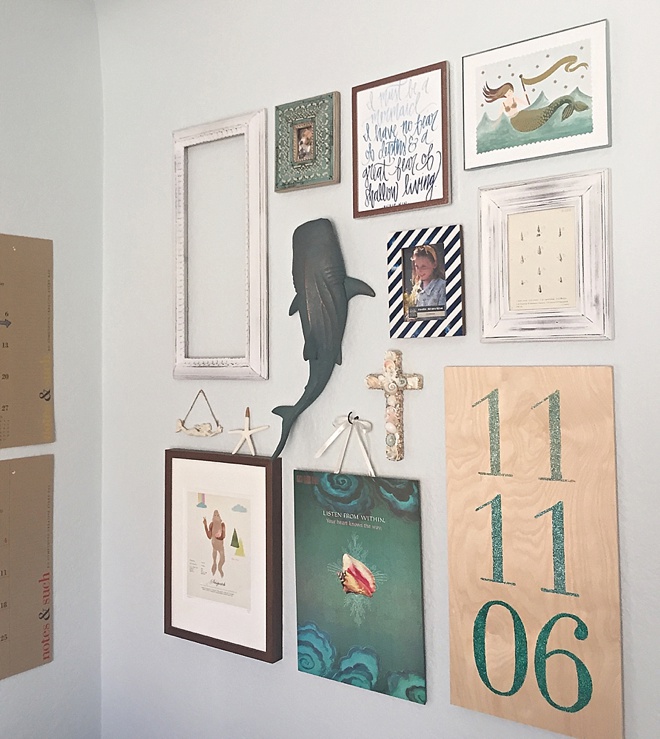
Gallery Wall Items: Picture of Catalina: Something Turquoise Photography // Both white frames + seashell dictionary page: Long Beach Flea Market // Mint lace frame + navy stripe frame: Michaels // Rose gold shimmer frame: Amazon // I must be a mermaid print: Shannon Kirsten // vintage mermaid print: Paper-Source // Shark: Home Goods // Shell Cross: Sandi’s Shellscapes // Sasquatch Print: Amy Sullivan – don’t buy from her, bad experience // Listen from within print: Fern’s Garden // DIY glitter wedding date sign: Something Turquoise
iPhone Snaps:
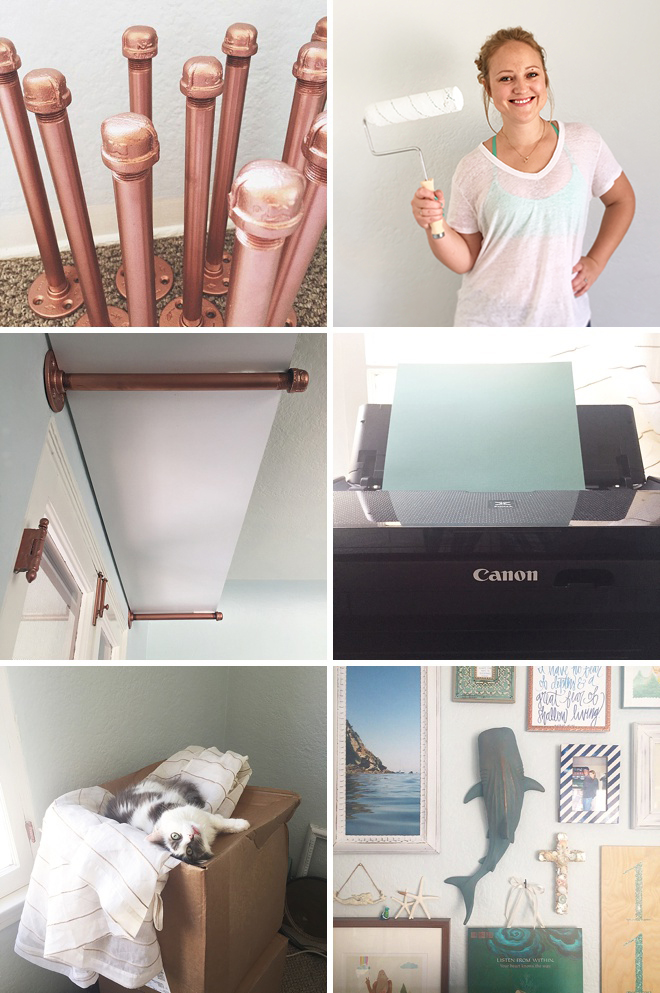
Here are a few pics from my phone during my painting and gallery wall process.1. All the gas pipes have been painted and are ready to hang! 2. Just got done painting and it feels so good! 3. The shelves are up – hooray!!! 4. Canon PIXMA iP8720 Crafting Printer, printing out some 12 x 12 fun, yep – that’s right! 12″ x 12″ and then some! 5. My wild cat Ash, enjoying the process. 6. The hubs printed one of his photos for my gallery wall and all the other frames are filled!
Craft Room Credits:
Special thanks to Home Depot, Behr Paint and Glue Dots® for partnering with us on this project! // Photography: Something Turquoise // Crystalline Falls (walls) + Snowfall White (trim): Behr Paint // All painting + shelving supplies: Home Depot // collapsible sewing table: Martha Stewart Living™ Home Decorators Collection // copper spray paint: Krylon // Canon Pixma iP8720 Craft Printer: JoAnn Stores // See above for all gallery wall credits
All images copyright of SomethingTurquoise.com®. If you’d like to share these images, please do! Guidelines: only 1-2 images can be shared at one time, in their original format, with a direct link to this exact post including that express credit for the image and idea is given to “Something Turquoise”.
This is part two, don’t miss the other features:
Craft Room Partners:

I have partnered with the brands listed above to create this craft space. All expressed opinions and experiences are my own.
#stcraftroom sweepstakes!
It’s day number two of our awesome #stcraftroom sweepstakes, we’ve got Behr Paint who is giving away 2 gallons of BEHR MARQUEE Interior Paint and the winner gets to pick the color(s)! How awesome is that!?! One coat of paint changes everything… from your craft room to your new home as Mr & Mrs! My favorite adhesive of all time, Glue Dots® is giving away a HUGE stash of their amazing adhesives! From the mounting tape that I used in my gallery wall to the tried and true Craft Dots – one lucky crafty reader is going to have some major fun with this tacky stash, lol! Good luck to all who enter!
Use the individual Rafflecopter Widgets above to enter. All contests end on Friday, 8/21/15 at midnight, PST. Winners chosen at random. Winners will be contacted via the email address that they provide to the Rafflecopter Widget. If the winner doesn’t respond to our contact email by 8/26/15 at midnight, another winner will be chosen. Winners will be announced here within this blog post no later than 8/31/15. Only one #stcraftroom sweepstakes winner per household. Readers are allowed to enter to win all 11 prizes, but can only win once during the Sweepstakes period. Available to US residents only. Must be at least 18 years old to enter. Click here to read the official rules for the Behr Paint prize. Click here to read the official rules for the Glue Dots® bundle prize.

Comments