
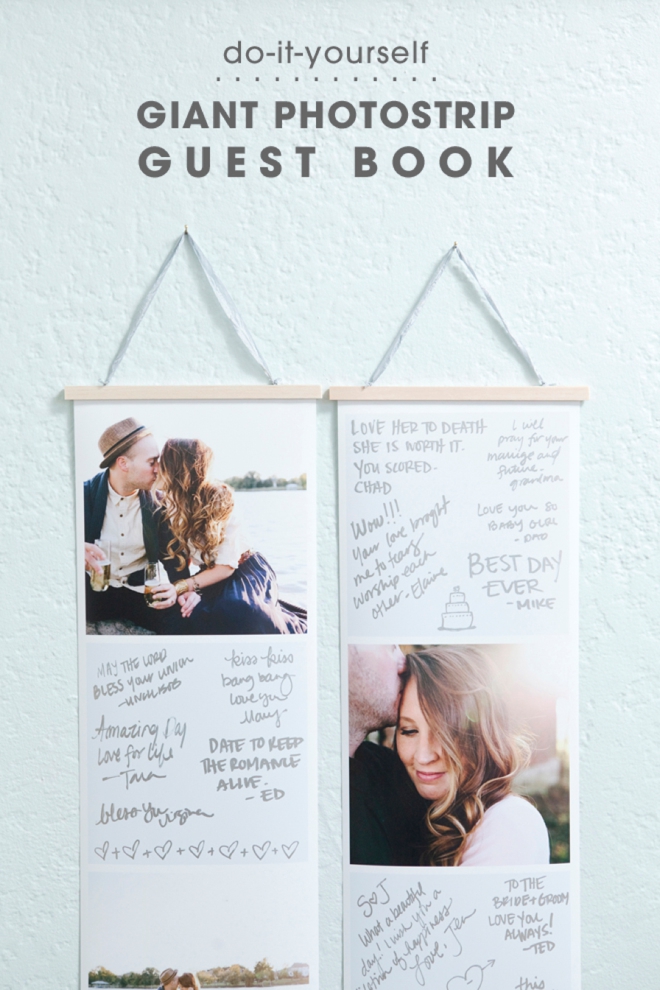
DIY | Giant PhotoStrip Guest Book
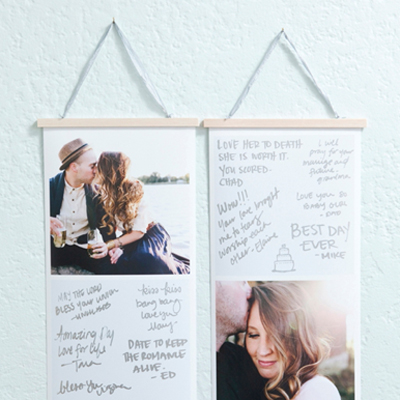
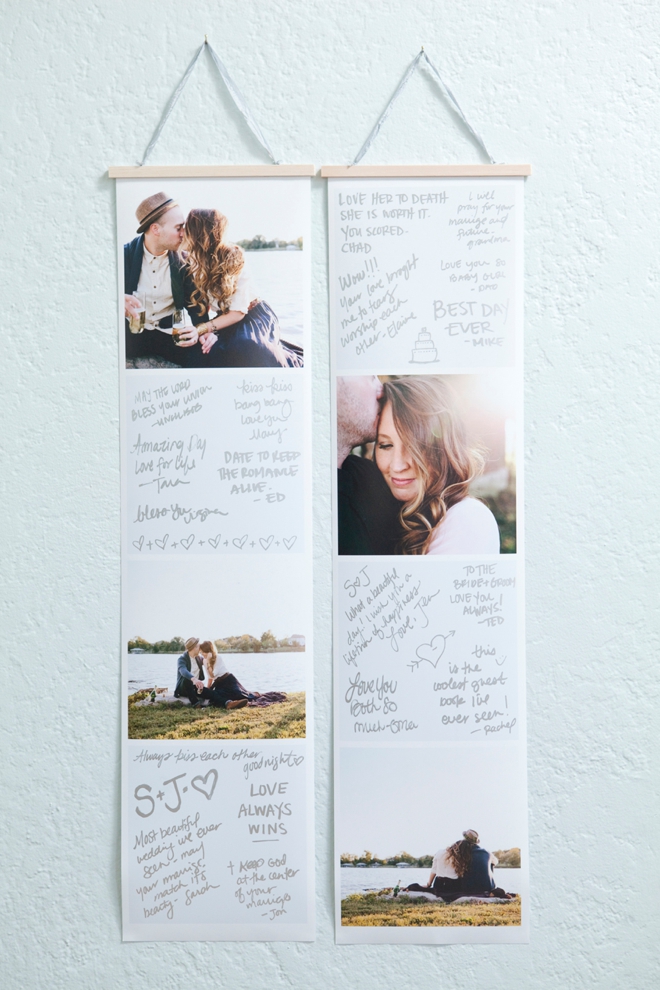
I love creative guest books. They are a wonderful detail to DIY for your wedding since you only have to make one and most every guest will interact with it, which will make a statement. It’s also a very special memento of your day, being able to read loving sentiments of family and friends who were in attendance is truly a gift. In thinking of what you’d like to make, don’t forget to think about the future – where will it go after your wedding? Do you want to have it out on display or will it be kept in a special box somewhere? When I got married eight long years ago, it was super cool to have your guests sign a matted frame of an engagement photo and so that’s what we did. As passé as that might be now, I still love it. It hangs on our wall and I actually read it often. So I was thinking on how I could bring you a project that was similar… and when I saw these giant photostrips from Social Print Studio I knew I had found it. So today I’m excited to share how you can make your own Giant Photostrip Guest Book with just a few easy steps. Huge thanks to Shots by Cheyenne for allowing me to use these beautiful images of Joseph + Shea (our new bridal blogger!) for the project. You can make one, two or many more, hang them together or in a few different places… maybe even one on his side of the bed and one on yours!
SUPPLIES:
- Pretty pictures!
- Giant Photostrips from Social Print Studio
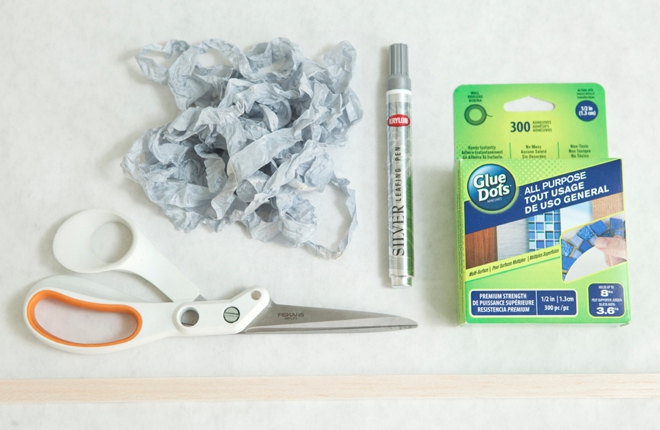
- 1/2″ Balsa Wood Strips
- Premium Strength Glue Dots
- Fiskars Amplify Scissors
- Krylon Silver Leafing Pen
- Pretty ribbon
Order Your Giant Photostrips
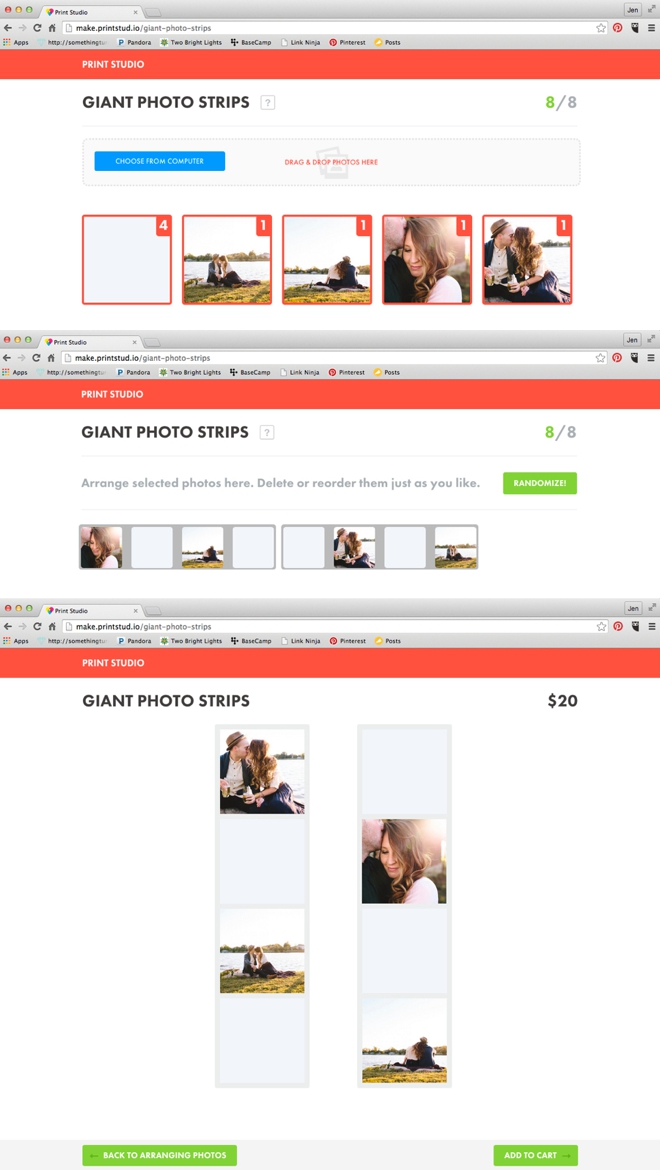
On Social Print Studio, you get 2 giant photostrips for $20. You’ll need to upload 8 photos and you can duplicate them if you’d like. For the blank “signature” areas, I actually took a picture of a very light blue piece of paper. You can see here that I uploaded 4 images and then duplicated the 4 blank pictures. The website allows you to organize your pictures however you’d like. That’s all there is to it.
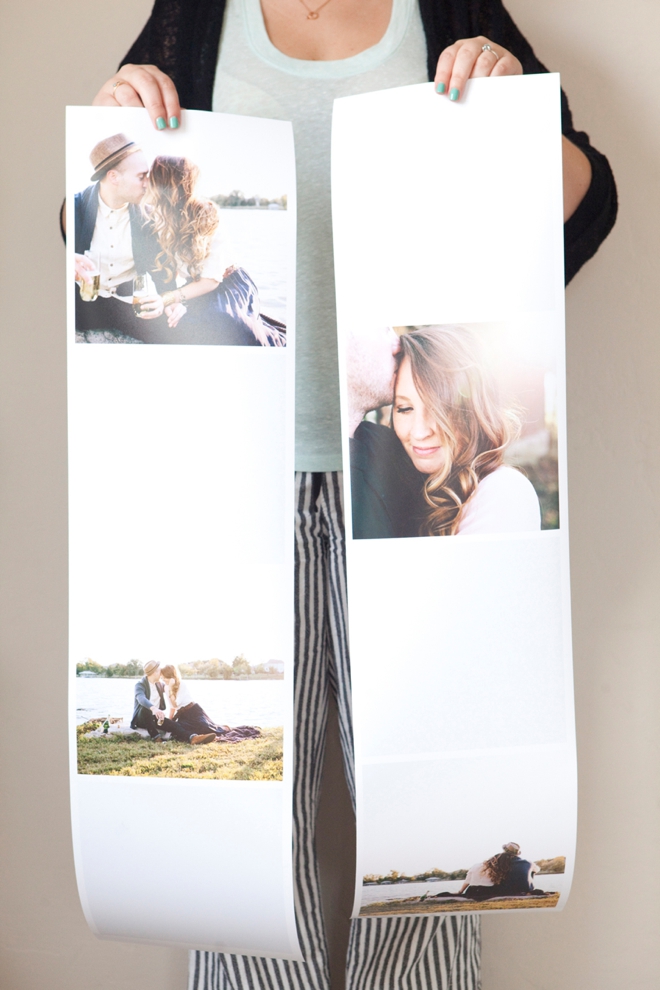
When these beauties arrive in the mail, they are all rolled up. Lay them on a flat surface, protect the images with printer paper and weight them down with books to get them to flatten out. A day or two should do the trick.
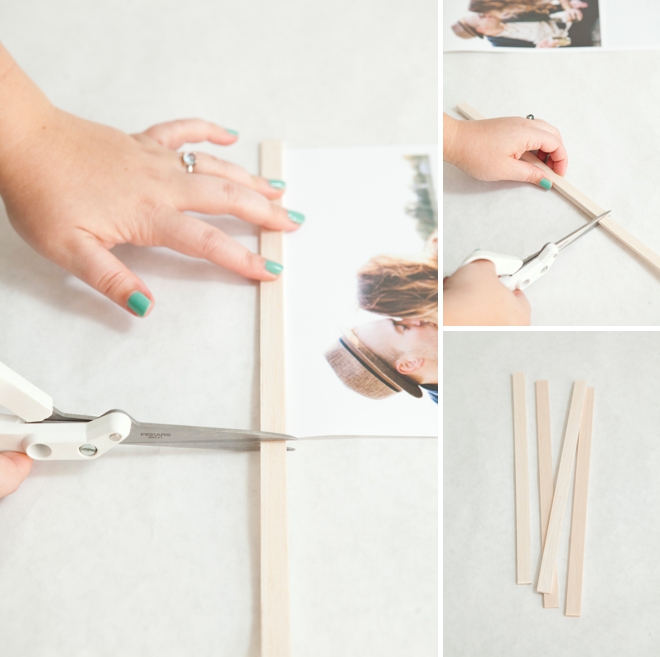
Using a strong pair of scissors, cut 2- 9.5″ balsa wood strips for each hanging.
Tie pretty ribbon to one piece of balsa wood and pull the knots to the top or bottom, you don’t want them on the flat surface of the balsa wood.
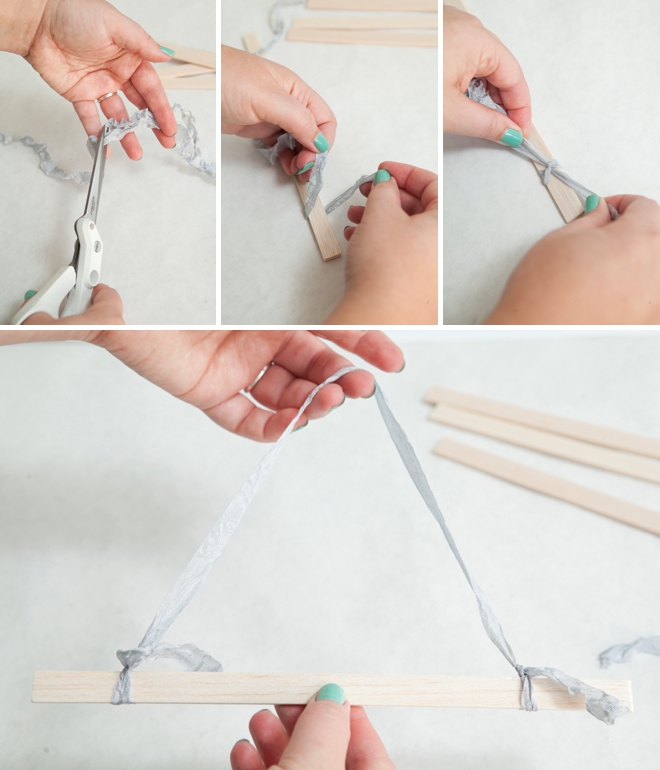
Add 8-10 premium strength Glue Dots to the flat side of the balsa wood with the ribbon. Then place the top of the giant photostrip on top of the Glue Dots, press firmly.
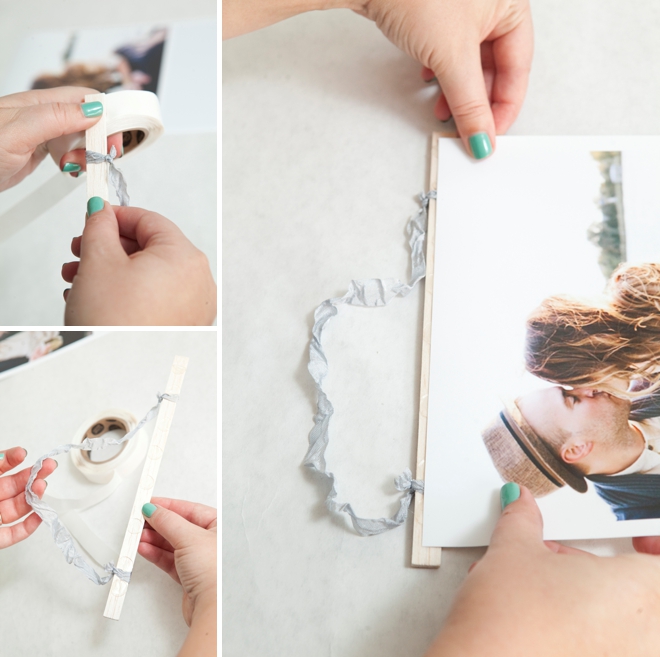
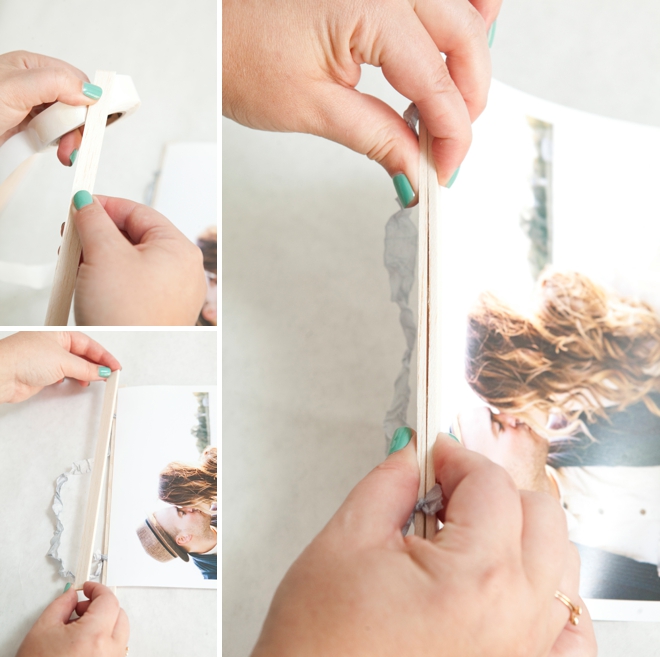
Then add 8-10 Glue Dots to the other strip of balsa wood and then place it on top of the print and press firmly. Sandwiching the giant photostrip in between the two strips of balsa wood. These Glue Dots have such a strong hold that I actually broke the balsa wood trying to pull them apart!
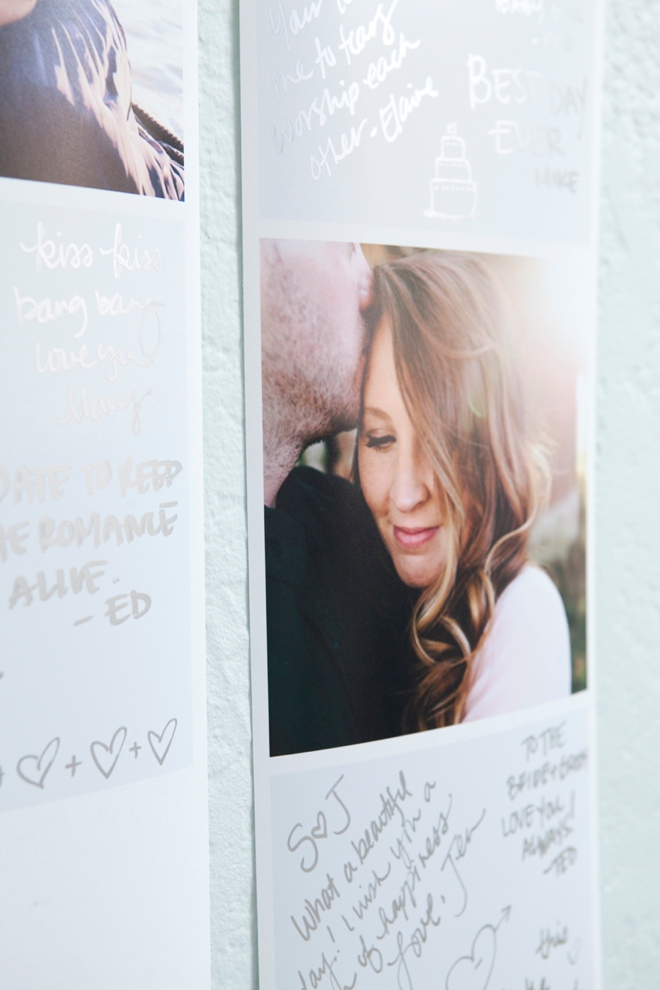
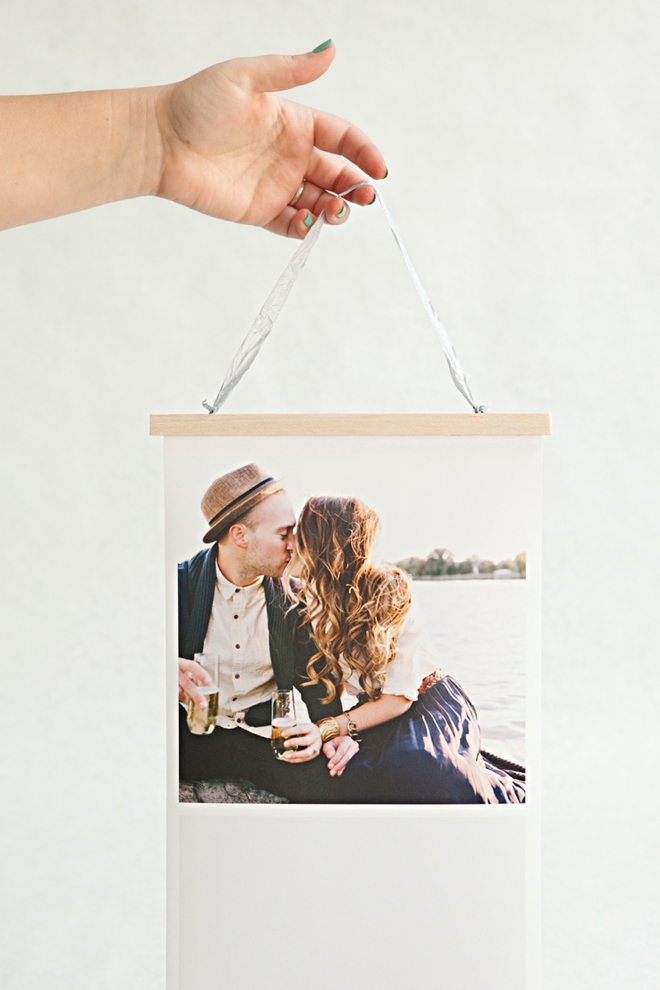
And there you have it, a beautiful print ready to be signed by your loved ones!
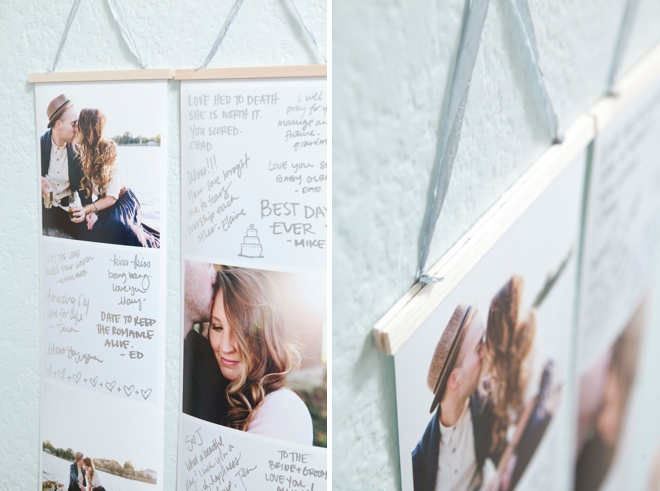
Display At Your Reception
You can either lay these giant photostrips flat on a table or hang them up at your reception to be signed, the choice is yours and depends on what your venue is like. Roll or lay flat to store.

I’m in love with this simple guest book idea and hope you are too!
As with all our DIY tutorials, if you create one of our projects please send us a picture – We Love Seeing Your Creativity! If you use Instagram or Twitter please use the hashtag #SomethingTurquoiseDIY and it will show up on our Get Social page. Happy Crafting!
DIY Tutorial Credits
Photography: Something Turquoise Photography for SomethingTurquoise.com // DIY tutorial: Jen | Something Turquoise // Bride + Groom: our bridal blogger Shea DeForest // Images: courtesy of Shots by Cheyenne // Giant Photostrips: courtesy of Social Print Studio // Premium Strength Glue Dots: courtesy of Glue Dots // 1/2″ balsa wood strips: Ace Hardware // Silver Leafing Pen: Krylon // Shabby wrinkle ribbon: Prairie Bird Boutique // Fiskars Amplify Shears: Amazon // nail polish: OPI – Withstands the Test of Thyme
Shop The Supplies:
Find the supplies you’ll need for this project from our affiliate links below:

Comments