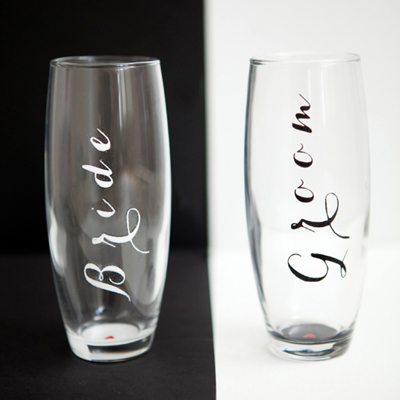

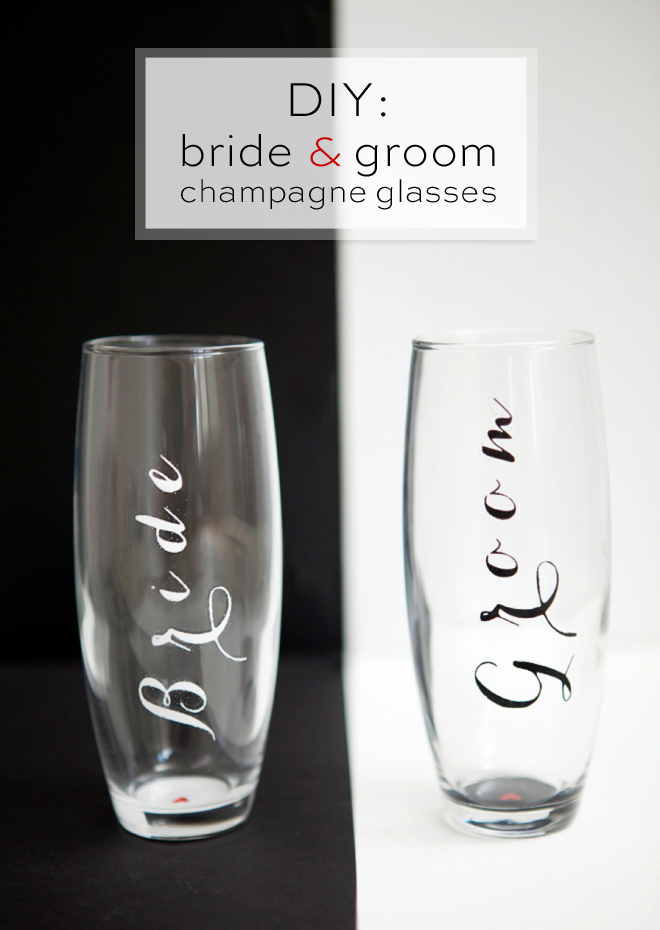
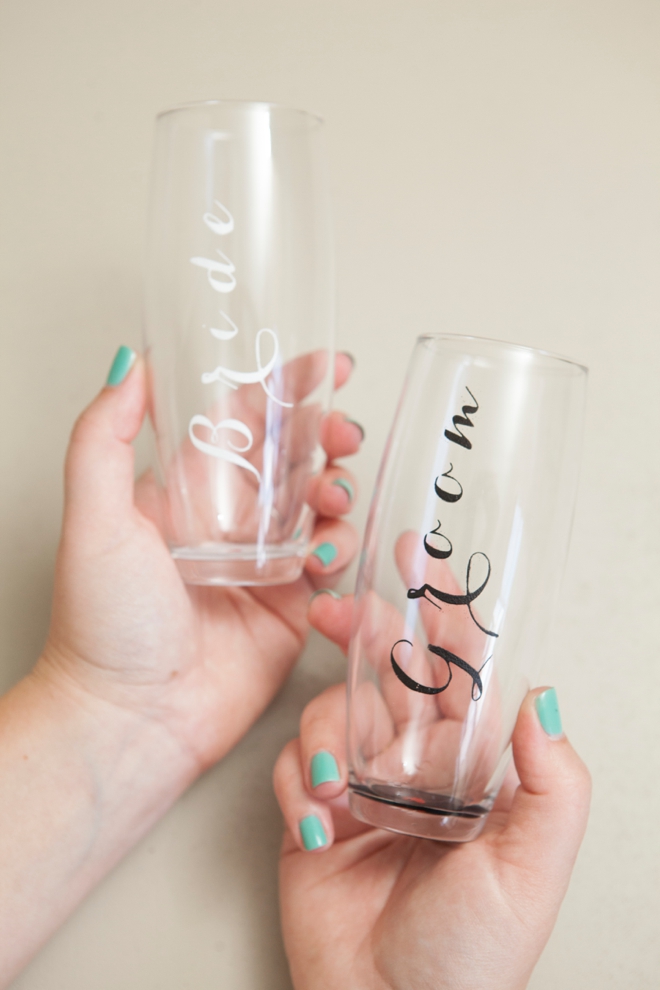
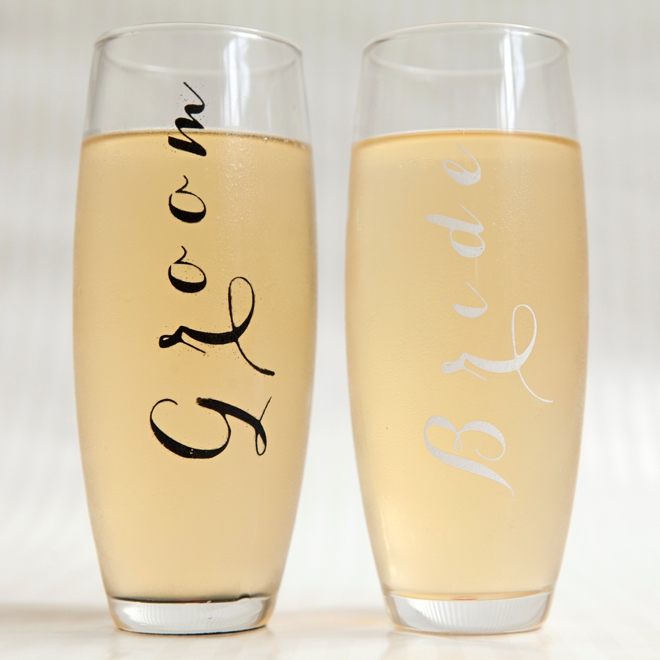
DIY | Bride & Groom Champagne Glasses
You don’t have to tackle giant projects to “DIY” something special for your wedding… there are tons of awesome little details that you can easily get creative with. Like these painted Bride & Groom Stemless Champagne Glasses. This project is a quick one, you only need one evening (or an afternoon) to complete it and the best part is they are dishwasher safe! These darling glasses will make wonderful props for your wedding pictures and sweet keepsakes that you can use to celebrate anniversaries for years to come. If you’re feeling extra crafty you could also make them for your bridesmaids and groomsmen! My favorite part is the hidden little heart on the bottom…
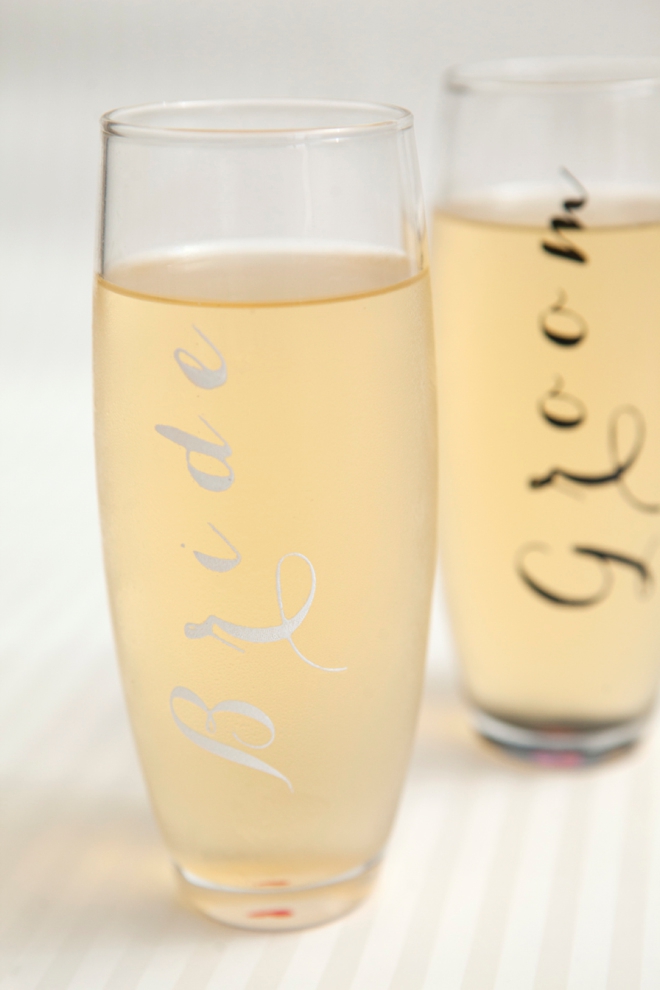
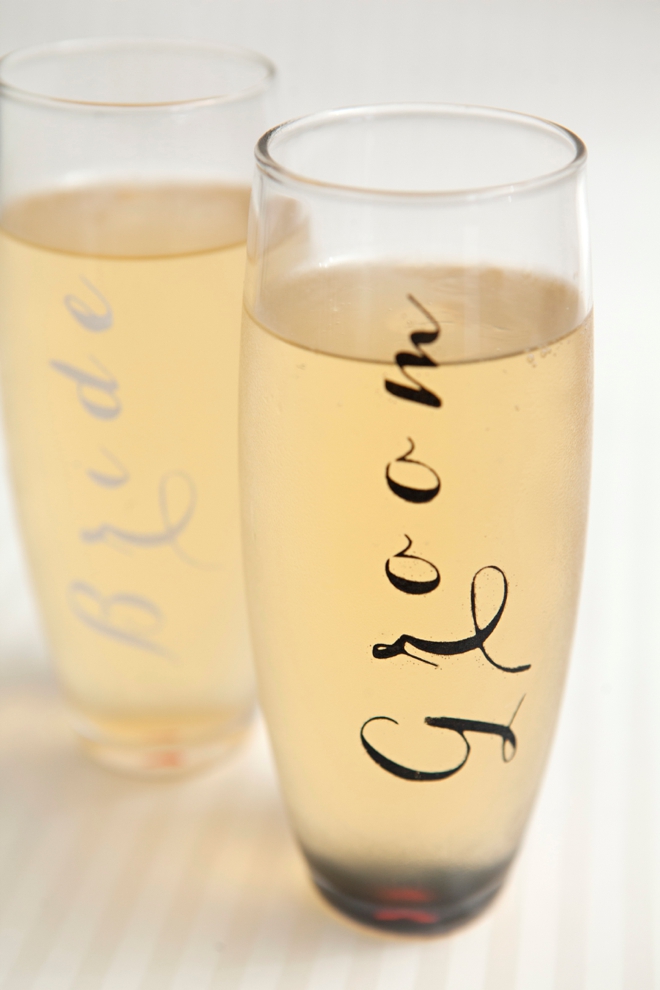
After properly curing, these darling painted champagne glasses are top shelf dishwasher safe!

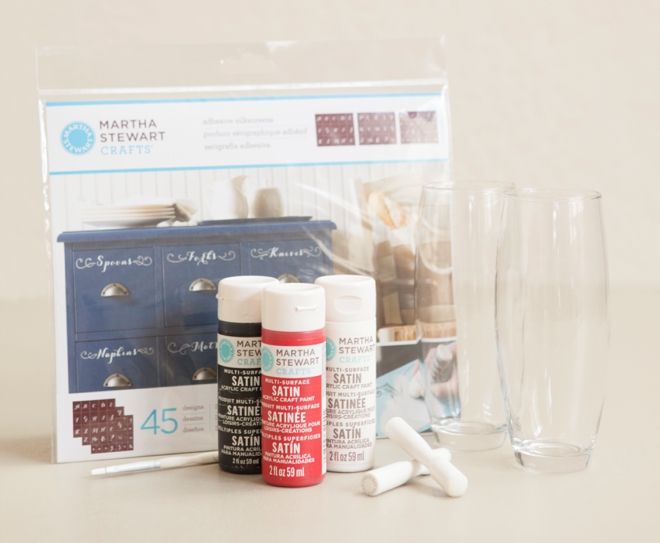
SUPPLIES:
- Champagne Glasses
- Martha Stewart Crafts Adhesive Silkscreen Stencils in Carolyna Script
- Martha Stewart Crafts Satin Paint (wedding cake, beetle black, tartan red)
- Martha Stewart Crafts Paint Daubers
- Martha Stewart Crafts Paint Brush
- Martha Stewart Crafts Scissors
- Rubbing alcohol
Visit our shoppable widget at the end of the post for links to these supplies!
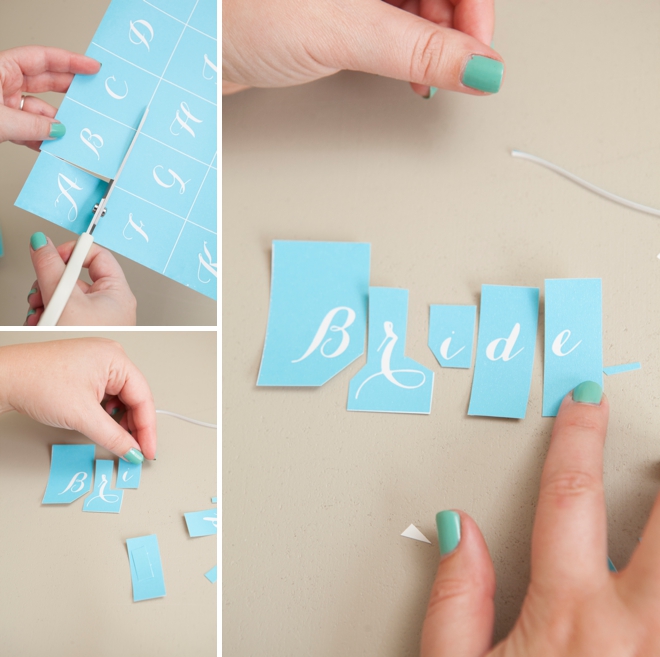
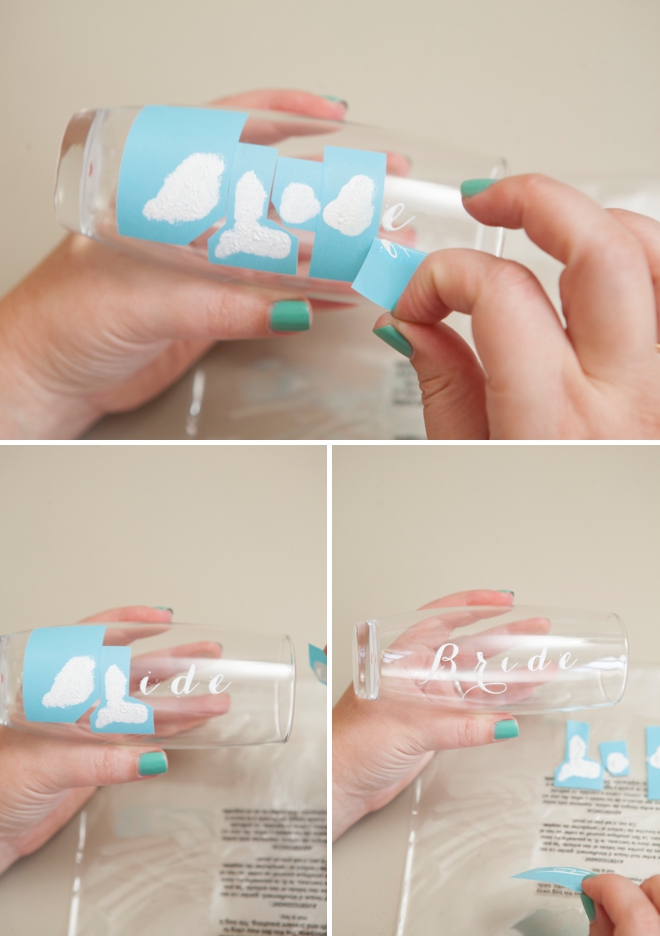
Using Adhesive Silkscreen Stencils
I am obsessed with these stencils. Typically I’m not a big “stencil” person as they can be hard to use, messy and perfect details can almost be impossible to achieve. These are adhesive and stick wonderfully to projects, but they work best on really smooth surfaces like glass. They have a super fine silkscreen mesh which allows for much more detail than you could ever get from a regular stencil. That being said, in order to reuse these – you must wash them with warm soap and water immediately – if the paint dries in the silkscreen they are done.
Cut up your stencils so that they fit together for your champagne glass.
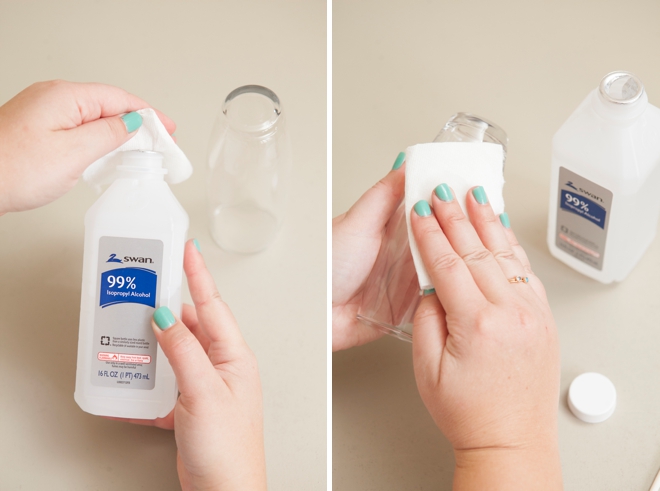
Any glass surface that you are painting must be cleaned with rubbing alcohol first!
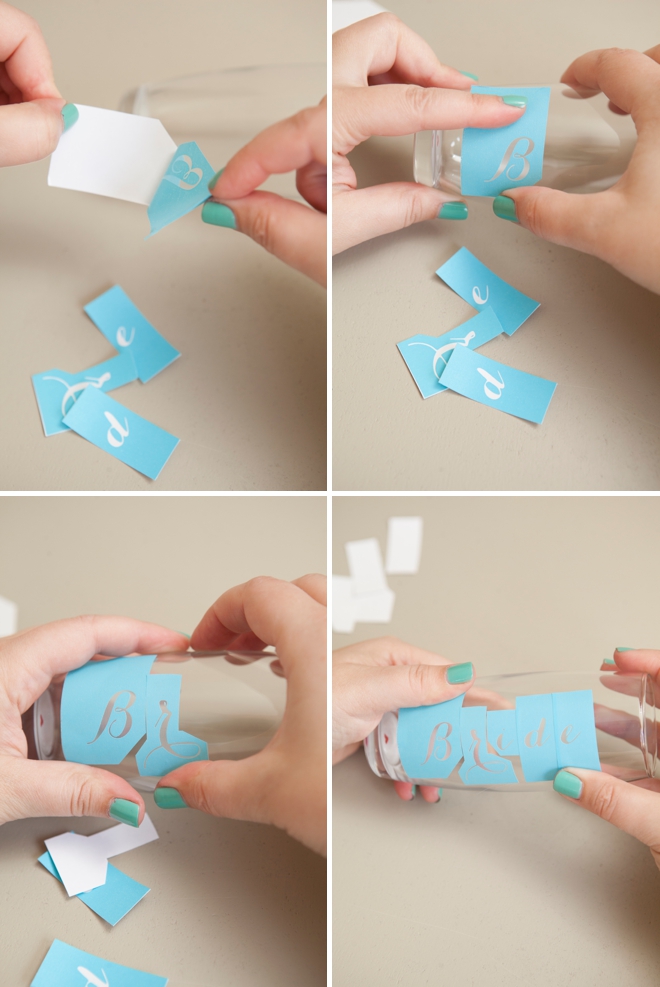
Peel the adhesive silkscreen stencils off their backing and place them onto the glass. If you are concerned with being messy, you can use patterning tape to further tape off your design.
Painting Your Glasses
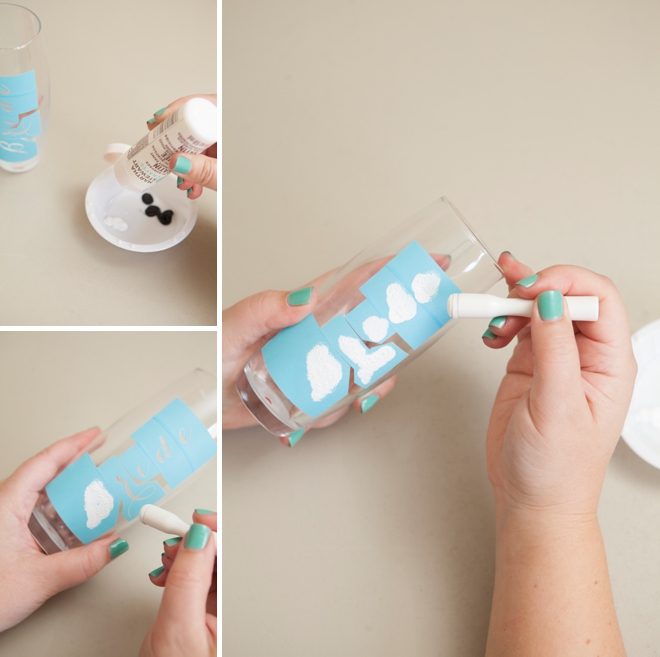
When your stencil design is complete, the next step is to add paint! I’m using the MSC paint daubers (which I love) to gently add paint to each design. A few tips:
- Stenciling is gentle work. If you press too hard, paint will bleed under your stencil. Daub with gentle pressure.
- You only need a tiny amount of paint. Press the dauber into the paint and then remove the excess paint by daubing in your paint dish or on a piece of paper, then daub on the stencil.
- Less is more. Only daub as much as you need to cover the design. Once it’s covered you are done. The more you go over the same spot, the more chance you will have for your paint to bleed.
- Be careful to only paint the stencil design area.
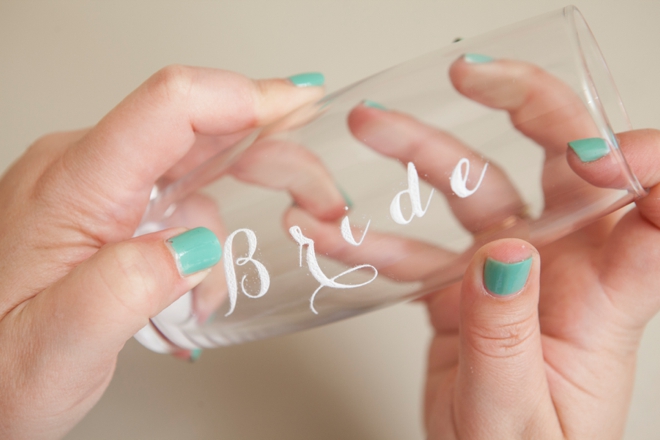
As soon as you are finished with painting, quickly remove each stencil – they don’t need to sit or dry. I like to place mine onto the plastic covering that they came in. Leave your glasses and go wash your stencils immediately, otherwise as I said before they will become unusable.
**You can also use a wet wipe to remove paint quickly, if you don’t have a sink nearby.
Clean Up Your Paint
Although this paint will become permanent and dishwasher safe, for the first few hours after it’s dry you can scratch off little dots, smears, and imperfections to clean up your design. You can also add more paint to your design if you need to.
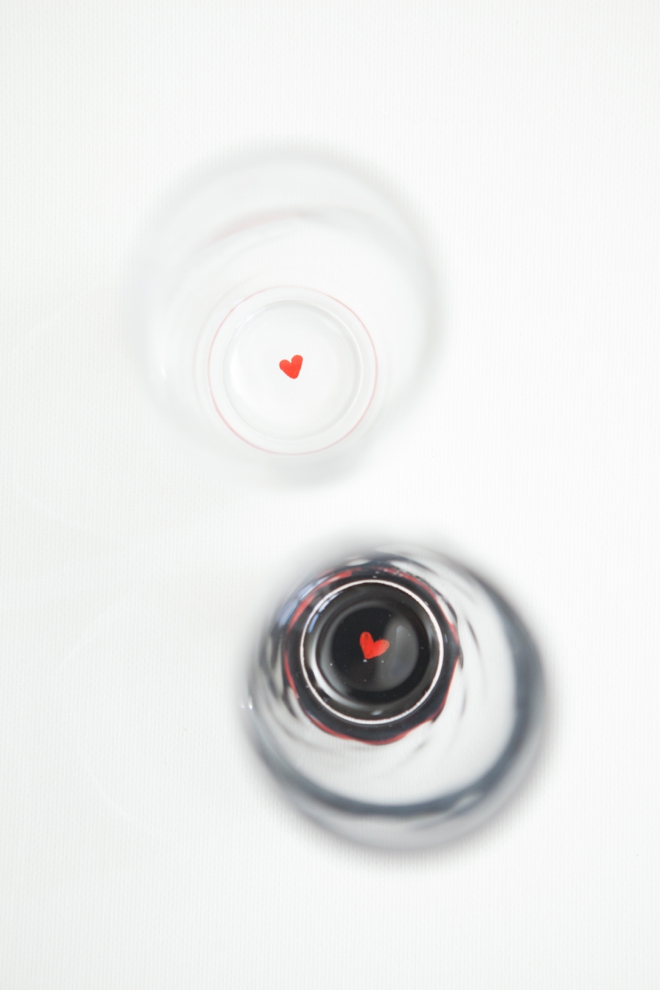
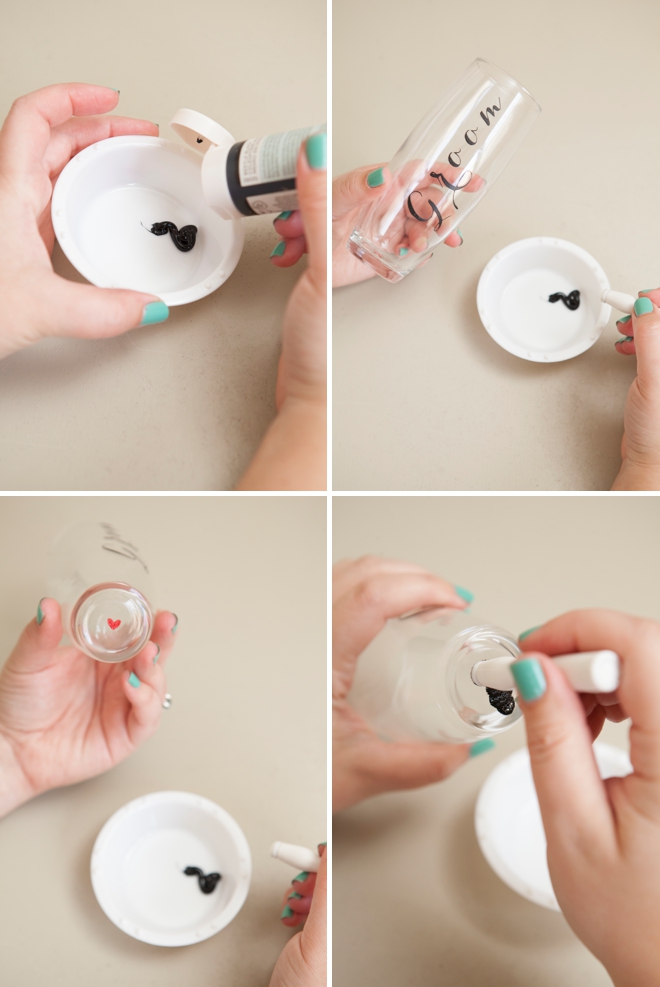
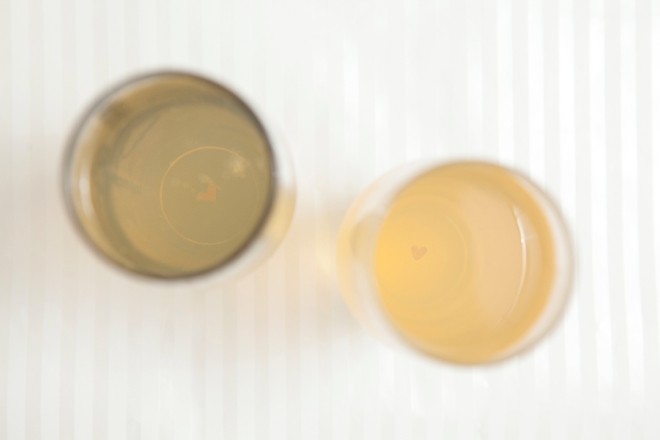
The Hidden Heart
My favorite part! Paint a tiny heart on the bottom of each glass.

Once the heart has dried for at least one hour, paint the bottom of the champagne glass using a dauber.
Dauber VS Paint Brush. On glass a dauber, pouncer or sponge will give you a much softer smoother look. On glass a brush will leave streaks and will require more coats. Your choice.
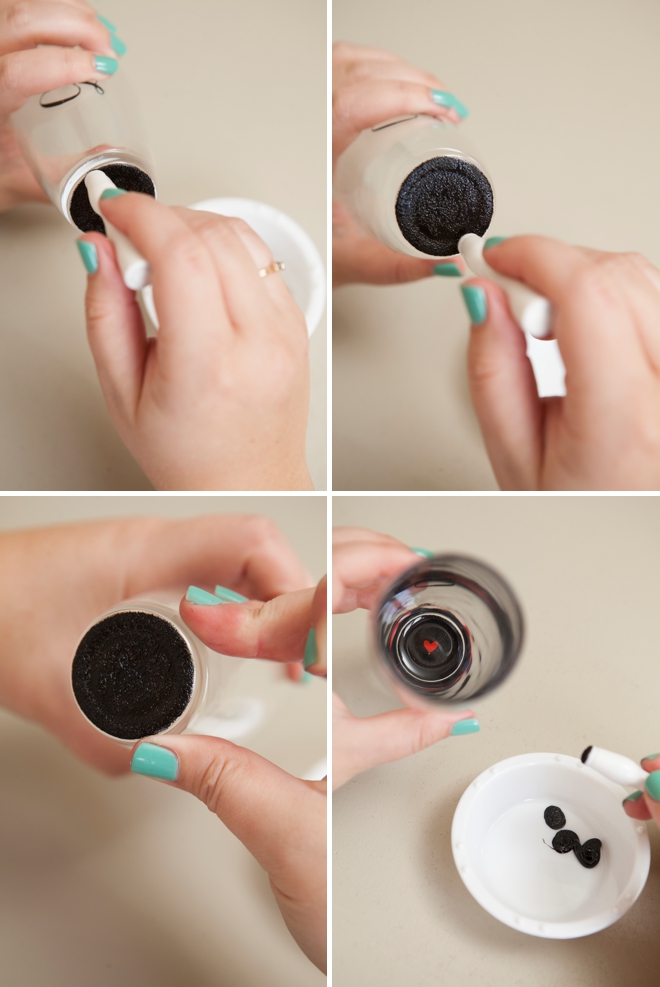
Dab and dab until the bottom of the glass is covered. Some colors will require a second coat. Make sure to allow for an hour of dry time in between each coat. Wipe off any excess with your finger. So cute!
The bottom of the bride glass is painted white.
Pick Colors To Fit Your Theme
This entire design can be easily customized to fit your wedding colors or theme. From the wording colors, to the heart and the bottom of the glass – all are up to you!
Dishwasher Safe Rules:
You must cure these glasses; here are the 2 curing techniques:
- Let them dry for 21 days. Super simple.
- After they have dried for 72 hours, place them in a cold oven and turn to 350*. Bake them for 30 minutes and then turn the oven off. Let the glasses cool down inside the oven. The gentle warming and cooling ensures that your glass won’t crack!
After you have accomplished one of the two above, your painted glassware will be top-shelf dishwasher safe!
- If you don’t have 72 hours or 21 days, you CAN still use these glasses – you just have to be incredibly careful when you are hand washing them, and using them for that matter.
- For this design you want to avoid letting the bottoms of the glasses sit in water for an extended period, even after properly cured.
As with all our DIY tutorials, if you create one of our projects please send us a picture – We Love Seeing Your Creativity! If you use Instagram or Twitter please use the hashtag #SomethingTurquoiseDIY and it will show up on our Get Social page. Happy Crafting!
DIY Tutorial Credits
Photography: Something Turquoise Photography for SomethingTurquoise.com // DIY tutorial: Jen | Something Turquoise // champagne glasses: Amazon // MSC stencils, paint, scissors, paint brushes and pouncers: courtesy of the Editors at Martha Stewart // nails: OPI – Withstands the Test of Thyme
Shop The Supplies:
Find the supplies you’ll need for this project from our affiliate links below:

Comments