
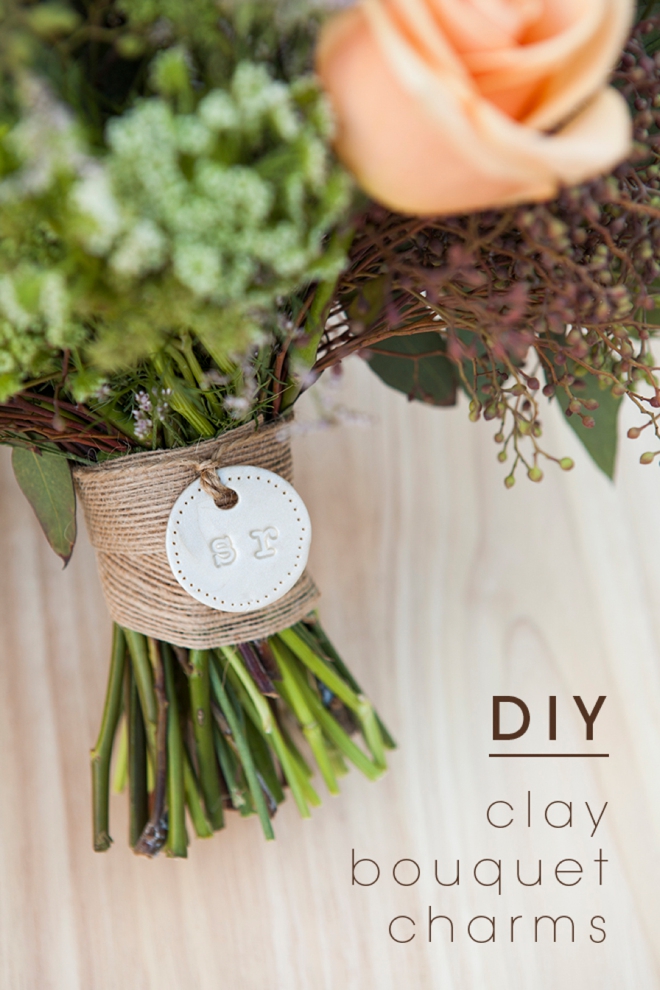
DIY | Personalized Clay Bouquet Charms
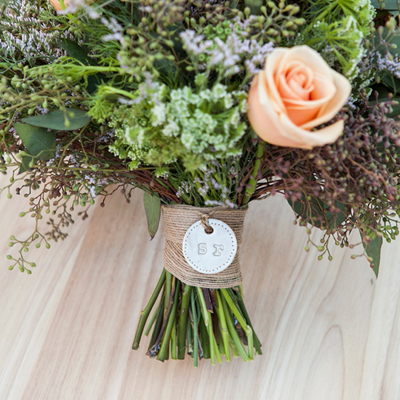
I’m all about creating thoughtful little details that make a wedding day ultra special… like these personalized clay bouquet charms! If you’ve ever been in a wedding (especially a large one) – you know how crazy it can get with bridesmaids setting down their bouquets and forgetting whose is whose. Now sometimes it might not matter, but what if each bridesmaids bouquet was specifically meant for their mismatched colored dress or what if the bride wanted an ombre flower look? Figuring out what bouquet belongs to what girl can get confusing, but not if you make your bridesmaids these darling initial charms! Quick, easy and totally inexpensive – you can have these done and ready in under an hour. Sure to charm your bridesmaids and your photographer!
SUPPLIES:
- Premo Sculpey Accents clay (pearl, silver, bronze, copper, antique gold)
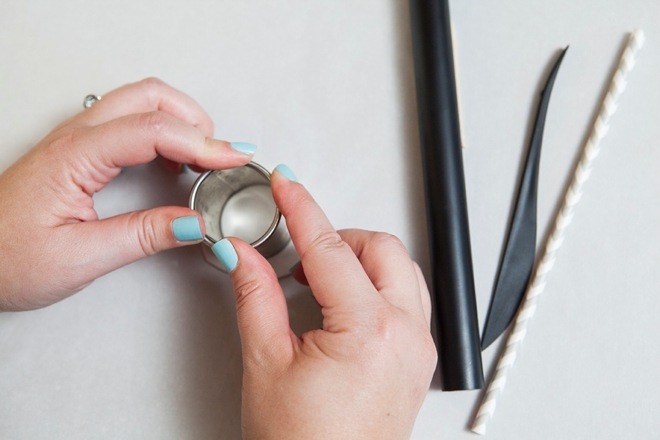
- 1.5 inch circle cookie cutter
- Clay rolling pin
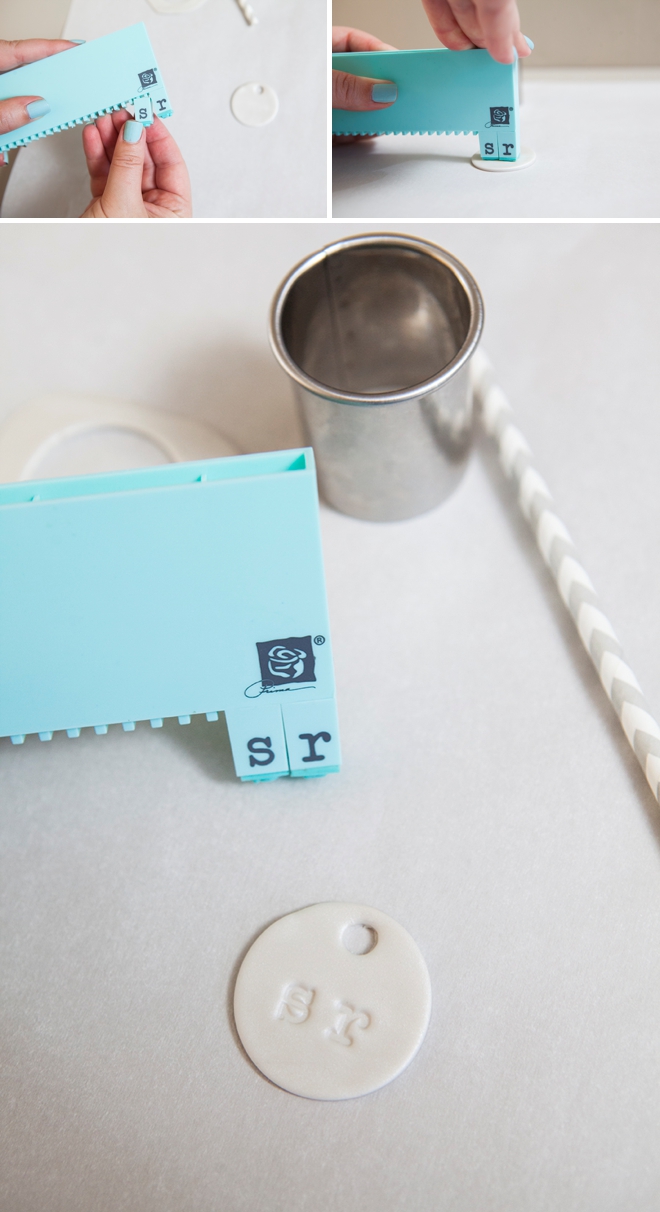
- Alphabet stamps
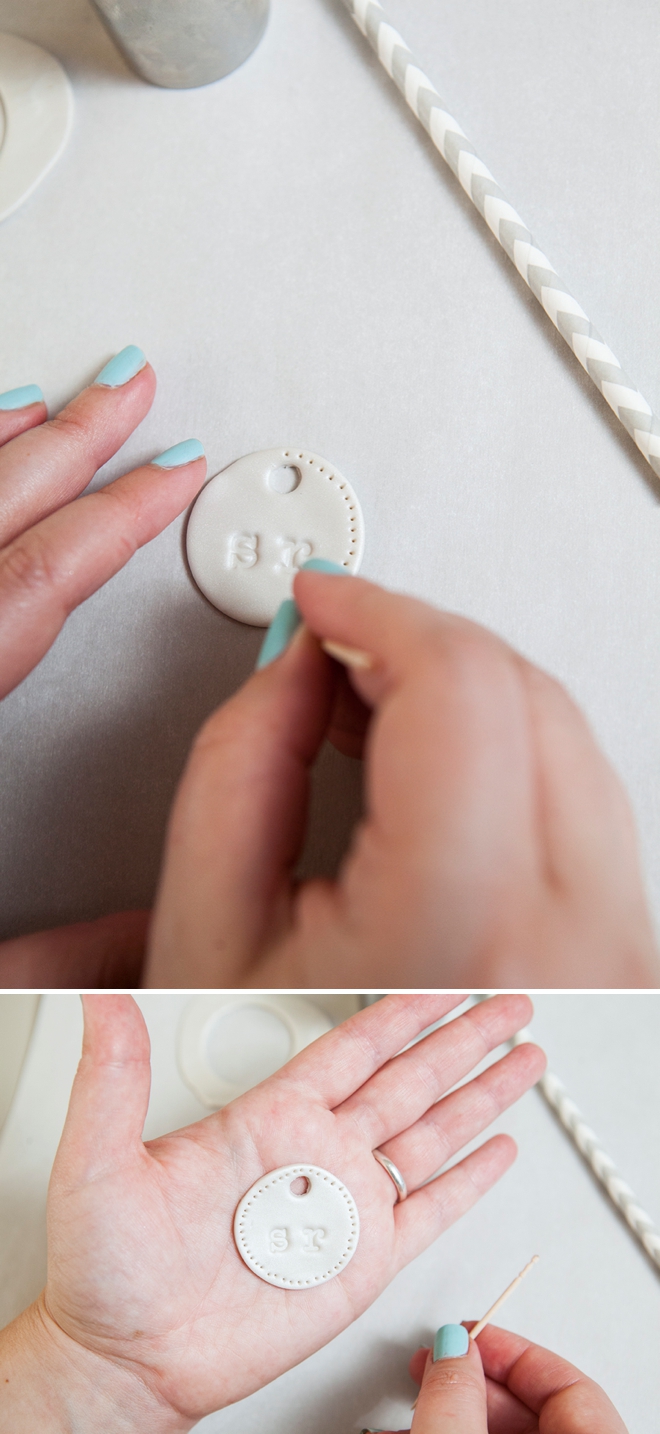
- toothpick
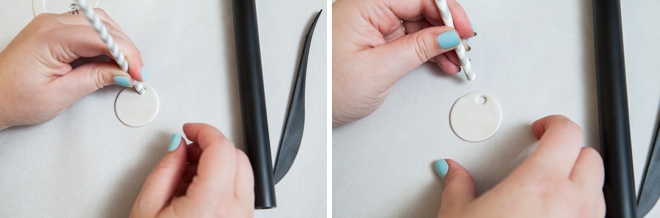
- straw
- ribbon, twine or cord
- (see credits for sources)

Start by warming up the clay in your hands and then rolling it to about 1/4″ thick, large enough for your circle cookie cutter. This Premo Sculpey clay is so easy to work with and comes in SO many beautiful colors.
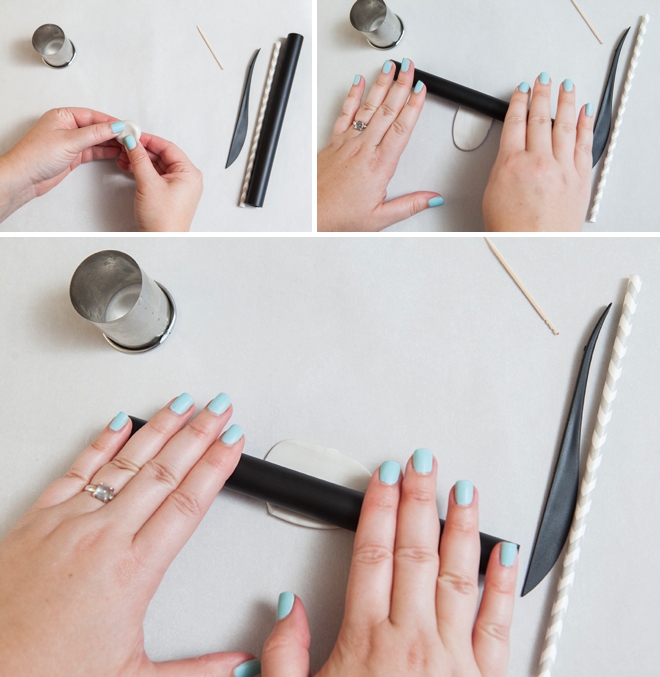
Cut your clay circle.
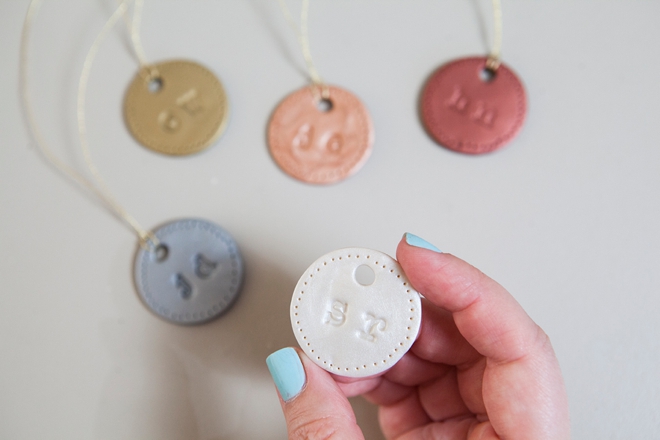
Using a straw, punch a hole through your clay circle.
Now stamp the initials into each clay charm with alphabet rubber stamps. Any kind will do but I love these from Prima Press because you can align and stamp multiple letters at once.
To add a little embellishment, I simply poked holes around the circle with a toothpick.
Oven bake your charms according to the instructions on your clay package.
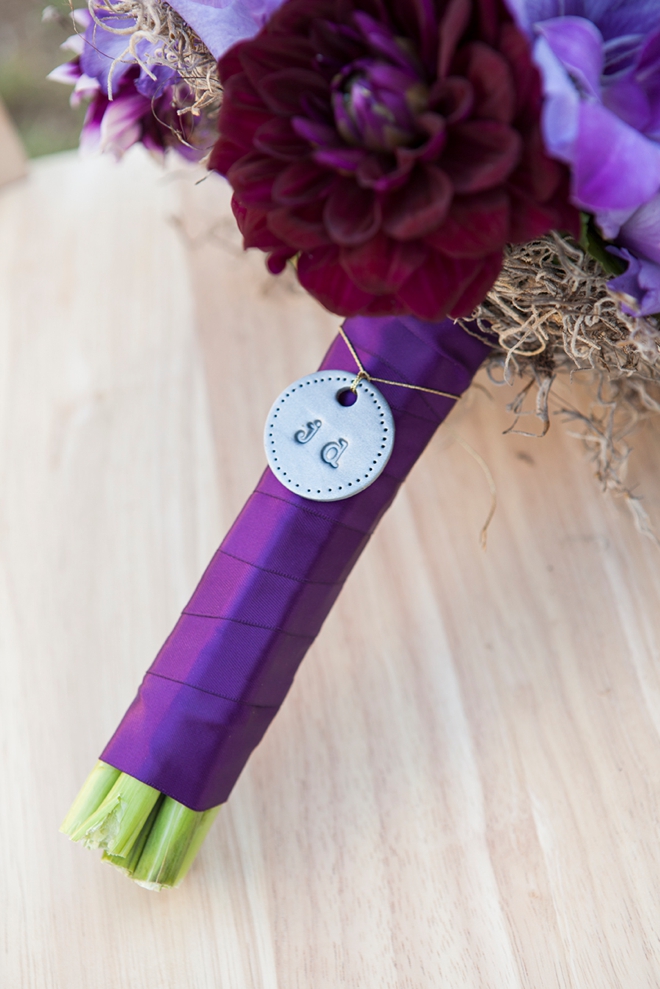
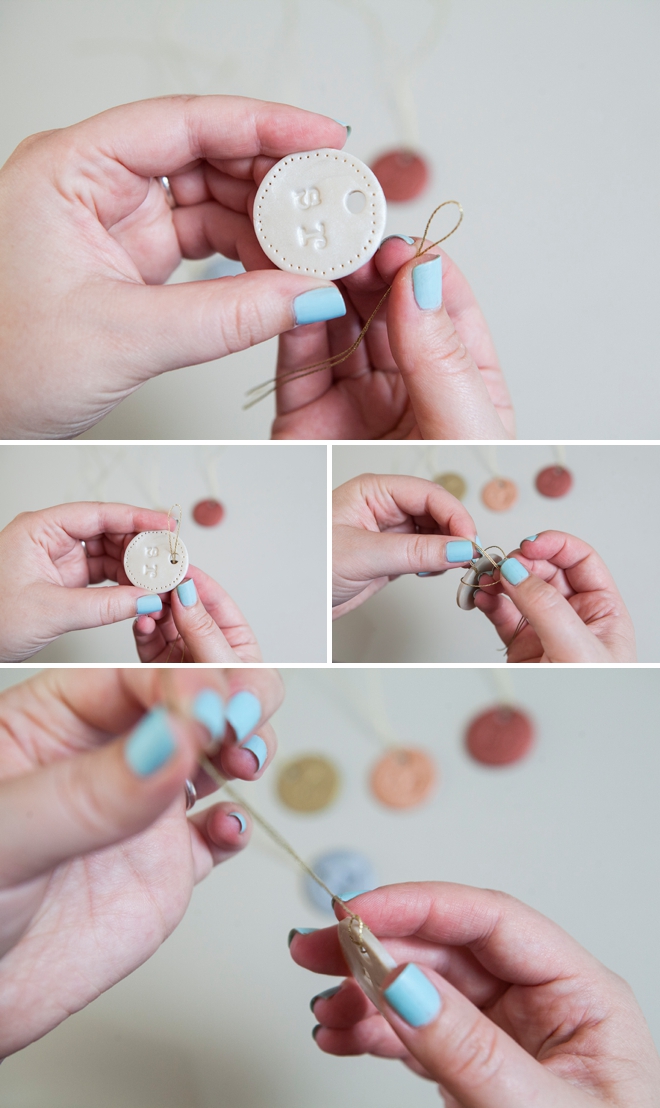
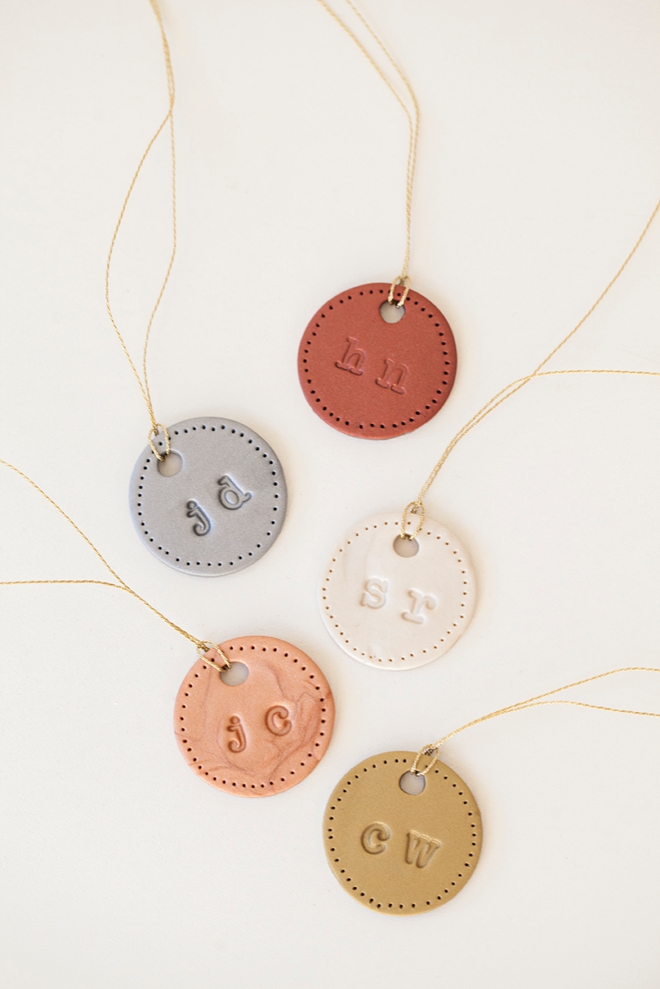
With a simple loop, add your ribbon or twine.
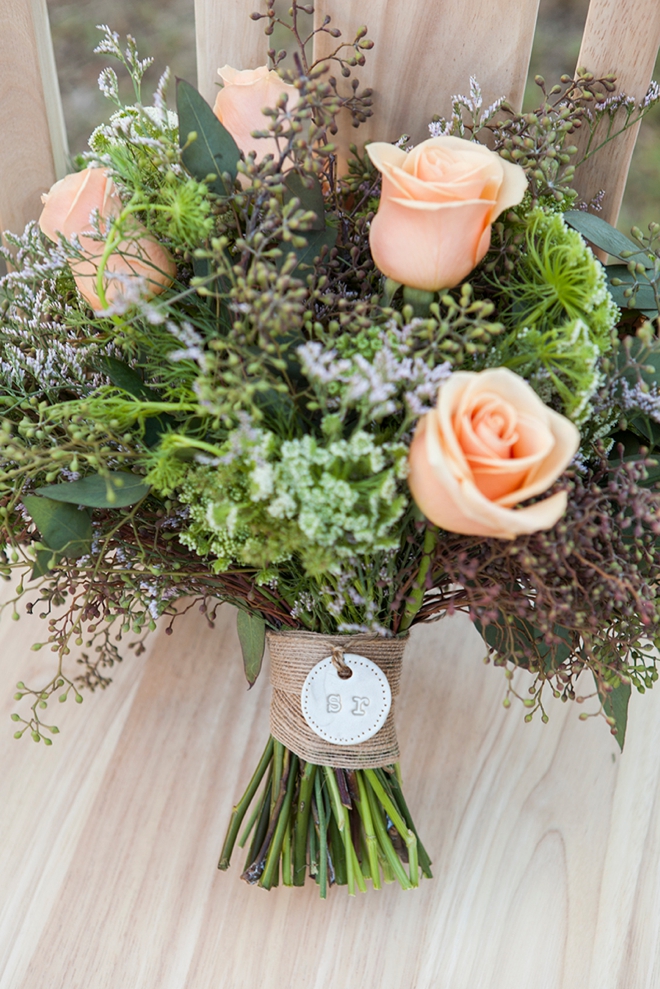
You can easily give these charms to your florist for her to put on each bouquet, or you can add them yourself the morning of your wedding.
This is such a sweet little detail that will bring a smile to your bridesmaids faces and make darling pictures! The best part is it’s quick, easy and totally inexpensive!
As with all our DIY tutorials, if you create one of our projects please send us a picture – We Love Seeing Your Creativity! If you use Instagram or Twitter please use the hashtag #SomethingTurquoiseDIY and it will show up on our Get Social page. Happy Crafting!
DIY Tutorial Credits
Photography: Something Turquoise Photography // DIY tutorial: Jen | Something Turquoise // gorgeous bouquets: Floral Design by Jacqueline Ahne // Premo Sculpey Accents clay and tools courtesy of: Polyform Products // Prima press alphabet stamps: Amazon![]() // 1.5″ cookie cutter: Amazon
// 1.5″ cookie cutter: Amazon![]() // gold cord: Martha Stewart Crafts // nail polish: Essie – Mint Candy Apple
// gold cord: Martha Stewart Crafts // nail polish: Essie – Mint Candy Apple![]()

Comments