

DIY | stamped ombre clay escort ornaments
Wow. This is our last DIY tutorial of 2012 – what an amazing year of wedding crafts! I truly hope that I have been able to inspire you one way or another to create something special for your wedding day. xoxo
Today’s super easy project can lend itself to almost any wedding theme… and is just so adorable! Using Martha Stewart Crafts Crafting Clay, this light weight paper based compound effortlessly turns into these darling ombre escort ornaments… no baking required!
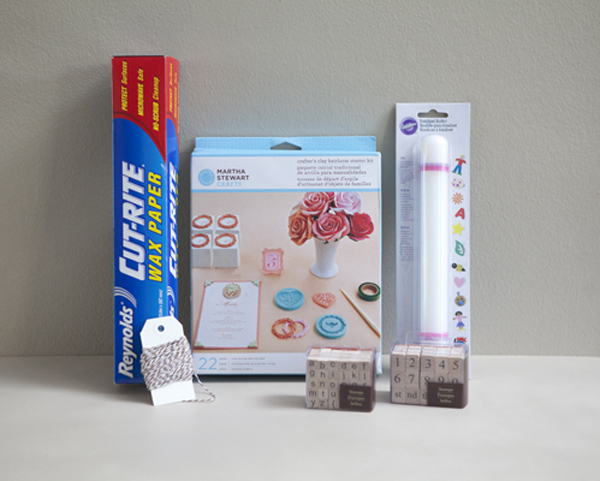
SUPPLIES // Martha Stewart Crafts Crafter’s Clay (either in a kit like below or purchased separately), rolling pin (which you use for crafts only) alphabet and number stamps, cute ribbon or twine and wax paper.
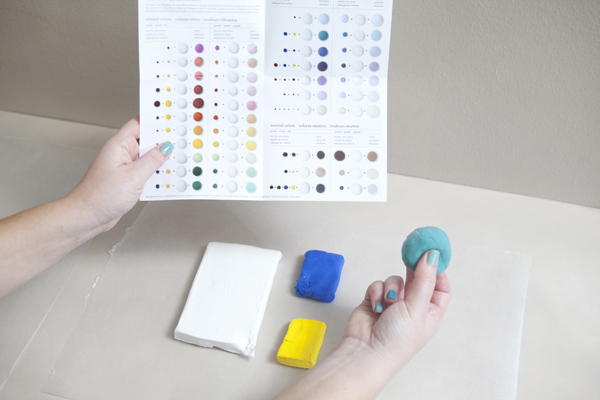
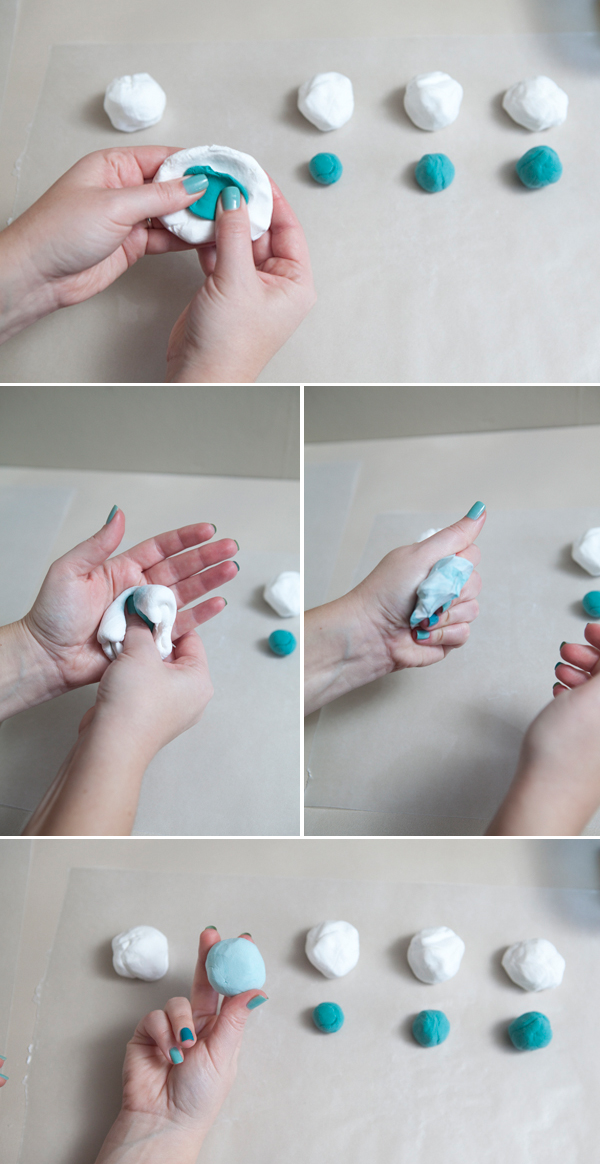
Using the Martha Stewart color guide that comes with the clay, pick and mix the color of clay that you want to ombre with – keeping in mind that the color you create will be mixed with white clay so the lighter the original color the less ombre you will see. I created my favorite – turquoise!
The easiest way to ombre the clay is to start by dividing it into as many even balls as you want shades of color – I wanted 5 shades within my ombre so I made 5 balls. Then make small balls of your colored clay that gradually grow in size to incorporate into each white ball – this creates the ombre. Each colored ball needs to be visually larger than the next, otherwise the difference in shade won’t be as noticeable. I chose to start with white as my first shade and then fade into turquoise.
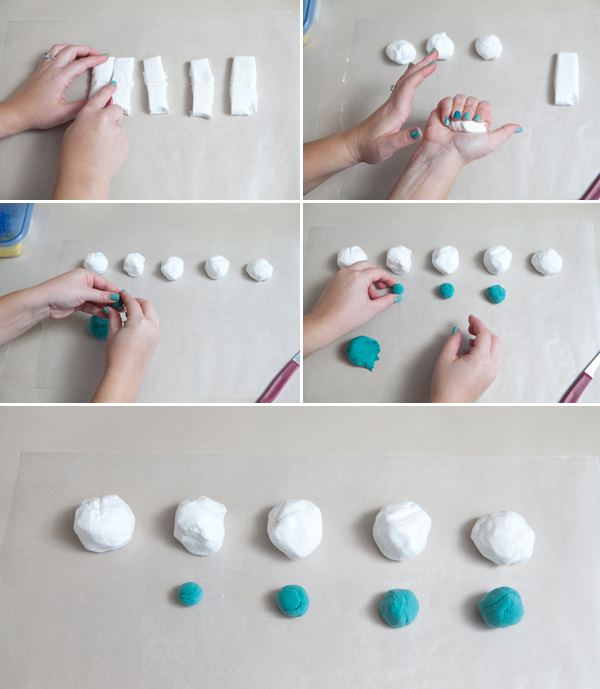
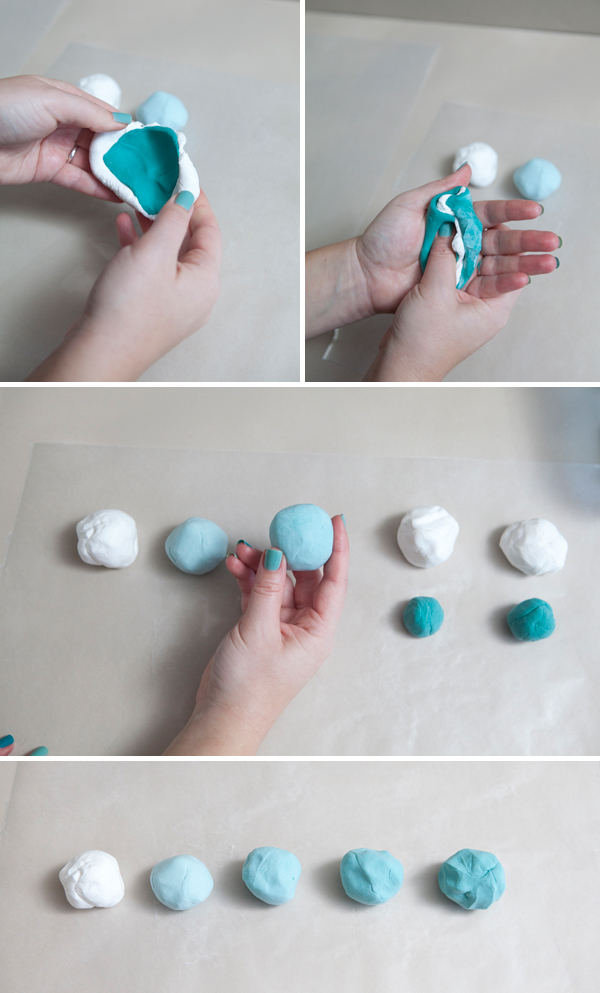
All the white balls of clay are the same size and the turquoise balls go from small to large. Start mixing each of the white balls with their corresponding turquoise addition. This clay is extremely easy to mix.
Keep mixing each shade until all are fully ombre’d! If you feel your clay is too dark – add more white clay, if it’s too light – add more colored clay.
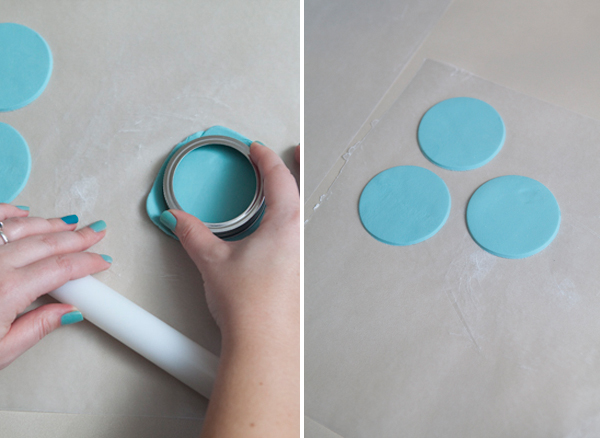
Next, roll out your clay using the rolling pin. Some rolling pins have nice little bands that surround each edge which act as a rolling guide for your clay – allowing you to evenly roll the clay out – very helpful!
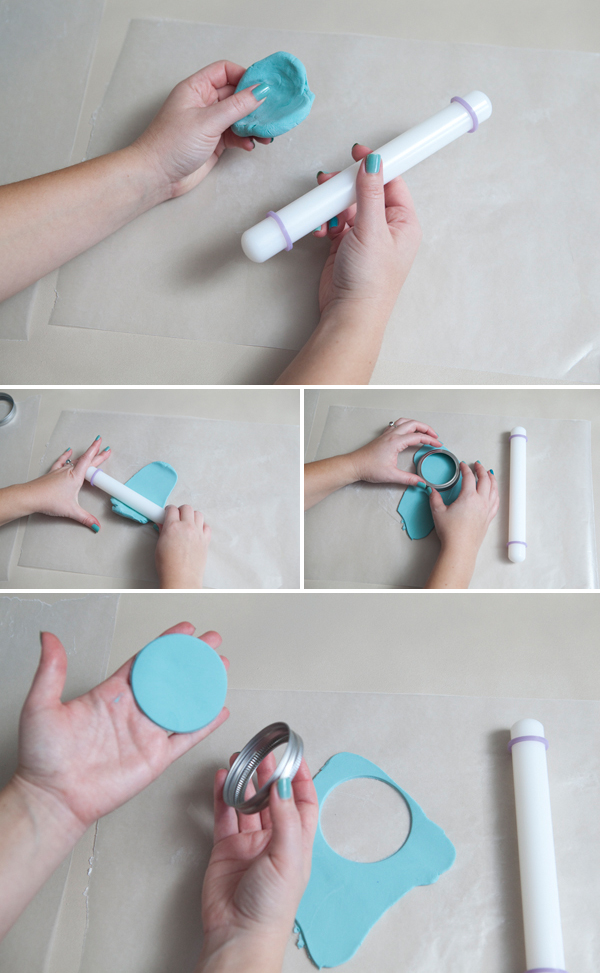
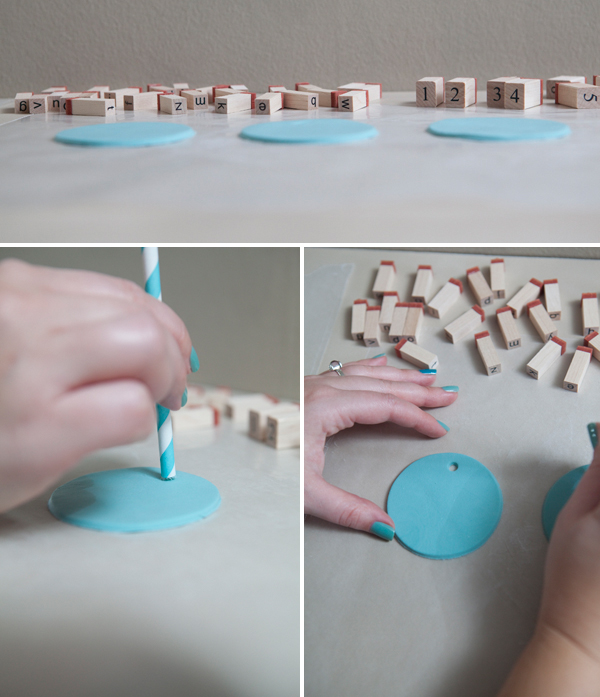
Using a mason jar lid, cookie cutter or the like, cut circles out of your clay.
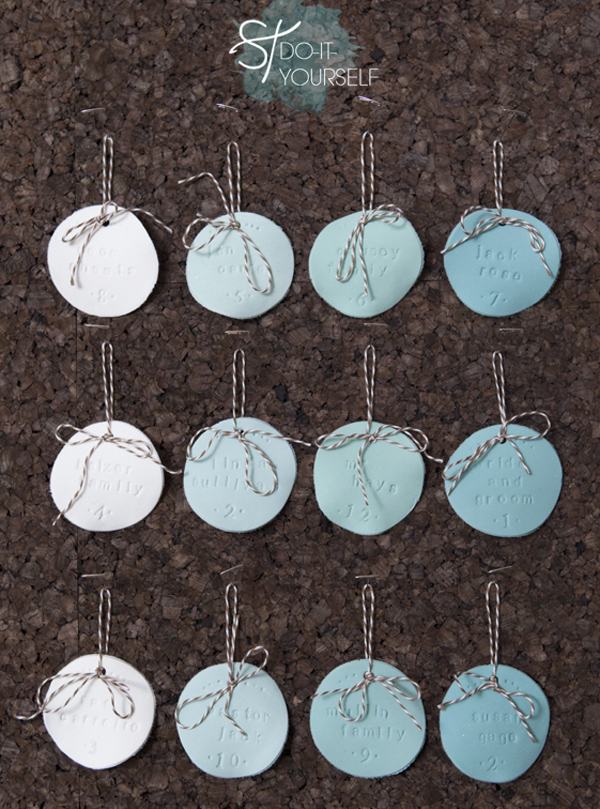
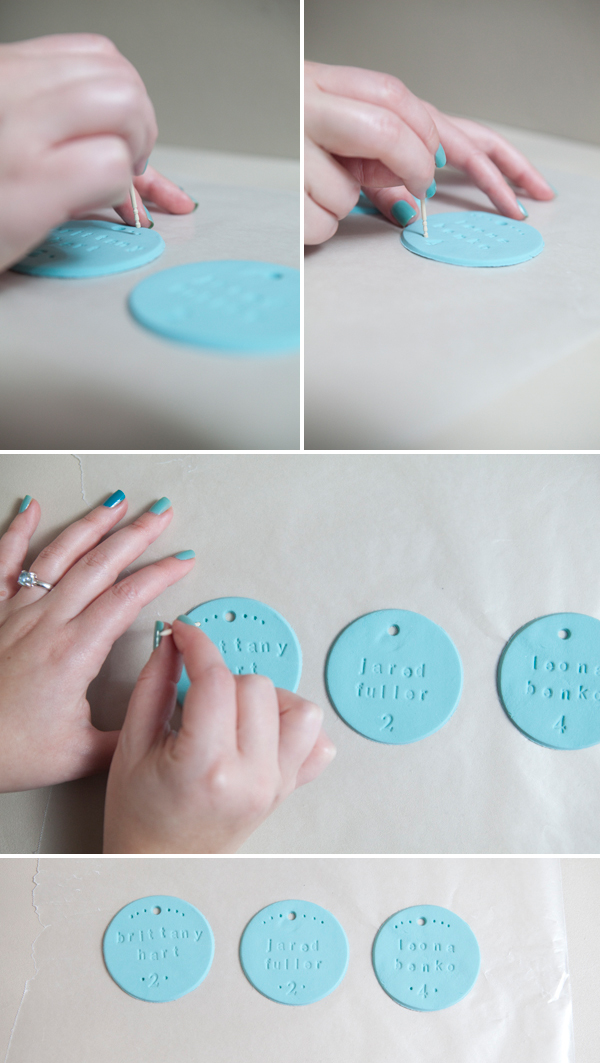
Now the fun part – stamping the clay! Start by punching a hole in the top of your ornament with a straw… this is where you will hang the twine/ribbon from.
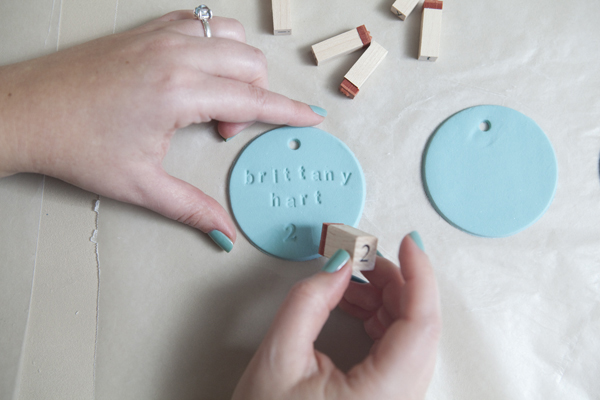
Now carefully stamp each of your guests names into a clay ornament! This will take about a minute or so per ornament so make sure to keep the clay circles that you aren’t working with under a slightly damp paper towel so that they don’t dry out before you stamp them. You should also keep any remaining clay in a sealed container with a damp paper towel to ensure that it doesn’t dry out as well. While working with these I had some of them out in the open air for over 45 minutes and they were still able to be stamped, but the edges of the letters/numbers weren’t as crisp as the fresh clay.
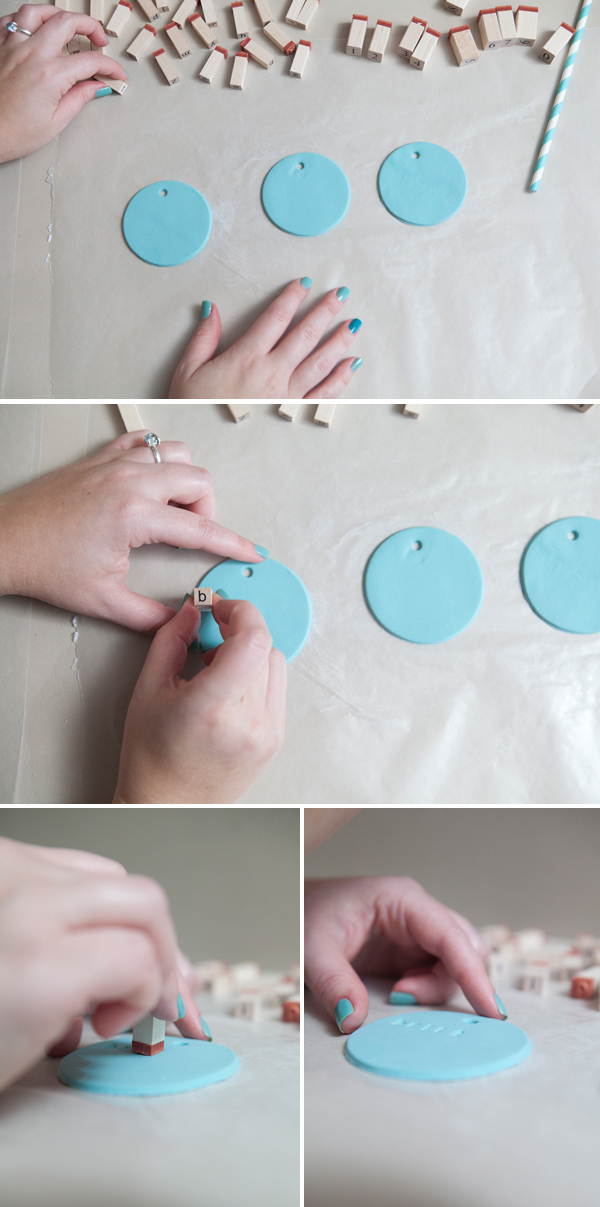
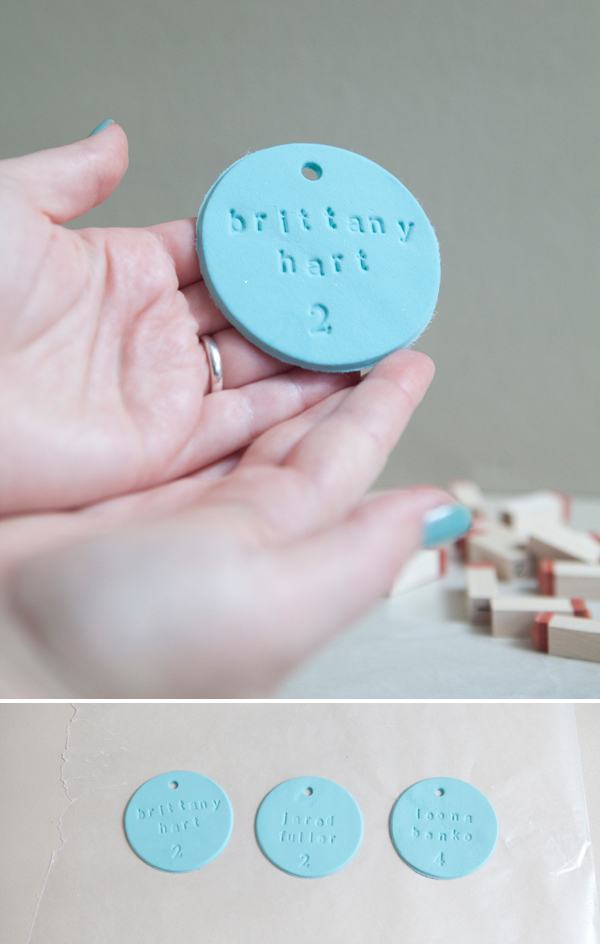
Then add the table number…
So darn cute!!!
You can add embellishments to these in SO many ways! You can add a little flourish with a toothpick like below, you could stamp them with a decorative stamp… once dry you can add glitter or even paint them… what will fit your event?
After you are completely done stamping, let your clay ornaments dry for 24 hours. Once dry they are as light as a feather! The thinner that you roll this clay the wavier the ornament gets when it’s dry, which I kinda like…

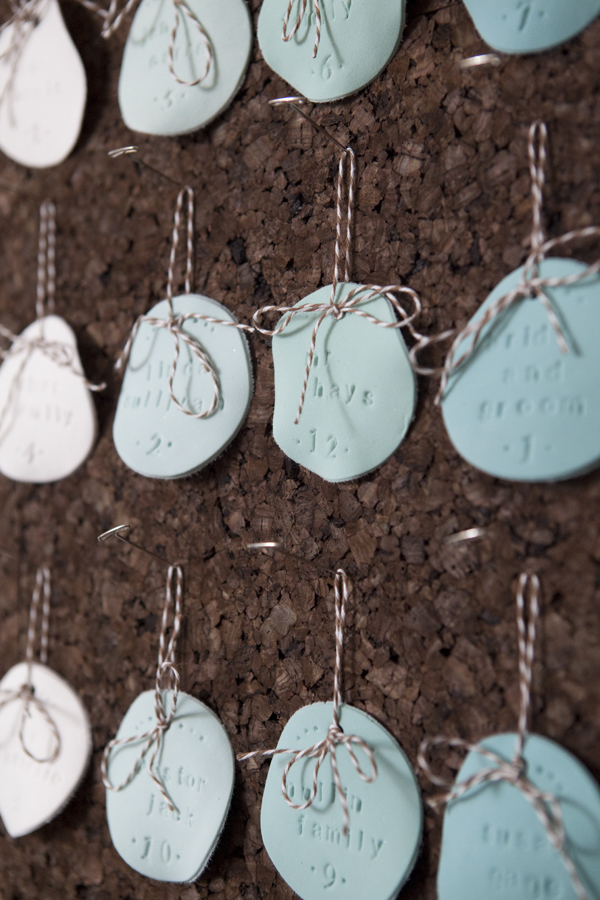
Tie on your cute twine or ribbon and hang on virtually anything! These are so light that even a beautiful potted tree at your reception venue would hold these no problem! This also makes a fun keepsake for your guests…

I love this ombre… and I cannot wait to see yours!
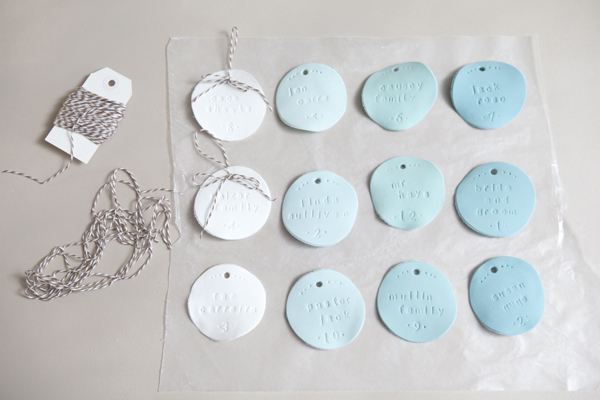
This clay is truly amazing, it is incredibly malleable and lends itself to so many different types of crafts! Not only are these perfect for a wedding or bridal shower but they would make amazing tags on presents and even great christmas ornaments!
As with all our DIY tutorials, if you create one of our projects please send us a picture or a trackback – We Love Seeing Your Creativity! Happy Crafting!
![]()
DIY CREDITS // Photography: Studio 11 // DIY tutorial by: Jen | Something Turquoise // Martha Stewart Crafts Crafter’s Clay, Wilton fondant rolling pin, and Recollections alphabet and number rubber stamps: Michaels // cute twine: Cupcake Social via Etsy // nail polish: Essie – Turquoise & Caicos and OPI – Fly

Comments