
DIY Personalized Acrylic Vow Boards With Cricut Maker
-Sponsored Post-
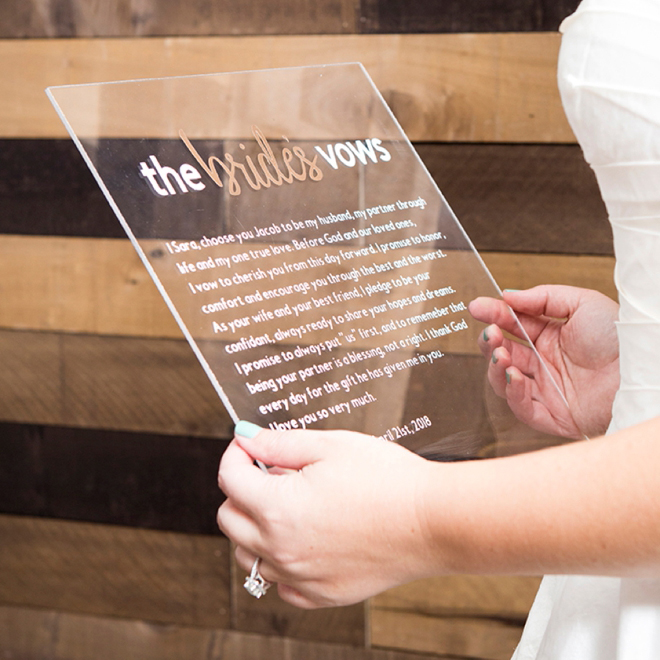
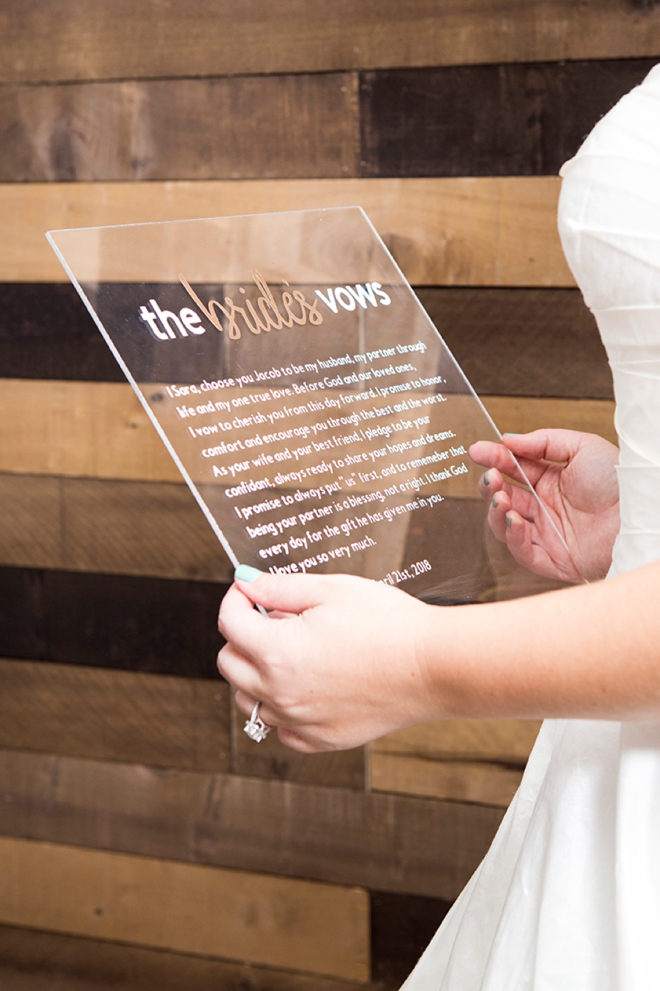
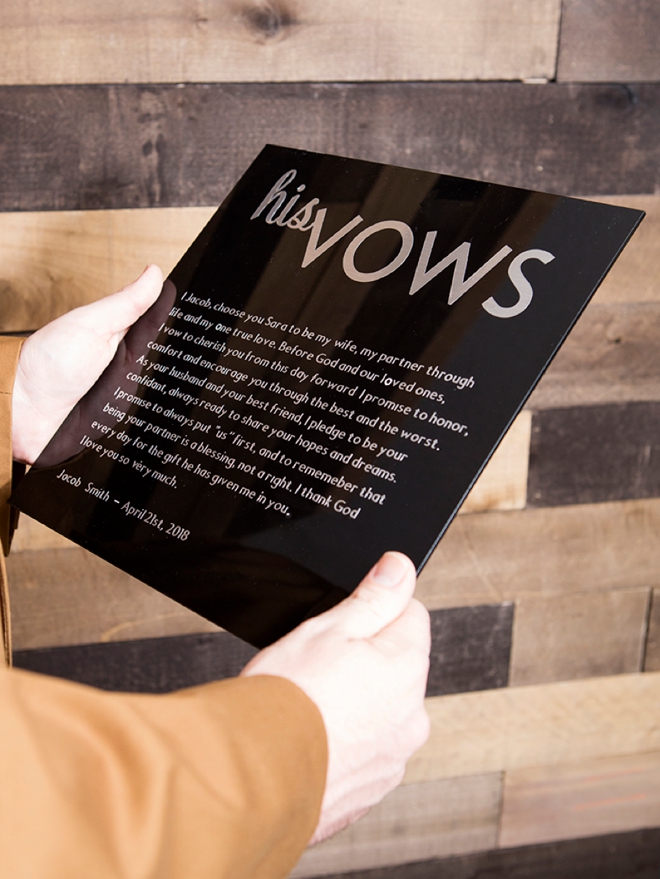
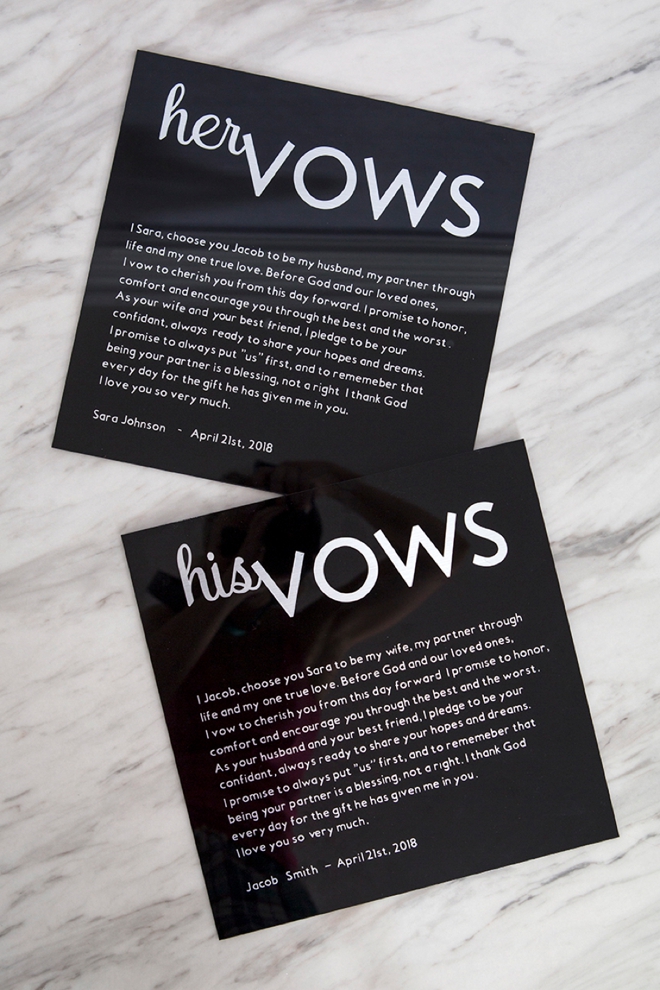
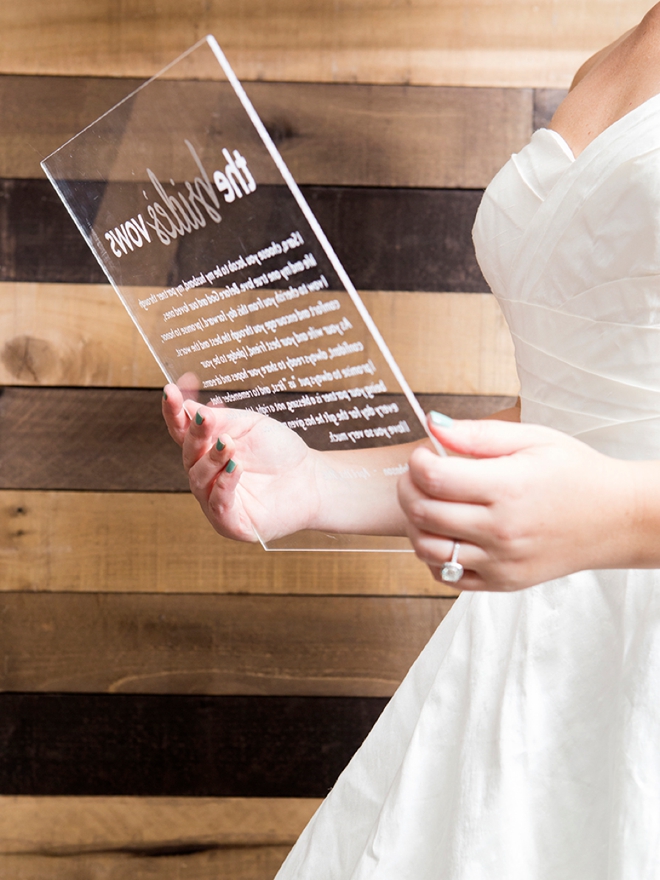
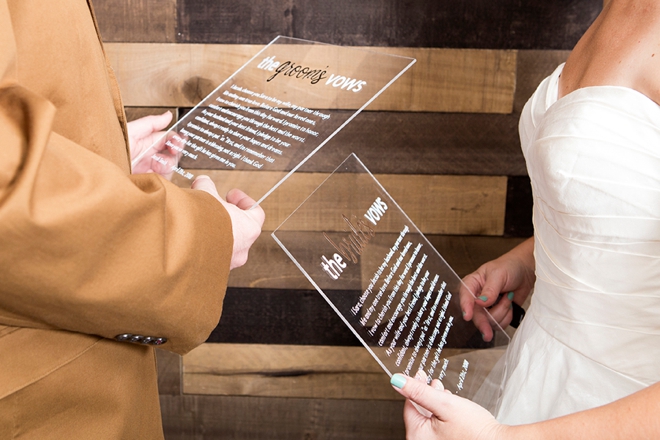
Gaahhh…. you guys, I’m in LOVE (insert like 10 heart-eye emojis). Today I’m using my new Cricut Maker and Cricut BrightPad to create the most romantic and heartfelt vow boards ever! We have two logos for you to use on the top of your board, or you can design your own in Design Space. Add your unique vows into the design, cut, weed and apply to each acrylic board. This project isn’t a super quick one and it will take a bit of patience, but man is it worth it. Not only will these make the sweetest keepsakes but they will look fabulous displayed at your reception for your guests to read and enjoy!
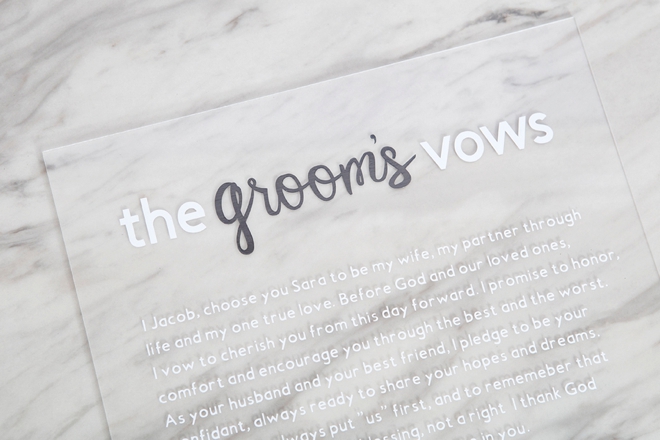
Fonts You Can Read
I’m obsessed with this idea but as romantic and pretty as it is, it also serves a function. So keep in mind that you will need to choose a font that you can read on the acrylic up there on the altar. That means the color of the vinyl, plus acrylic, plus font should be designed for easy reading because it’s hard enough to say these special words in front of everyone you love – you don’t want to struggle to see them!
For the actual vows I used Cricut Sans Serif.
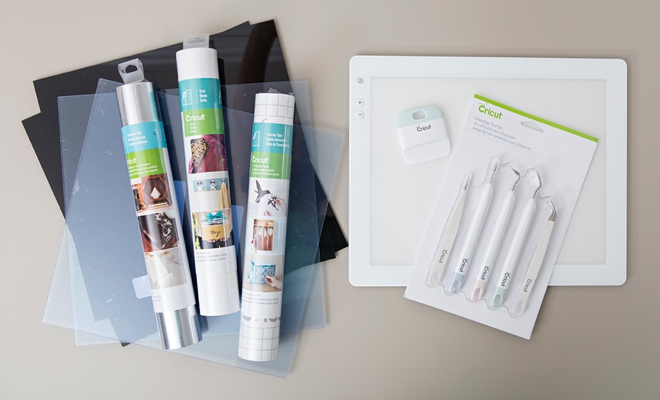
SUPPLIES:
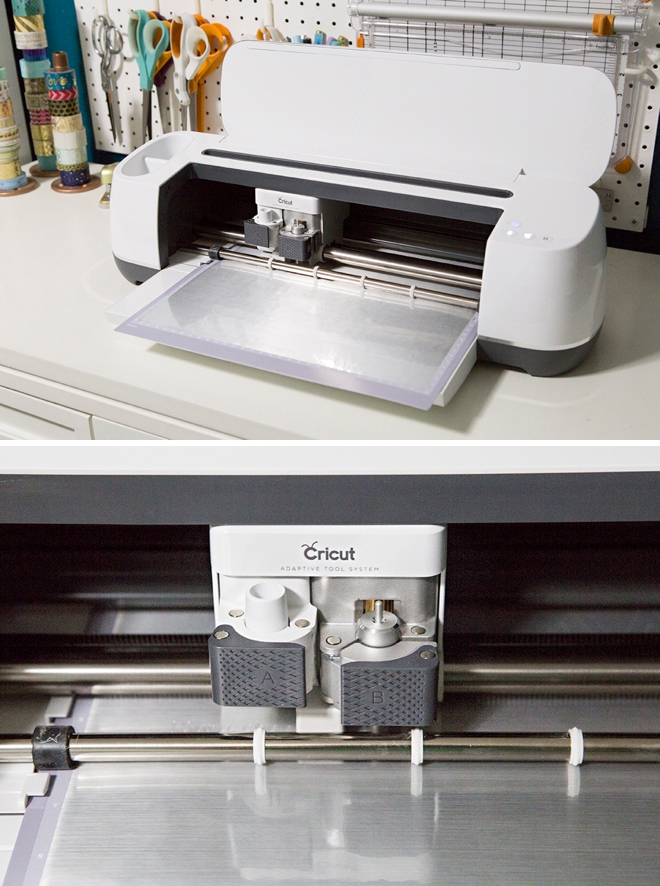
- Cricut Maker or Cricut Explore
- Cricut BrightPad
- 12″ x 12″ x 1/8″ Acrylic Boards
- Cricut Weeding Tools
- Cricut Vinyl or Adhesive Foil
- Cricut Transfer Tape
Visit these links below to be taken to Design Space and customize your vow boards now!
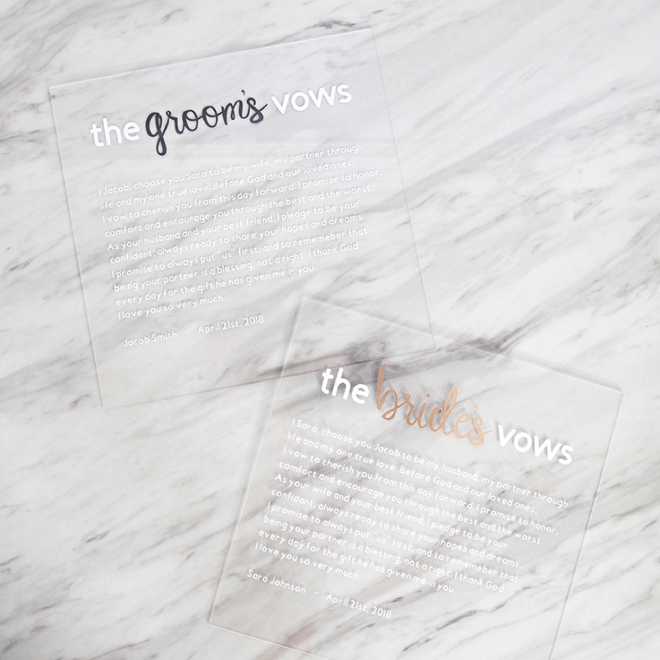
The Vows
Open up Cricut Design Space and design your vow boards. You can use the links above to use our board logos (which can be resized to fit any board), or you can design your own!
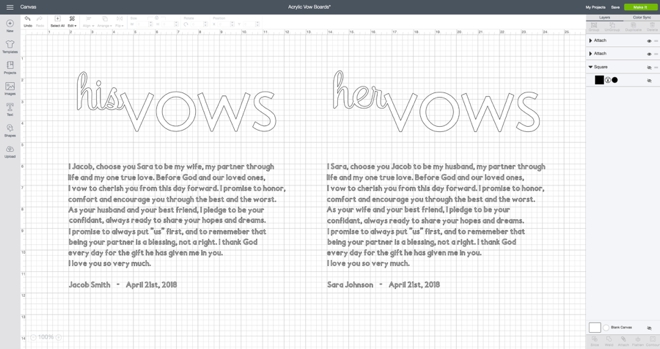
Cut
Add your choice of vinyl to a cutting mat and let your Cricut work it’s magic!
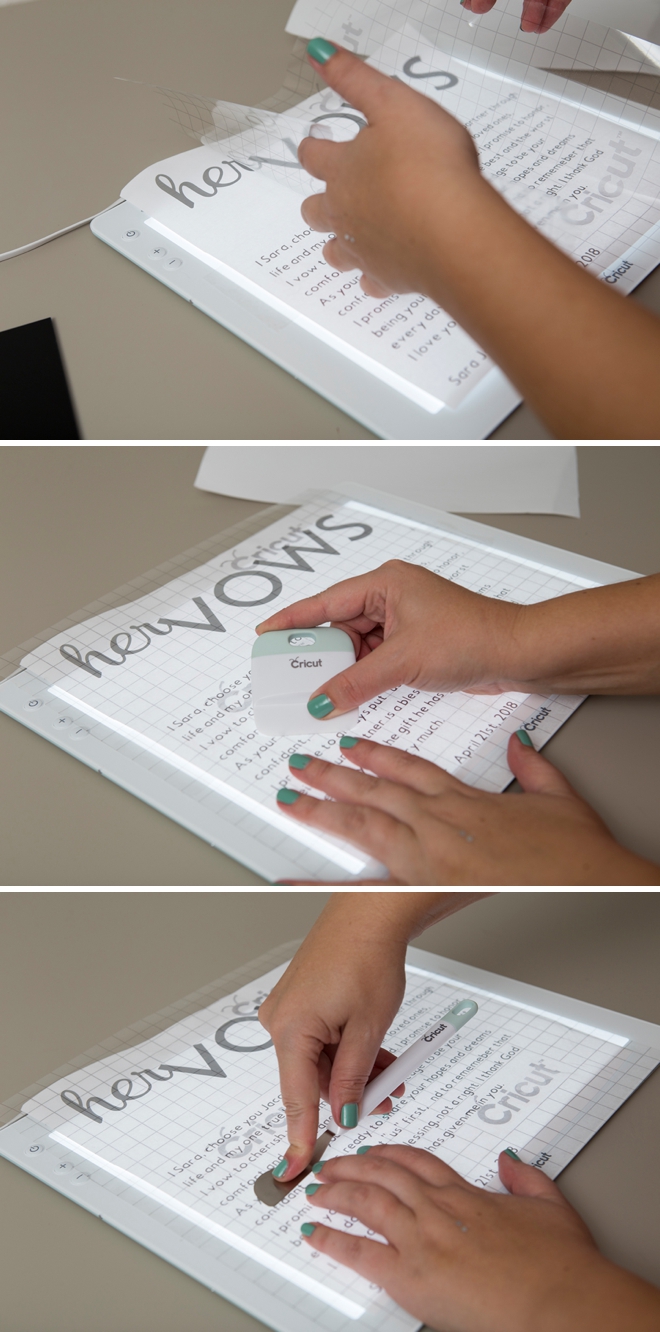
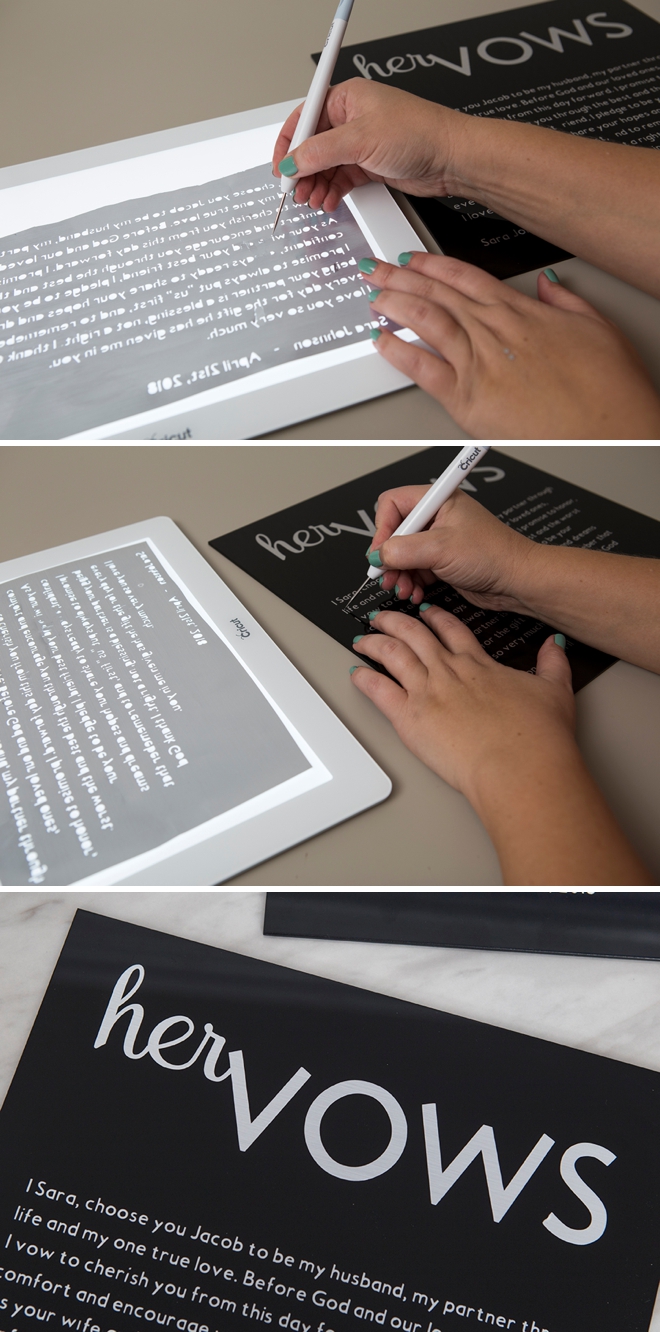
The Bright Pad
This is the new Cricut BrightPad’s debut on ST. When you have a vinyl project that requires lots of weeding – the BrightPad is going to be your best friend! It’s a thin light up pad that shines light through your cut projects and illuminates the areas you need to weed! Yaasss. Dream come true!

Top First
Weed and cut away the excess of the top part of this design first. It’s larger than the rest and is quick and easy to take care of and get out of the way.
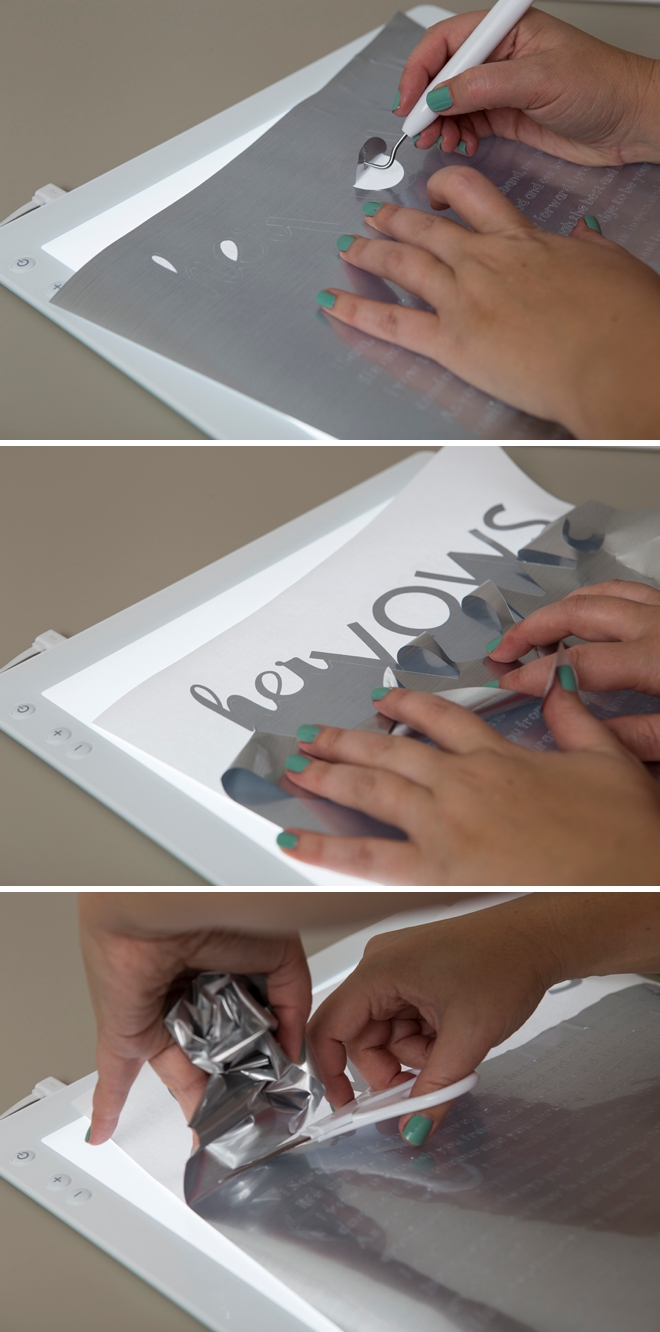
Tape It Down
To make things easy, add a few pieces of tape to hold the vows to the BrightPad.

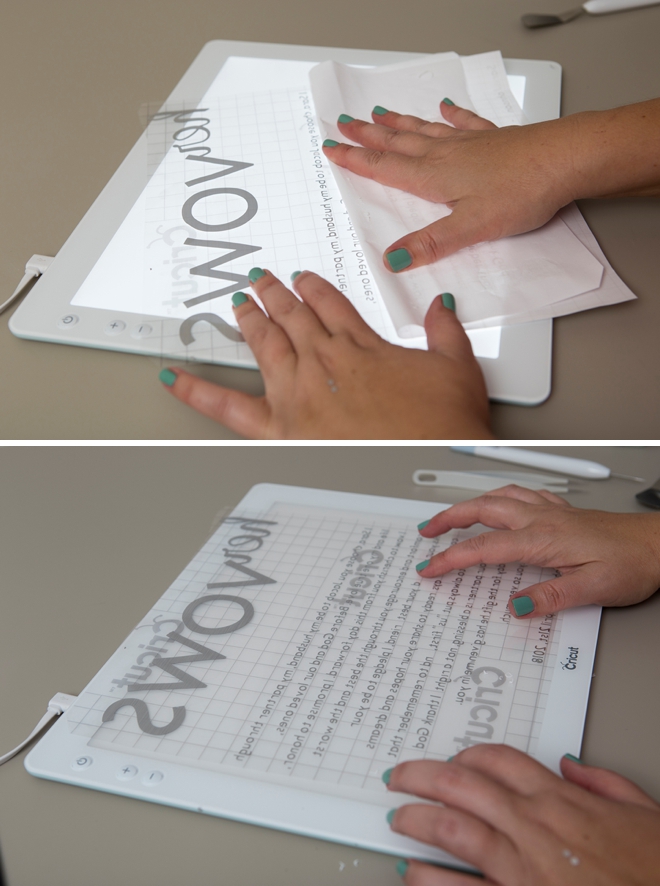
Simple Weeding First
First, go through and weed out all the centers of the e, a, d, o, b, and etc. Remove all the easy parts first.
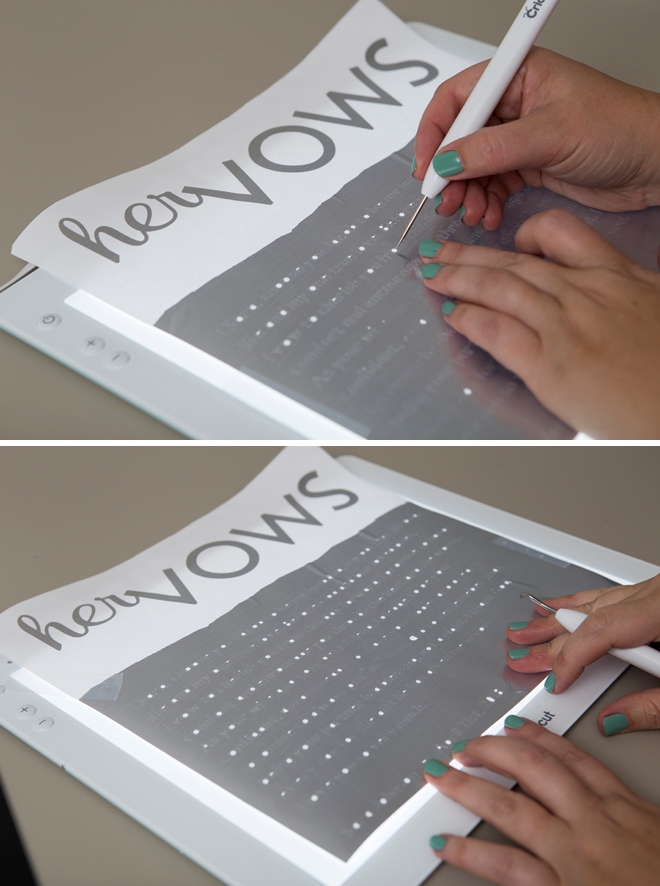
Peel The Rest Away
Carefully working from the top down, peel away the excess foil/vinyl. Keep a weeding tool handy to press letters back into place that pull up with it. Letters, dots, commas will pull up when you peel the background off. Go slow and keep your eye out. When you see something peel up, push it down with the end of one of the weeding tools.
Some dots and commas will be a bit annoying. If they don’t transfer right away, save them on the original sheet and transfer them later.
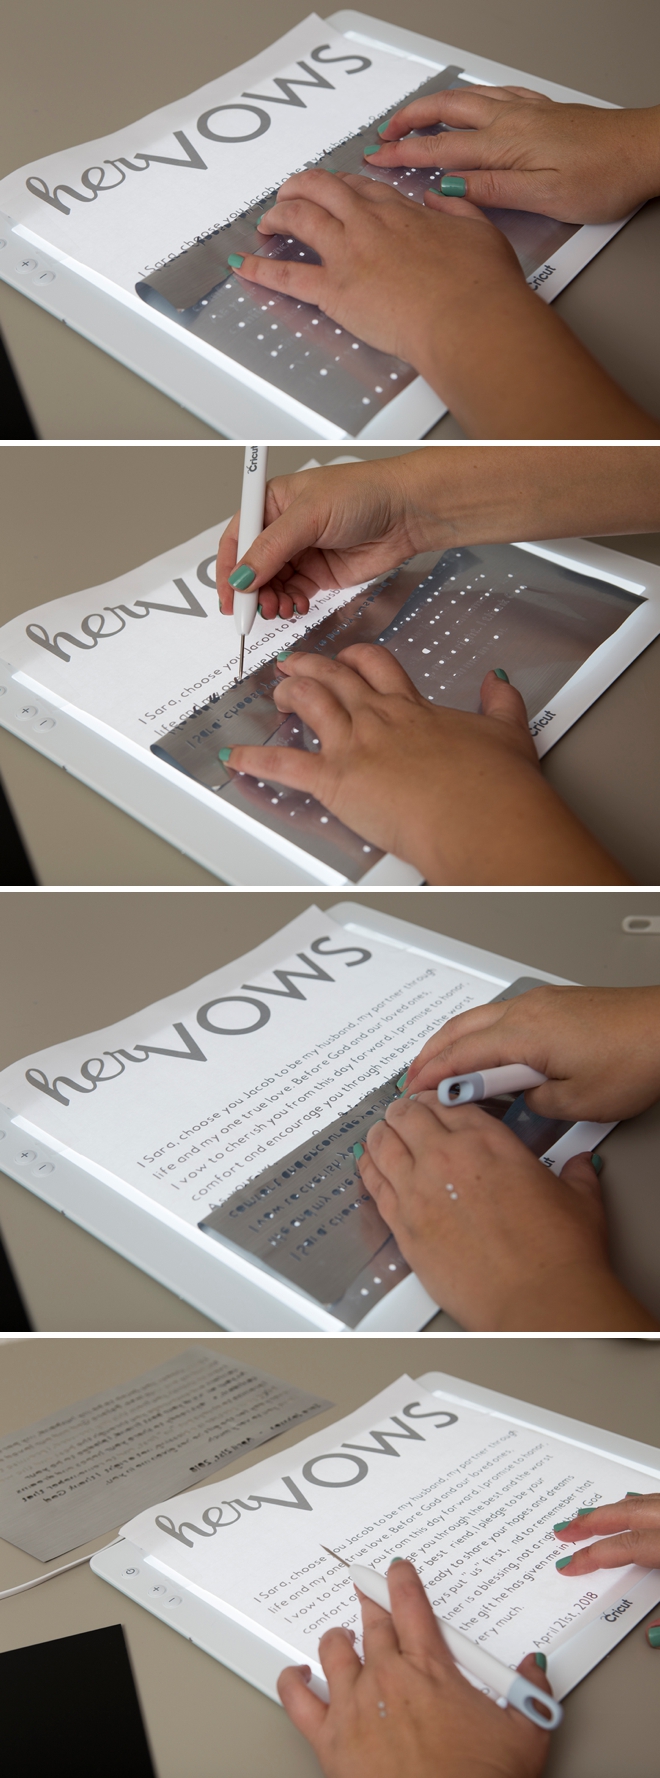
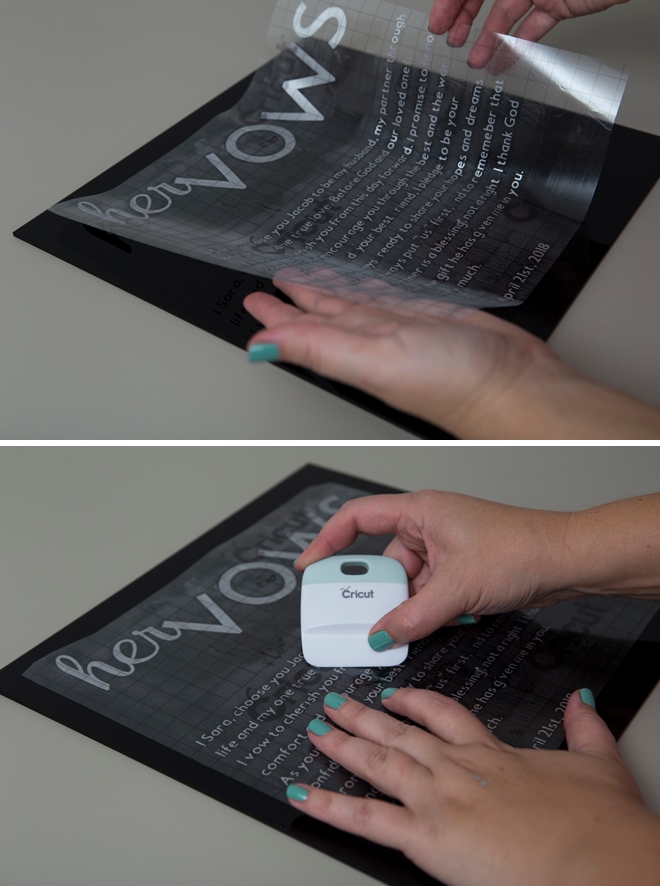
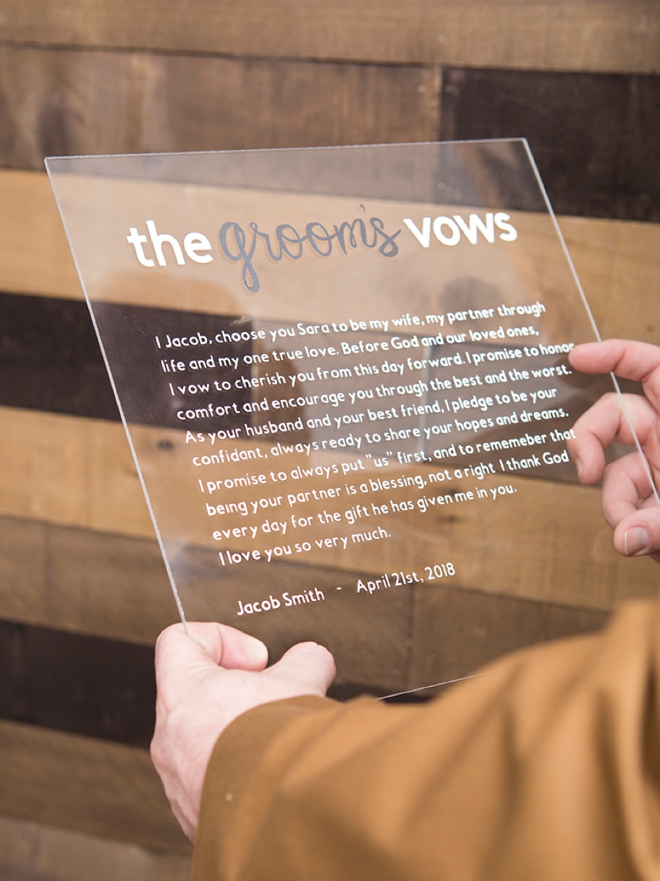
Transfer Tape
Cut a piece of transfer tape the same size as your design. Peel the backing off and add it to your freshly weeded design. Start in the middle and work out. Really press the transfer tape down, in every direction, to make sure the letters adhere to it properly.
Remove Backing
Flip the sheet over and now carefully remove the paper backing from the transfer tape. Again working slowly. Doing this on top of the BrightPad can help!
Add To The Acrylic
Starting in the middle with proper spacing in mind, place the transfer tape + design onto the top of your acrylic board. Then smooth and press the “vow sticker” onto the acrylic.
The acrylic will come with a protective coating that is either clear or blue, remove it before this step. Remove the protective layer from the back of the board when your project is complete.
Remove The Transfer Tape
Now carefully remove the transfer tape from the board, working from the top down. The transfer tape is used to properly transfer your design from it’s original paper backing!
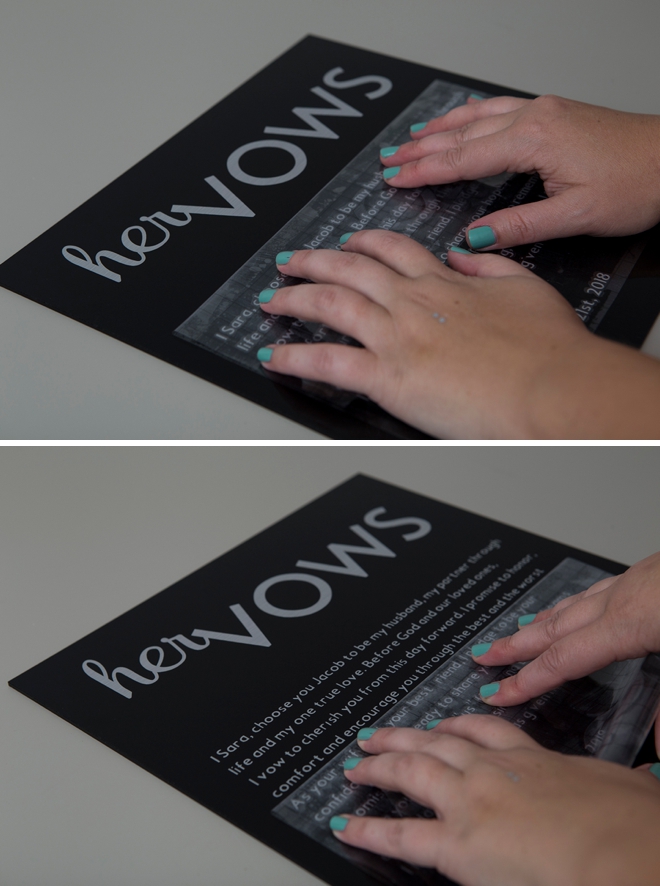
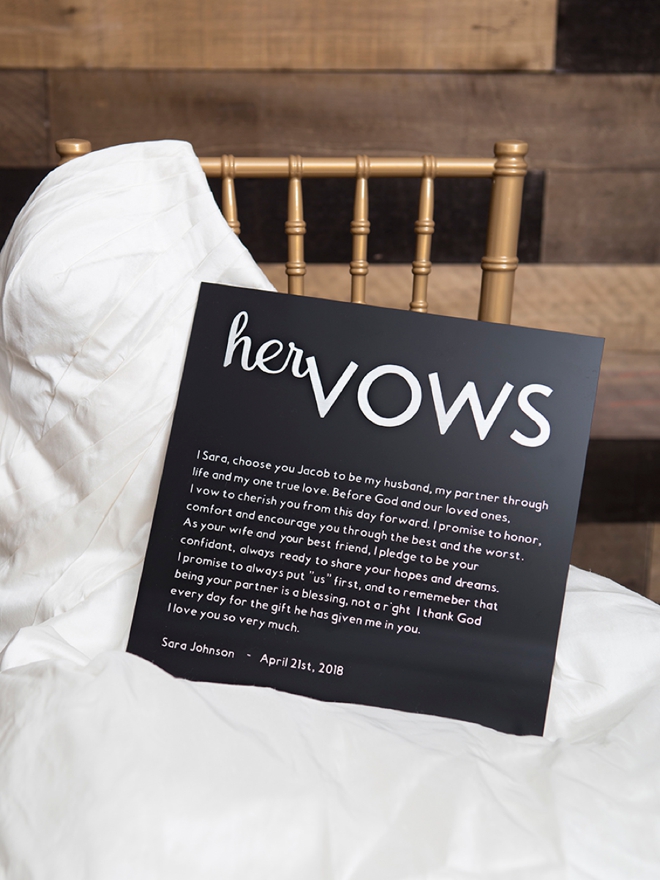
Make It Perfect
Now go over your finished design, align crooked letters, add periods and commas, fix anything that needs it. Cut more letters or symbols if you need to… and that’s it!
The Best Kind Of Keepsake
These sweet boards are made to last. The high quality of Cricut’s vinyl and adhesive foil will ensure that these boards will last a lifetime or longer. Hang them in your room, lean against the wall from your dresser, or keep them in a special box and read them on your anniversary. The best kinds of keepsakes are the type that you not only make by hand but actually used at one time!
DIY TUTORIAL PARTNER:

Cricut is a world-class leader in personal electronic cutting machines that has enabled people to achieve their creative best for over 50 years. Today, millions of people use Cricut products to create unique projects, and they focus on enhancing lives with this power of creativity. Let Cricut help you take your wedding personalization and project creativity to the next level!
Love This Project?
If you’re in love with this Cricut wedding project, you’ll be happy to hear that we now sell exclusive .SVG cut files for your Cricut in our shop! Most files are only $1.99 and they download instantly… so you can be crafting in minutes!
As with all our DIY tutorials, if you create one of our projects please send us a picture – We Love Seeing Your Creativity! If you use Instagram or Twitter please use the hashtag #SomethingTurquoiseDIY and it will show up on our Get Social page. Happy Crafting!
DIY Tutorial Credits
Photography + DIY Tutorial: Jen Carreiro of Something Turquoise // Cricut Maker, Cricut BrightPad, Cricut Vinyls, and Weeding Tool Kit: courtesy of Cricut // 12″ x 12″ x 1/8″ Acrylic Boards in Black and Clear: Amazon // Nail Polish: OPI – Withstands the Test of Thyme
Shop The Supplies:
Find the supplies you’ll need for this project from our affiliate links below:

Comments