
DIY | Twisted Bridal Hair Pin
Hey DIY babes! It’s the most wonderful day of the week… and today’s extra special because I made a video of this project for you! In this post, I’m sharing how to make these gorgeous, DIY Twisted Bridal Hair Pins and believe me when I say it’s easier than you think. I was actually surprised at how easy they were to make; they just take time and you don’t want to rush the process. Each one took me about and hour and a half, but I put on some good music, poured myself some wine and got to twisting! Let me know what you think of the video, if you like it – I might just share more!
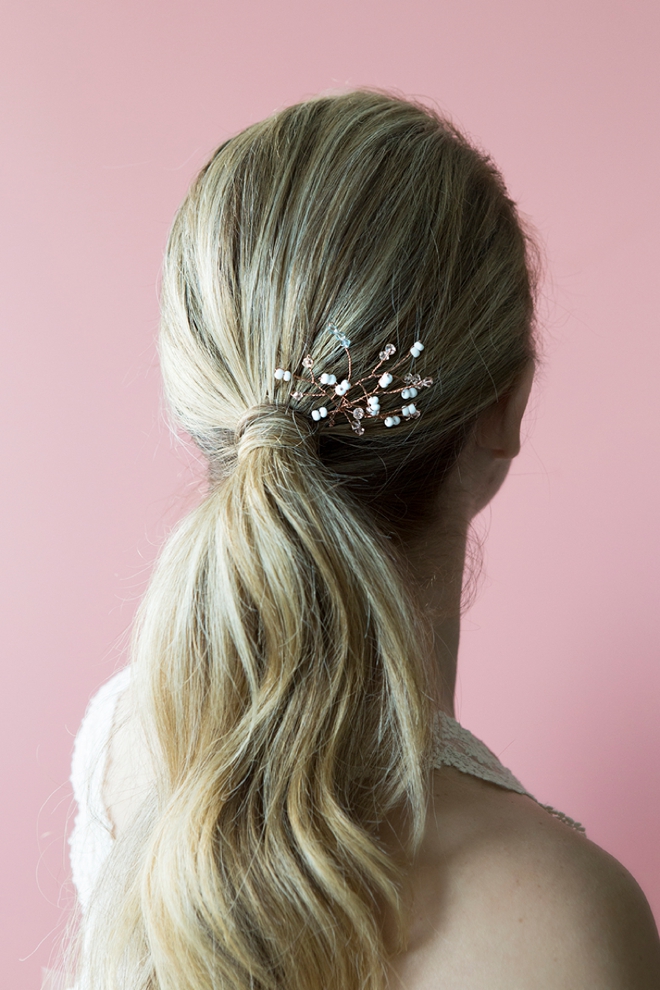
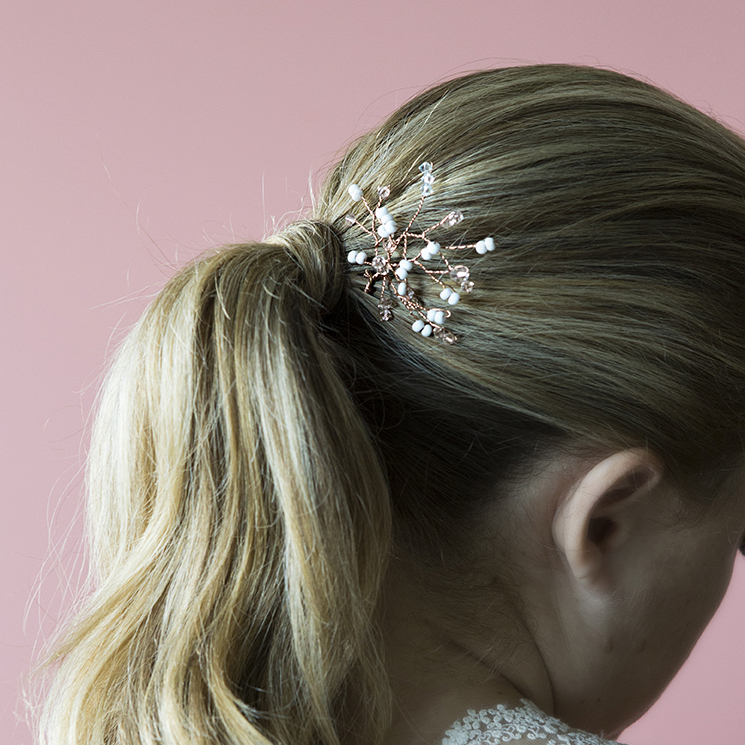
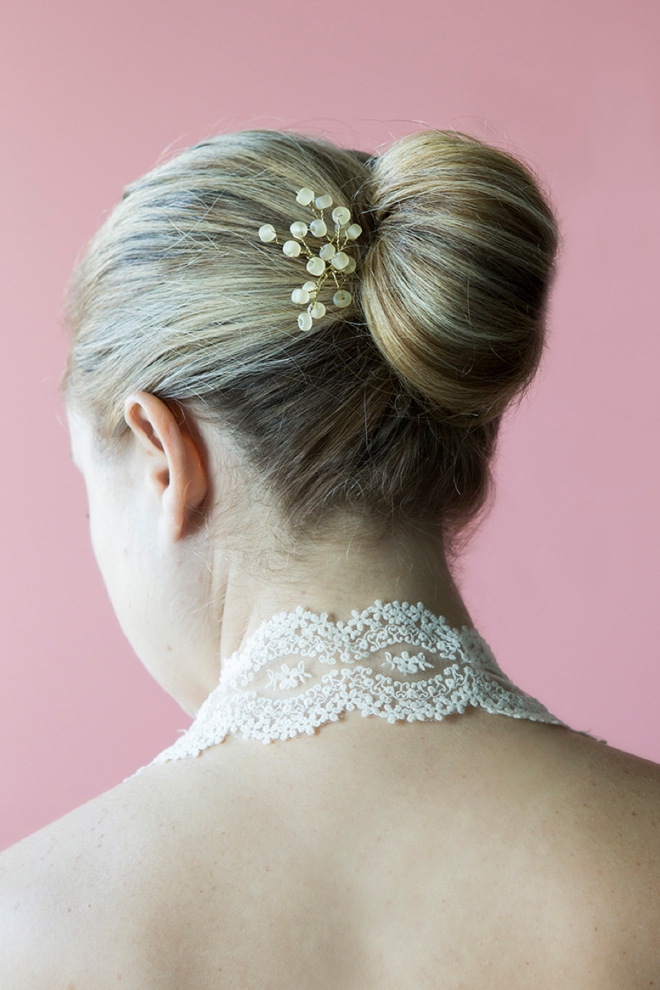
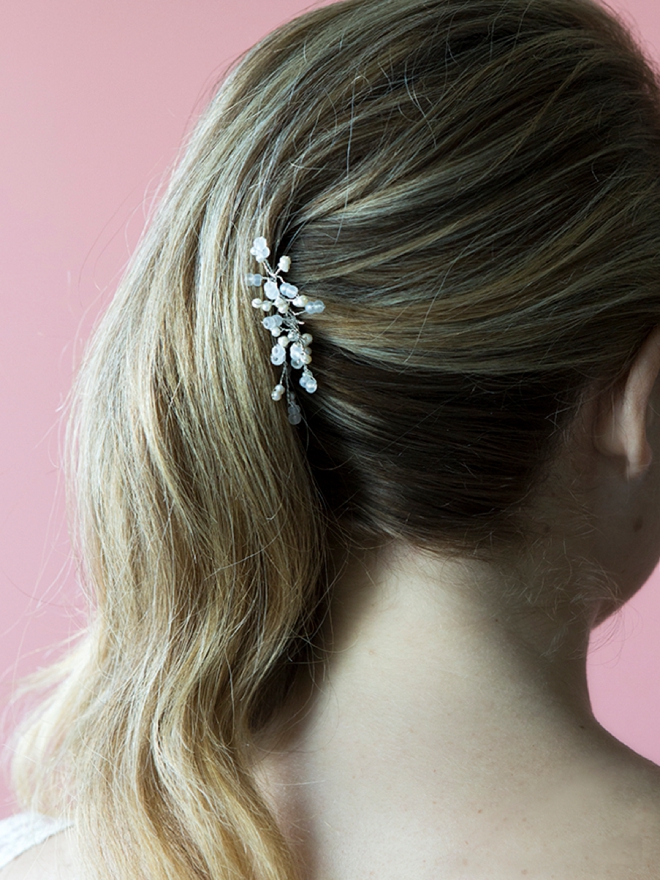
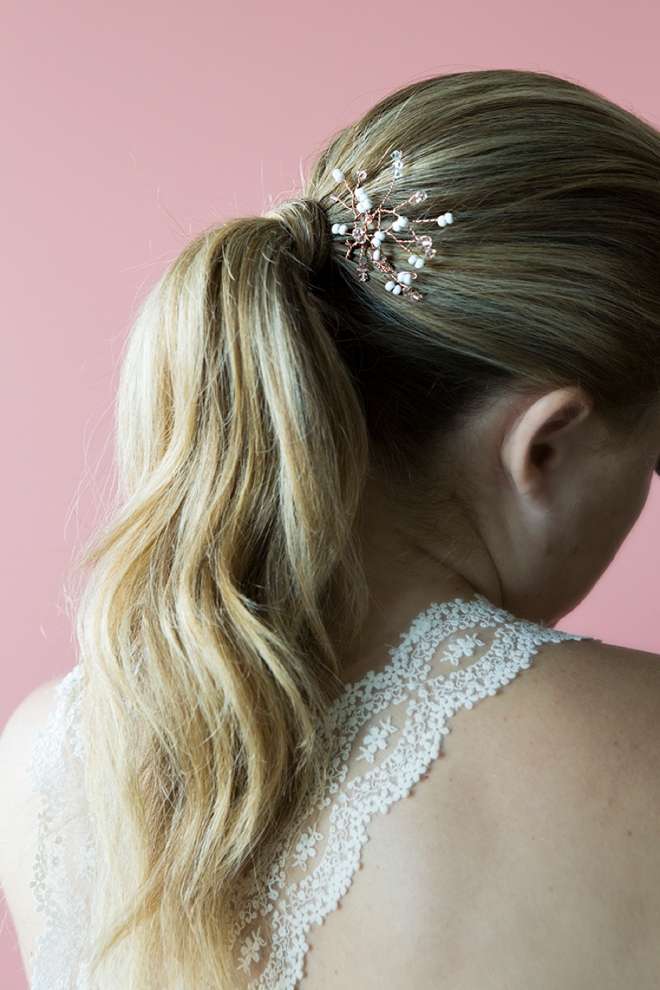
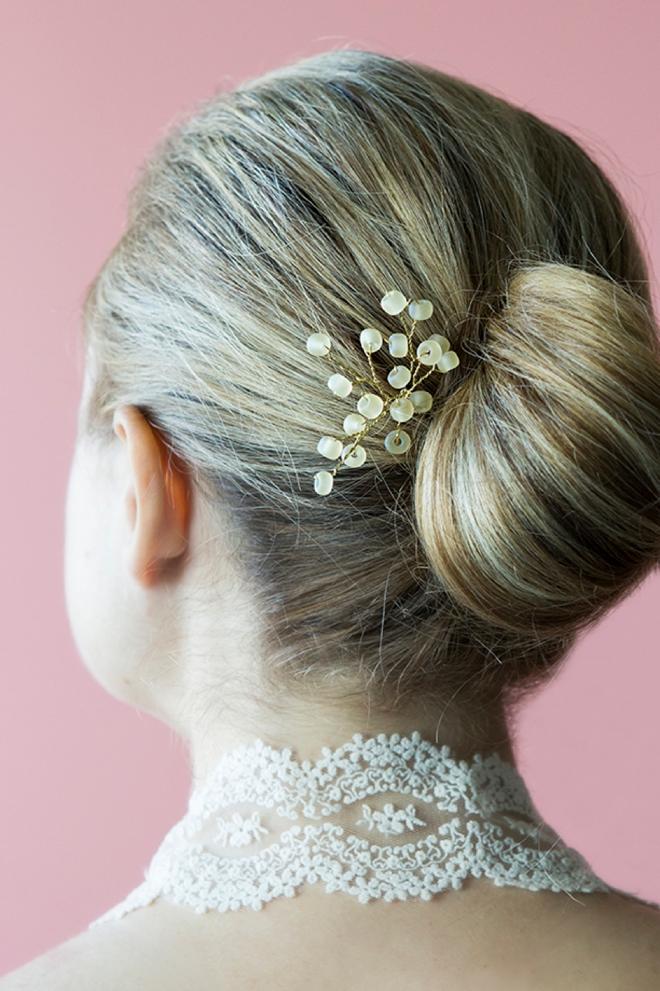
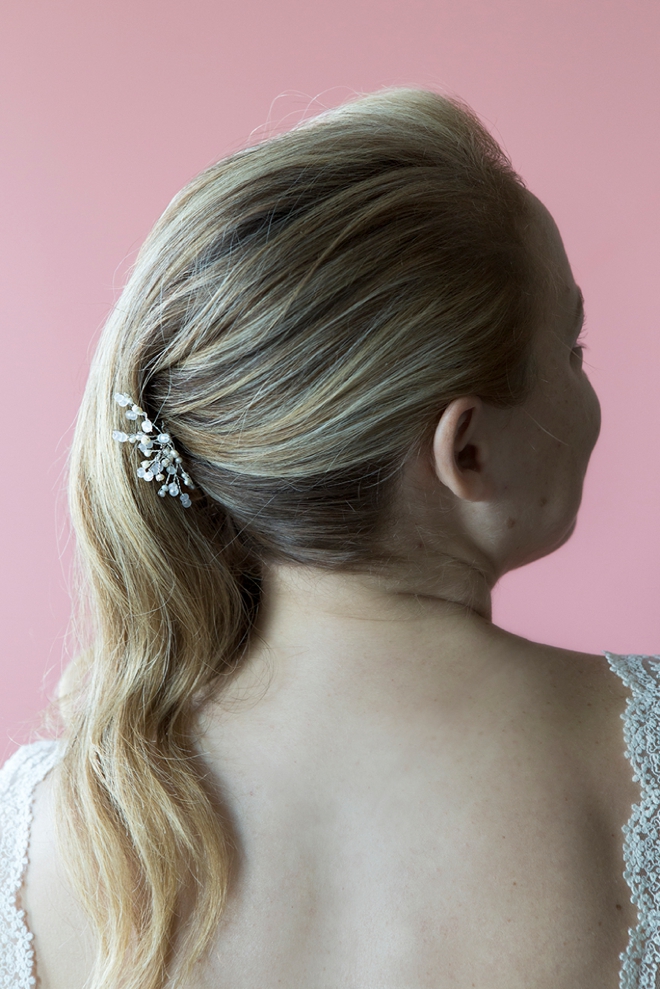
Any Hair Style Will Do
These gorgeous “vine” style hair pins look stunning with almost every single hair style… so pick your color of wire + type of bead to create the ultimate, personalized bridal hair accessory!
How-To Make Your Own Twisted Bridal Hair Pin:
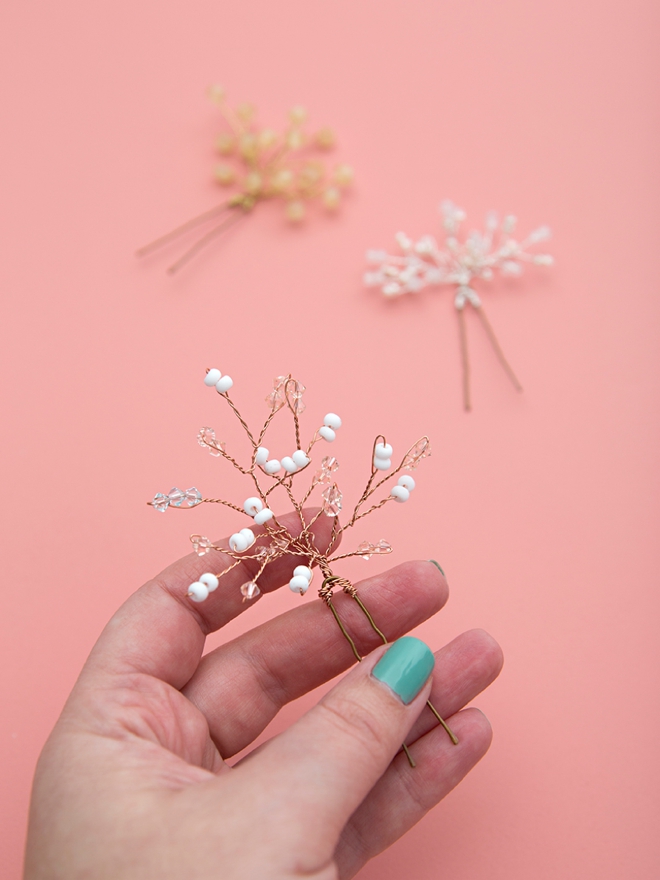
SUPPLIES:
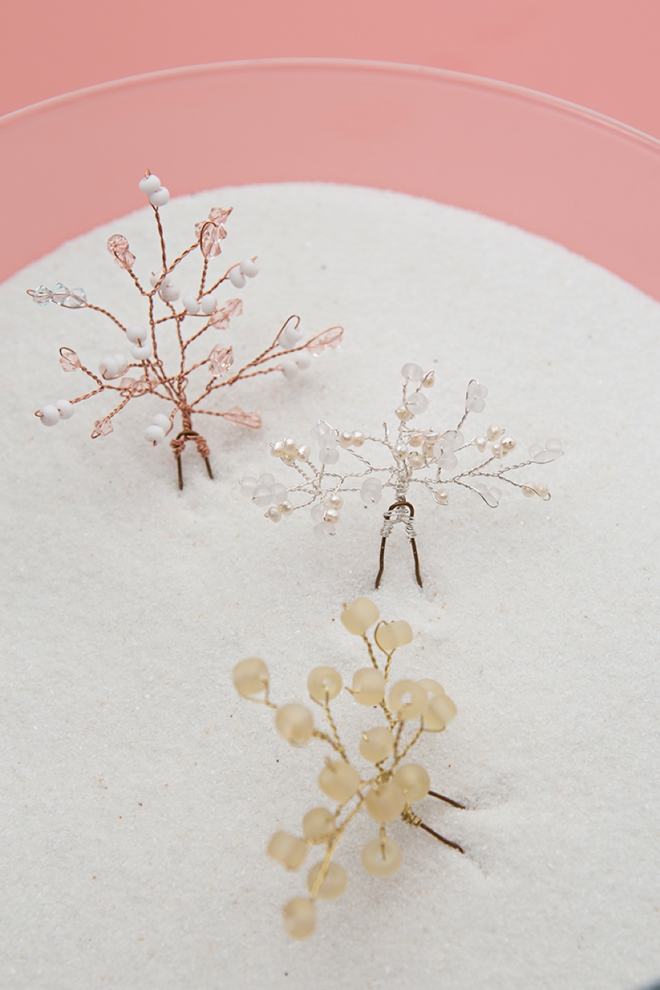
- 26 Gauge Beading Wire (copper, gold, or silver)
- Pretty Little Beads
- Mini Plier Set
- Hair Pins
STEPS:
- Gather your supplies and set yourself up on a piece of felt or fabric, so your beads don’t roll around on you.
- Cut a piece of wire about 9″ long and fold it in half, add a bead or two, pinch and twist for about a 1/2″.
- Bend one side of the wire up to form another twisted arm. Add a bead or two and twist. Then twist with the other wire about 1/8″.
- Keep bending and twisting until you’re happy with the look of your “vine”.
- Wrap an individual vine to a hair pin or gather several and wrap them together and to the pin for a fuller look.
- Make and wear one or as many as you’d like!
TIPS:
- Be gentle with yourself. Don’t expect to get it perfect on your first try, it takes a few times to get used to the wrapping technique.
- If you bend the wire back and forth too much it will break. Re-wrap and use what you can if that happens.
- Cut more wire than you need, you can always cut excess off, but you can’t glue it back on.
- Hair pins work better than bobby pins, but use what you have and save some money.
- You can use any pretty beads that you find. If you love the bead – it will look gorgeous in your hair.
- Add a blue (or turquoise) bead like I did to the copper design as your “something blue”.
- Take this hair pin with you when you visit your hair dresser for your trial wedding hair style.
Bridesmaid Gifts
Making one of these beauties for each of your bridesmaids to wear on your wedding day, would double as a lovely gift that they’re sure to wear again!
As with all our DIY tutorials, if you create one of our projects please send us a picture – We Love Seeing Your Creativity! If you use Instagram or Twitter please use the hashtag #SomethingTurquoiseDIY and it will show up on our Get Social page. Happy Crafting!
DIY Tutorial Credits
Photography + DIY Tutorial + Model + Hair: Jen Carreiro of Something Turquoise // Copper, Silver and Gold 26 Gauge Bead Wire: Amazon // Beads: Ruby Tuesday + personal collection // Mini Pliers: Craftsman // Hair Pins: Amazon // Nail Polish: OPI – Withstands the Test of Thyme
Shop The Supplies:
Find the supplies you’ll need for this project from our affiliate links below:

Comments