
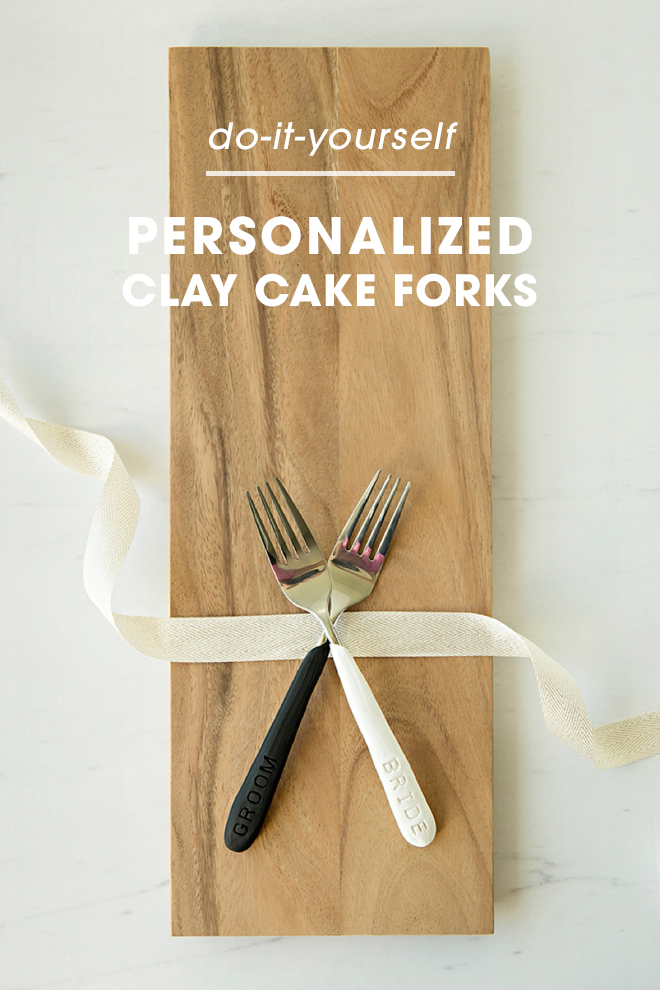
DIY | Personalized Clay Wedding Cake Forks
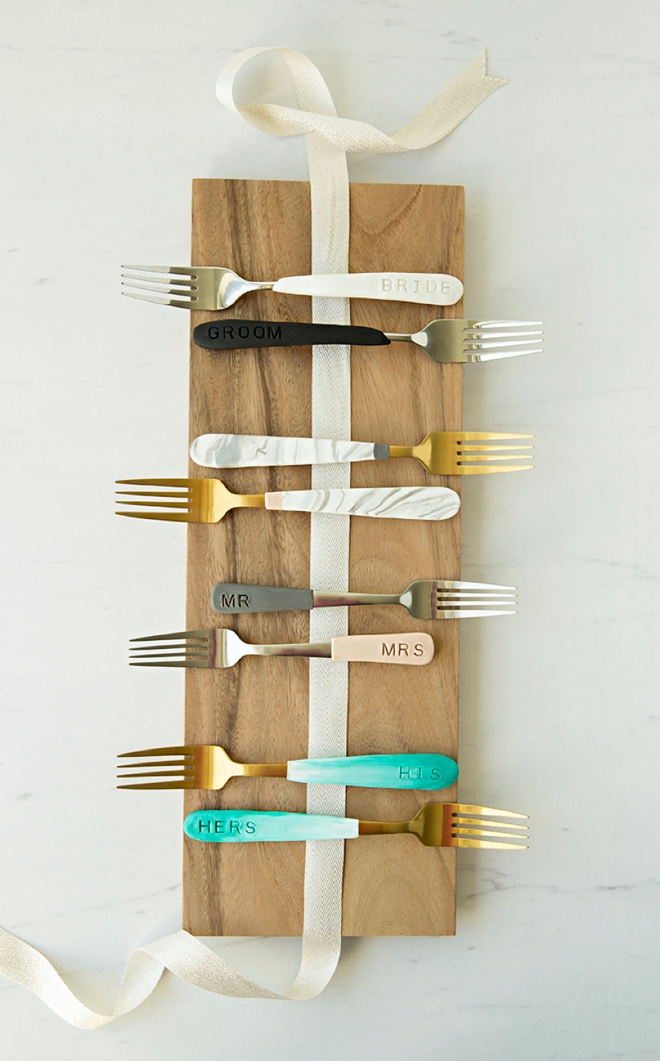
I feel like I’m always saying it’s all about the little things but it’s so true! All the special, little details that make up your wedding day is what makes your event unique and all about you. So today I’m sharing a super fun idea on how to make Personalized Clay Wedding Cake Forks to eat your first piece of cake with! Personalizing inexpensive forks to fit your wedding theme, color and personality is super easy as you find below. You can even wash the forks, but I recommend keeping them out of the dishwasher. This project makes a terrific keepsake that you can use on your anniversary to dig into a celebratory piece of cake, year after year!
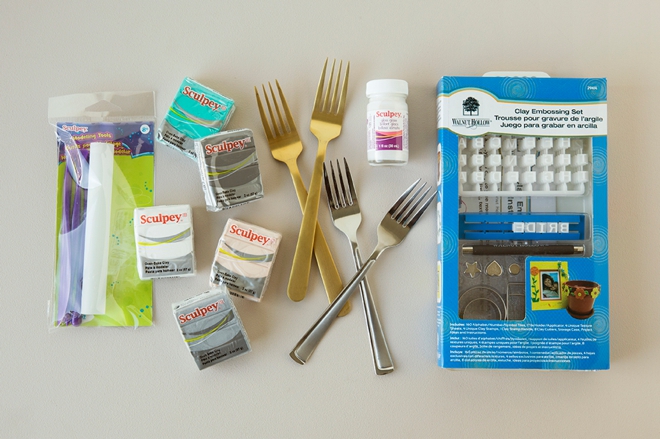
SUPPLIES:
- Forks – I bought these individually at Target
- Sculpey iii Oven-Bake Clay (or any brand you’d like)
- Modeling Tool Set
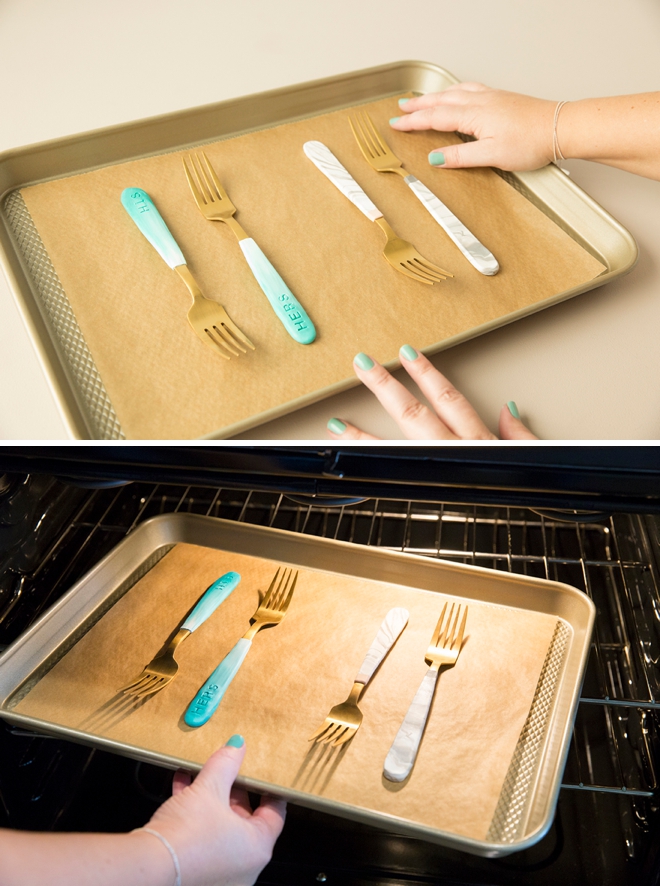
- Cookie Sheet + Parchment Paper
- Clay Embossing Alphabet (optional)
- Sculpey Gloss Glaze (optional)
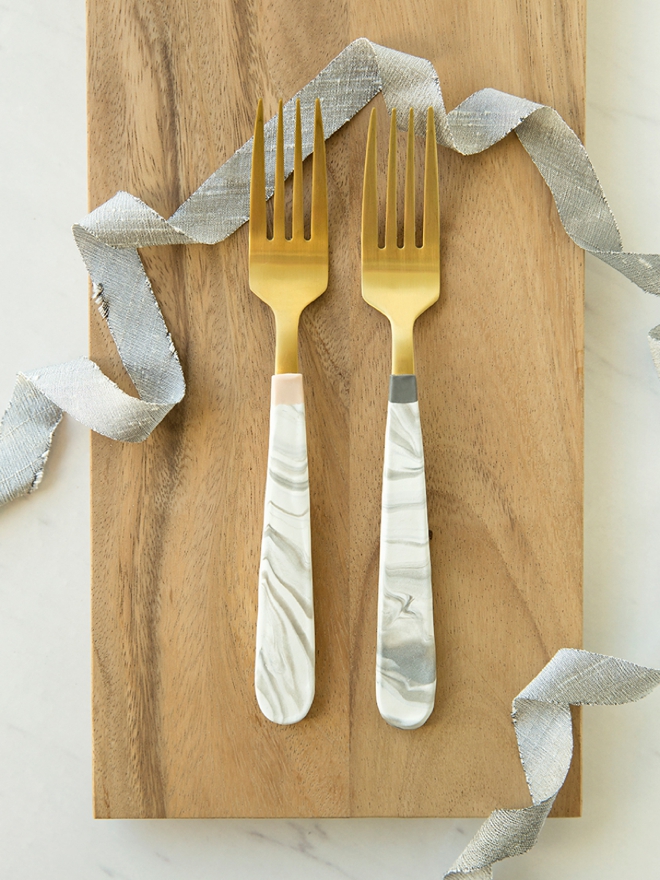
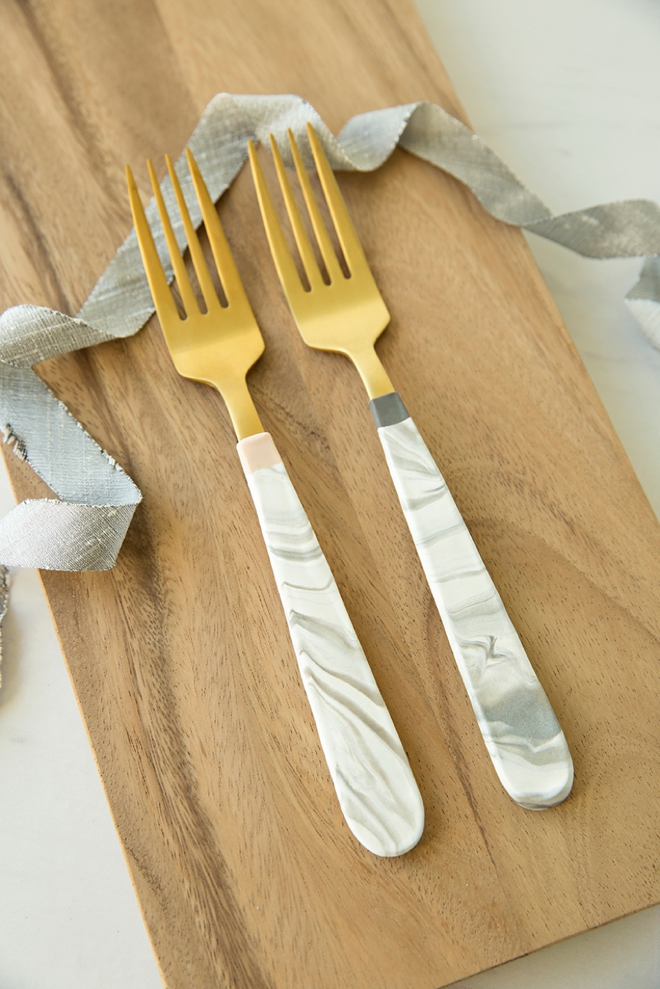
Make The Marble
Creating clay that looks like marble is actually really easy! Roll out some white, then add a few stripes of gray, two colors are best. Then roll it together, twisting the clay around to get unique swirls of color. Over mixing will make “light gray” so try not to do that.
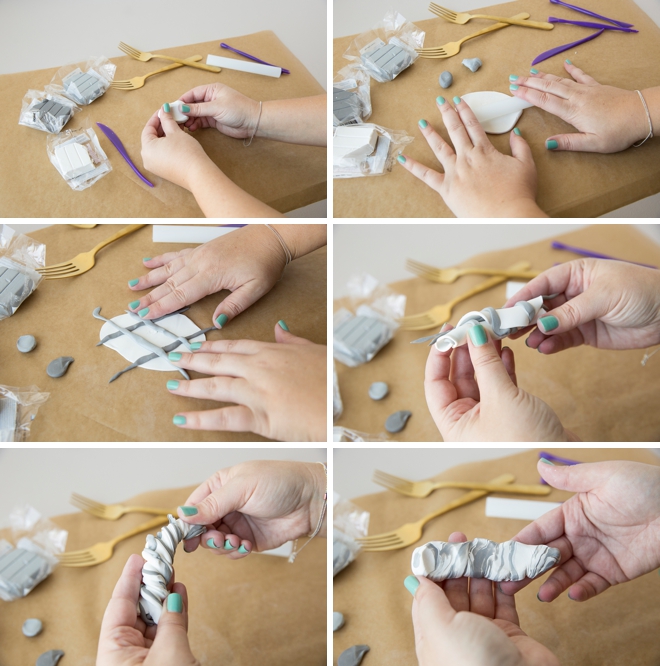
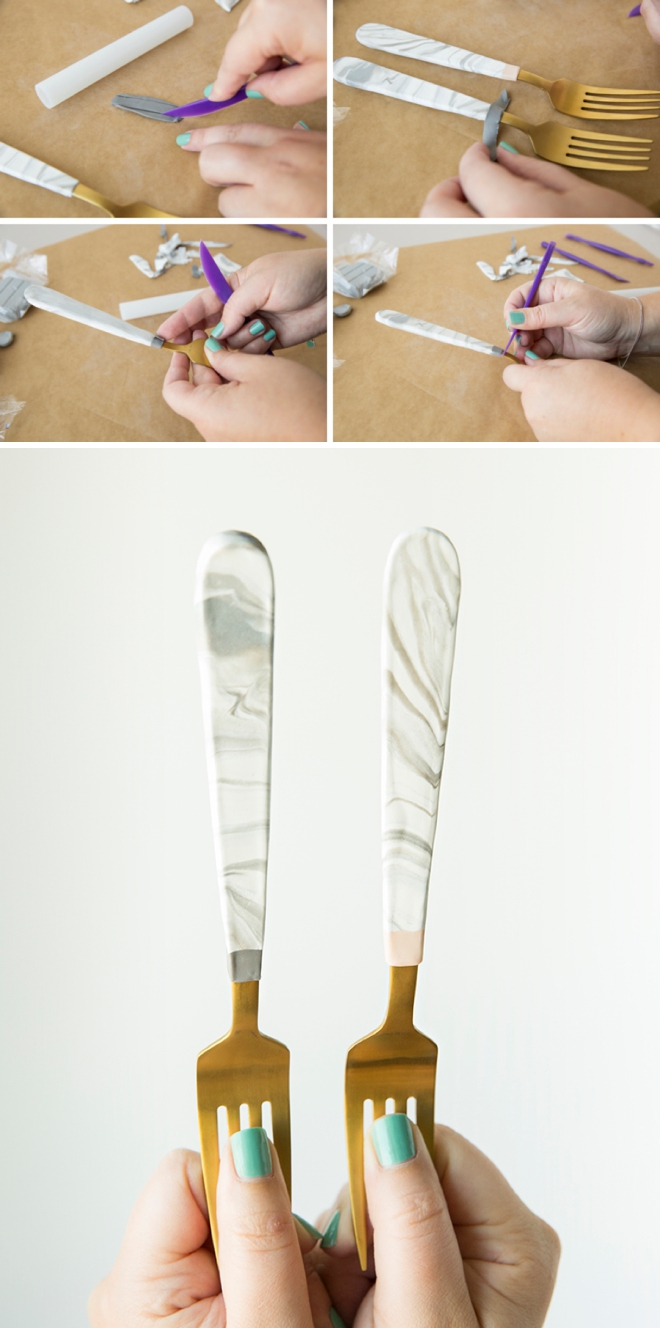
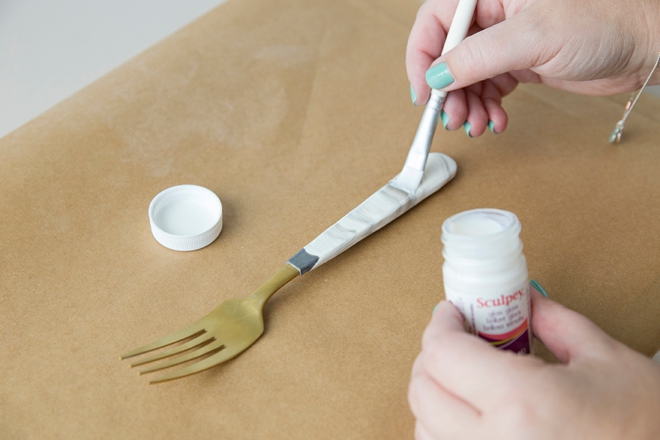
Cover The Fork
Roll out the clay to about 1/4″ thickness and then form it around the fork handle. Cutting off excess clay where necessary and trying to touch the marbling on the front as little as possible. The marbling on the back will disappear from all the smoothing.
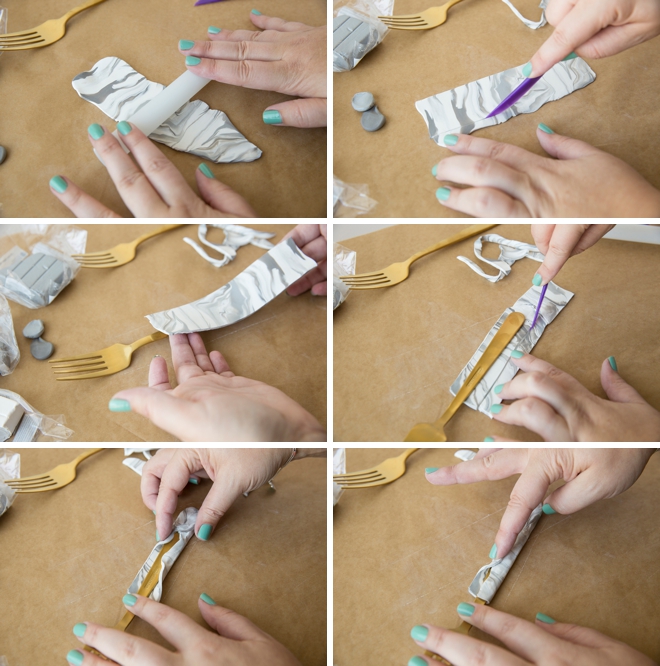
Smooth + Shape
Take your time to smooth and shape the clay around the handle. For me it took about 20 minutes to get each fork just perfect. Use the roller, your fingers and whatever else you have to smooth the clay. Take your time and enjoy the process.
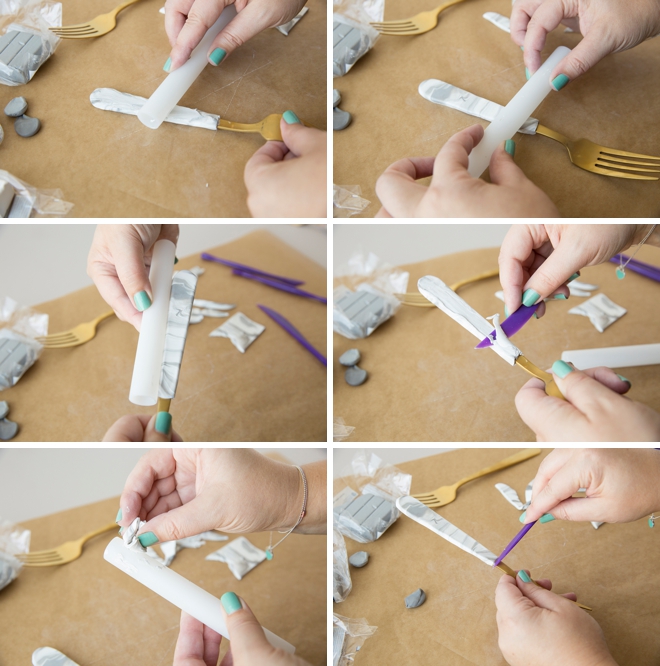
Add Accents
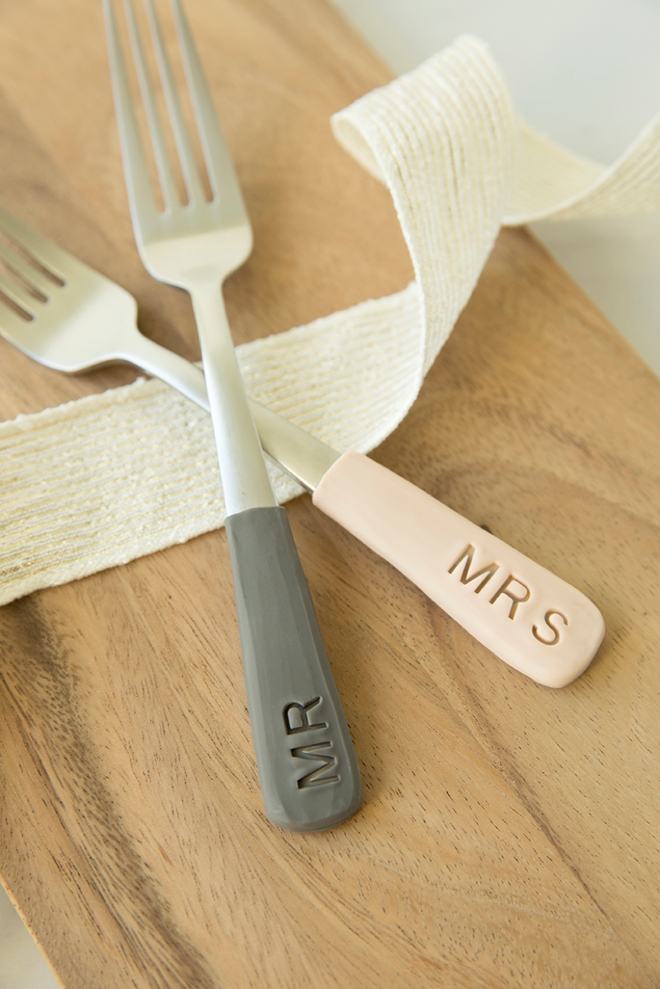
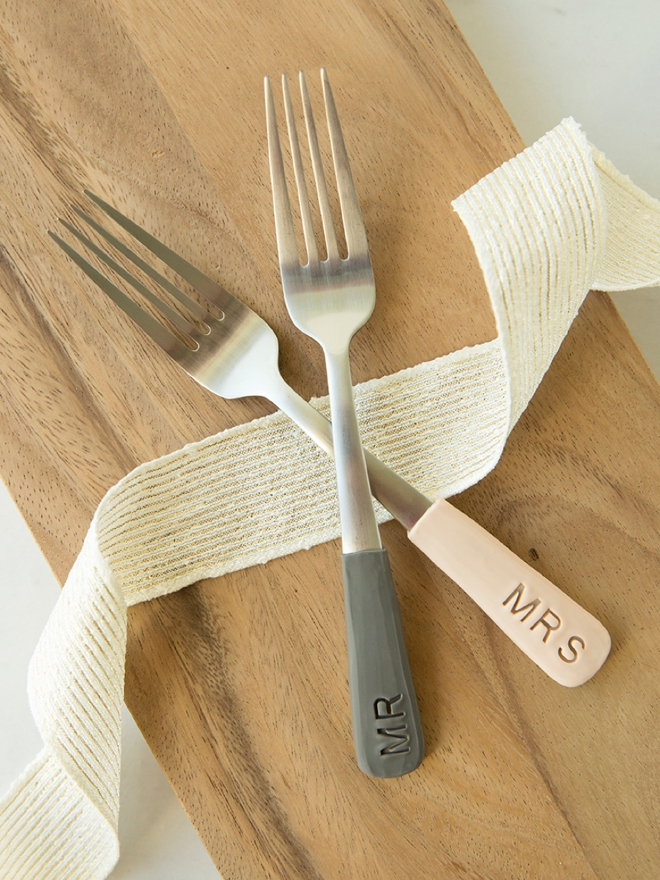
For this design I rolled and cut out a little piece of gray and beige clay to distinguish the his + hers forks, and then smoothed it into the marble.
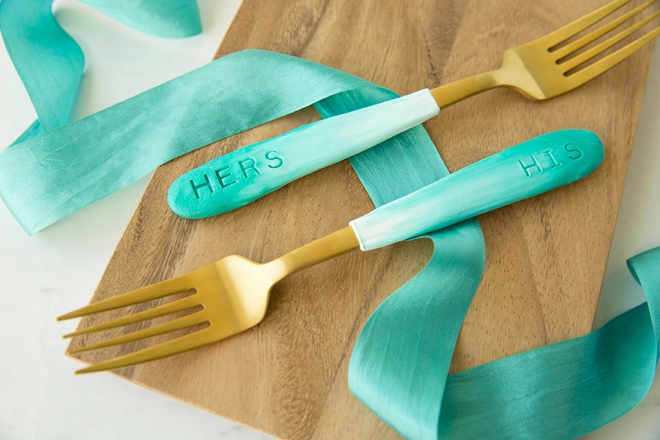
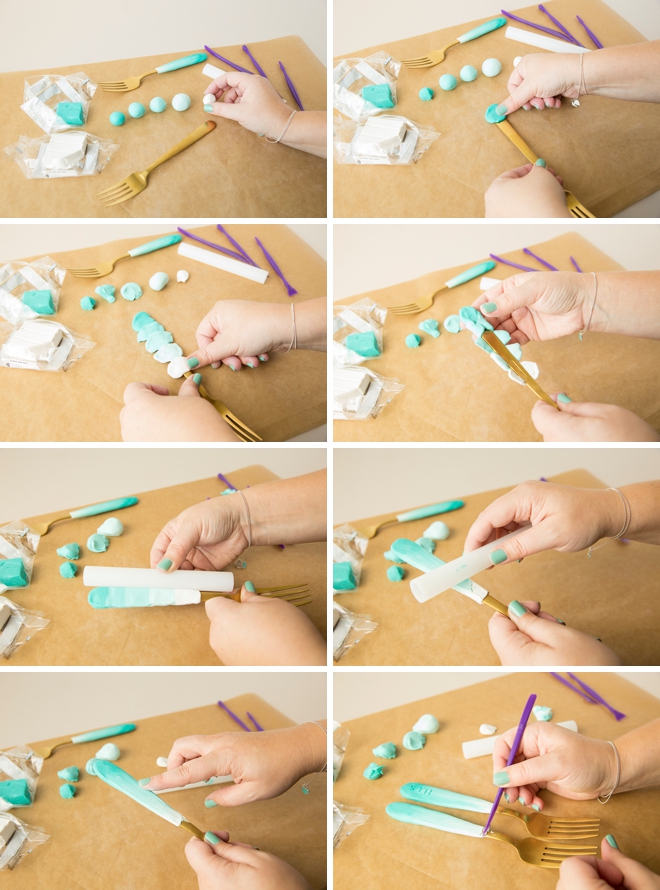
Make The Ombre
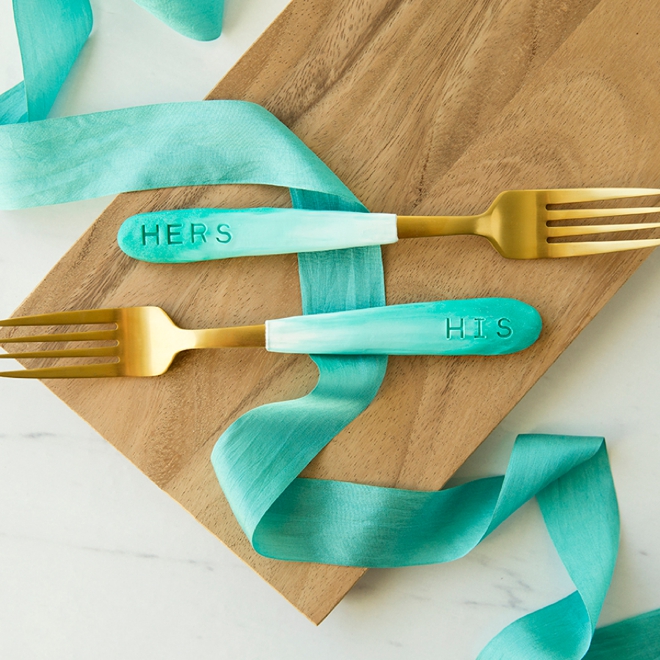
For the five ombre shades, mix your choice of color (mine of course was turquoise) with 3 varying amounts of white clay, to get the gradation in color. You’ll want the full strength formula, 3 mixed shades and white. Piece off a little of each color and wrap them around the fork handle. Smoothing with the roller in a downward motion helps blend the colors!
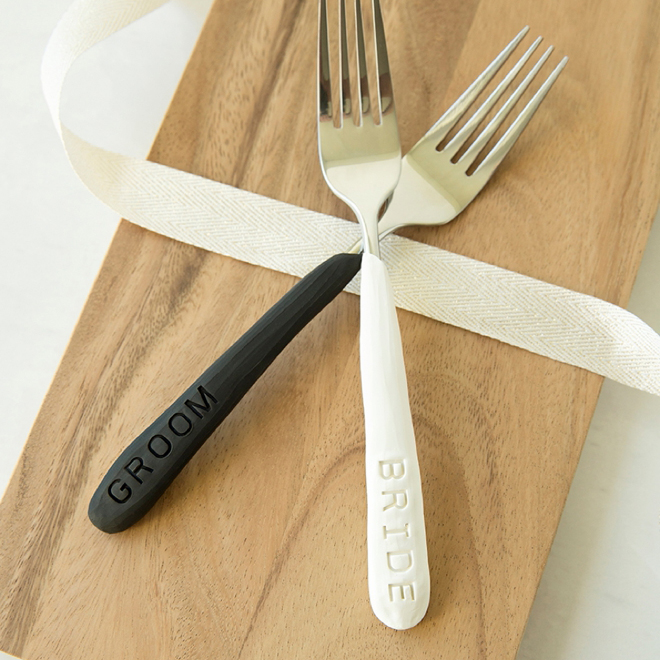
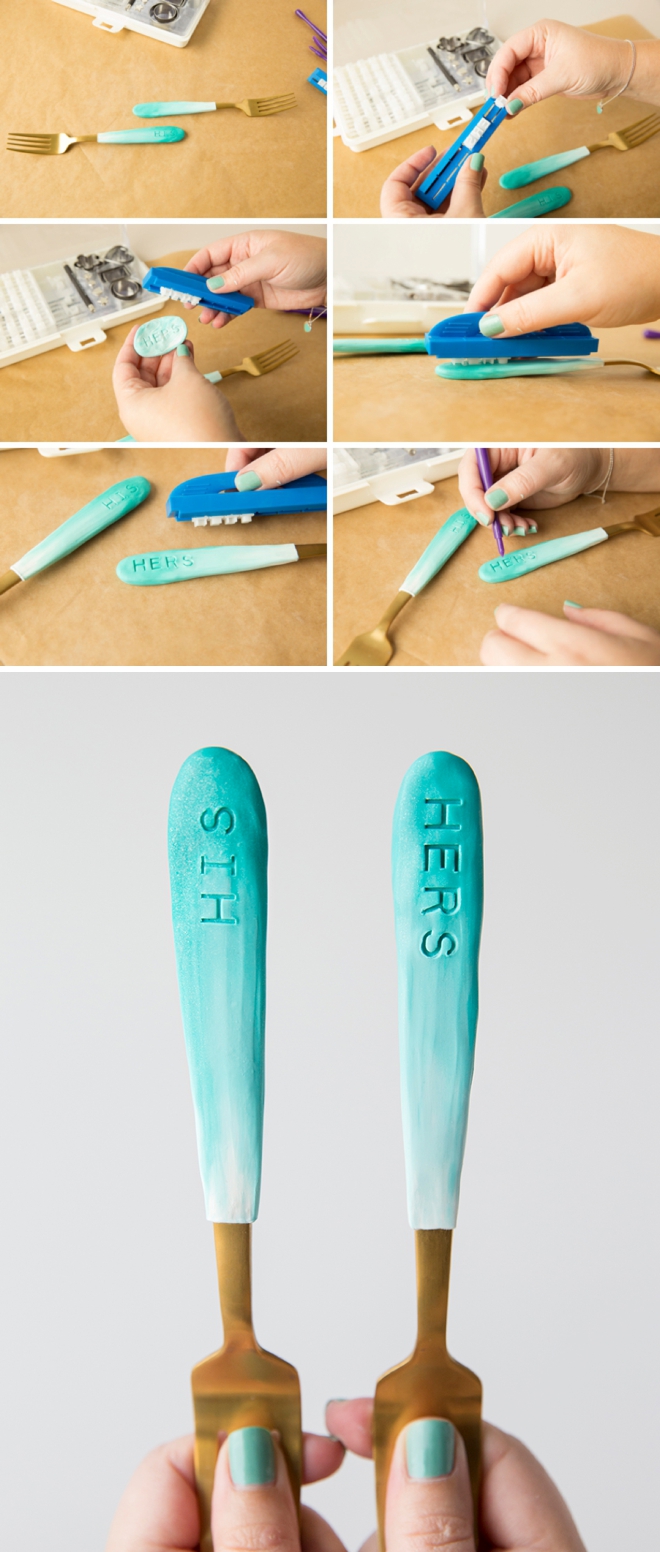
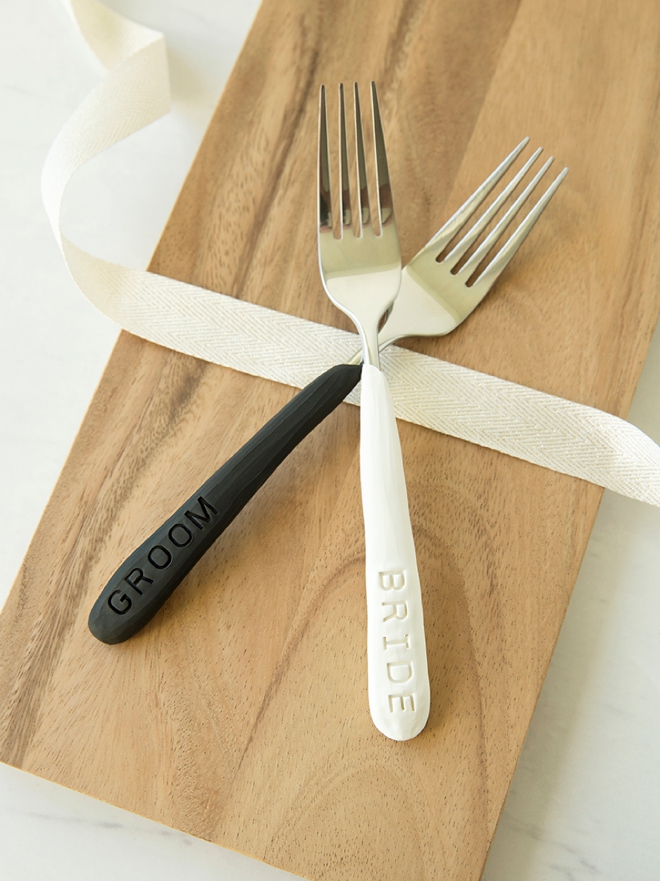
Stamp To Personalize
Use alphabet stamps to personalize your forks! Make them say, Bride + Groom, Mr + Mrs, His + Hers or pretty much anything. This set is made for embossing clay, but you can use any alphabets you’d like. Touch up any funky spots before you bake.
Oven Bake
Bake according to the instructions on your clay package on a cookie sheet lined with parchment paper. This clay says to bake it at 275˚ for 15 minutes for every 1/4″ thickness of clay. Some parts on my forks were a bit thick, so I did a half hour and they came out perfectly. Yes you can bake the forks and nothing happens.
Glossy Option
This clay has a matte finish after it’s baked, which I actually really like. But if you’d like a glossy finish you can do 1-3 coats of the Sculpey Gloss Glaze on the forks after they’ve baked.
Great Bridal Shower Gift Idea
If you’re a DIY Bridesmaid or Mother-of-the-Bride, this wedding cake fork project would make a fabulous bridal shower present for the bride-to-be in your life!
As with all our DIY tutorials, if you create one of our projects please send us a picture – We Love Seeing Your Creativity! If you use Instagram or Twitter please use the hashtag #SomethingTurquoiseDIY and it will show up on our Get Social page. Happy Crafting!
DIY Tutorial Credits
Photography + DIY Tutorial: Jen Carreiro of Something Turquoise // All Forks: Target // Gold Cookie Sheet: Target // Sculpey iii Oven-Bake Clay (White, Black, Silver, Elephant Gray, Beige, and Teal Pearl): Amazon // Modeling Tool Set: Amazon // Clay Embossing Set: Amazon // Nail Polish: OPI – Withstands the Test of Thyme
Shop The Supplies:
Find the supplies you’ll need for this project from our affiliate links below:

Comments