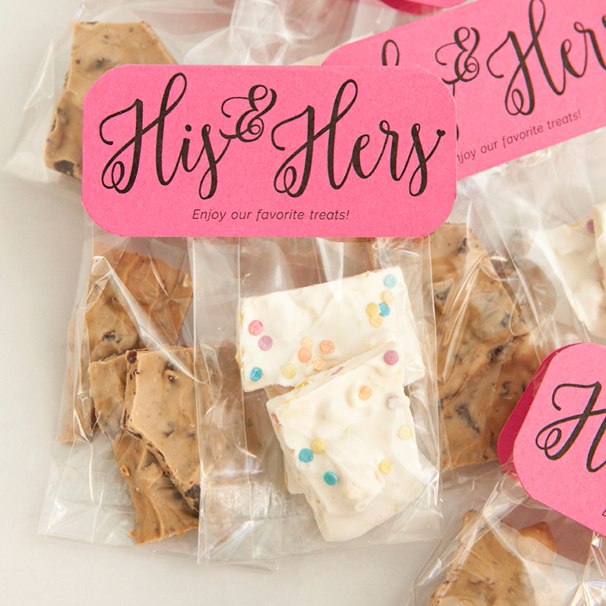

DIY | His + Hers Chocolate Bark Favors
I love when weddings get personal and include special, unique details about the couple. Celebrate your individuality and how you blend so well together with this fun DIY His + Hers Treat Favor idea! Maybe you like salty treats and maybe he prefers the sugary kind. Maybe you both like chocolate and fight over the last piece. Either way, sharing both of your favorite treats with your guests is a great way to give them a glimpse into your life as a couple. So I’m sharing one of my all time favorite candy recipes which I think would be the perfect treat to include in these favors. Don’t let the look fool you, it’s 100% fail-proof and will have your guests begging for the recipe. The only question is… what combination is your favorite?
OMG – This Bark
This chocolate candy bark is to die for… and I don’t even really like chocolate! Way back when I was a hair dresser, one of my clients brought some in for me as a Christmas present. I started raving about it and she explained that it’s insanely easy to make and that I had to try it. So I did, and my Mom and I made quite a bit that holiday season. I usually make at least one batch during the holidays and so I’m surprised that I never actually shared it here with you. There are many intense “bark” recipes out there but this one is simple and will take literally no more than 12 minutes per batch, seriously. I made all 8 batches in less than 2 hours, with two trays going – cleaning included… and like I said, it’s to die for and your friends will think you slaved over it for hours!
CHOCOLATE BARK SUPPLIES:
- Candy Melts (aka: candy coatings or candy wafers)
- Mix-in Treats
- Parchment Paper
- Cookie Sheet
- Microwave
- Glass Bowl
- Spatula
CHOCOLATE BARK RECIPE:
- 1 Pound Candy Melts + 3/4 Cup Mix-In Treats
Candy Melt Options
To make really good chocolate bark candy you need to use high quality candy melts… and I’m specifically saying do not use the “colored” kind you find at big box craft stores, it’s not good and it’s not really even chocolate. The brand I recommend using is called Merckens and they call their melts “candy coatings”.
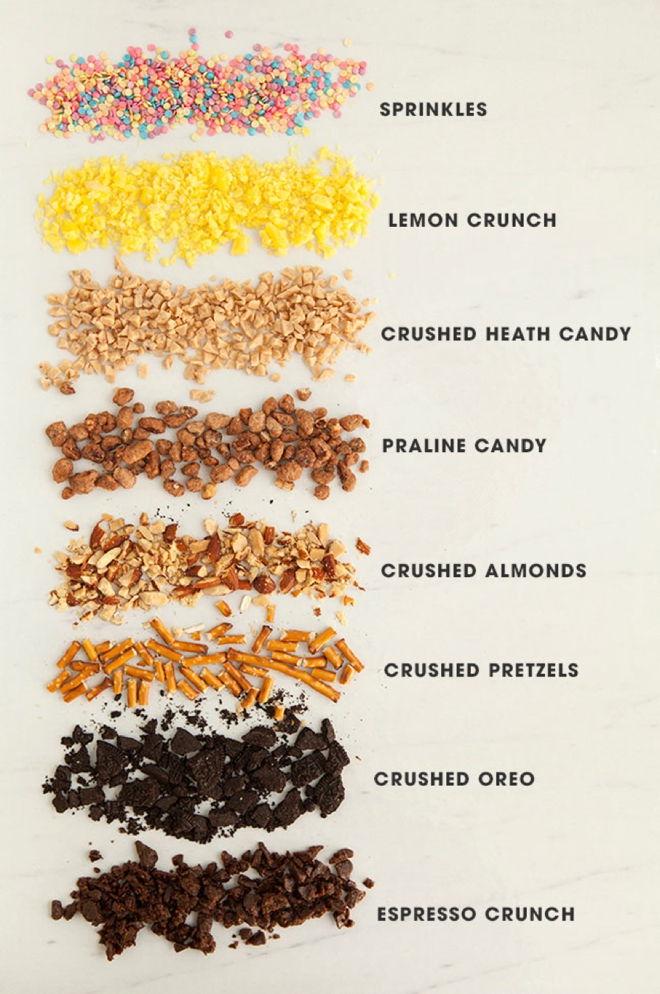
Mix-In Treat Ideas
You can literally mix any candies + chocolate melts you’d like…
- Cute Sprinkles
- Lemon Crunch
- Crushed Heath Candy
- Praline Candy
- Crushed Almonds or other nuts
- Crushed Pretzels
- Crushed Oreo (crush yourself)
- Espresso Crunch
If you purchase the candy crunch from Classic Cake Decorators, the bags come with 8oz of crunch which is about 1.5 cups – enough for two batches!
Chocolate Bark Directions:
Making this chocolate bark literally couldn’t be any easier and if you have kids it’s a wonderful project to make with them!
10 Easy Steps To Delicious Chocolate Bark:
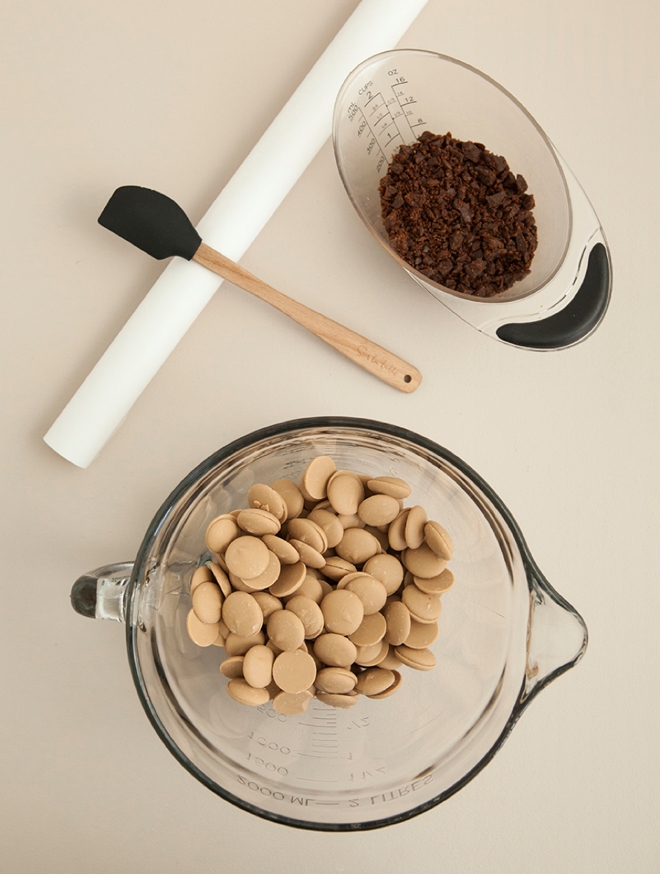
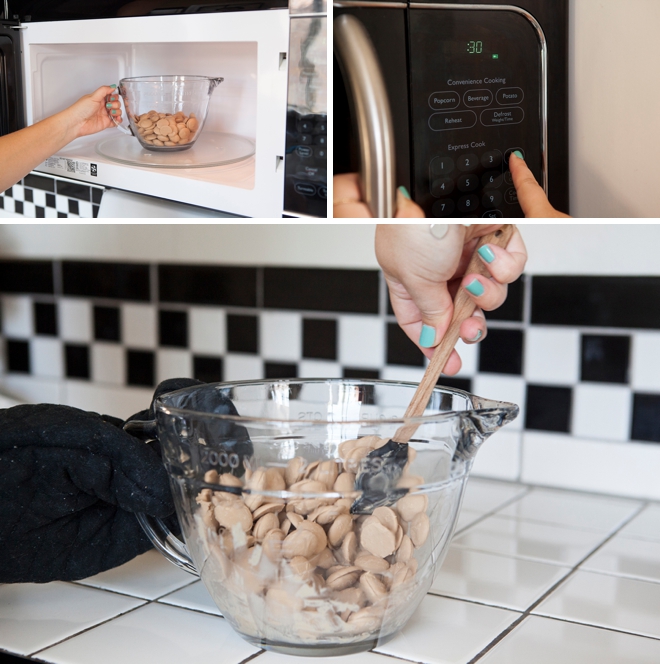
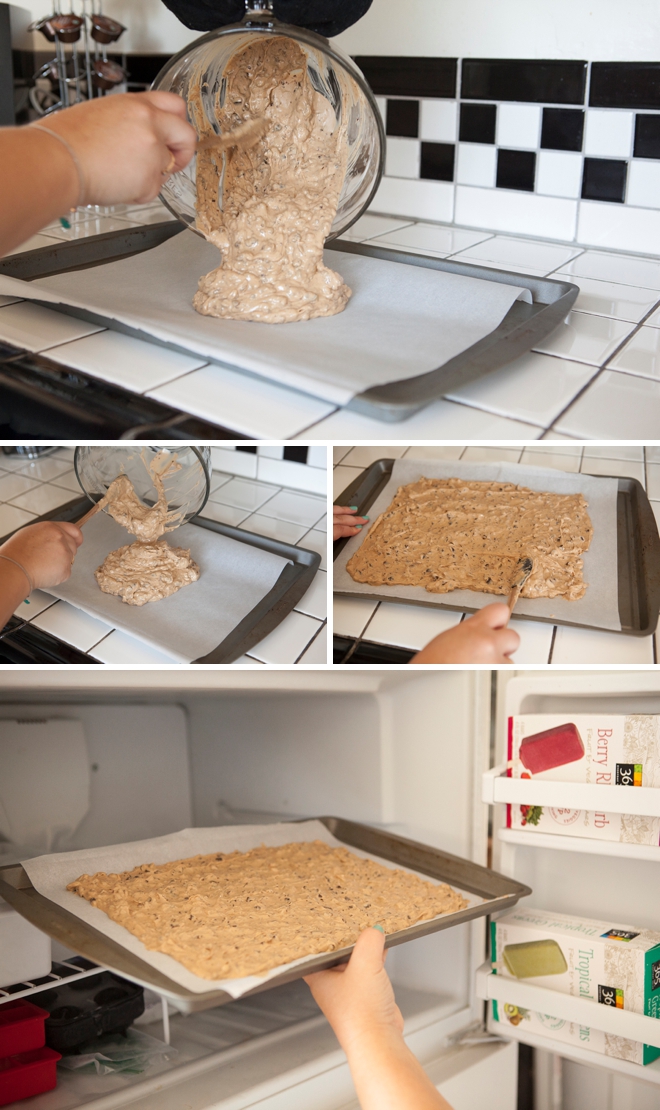
- Place the candy melts in a glass bowl and microwave for 30 seconds
- Remove and stir, although you might feel like you’re stirring nothing
- Place back in the microwave for another 30 seconds
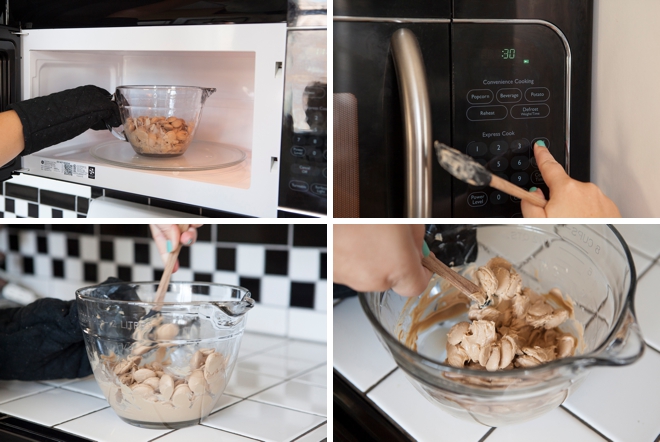
- Remove and stir again, this time the melts should have melted significantly
- Place back in the microwave for 15 second intervals, stirring in between each until the melts are fully melted, do not burn (how many times may depend on your glass jar, melts, microwave and weather; mine only took one)
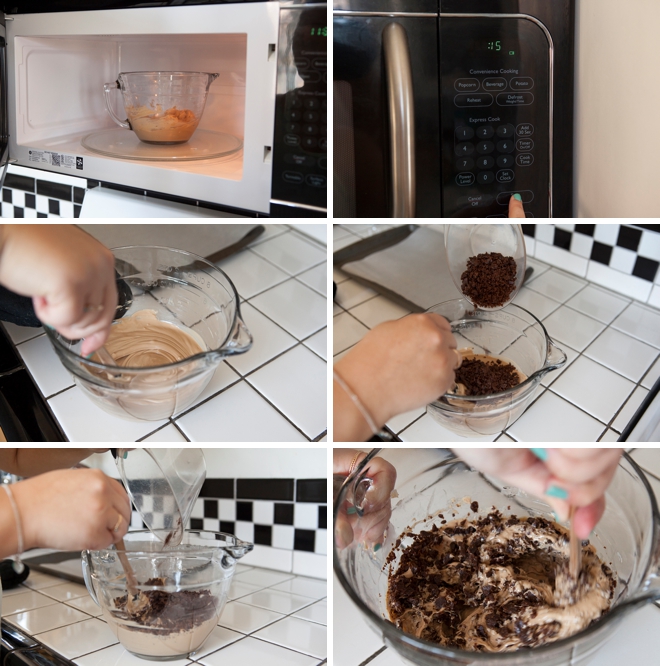
- Add your mix-in treats of choice and stir.
- Pour onto a parchment lined cookie sheet and smooth into as thin of a layer as you can, but not so thin that you can see parchment through the candy
- Place in your fridge or freezer for 10 minutes (If you’re making this candy and it’s really cold where you live, 10 minutes in the fridge might be enough, I made mine in about 85˚ humid summer heat, so 10 minutes in the freezer was perfect)
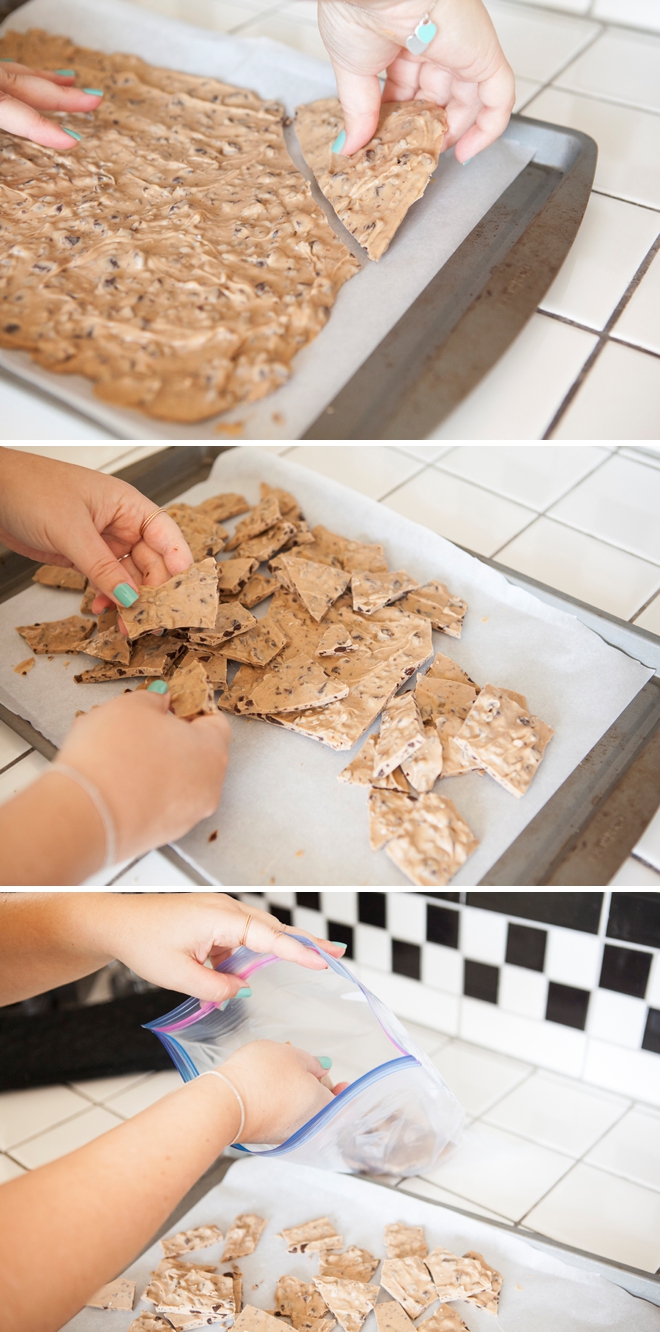
- Remove from the freezer and break into pieces!
- Store in an air tight bag or container, in a cool dry place away from sun and heat for quite a long time. I’ve heard that the bark can stay fresh for months in an air tight container, but it’s SO good it won’t last that long!
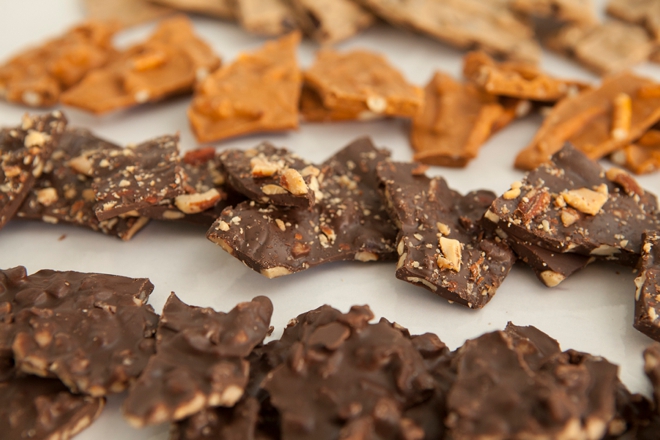
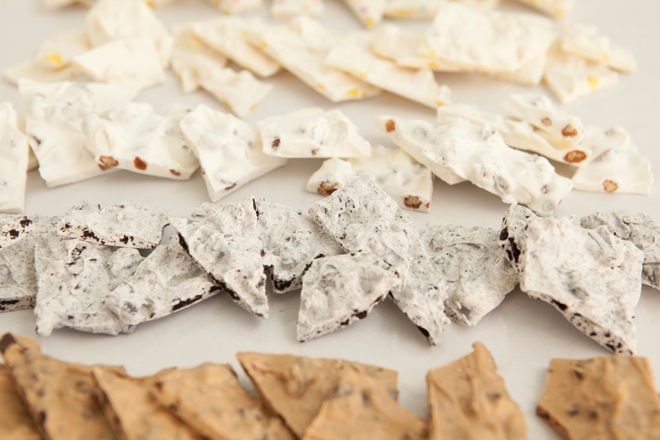
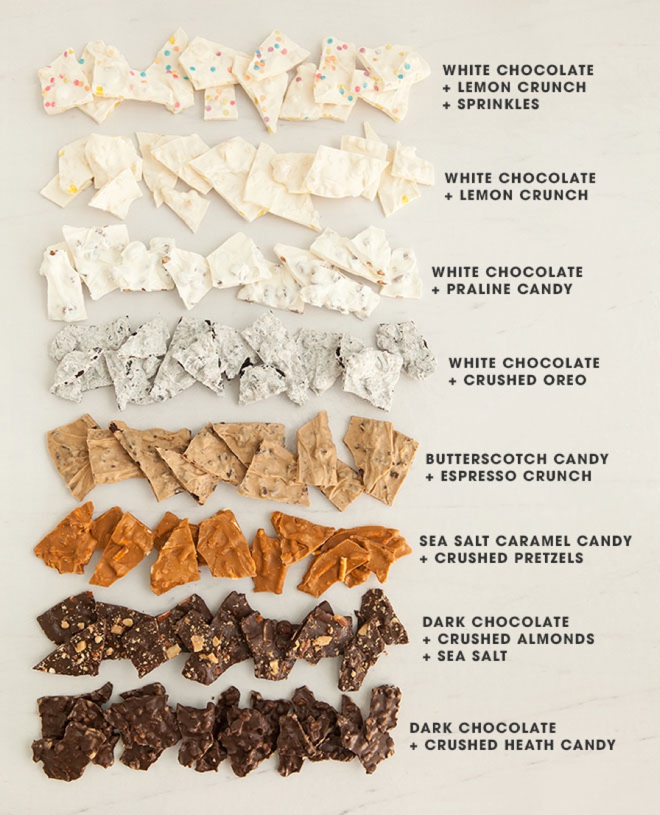
My Favorite Candy Combos
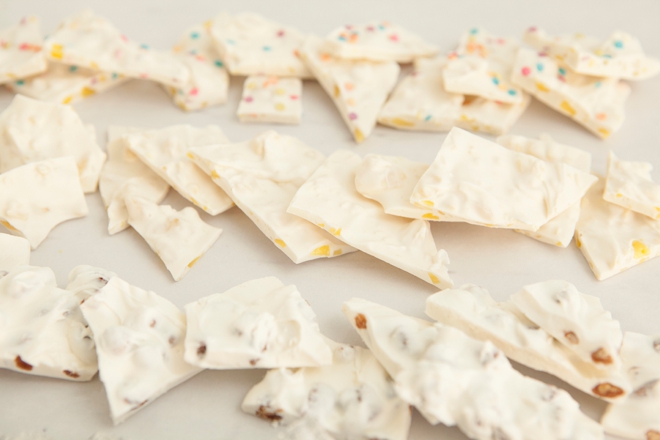
- White Chocolate + Lemon Crunch + Sprinkles
- White Chocolate + Lemon Crunch
- White Chocolate + Praline Candy
- White Chocolate + Crushed Oreos
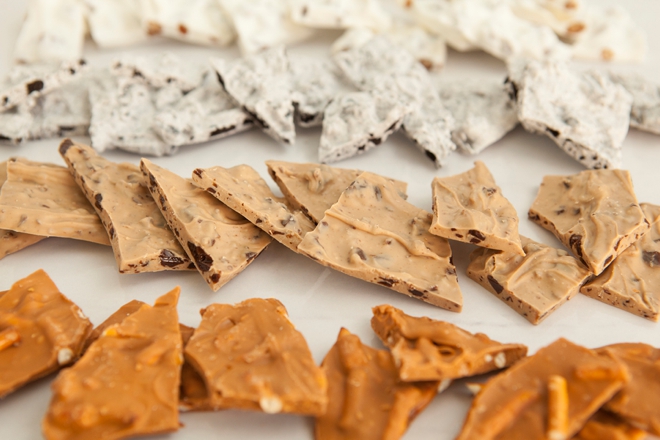
- Butterscotch + Espresso Crunch (what I made above)
- Sea Salt Caramel + Crushed Pretzels
- Dark Chocolate + Crushed Almonds + Sea Salt
- Dark Chocolate + Crushed Heath Candy
I’m not a chocolate person to begin with and I don’t like milk chocolate at all, which is why I didn’t make any… but rest assured I’ve probably already eaten a pound of what you see here, it’s that good!
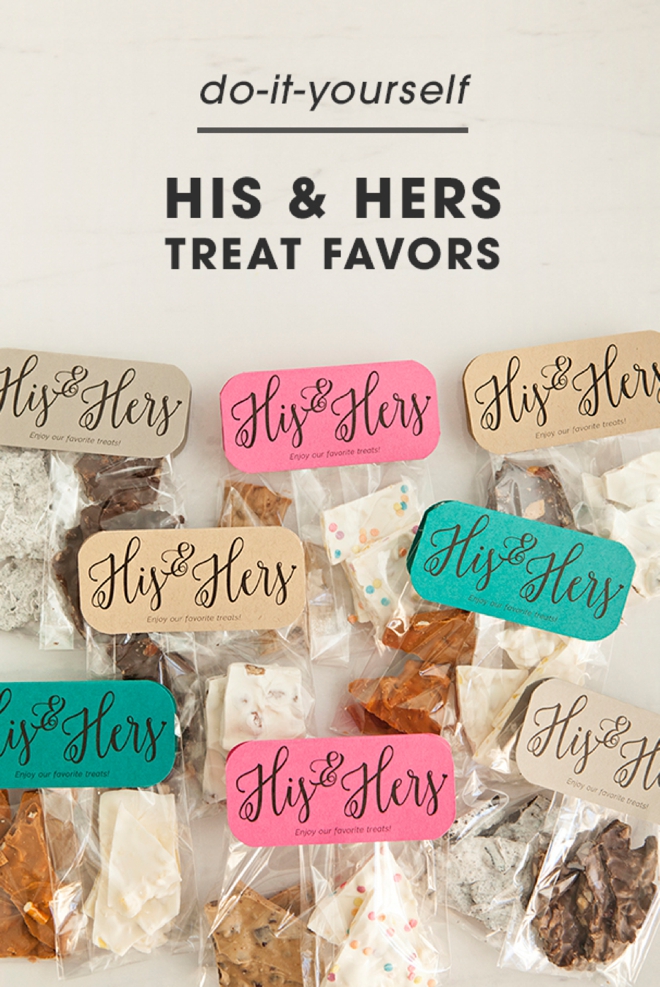
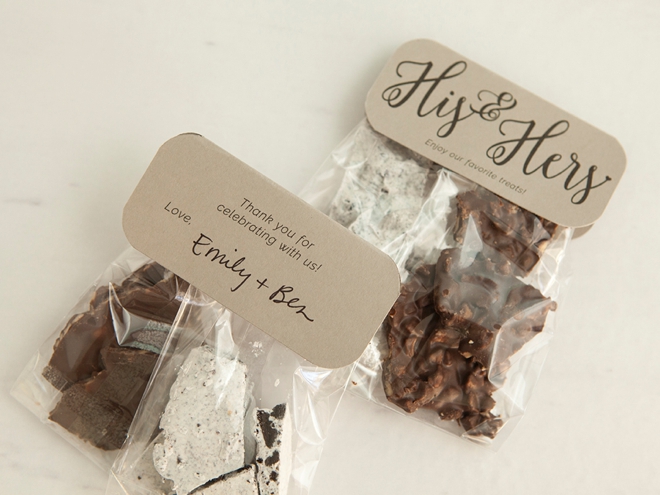
Turn This Bark Into Favors
This amazingly easy and super delicious chocolate bark would make for fantastic wedding or bridal shower favors. Of course to use this “his + hers” favor idea you don’t have to use this bark… feel free to add any type of treats to truly make this favor all about you!
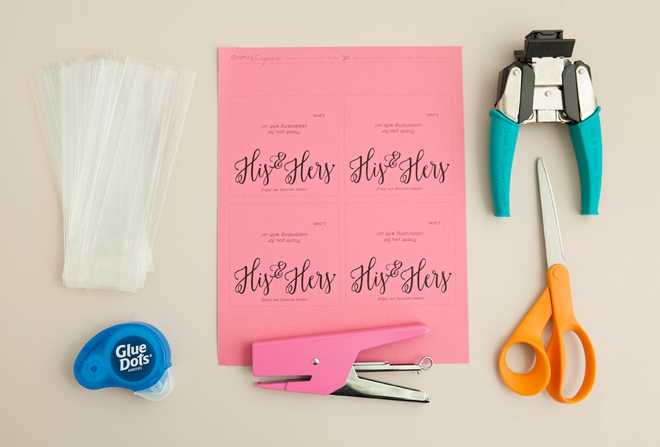
FAVOR SUPPLIES:
- 2.5″ x 7.5″ Cello Treat Bags, 2 per favor
- 8.5″ x 11″ Colored Cardstock
- Paper Trimmer or Scissors
- Corner Punch
- Glue Dots
- Stapler
- Scale
- Our free printable tag design at the end of the post!
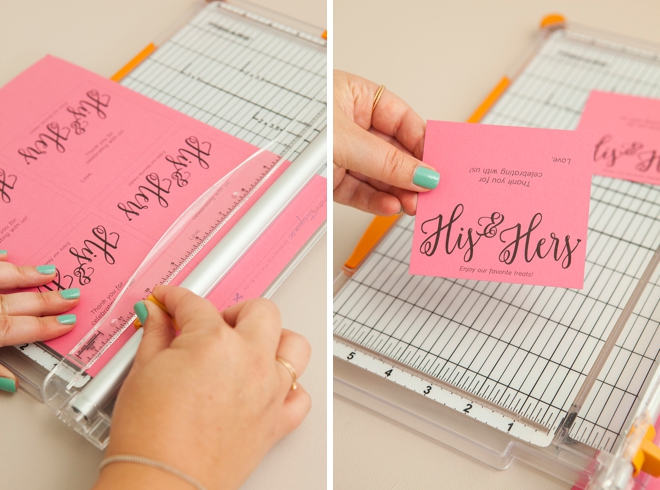
Print + Cut
Download our free tag design at the end of the post and print it onto your choice of 8.5″ x 11″ cardstock. Trim on the lines provided; there are four tags per sheet
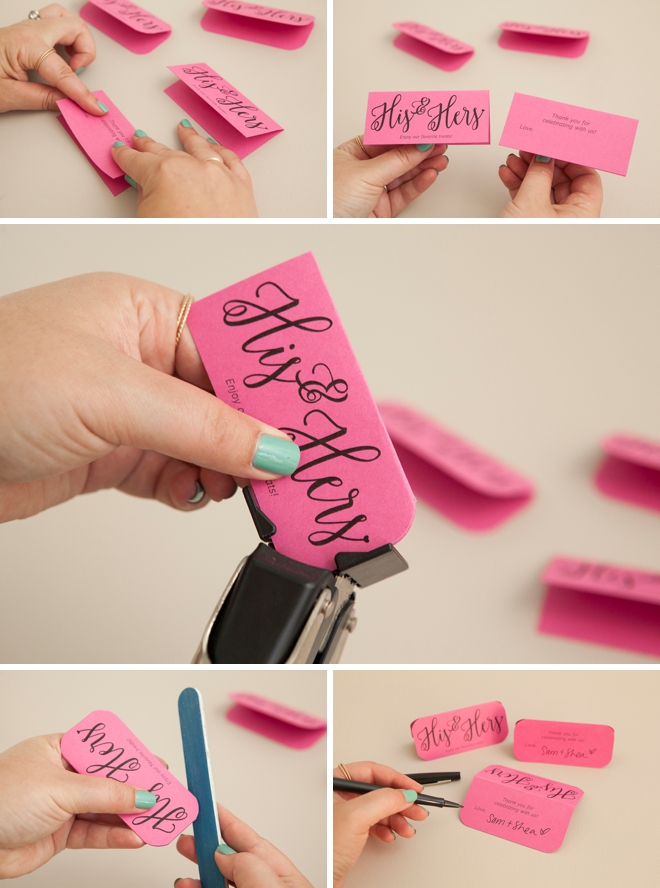
Round The Corners + Sign
Fold the tags in half and then round the corners. If the punch isn’t perfect you can always smooth rough edges with a nail file. Then sign your names on the back of the tag!
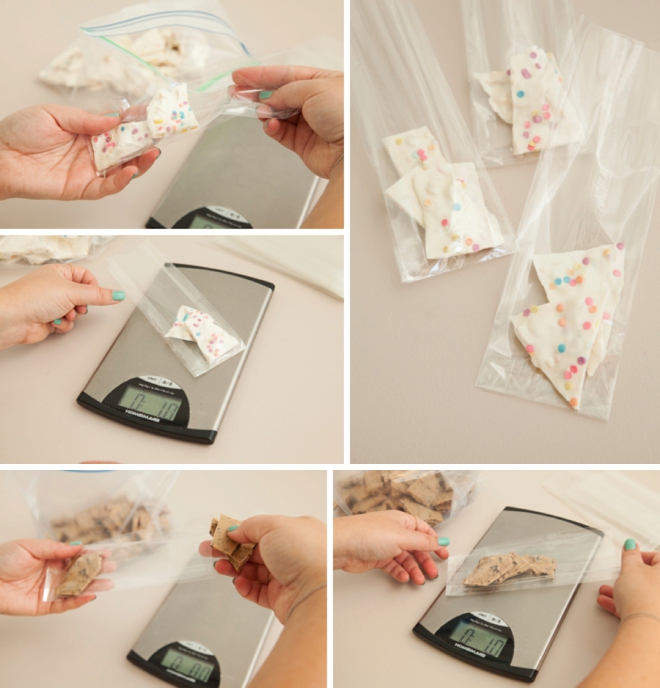
Weigh The Treats
This chocolate bark is rich, so giving just one ounce of each of your favorites is plenty. That means it’s two ounces of candy/treats per favor and you’ll be able to get 10-12 favors per batch.
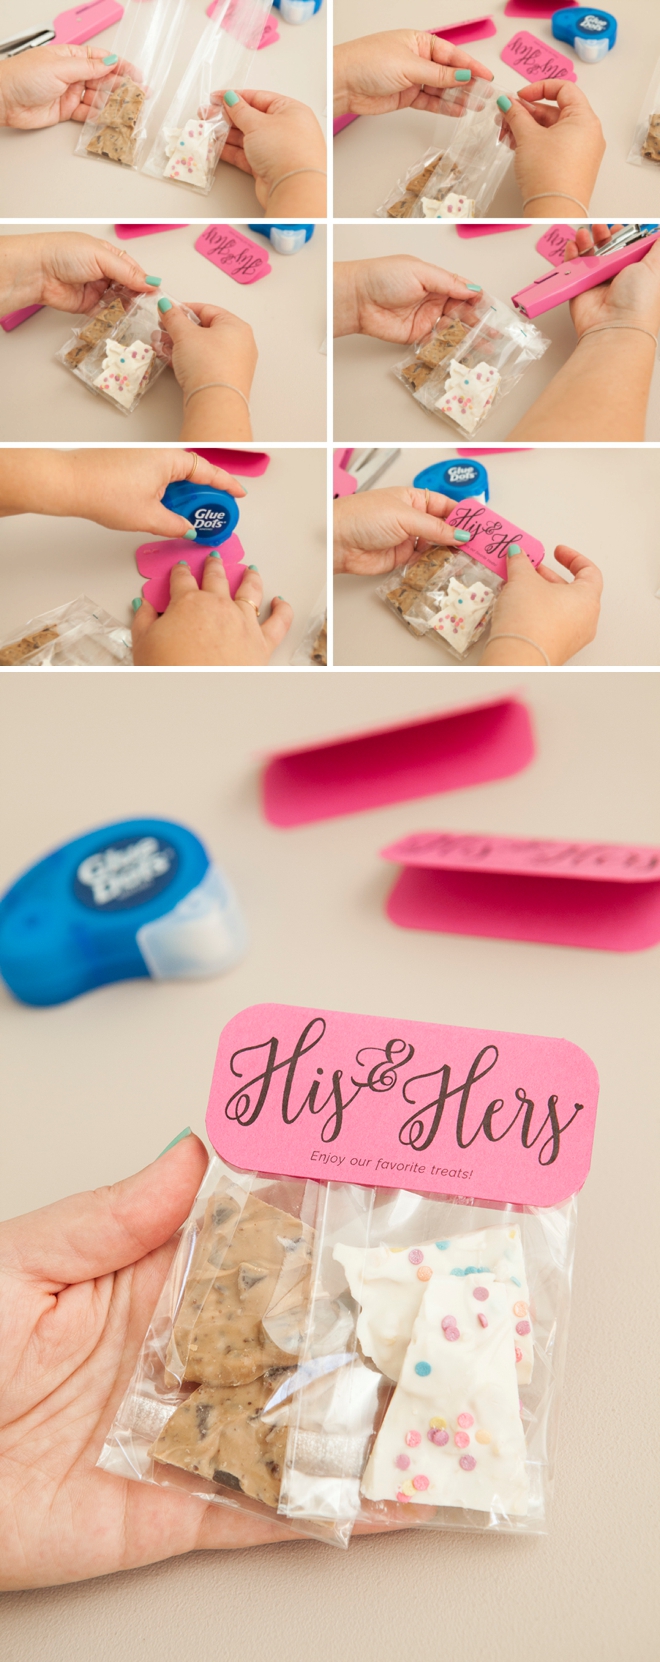
Assemble The Favors
Holding both of the cello treat bags together, fold the tops down at the same time and staple closed. Add your favorite scrapbook adhesive to the tags and adhere over the top of the cello bags – that’s it!
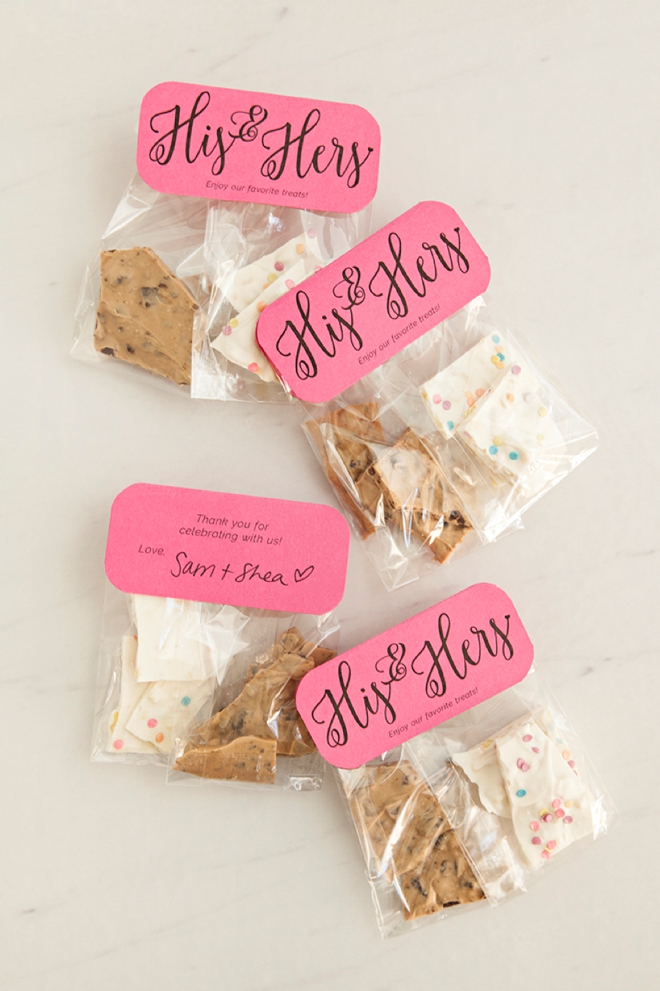
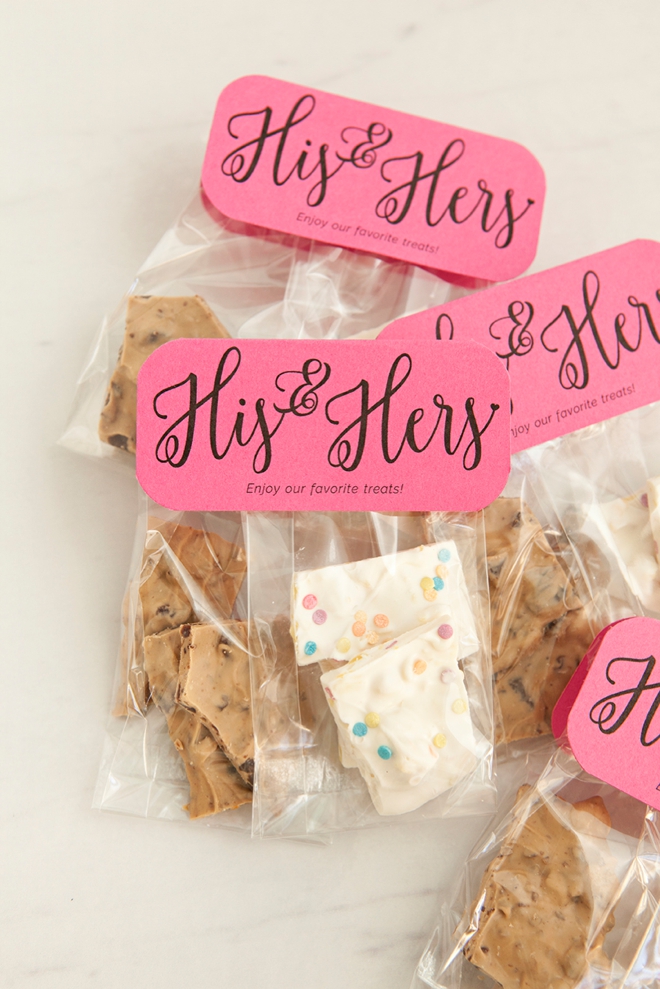
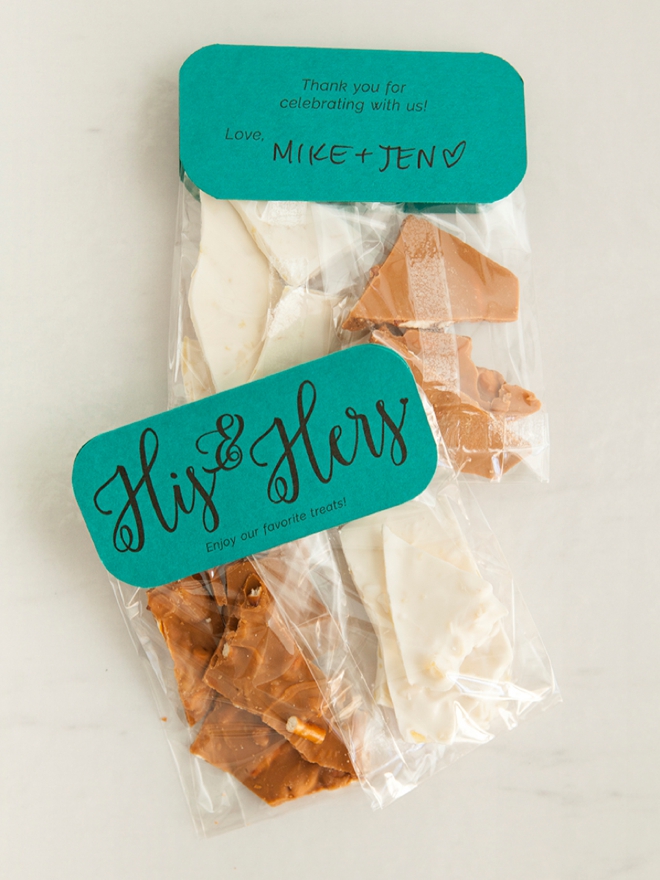
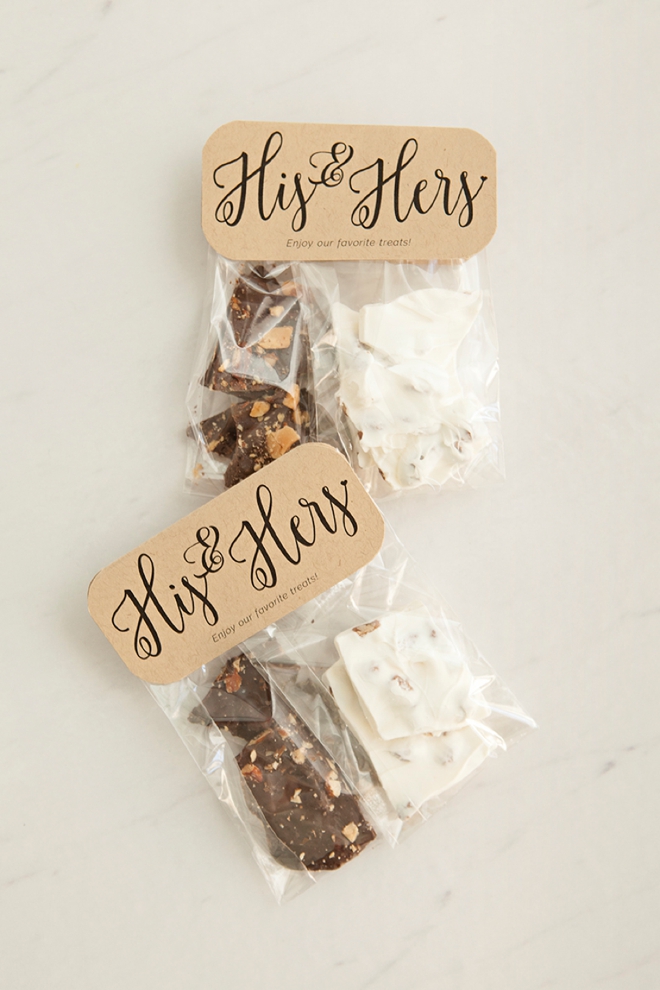
His + Hers Favors
Of course to use this “his + hers” favor idea you don’t have to use this bark… feel free to add any type of treats to truly make this favor all about you guys!


As with all our DIY tutorials, if you create one of our projects please send us a picture – We Love Seeing Your Creativity! If you use Instagram or Twitter please use the hashtag #SomethingTurquoiseDIY and it will show up on our Get Social page. Happy Crafting!
DIY Tutorial Credits
Photography + DIY Tutorial + Free Printable Tag: Jen Carreiro of Something Turquoise // All Chocolate Bark Supplies: Classic Cake Decorations, Garden Grove, CA. // Cardstock in Fushia, Peacock, Gravel and Paper Bag: Paper Source // Nail Polish: OPI – Withstands the Test of Thyme
Shop The Supplies:
Find the supplies you’ll need for this project from our affiliate links below:

Comments