
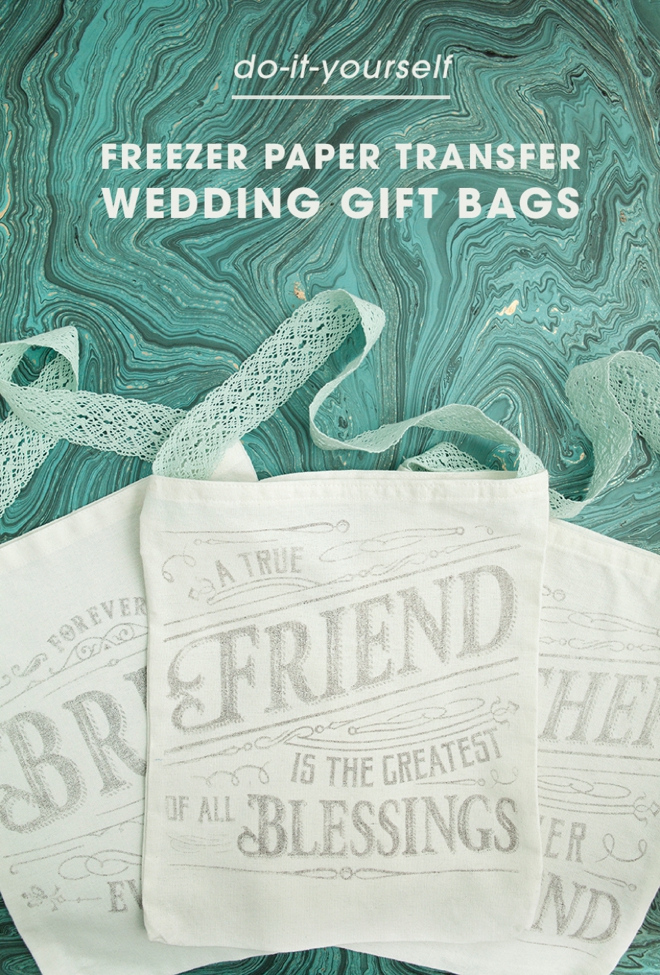
DIY | Freezer Paper Transfer Bridal Party Tote Bags
-Sponsored Post-
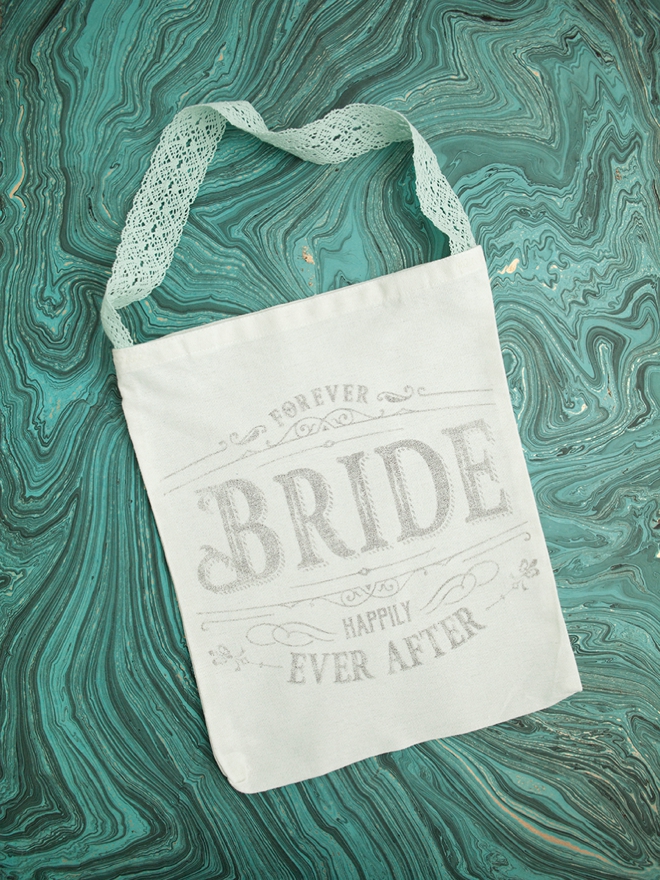
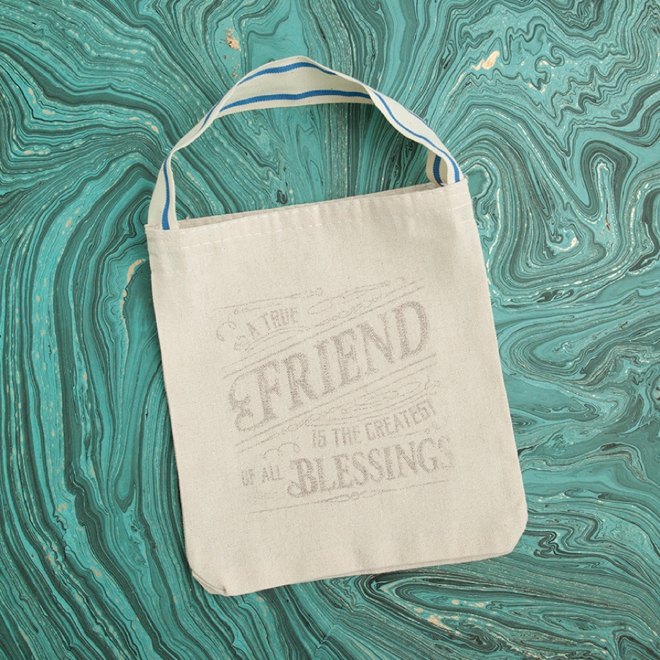
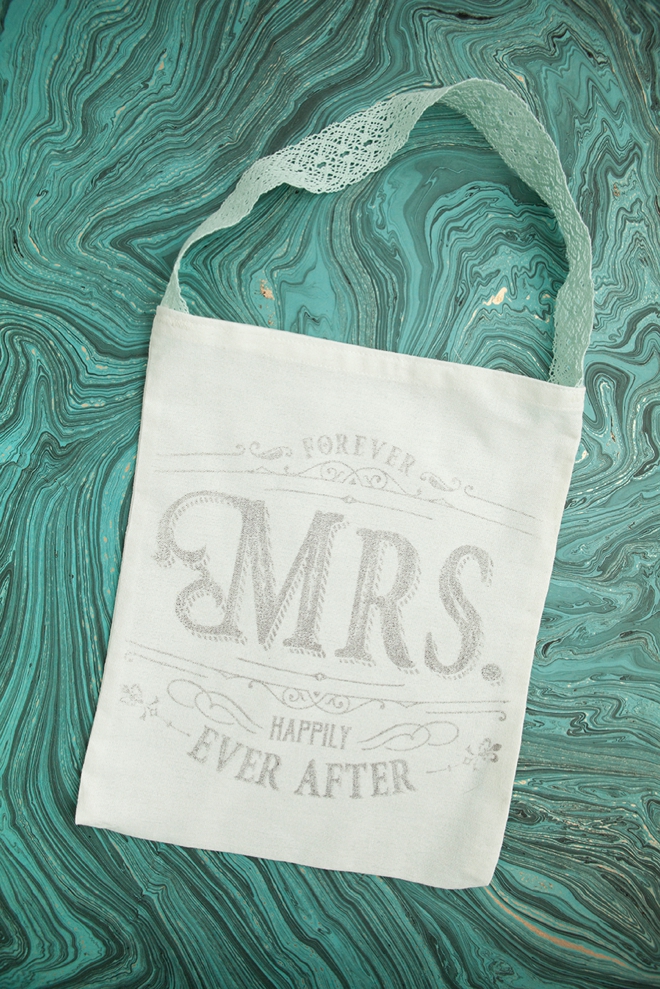
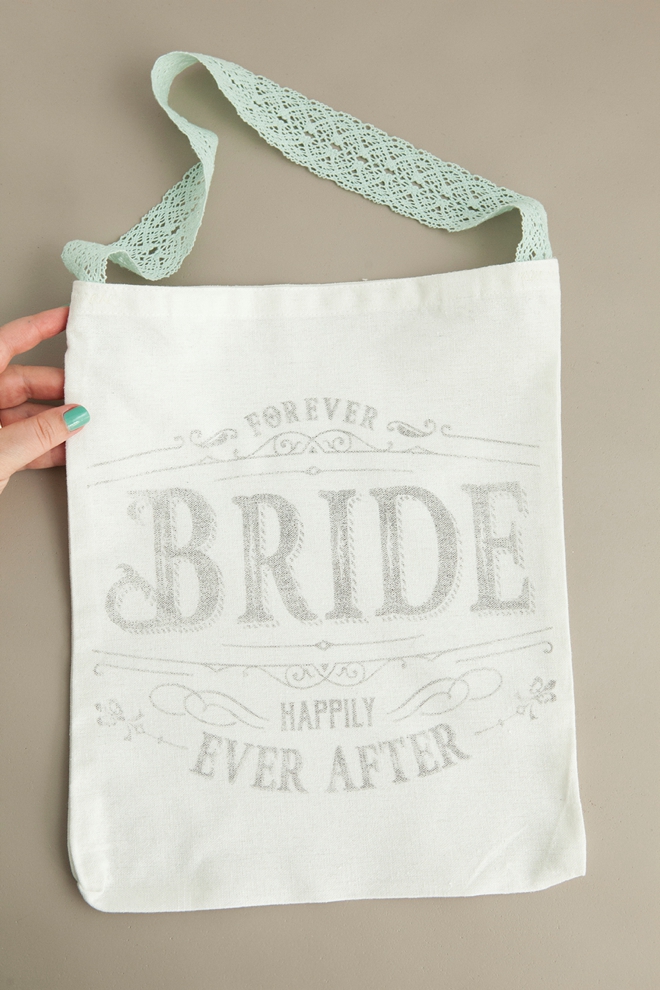
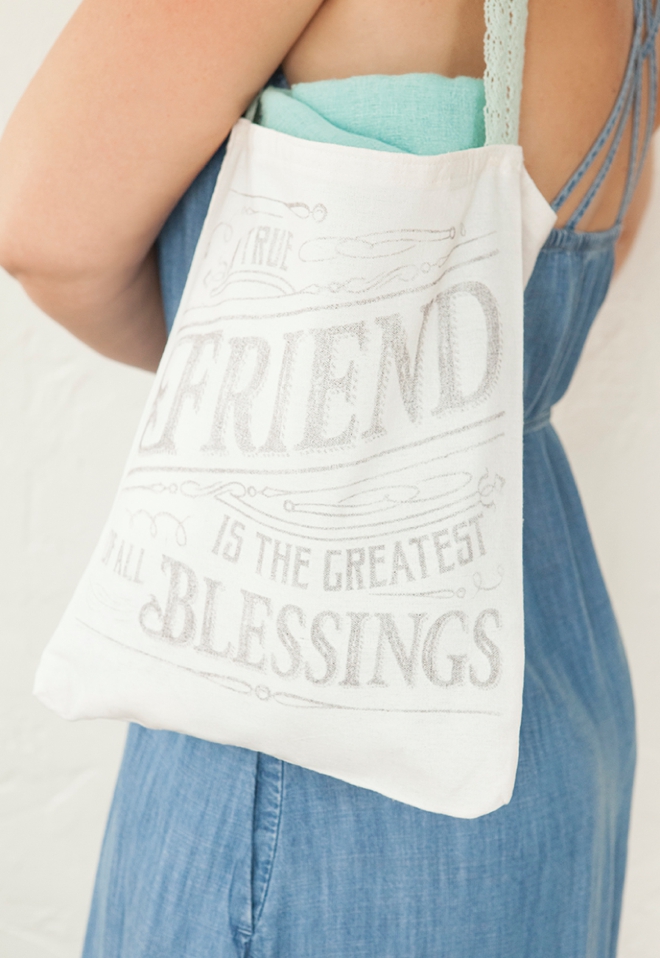
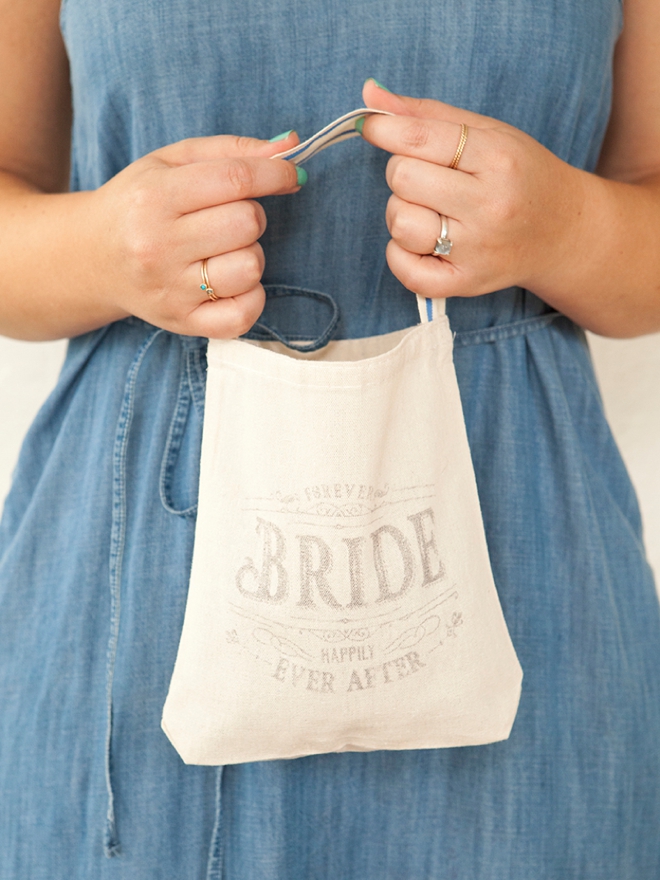
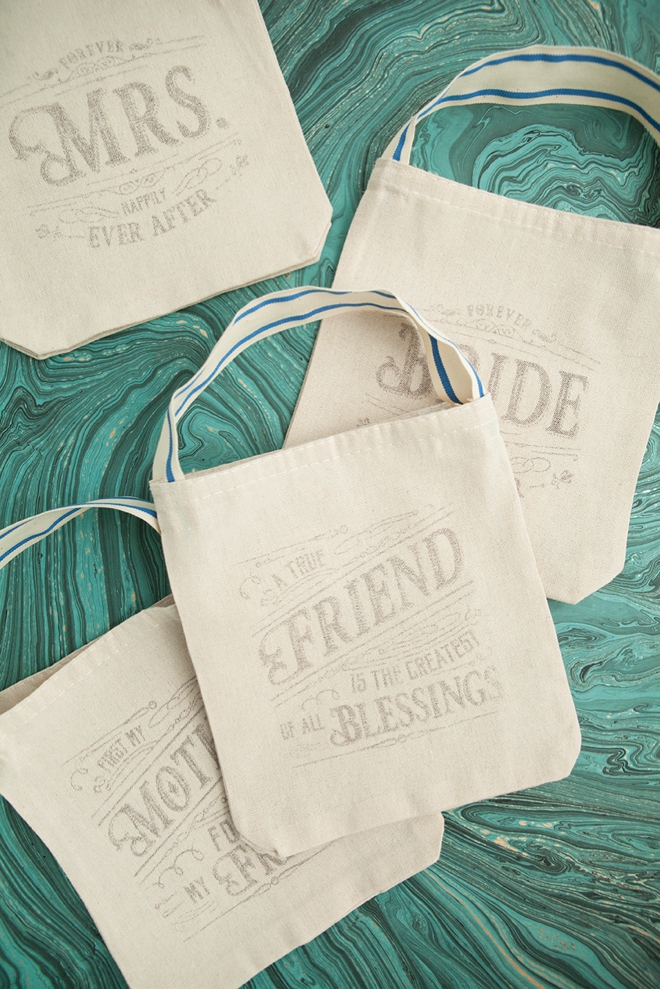
The technique I’m sharing today is AWESOME. I’ve been seeing craft bloggers use this technique for a while now and it just seemed like it wouldn’t really work. I’m sure you’ve seen (or tried) those online projects that don’t turn out the way they show in the pictures and ashamedly that was my thought. But then I saw Amy from Homey Oh My! do it with a photo she took and I thought, wow – it really must work. And it does!!! Ok, what is it right? It’s transferring printer ink from freezer paper onto another surface. In this case, we are using this technique to make the most darling DIY Bridal Party Tote Bags ever. Since I’m using my fabulous Canon PIXMA iP8720 Crafting Printer I have two different size design files for you, one large (10″) and one small (5″); in Bride, Mother, Mrs and Friend. And since I know I’m going to get the question, “why didn’t you make one that says bridesmaid?”, my answer is because your bridesmaids don’t want to carry around a tote bag that says “bridesmaid” when “friend” lasts forever. If you like this printable idea you’ll love all my other Canon projects, check out this page to find them!
Gifts Galore
These tote bags are totally dual purpose. The bride can make them for her bridal party… or crafty bridesmaids can make them for the bride in their life. Of course with the “friend” and “mother” designs, there are many other uses far beyond weddings!
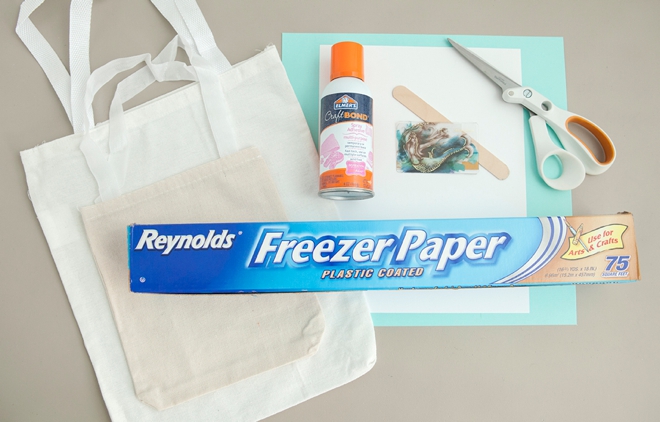
SUPPLIES:
- Canon PIXMA iP8720 Crafting Printer
- Freezer Paper
- Spray Glue
- Cardstock
- Scissors
- Old Gift Card, Wood Stick or the like
- Our free printable designs at the end of the post!
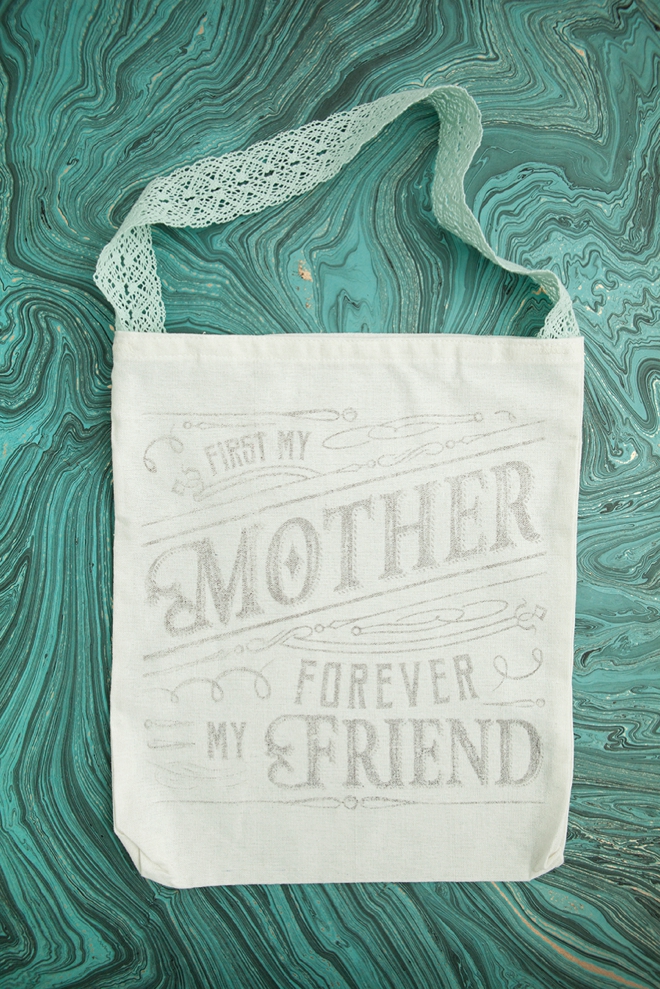
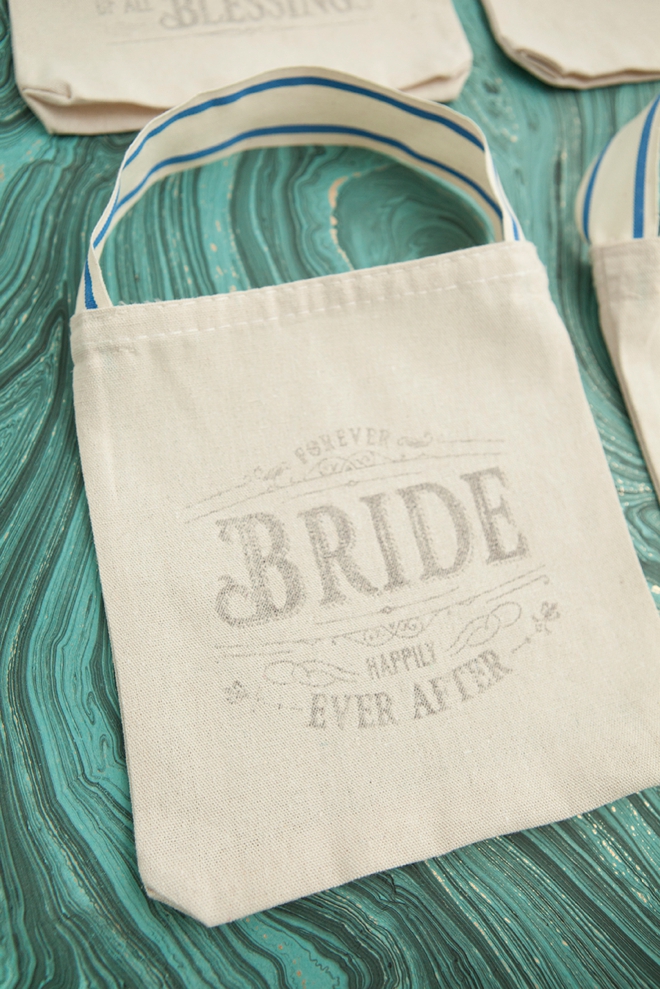
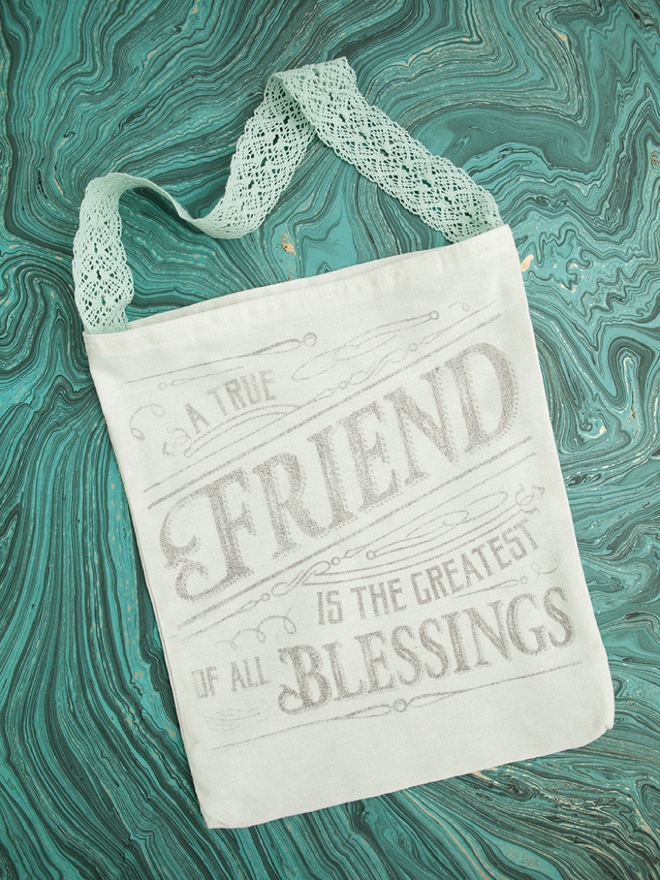
New Handles
Totally optional. These cheap but sturdy canvas tote bags needed handle help, so I added my own. Cut off the old handles and sewed ribbon in their place!

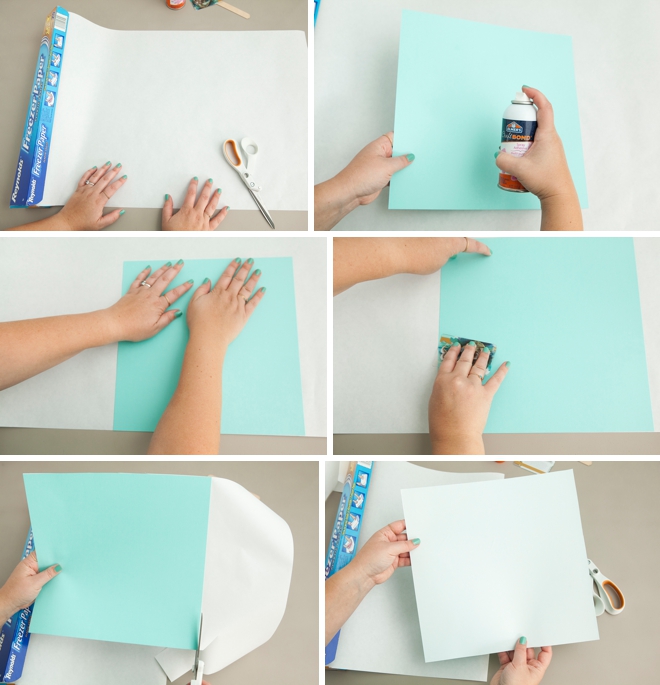
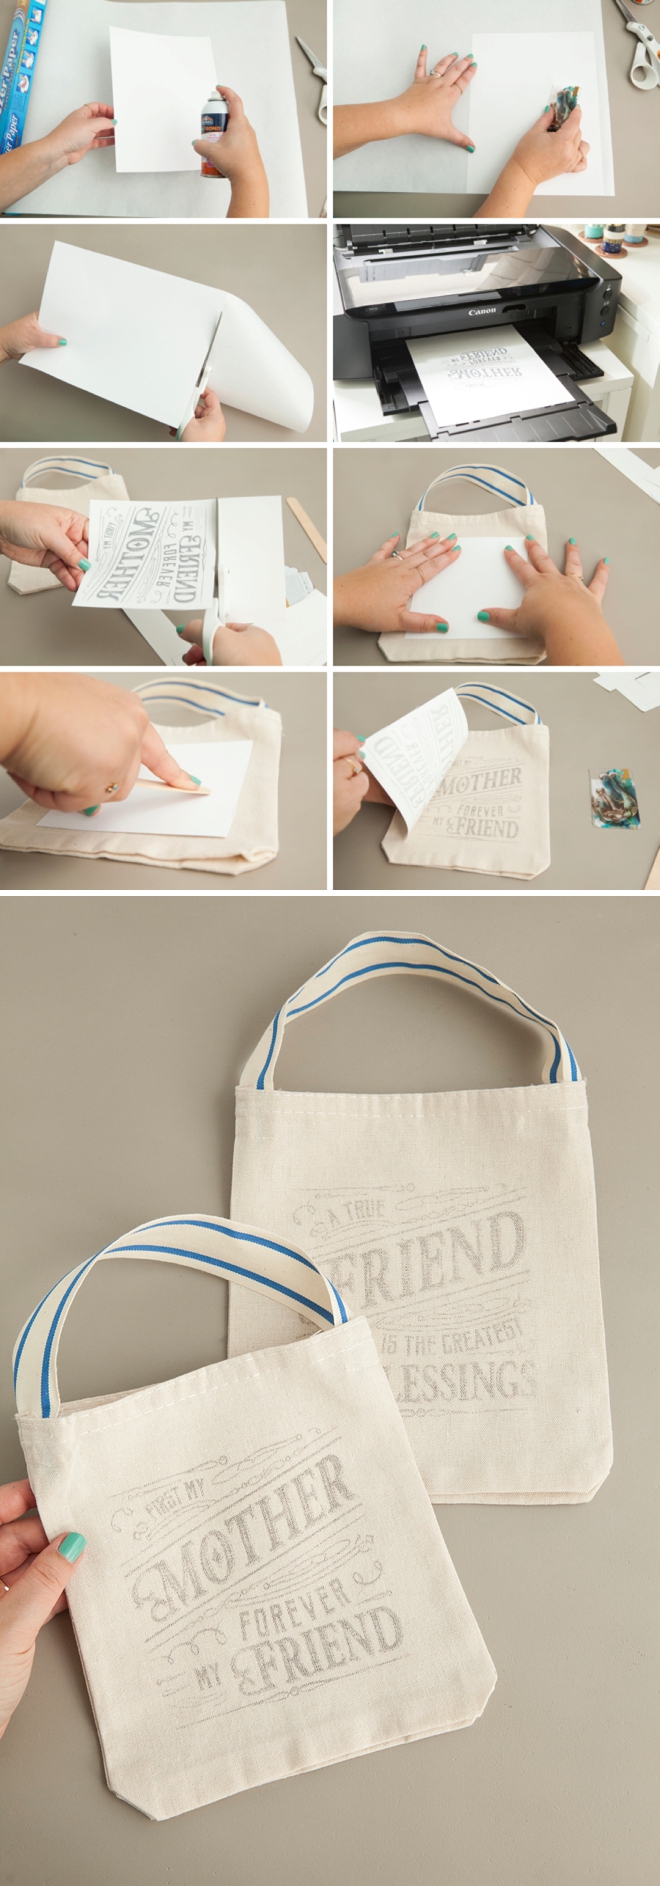
Prepare The Freezer Paper
What you need to do is glue freezer paper to the size of cardstock you plan on printing, here I’m using 12″ x 12″. Start by adding spray glue to the cardstock then apply to the freezer paper. Smooth out all the bubbles using an old gift card and then trim the freezer paper down to the original cardstock size. Ensuring that the waxy side faces up!
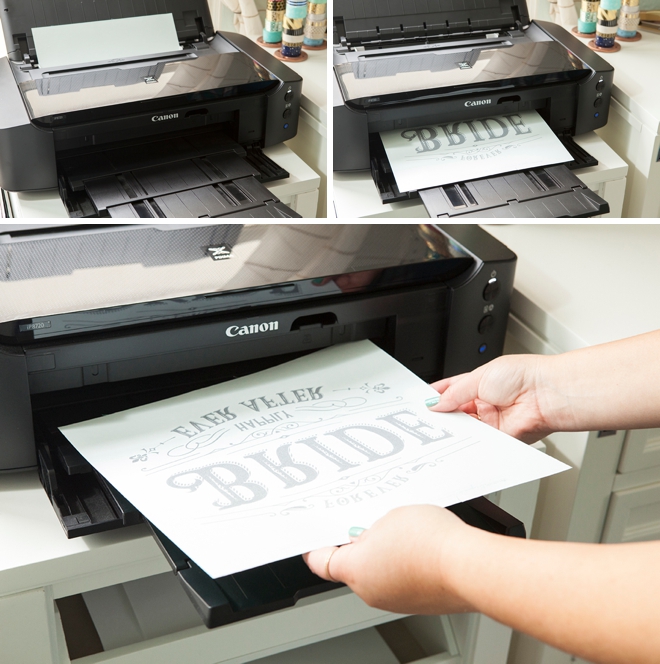
Print The Design
I’m using my favorite printer, the Canon PIXMA iP8720 Crafting Printer. It’s my favorite for two reasons; first that it can print up to 13″ x 19″, which includes 12 x 12 scrapbooking paper (can you say dream come true!) and second that it’s back-loading, meaning it can handle thicker materials than a normal printer. If you’d like to print my large 10 x 10 tote bag design, you’ll need to use this printer!
Insert the paper into the printer, freezer side up and print using the “photo” setting. Be careful. The ink doesn’t sink into the paper it just sits on top – so it can smear!
I’ve already “mirrored” the designs for you so all you have to do is PRINT!
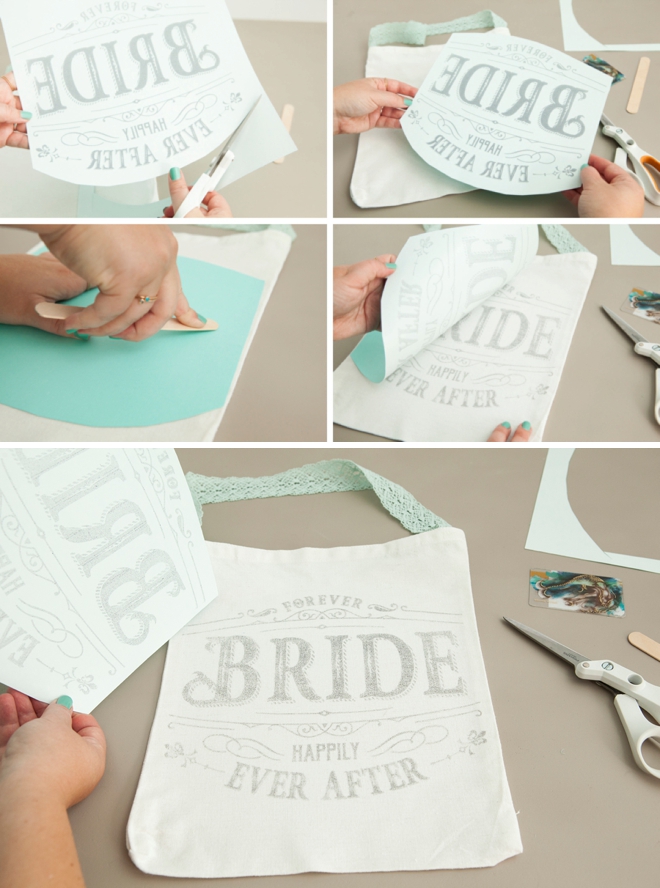
Cut + Transfer
You’ll want to move quickly for this step to keep the ink from potentially drying out. I found it easiest to cut the paper down to the design size first. Then very carefully lay the print onto your tote bag and using an old gift card or wooden stick – press and smooth every area of the print onto your tote bag. In this step you are actually pressing the ink from the paper onto the material. Be very careful not to move or bump the design or it can smear on the bag. Once you’ve smoothed across every bit of the paper, remove the design for an impressive reveal!
Fabulous Right?
…I wanted to give you a size comparison of these two different tote bags…
Little Bags
The same steps apply for any bag, paper, piece of wood or material that you’d like to use this technique on… yes, it will work on all those surfaces!
- Use spray glue to adhere freezer paper to cardstock
- Trim the freezer paper down to the cardstock size (either 12 x 12 or 8.5 x 11)
- Print our designs using the “photo” setting
- Trim down to the edge of the design
- Carefully rub and press the ink onto the bag
- Lift to reveal!
Two Design Sizes
Large: sized to 10″ x 10″, prints on 12″ x 12″ paper.
Small: sized to 5″ x 5″, prints on 8.5″ x 11″ paper.
Washable?
Although you can wash these tote bags, I don’t recommend it. We didn’t use paint, or an iron on and not a fabric marker – we used printer ink. I also don’t recommend putting anything “cold” inside that can sweat and wet the bag. If the ink gets wet it can run or fade significantly. I washed two bags and a medium brown pigment was left in place of the black design – which doesn’t look bad, but not ideal.
If you’re looking for something more permanent you can always do this with iron-on material instead, or trace over it with a permanent fabric marker!
DIY TUTORIAL SPONSORED BY:
Canon U.S.A., Inc. prides itself on allowing consumers to create and preserve beautiful imagery, from capture to print. With wireless technology and seamless printing capabilities, you can print your photos and printables with precision and ease.


As with all our DIY tutorials, if you create one of our projects please send us a picture – We Love Seeing Your Creativity! If you use Instagram or Twitter please use the hashtag #SomethingTurquoiseDIY and it will show up on our Get Social page. Happy Crafting!
DIY Tutorial Credits
Photography + DIY Tutorial: Jen Carreiro of Something Turquoise // Canon PIXMA iP8720: courtesy of Canon // Bag Designs: Julia Ensign // Canvas Bags: Amazon // Spray Glue: Amazon // Nail Polish: OPI – Withstands the Test of Thyme
Shop The Supplies:
Find the supplies you’ll need for this project from our affiliate links below:

Comments