
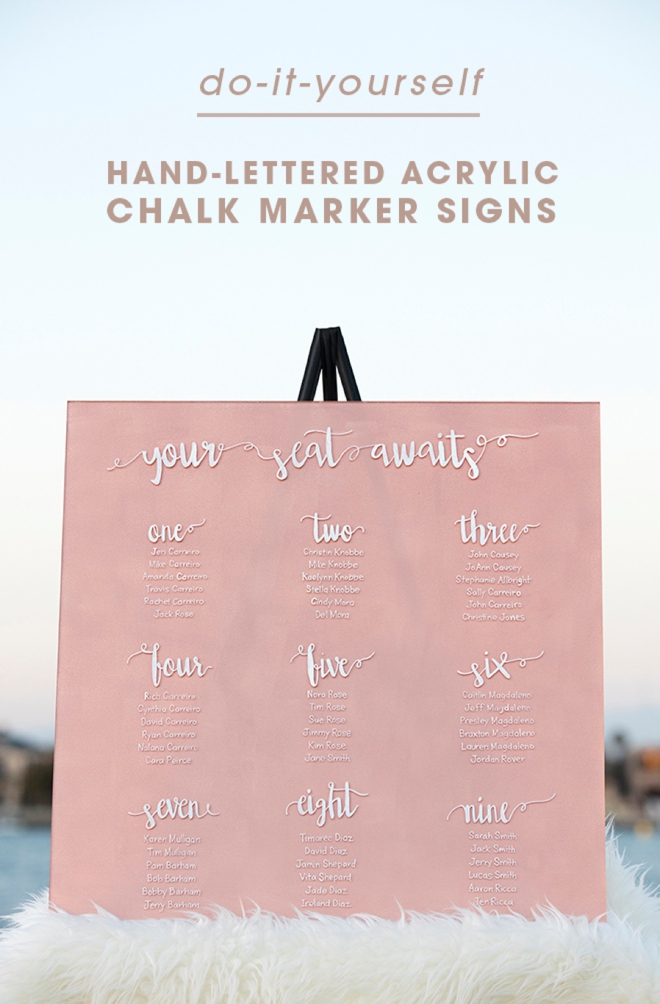
DIY | Hand Lettered + Painted Acrylic Wedding Signs
-Sponsored Post-
Handmade wedding signs of all shapes and sizes are an enormous trend and they aren’t going anywhere. So I feel like it’s my job to help you learn the many different ways to make your own amazing wedding signs, and I’m absolutely nuts over today’s technique. Using my all time favorite markers ever from Chalk Ink, I’m sharing how to make the most beautiful DIY Hand Lettered + Painted Acrylic Wedding Signs. You control the design and create it on your computer, then print it out, tape it to the back of a piece of acrylic plexiglass and trace – making you look like a hand-lettering rockstar! The final touch is painting the backside of the acrylic to match your special event. Just a few steps will produce an amazing sign in one evening or less. You could even use this technique for table numbers, seating cards, vow tablets and more!
In Love With Acrylic
After making these signs, acrylic is my new favorite medium! 1/4″ is the ideal thickness for a sign and I used 12″ x 24″ and 24″ x 24″ here, but they sell many, many different sizes and shapes online. You can drill into it and hang these from a tree, you can frame them, or leave them be… and since we’re using Chalk Ink markers you can use this acrylic over and over!
SUPPLIES:
- Chalk Ink Markers (a must!)
- Clear Acrylic Plexiglass Plastic Sheet (ours are in 12″ x 24″ and 24″ x 24″)
- Craft Paint
- Paint Roller or brush
- Windex Wipes
- Tape
- Your seating chart and/or custom sign design!
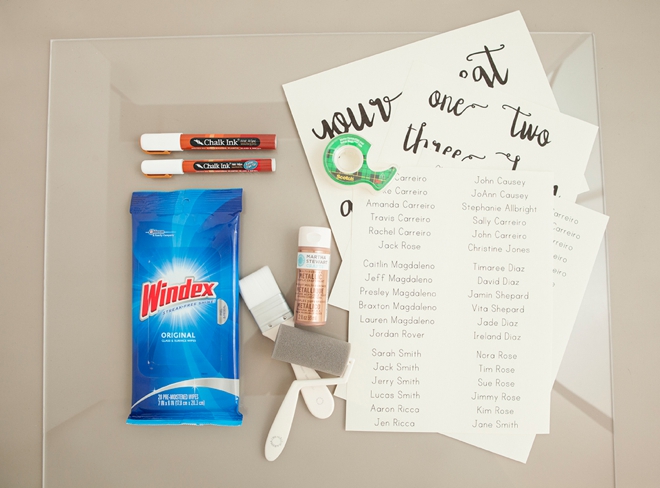
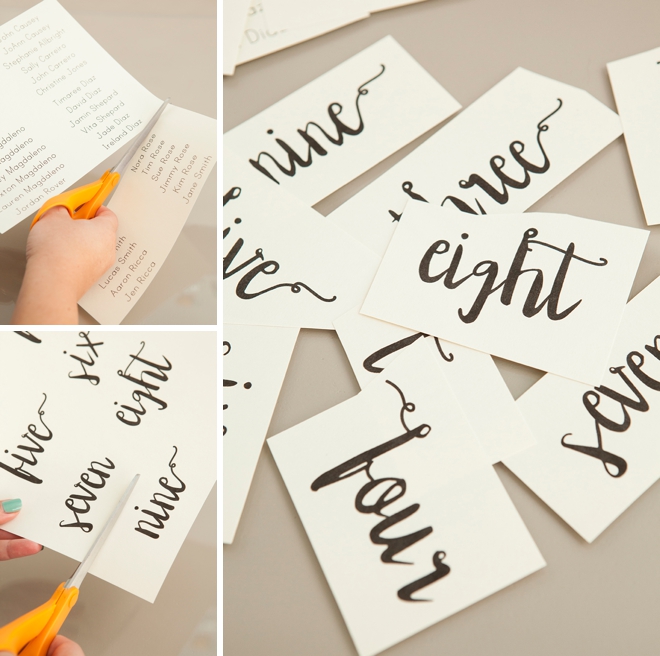
Figure + Design + Print
The first step is figuring out what your sign will say. Then you’ll need to design your special saying or seating chart on your computer and print them out, cut them up and get them situated for your sign!
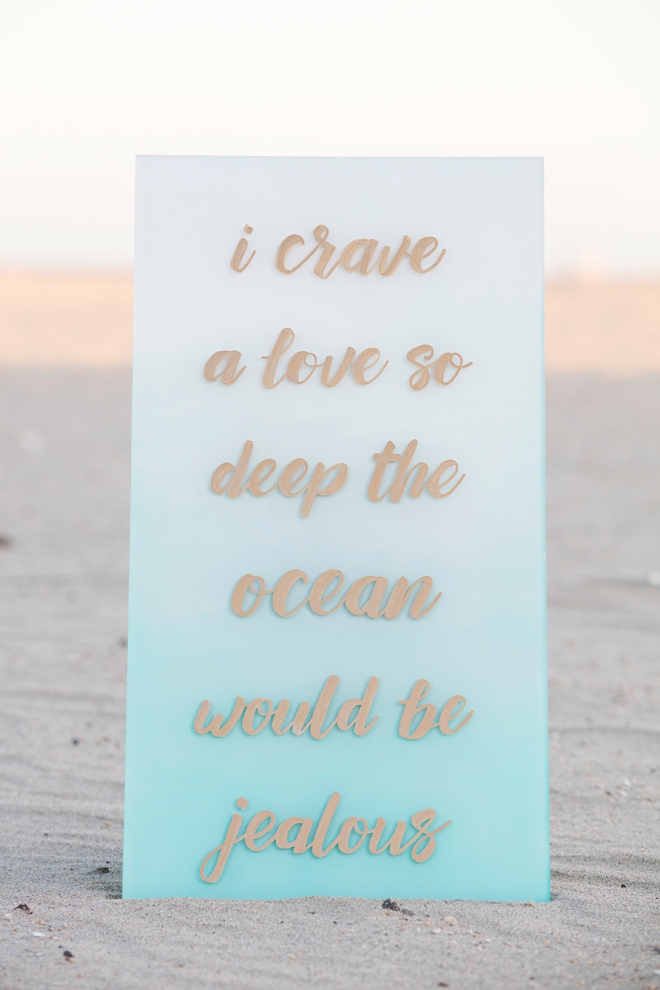
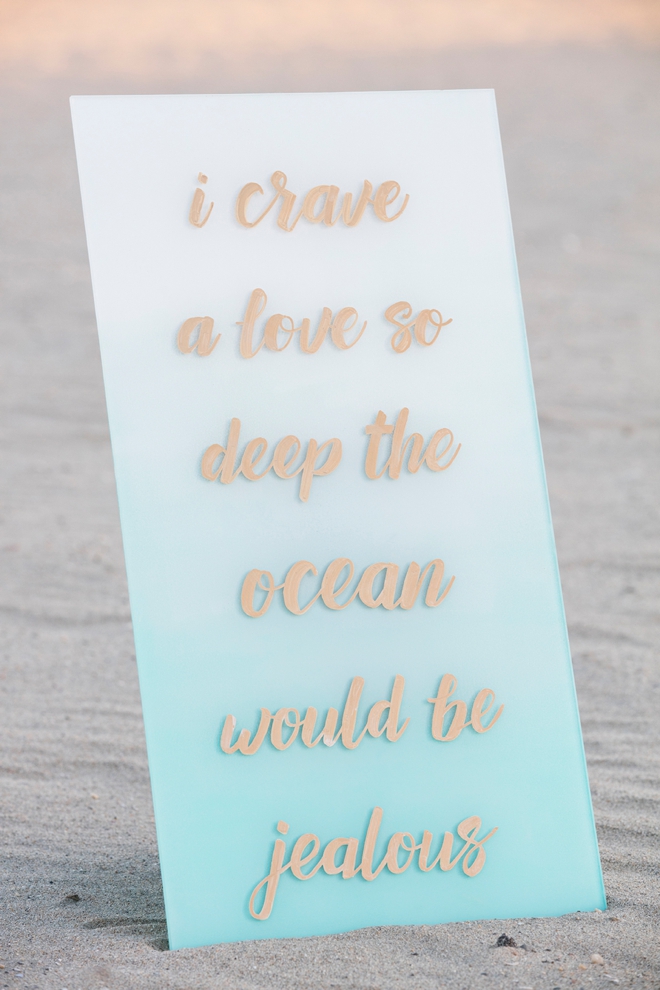
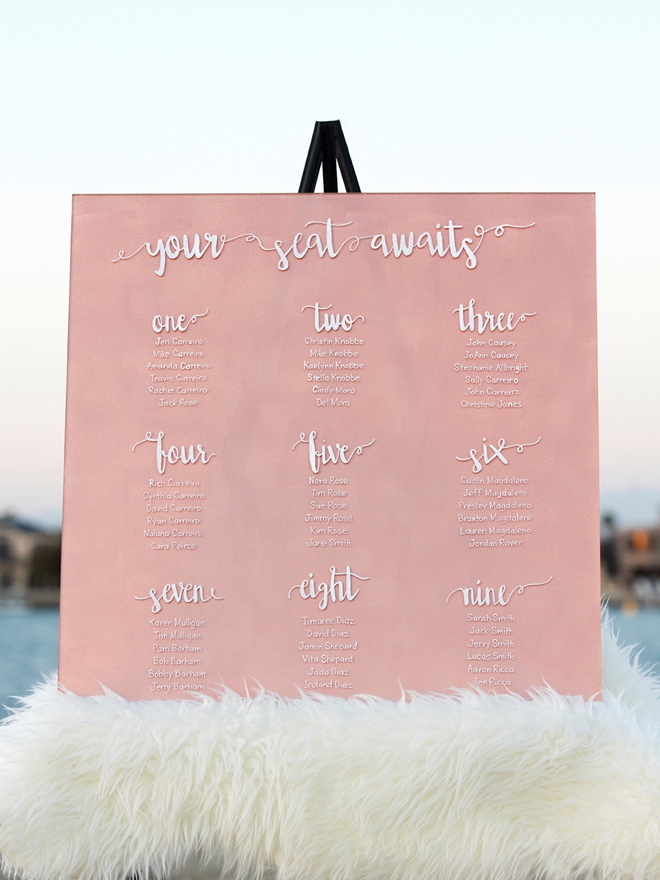
The fonts I used are Edeline and Print Clearly for the seating chart, and Hello Lary for the love sign – which can be found here.
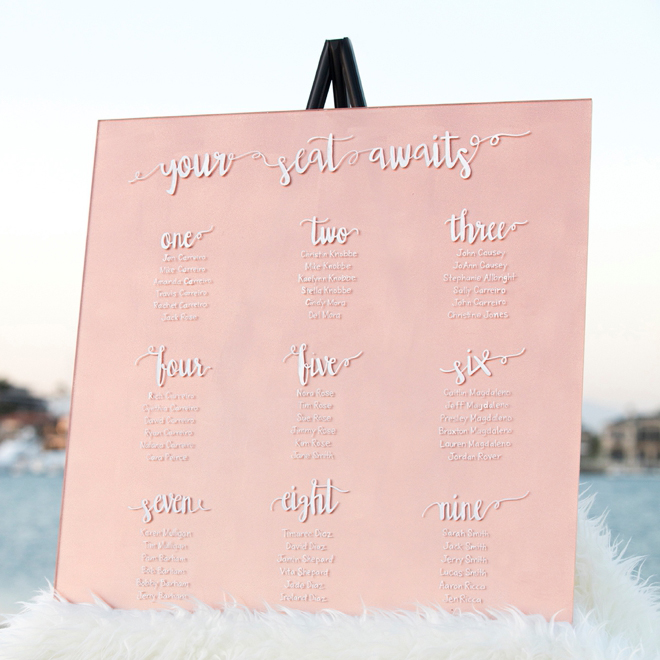
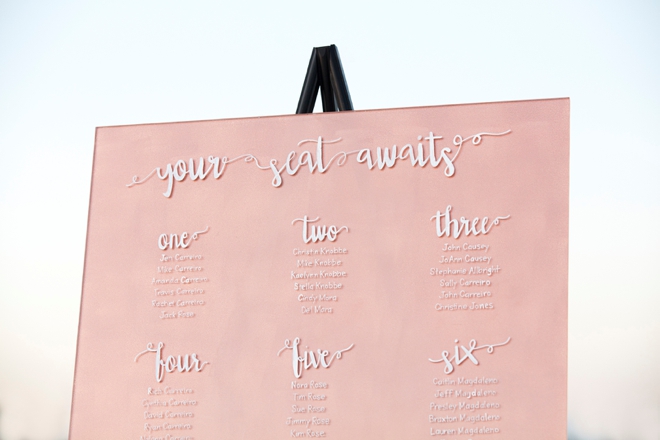
Seeing as you might like the designs I created, I added the “Your Seat Awaits + Numbers” as a free printable. I also added the love quote, however you’ll need a printer that can print 12 x 12 for that one – like my Canon PIXMA iP8720.
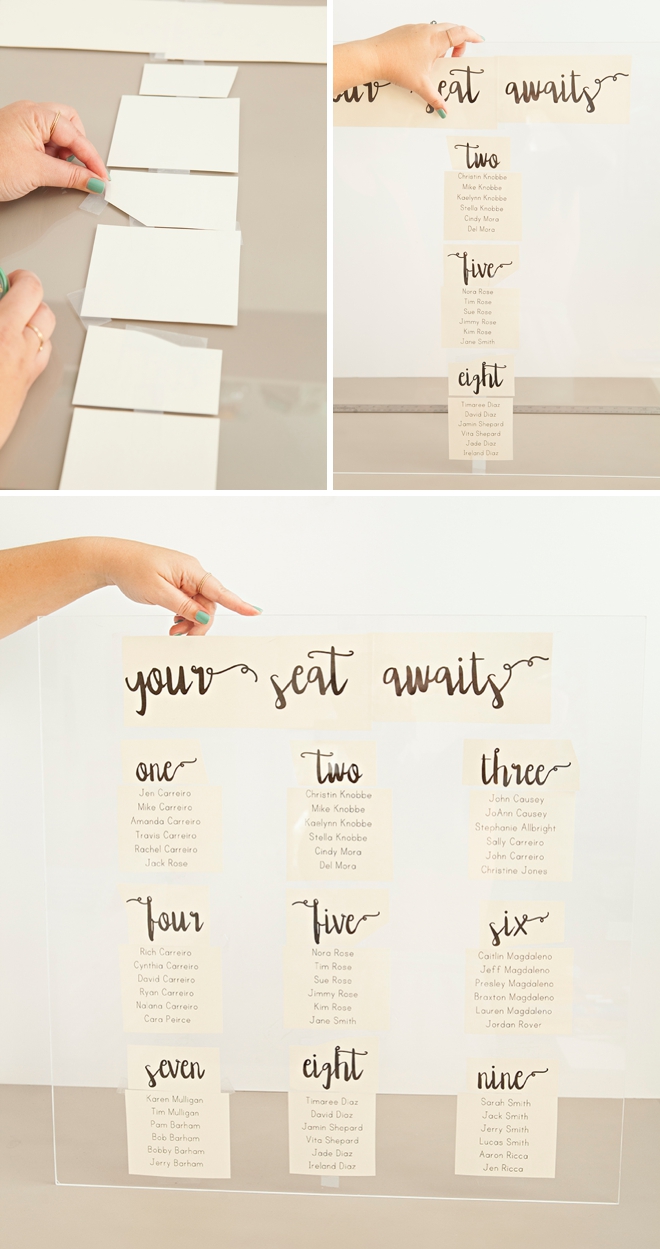
Measure + Tape
Simple signs are going to be SUPER easy… while a seating chart like this is much more complicated. Here I typed and cut up each table arrangement, measured to make sure my spacing was perfect and taped the design starting in the center onto the backside of the plexiglass.
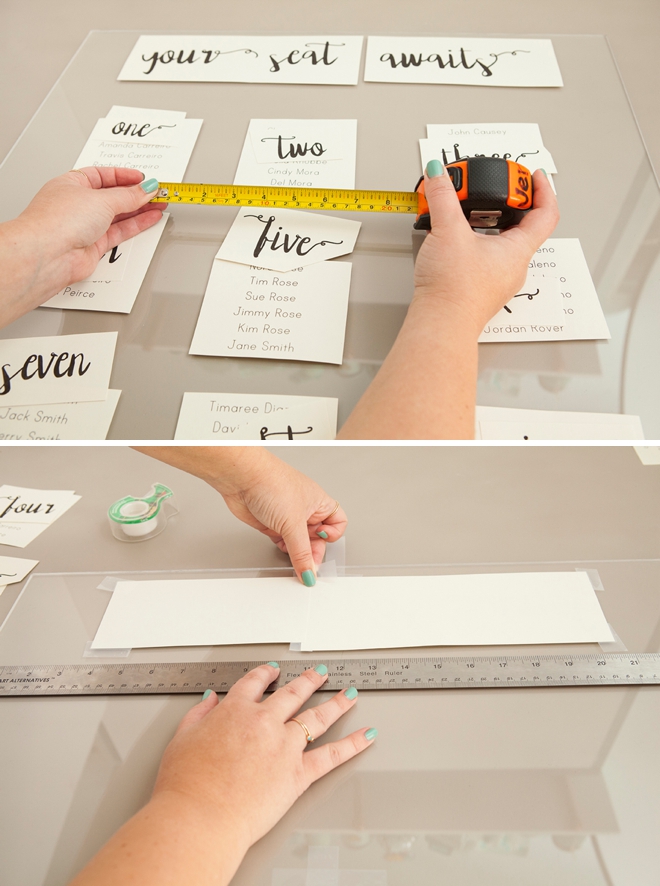
Measure + Tape
You’ll have to flip the acrylic back and forth to make sure that you’re happy with the layout you’re creating. Like I said, a one quote saying is simple – just tape it on in one piece. With a seating chart you might have to print and cut a bit – but it’s totally worth it. Remember, the taped design is on the BACK of the acrylic.
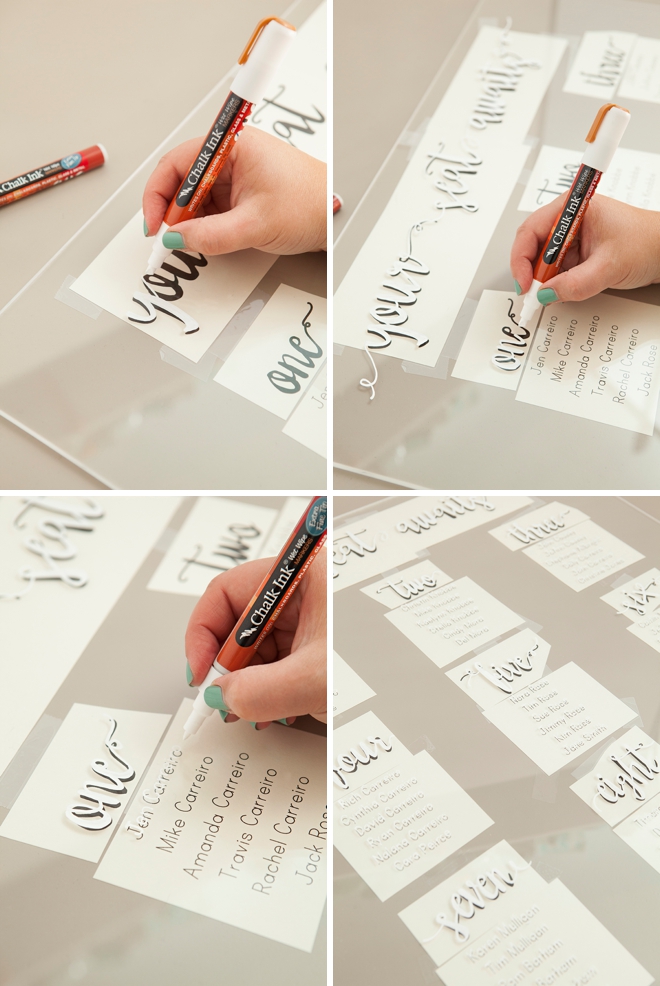
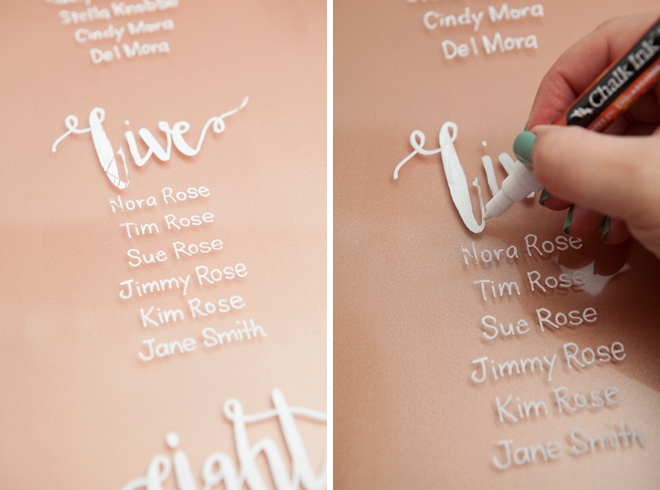
Trace Your Heart Out
The next step is to carefully trace your printed design. Yep, trace. You create an amazing design on your computer and easily trace it onto the plexiglass like a hand-lettering super star! I took a few creative freedoms when it came down to the exact writing, which you can do as well. The printout gives you the guide – but you can embellish from there!
I’m using my absolute favorite, can’t live without, Chalk Ink Markers for this sign. If you mess up, they quickly erase with Windex or Wet Wipes. These markers are a DIY brides dream come true and you have to try them. Also, after your event is over you can wipe off this sign and use it for something else! For the larger lettering I used the 6mm chisel tip marker, for the tiny names I used the extra fine tip marker.
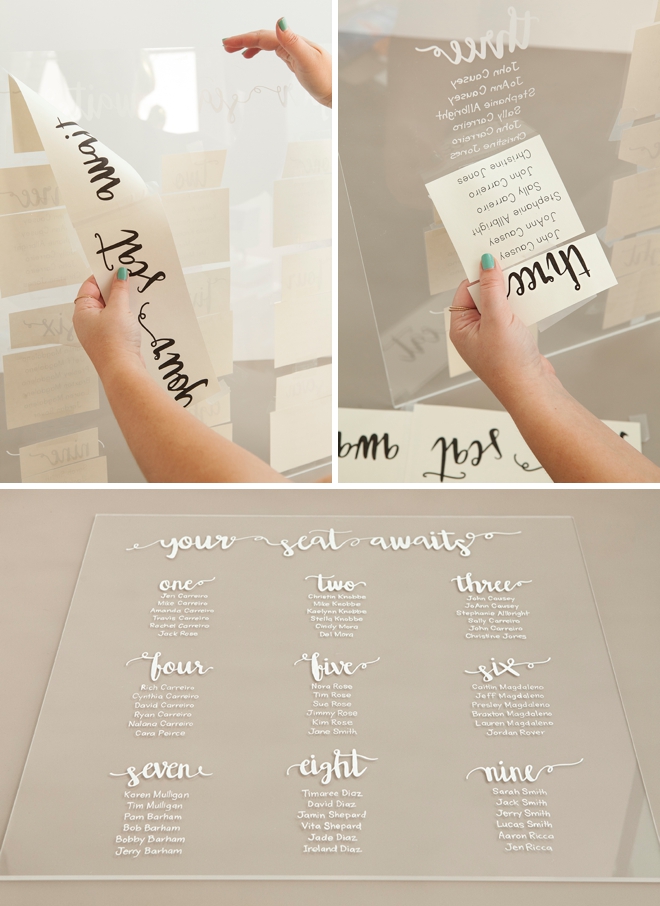
Remove The Guides
Once you’re finished lettering your sign, remove the printed design and voila – your amazing artwork is revealed! Even I was amazed at how good my design looked!
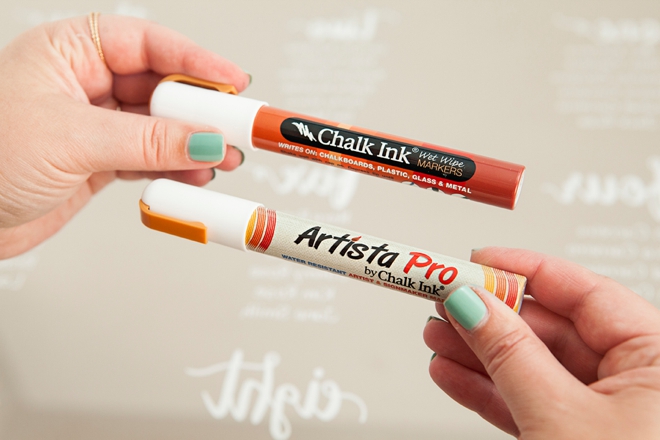
Wet Wipe VS. Artista Pro
Chalk Ink makes two marker versions; the Wet Wipe marker that wipes off with a wet wipe or water – and the Artista Pro marker that is water resistant. If you are looking for a quick erase, move-onto-the-next-sign type of marker – the wet wipe version is for you. If you’re creating a more long lasting sign, that potentially could get wet (we’ve all seen the chalk wedding signs on Pinterest from weddings where it rained on the sign, so sad) you absolutely must use the Artista Pro marker.
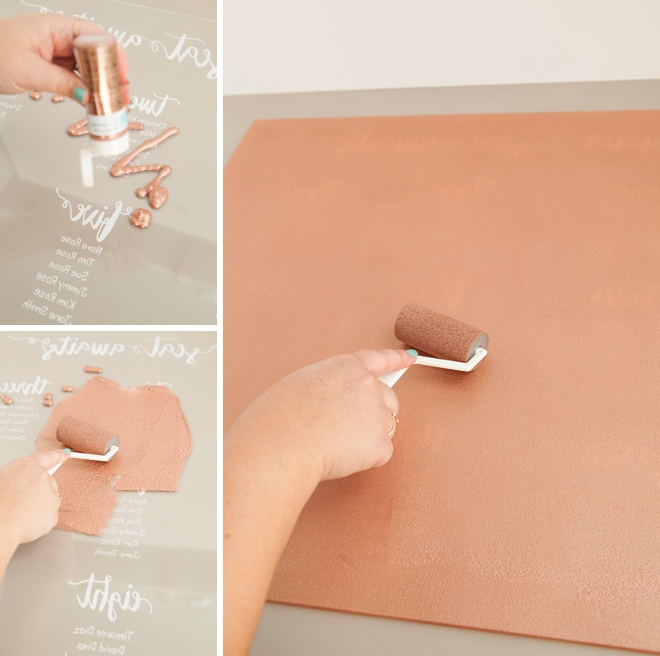
Paint The Backside
This step is optional but amazing. Obviously if you paint the backside of your sign you’ll never be able to do this technique again… but it looks gorgeous and really makes your writing stand out, so I vote yes. Two coats with an hour of dry time in between will do the trick but if you can still see through your sign – you might need a third coat. Also, a roller will give you more even coverage than a brush – but it’s totally your call.
Fix Any Scratches
Your chalk sign won’t rub off like regular chalk, but in transit you might get a few scratches so pack your marker to make minor fixes. I recommend wrapping these in tissue and then bubble wrap to transport.
Stunning Right?
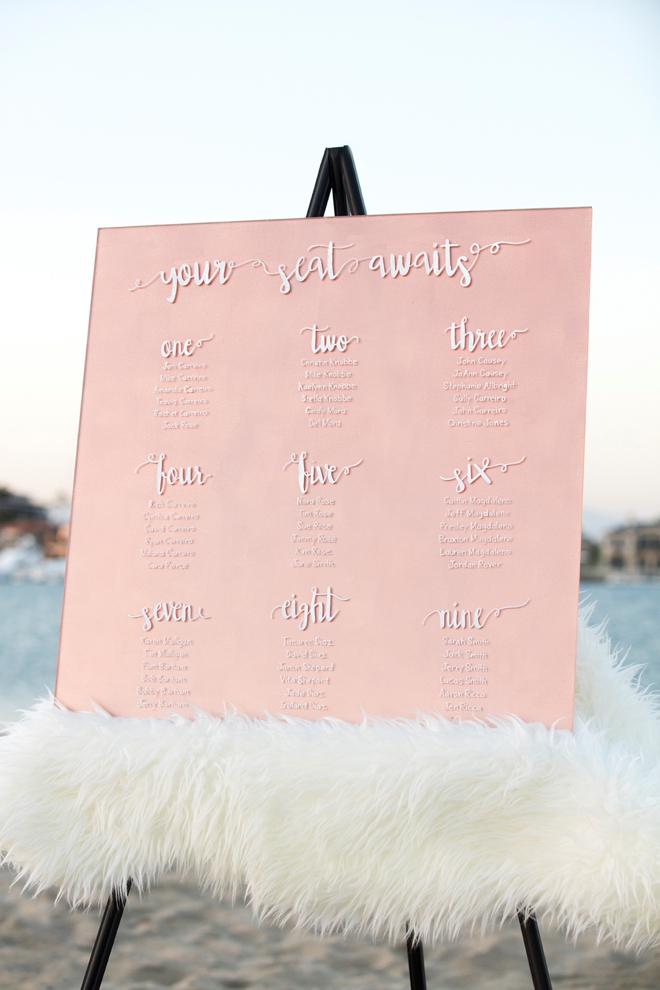
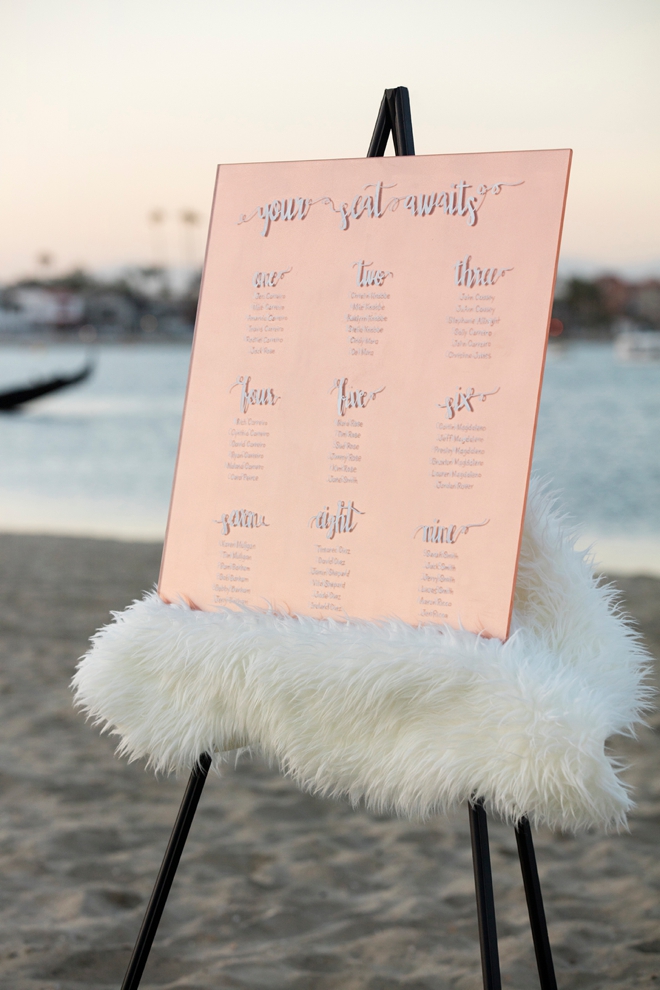
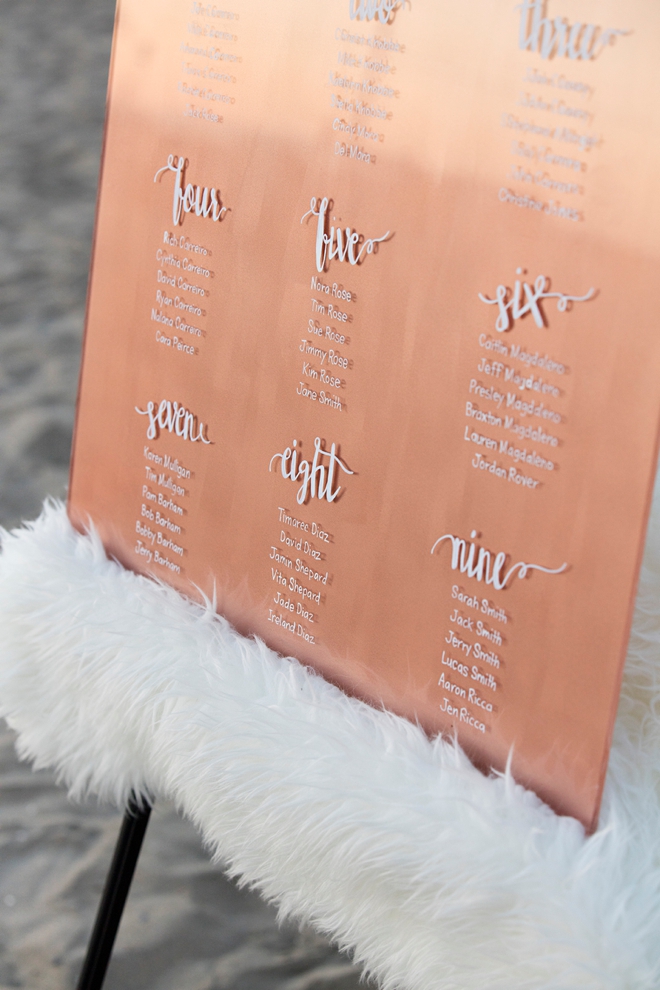
Metallic VS. Satin
For the seating chart sign I used a metallic rose copper paint from Martha Stewart Crafts and shot this picture as the sun was setting. The metallic finish gave an amazing sheen as the setting sun passed by! I used a satin finish for the ombre sign which looked flat and beautifully milky. What paint would be right for your wedding theme?
Ombré For The Win
Using the same paint roller and 3 shades of paint, I carefully worked from the top down to achieve this gorgeous ombre. The backside doesn’t nearly look as good as the front, so doing this paint technique with the acrylic is really forgiving!
DIY Tutorial Sponsored By:
Chalk Ink is your one stop shop for all things DIY! From erasable chalk markers to colorful chalkboards and even chalkboard wallpaper. Chalk Ink is the creator of the original and premier liquid chalkboard marker that, unlike traditional chalk, produces zero dust and mess, won’t swear once dry, and is easily removed using water.


As with all our DIY tutorials, if you create one of our projects please send us a picture – We Love Seeing Your Creativity! If you use Instagram or Twitter please use the hashtag #SomethingTurquoiseDIY and it will show up on our Get Social page. Happy Crafting!
DIY Tutorial Credits
Photography + DIY Tutorial + Printable Design: Jen Carreiro of Something Turquoise // Chalk Ink Markers: courtesy of Chalk Ink // Clear Acrylic Plexiglass: Amazon // Martha Stewart Crafts Paint Roller + Paint: Amazon // Ruler: Amazon // Nail Polish: OPI – Withstands the Test of Thyme
Shop The Supplies:
Find the supplies you’ll need for this project from our affiliate links below:

Comments