
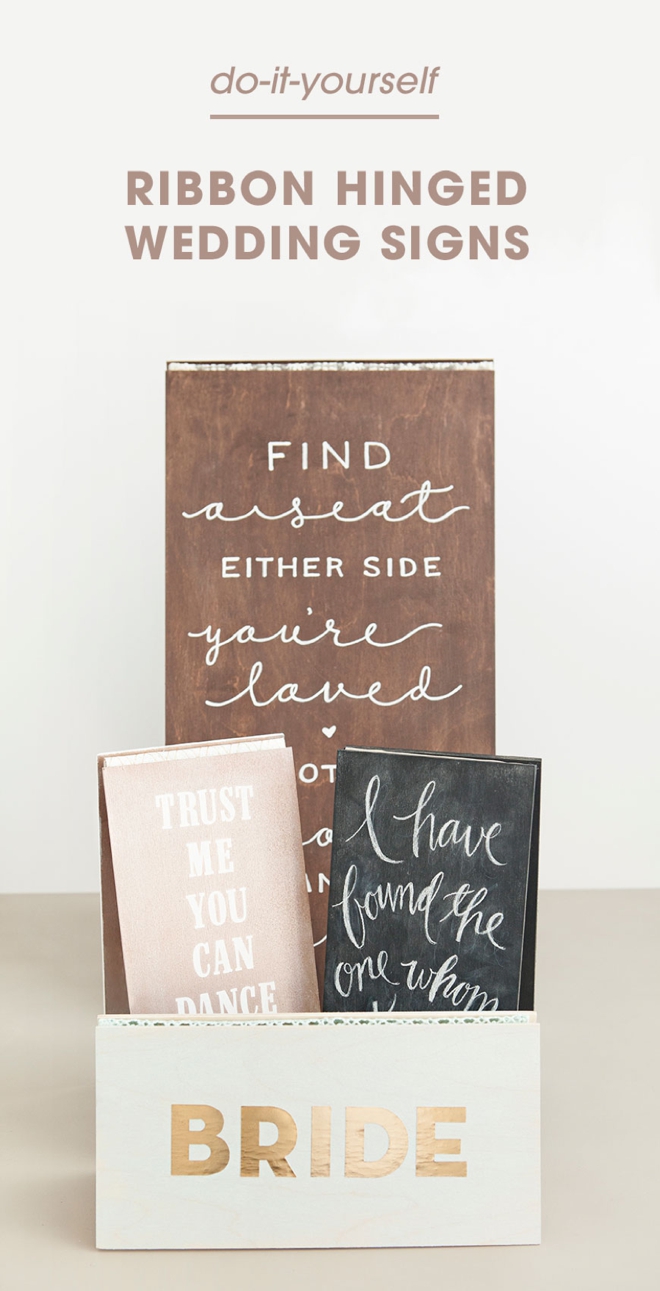
DIY | Ribbon “Hinged” Wedding Signs
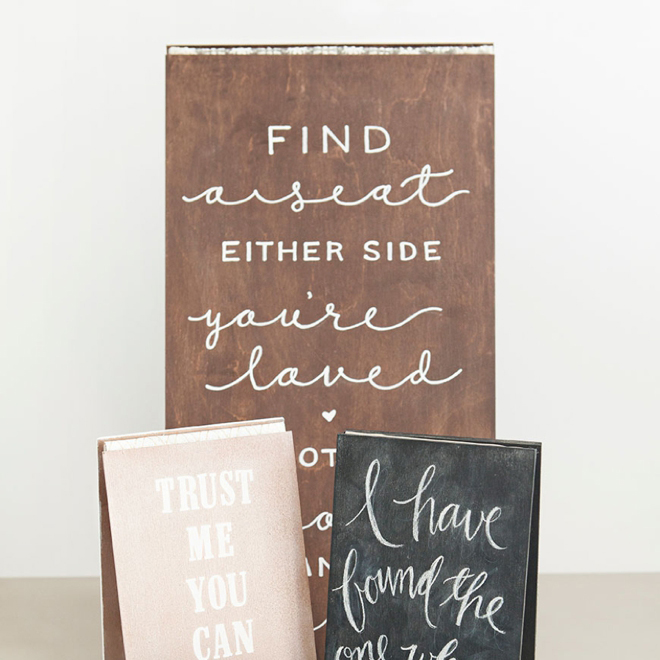
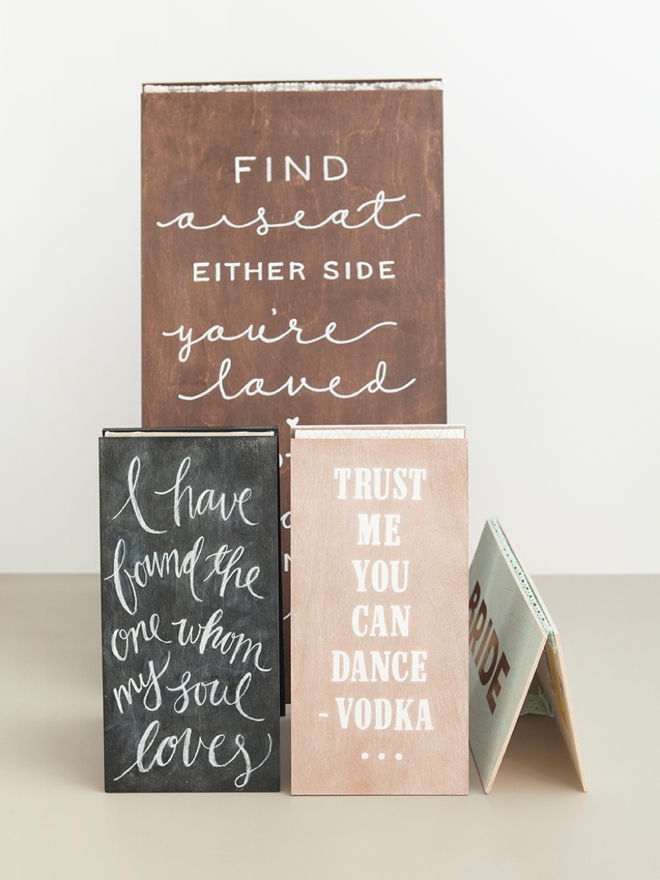
Having signs at your wedding is important, it’s not only a wonderful way to communicate with your guests but it’s a fabulous trend that makes for darling pictures. I personally would call on Dad to build me that custom sign I’d been dreaming about and he’d whip it out no problem, ok he’d make me do some of it too. But what if you don’t have access to saws or awesome lumber or maybe your dad or fiancé isn’t the handy type? No need to fret because I came up with a fabulous idea while taking a nap last week (that’s when my best ideas come to me) that you are going to love! It’s crazy easy, it’s cheap, and it has SO many uses, I introduce you to the DIY Ribbon “Hinged” Wedding Signs. You don’t need any special tools, just ribbon, craft store wood and a glue gun, because we are making hinges out of ribbon – amazing right? I kind of impressed myself with this one!
Want to learn how I did the lettering on all these signs? Visit yesterdays post!
SUPPLIES:
- 2 pieces of craft store wood in any size.
- Hot glue gun
- Pretty ribbon that’s at least 1.5″ wide
- Scissors
- If using lace, you’ll also need wax paper and a silicone stick (or something similar)
If you are going to paint your sign, you’ll need to do it before you assemble it. To learn how I painted these signs, visit this post!

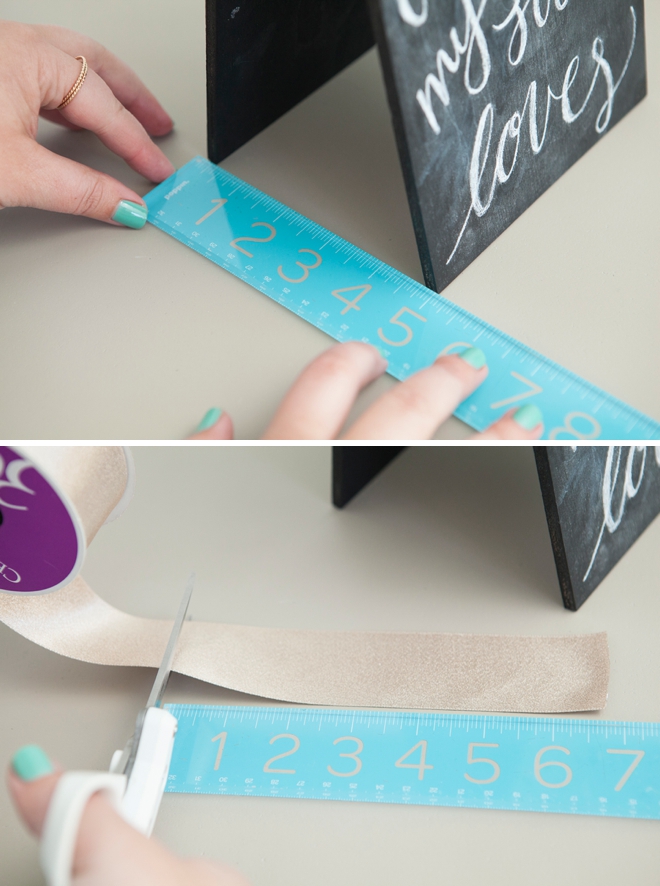
Measure + Cut
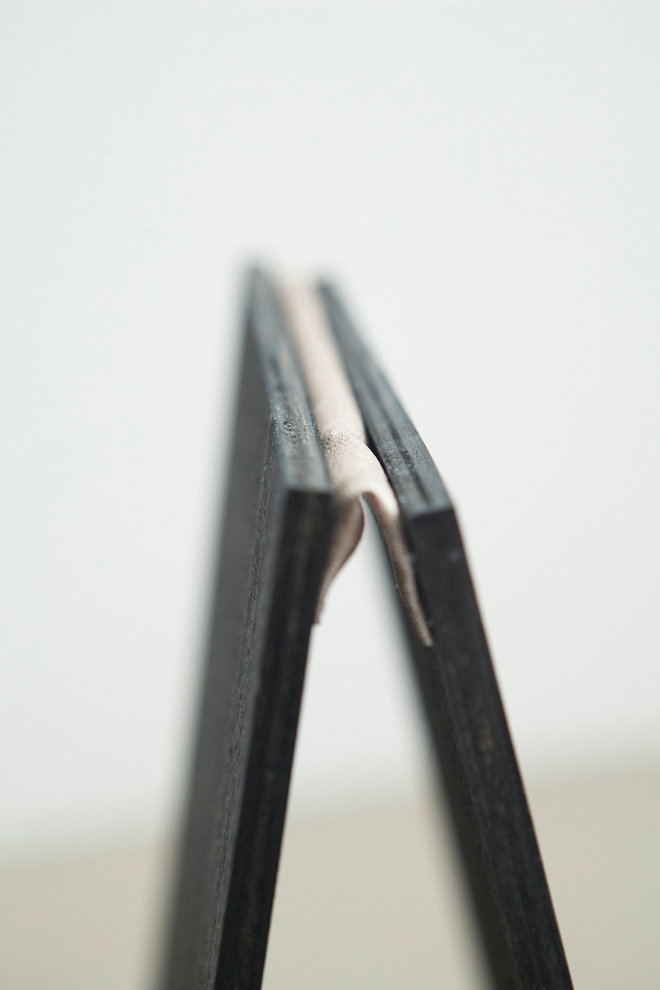
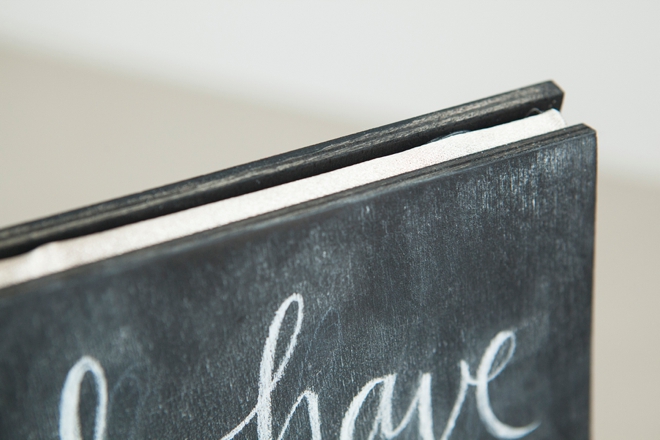
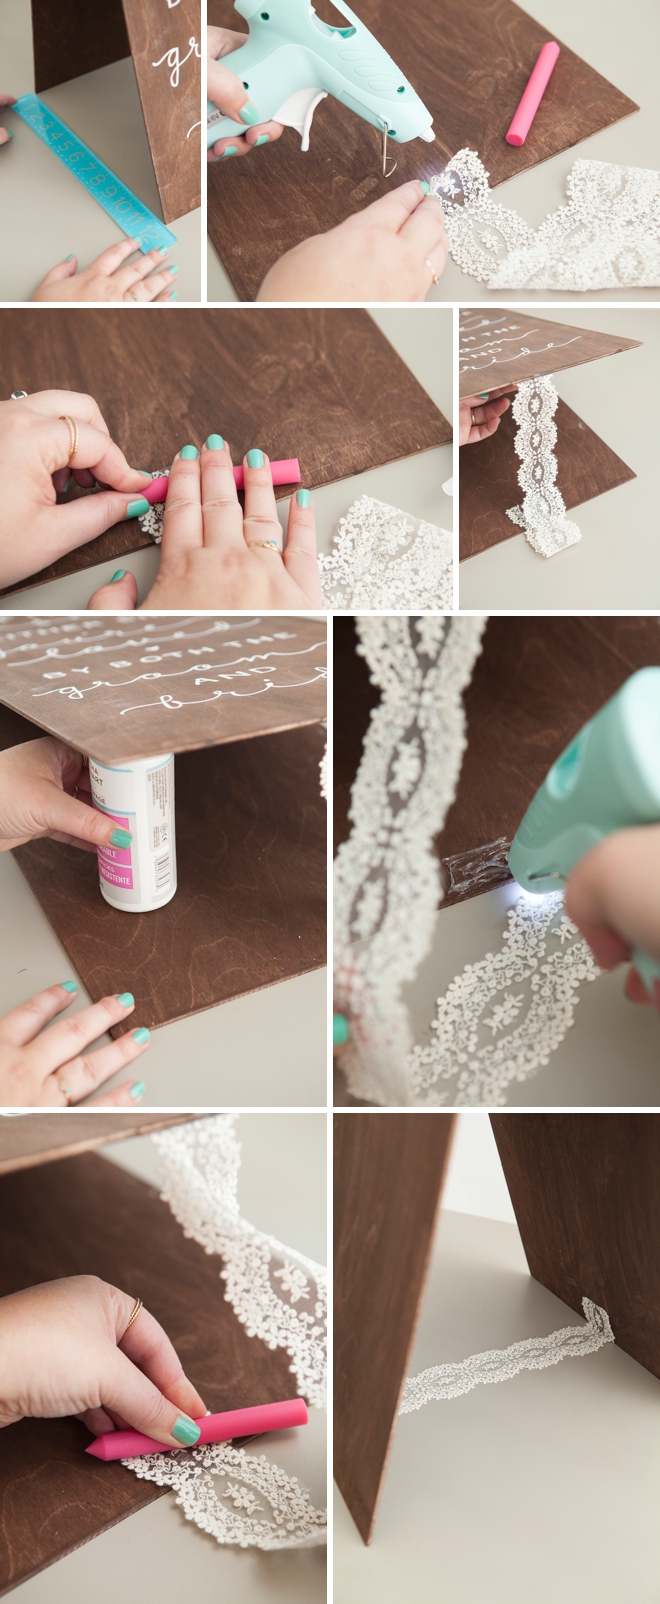
First we are going to measure and cut the piece of ribbon that will hold the front and back of the sign together. Measure your ribbon across the top of your sign and leave an extra inch or so on each side. Then fold the ends up and hot glue them to the ribbon to add a finished edge to your “hinge”.
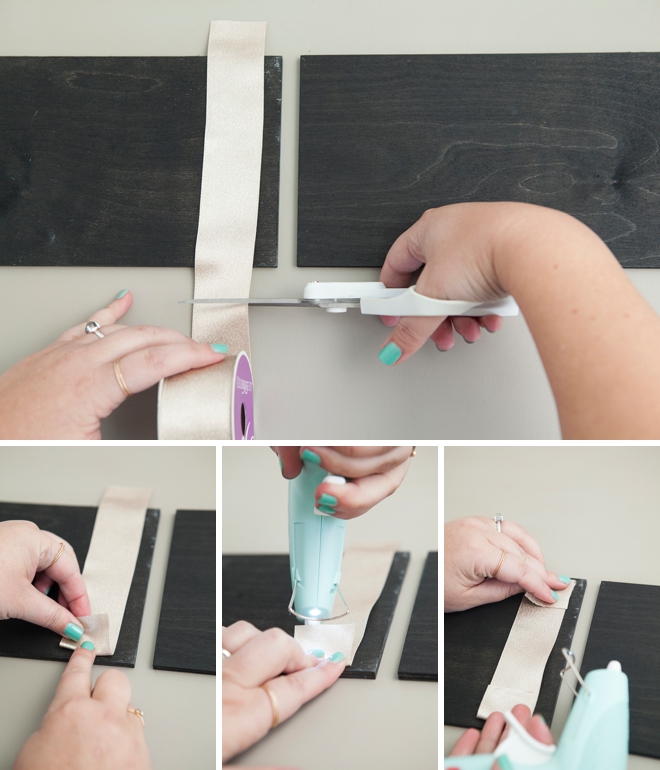
Glue The Hinge
hinge. noun. a movable joint or mechanism on which a door, gate, sign or lid swings as it opens and closes, or that connects linked objects.
Evenly space the top of your signs from each other on your workspace and carefully glue the ribbon evenly to both sides – creating a ribbon hinge! I worked in small sections to make sure the ribbon touched the hot glue while it was really hot – if not you can pull the ribbon right off the wood.
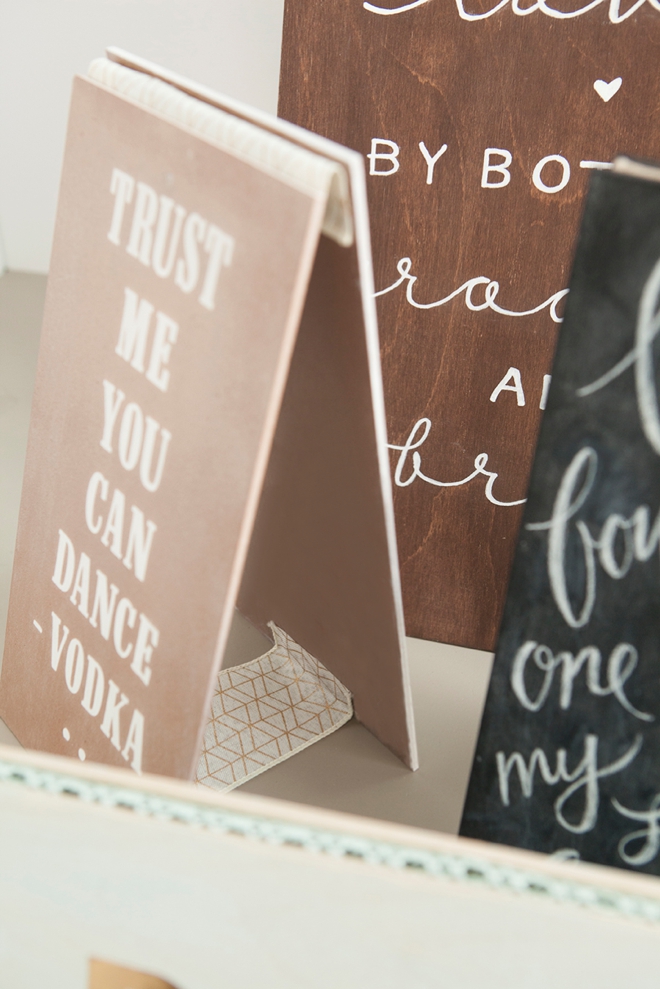
Prop The Wood Up To Reveal The Pretty Hinge
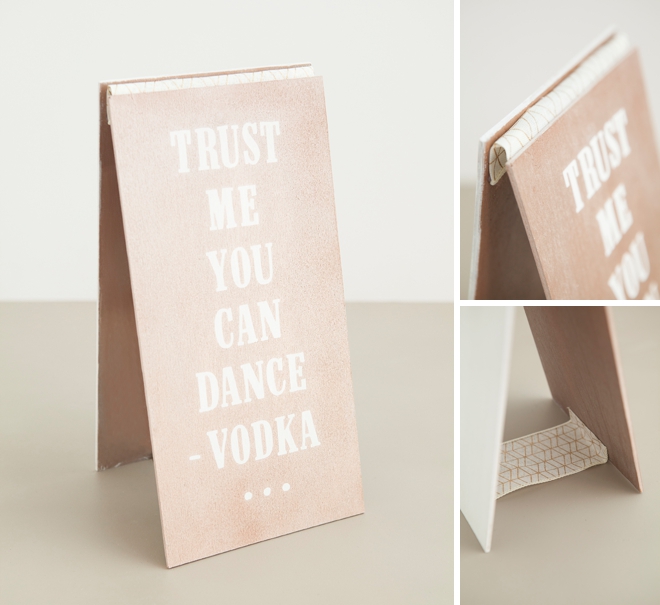
Now For The Stabilizer
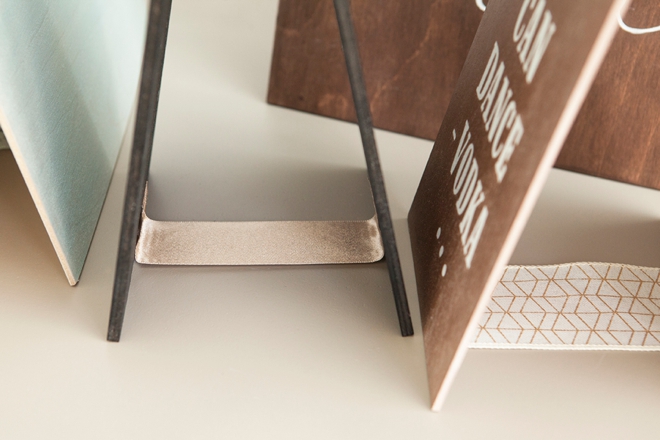
You need to add another piece of ribbon on the bottom, between the two pieces of wood to stabilize your sign. Otherwise a guest could tap it and it might collapse.
The length of your stabilizing ribbon is up to you and how you want your sign to look. Measure the distance you like, add an inch to either side and cut a piece of ribbon that length.
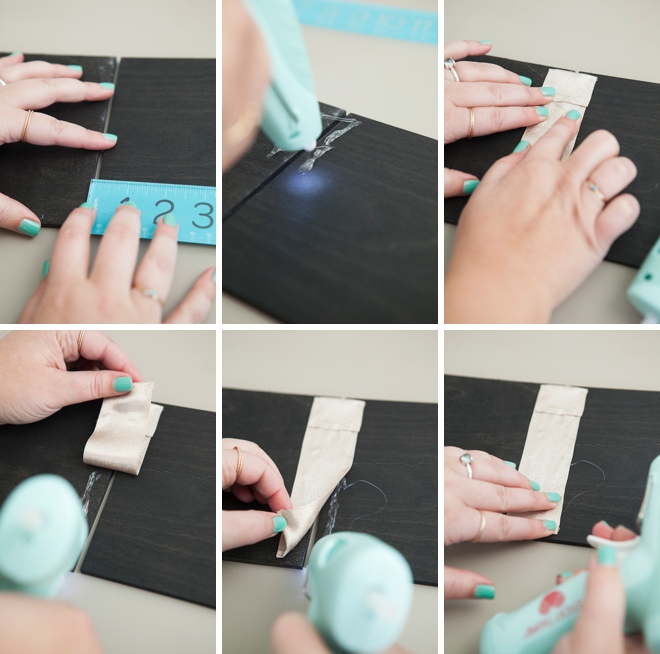
Add The Stabilizer
This is easy, but adding the second ribbon end can get awkward. You basically just glue the ribbon on the inside of your sign… but here are a few tips. Glue the ribbon at the center of your sign and if you are a perfectionist you can even mark where the second end should go. To hold the top of the sign up you can prop something in between the pieces of wood. Hot glue cools fast, so work fast. If you don’t like how it’s sitting, rip the ribbon and old hot glue off and try again!
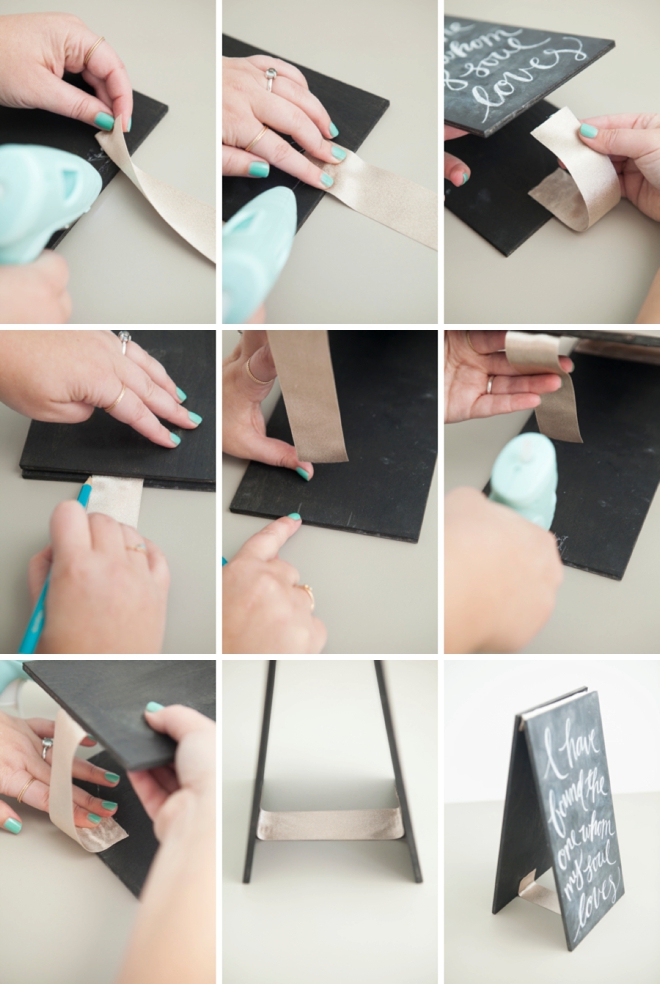
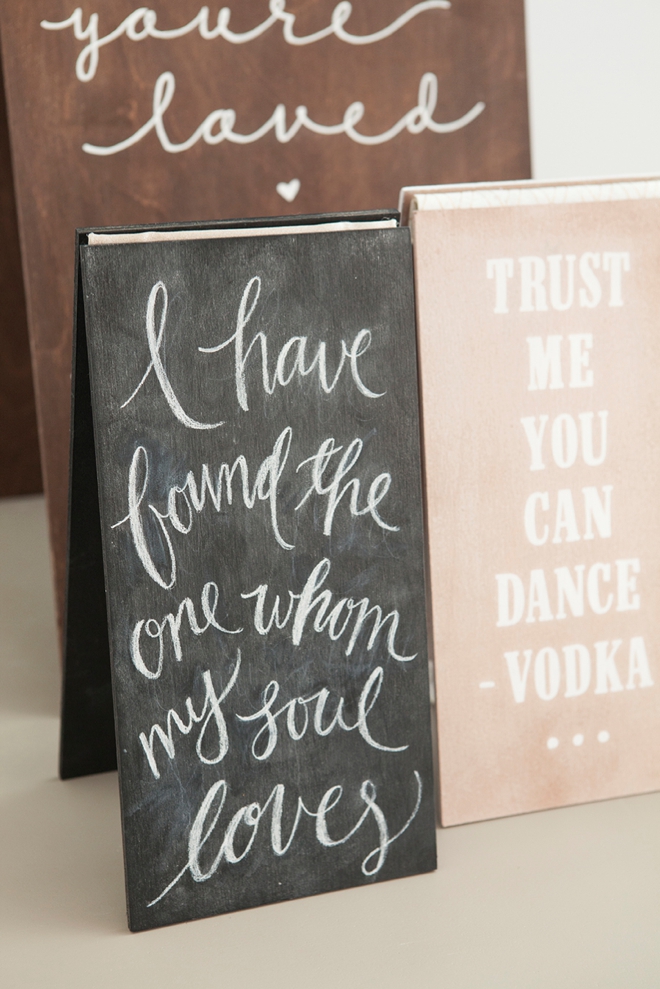
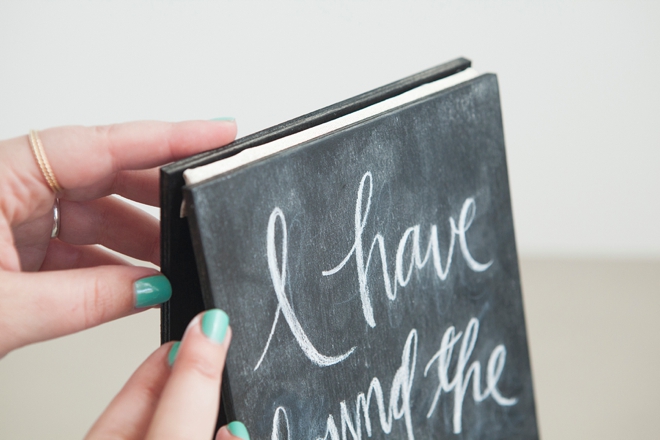
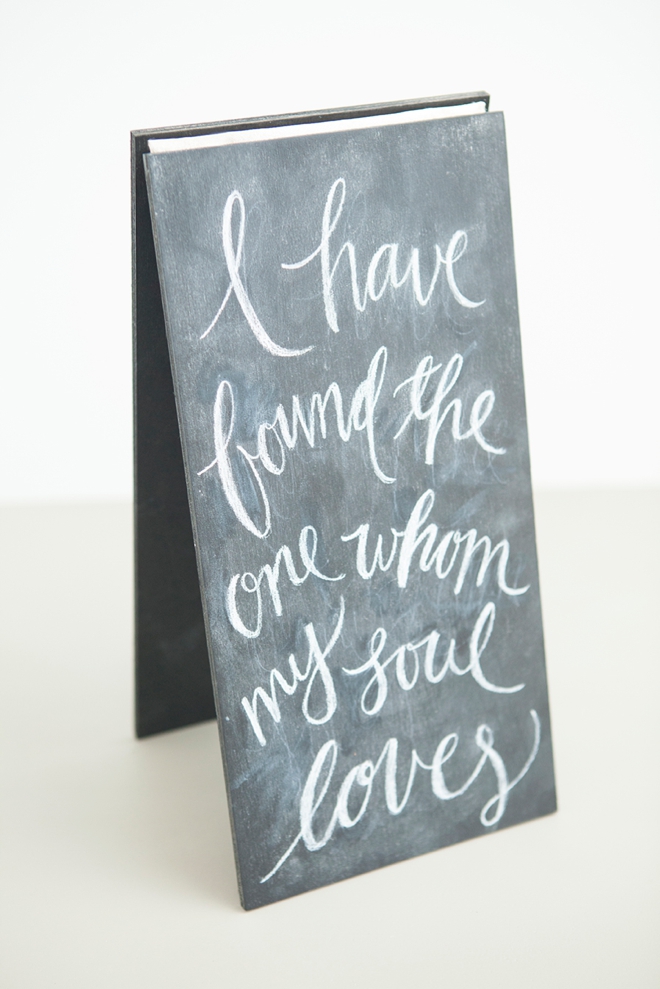
I Have Found The Hinge That My Creative Soul Loves
The Big Sign Next
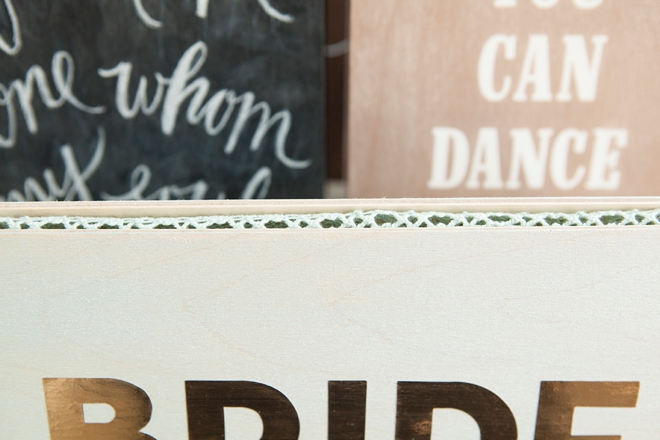
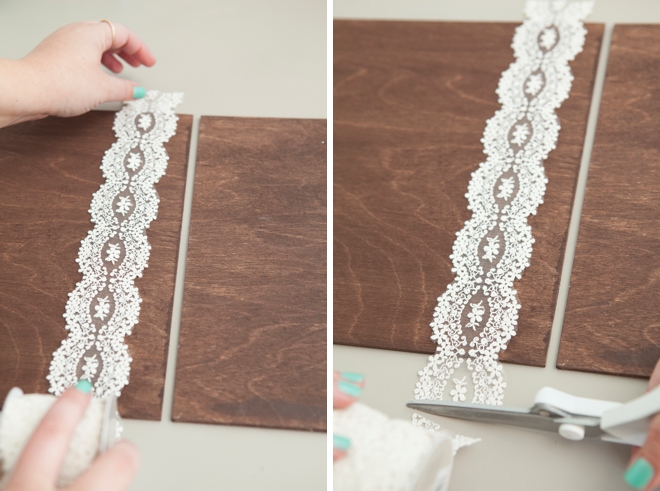
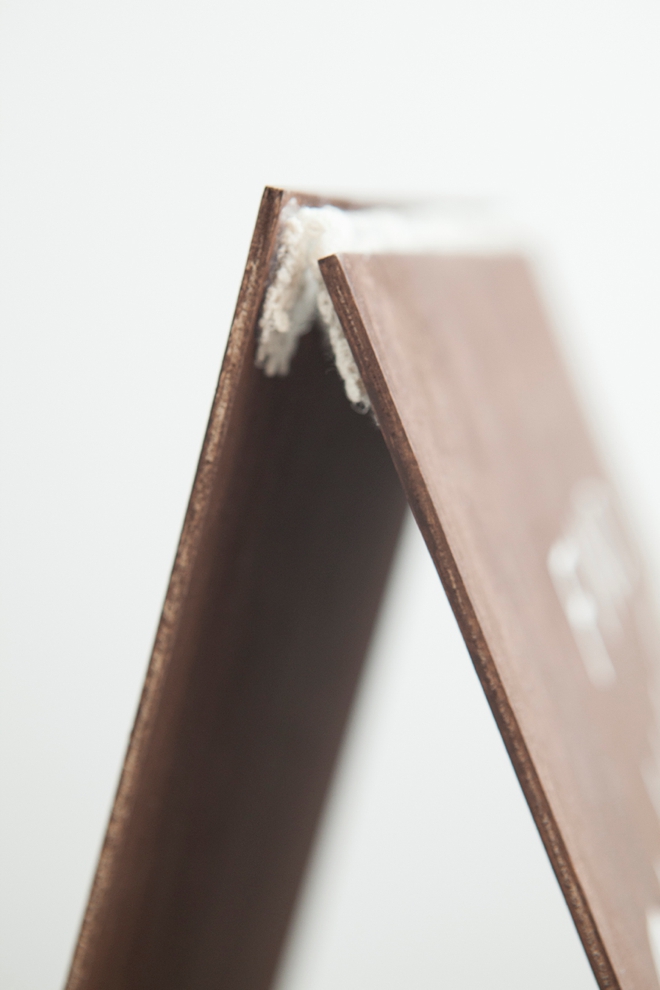
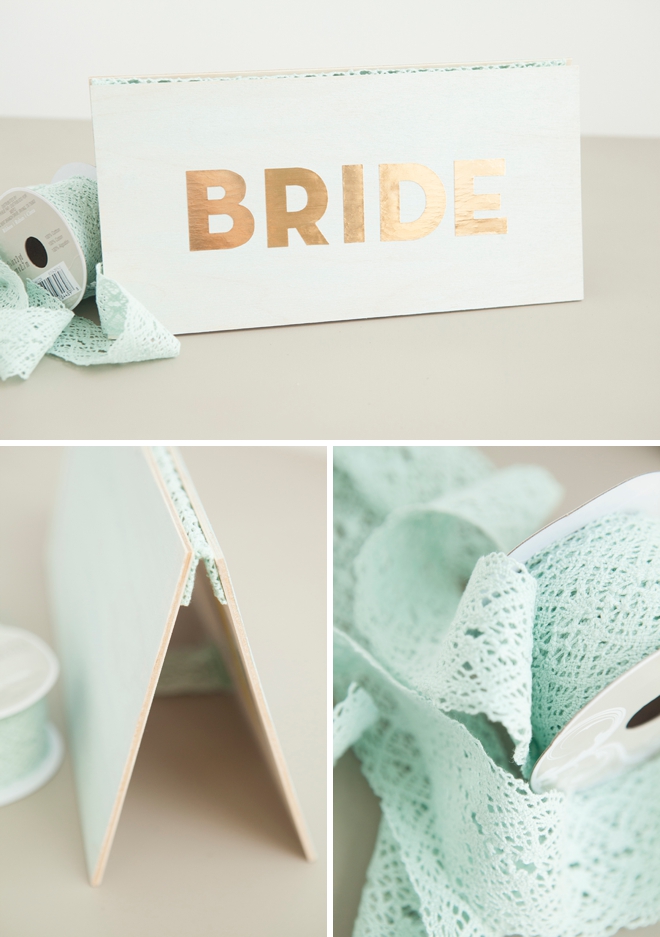
Same steps as above… but we are adding LACE into the mix.
You can use pretty much any type of ribbon for this project, minus the stiff paper kind, including lace and burlap. However, both of those have a texture that hot glue likes to seep through. Which is terrific for the stability of your sign, but not for your fingers!
Measure your ribbon across the top of your sign and leave an extra inch or so on each side.
Glue The Ends
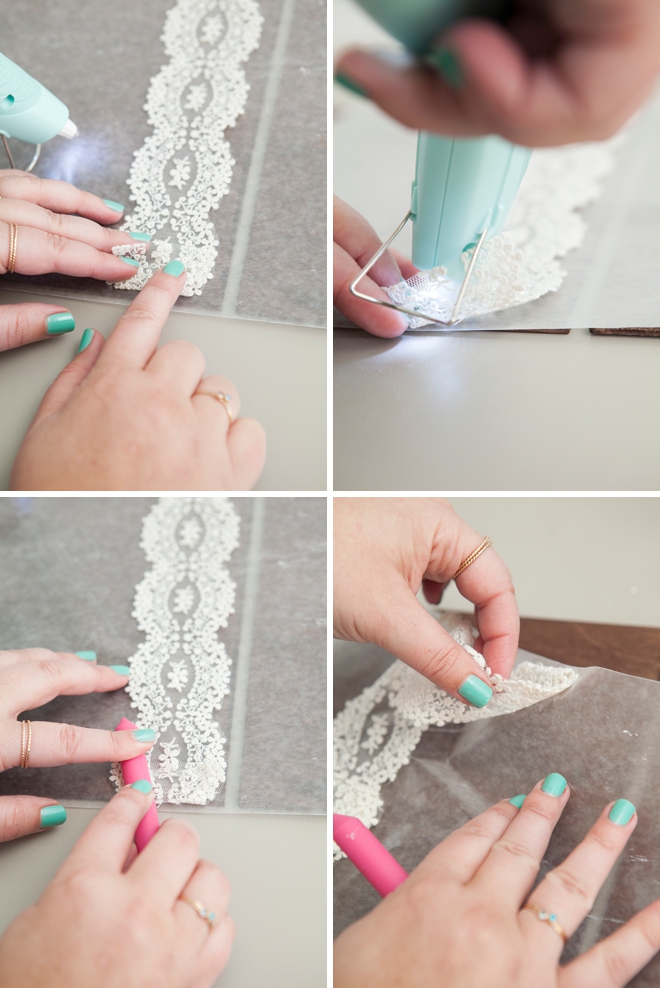
To finish the ends of the lace, I’m working on a piece of waxed paper because when I go to glue the lace together, glue is going to seep out from all the pretty holes in the lace. I’m using a silicone stick to press the lace into the glue to save my fingers from getting burned! Peel the ribbon hinge off the wax paper and discard it.
Make the Hinge
Same steps, carefully and evenly glue the lace across the tops of both pieces of wood. I’m still using my silicone stick to press the lace into the glue, because I’ll have hot glue all over my fingers if I don’t!

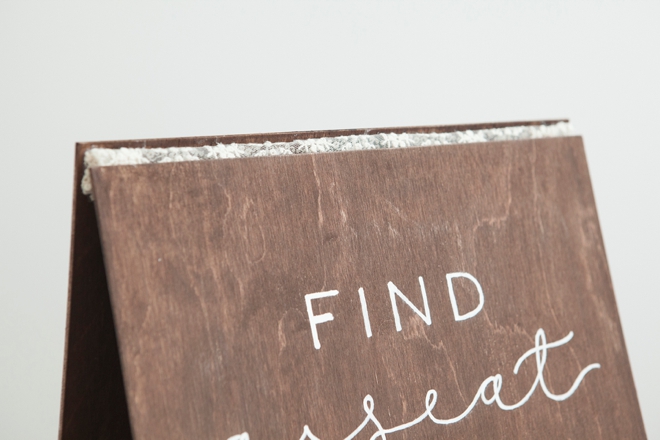
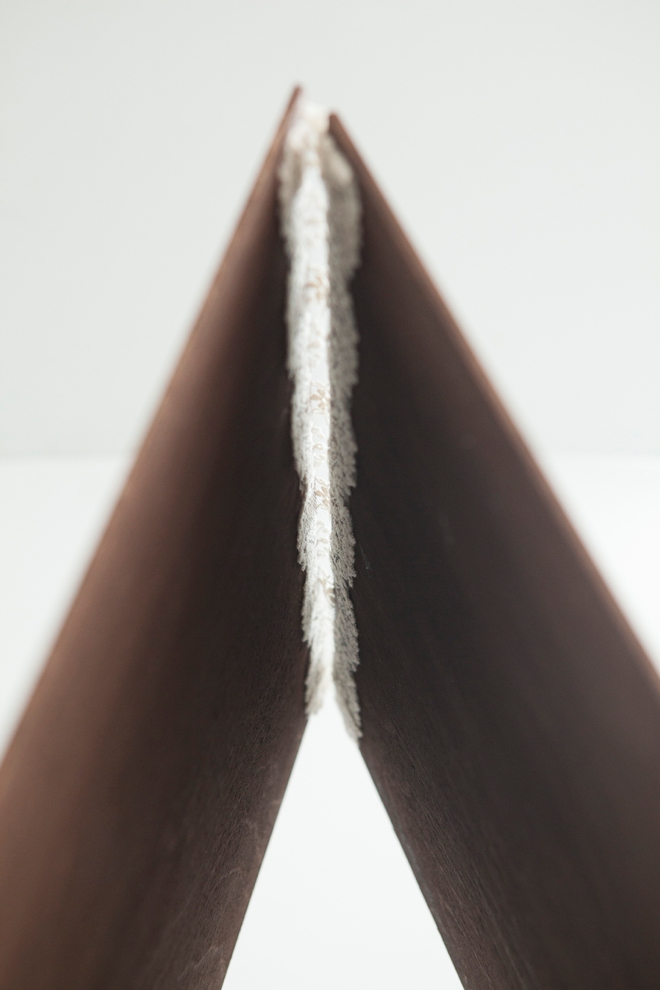
The Gap Size
I did 1/8″ to 1/4″ gap between these boards, but your gap is up to you. With a bigger gap you will see more of the ribbon, but if your gap is too big the sign will sit funny. I’d recommend not going over 1/2″.
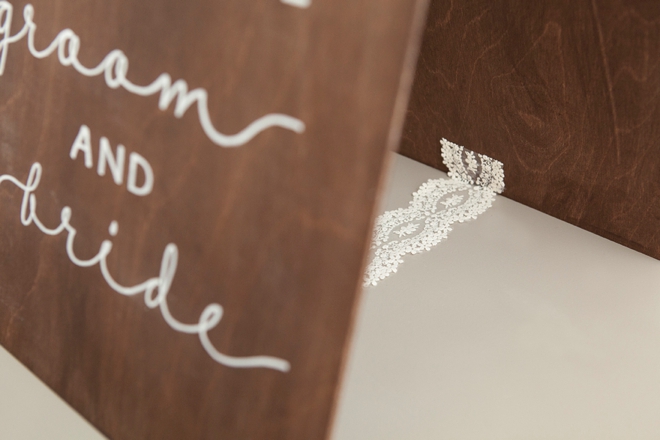
Adding The Stabilizer
For this sign I used a 14″ piece of ribbon for the large sign stabilizer. Glue the ribbon evenly between the two pieces of wood. Like I said, this part can be a bit awkward, even to photograph so I hope my pictures make sense to you!
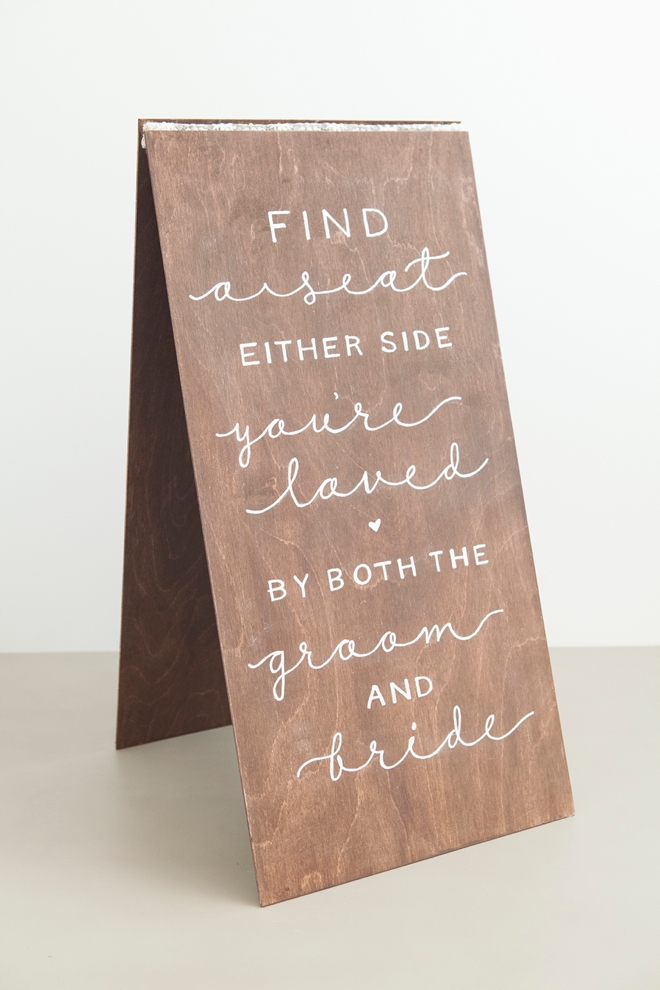
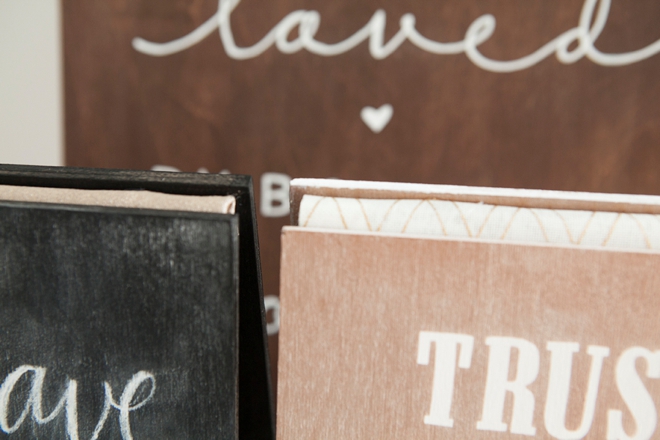
A Gorgeous, Cheap + Easy Sign!
This sign cost about $20 to make. $5 each for the wood pieces, $4 for the ribbon, $4 for the stain + tax… and I was finished in just a few hours, over two days including the staining and hand lettering!
Small Signs
This would make a darling reception table sign… I loved this pale blue lace I used!
Bar Signs
Whether it’s a funny sign or a drink menu sign, this would be perfect for your bar!
Who Knew Ribbon Would Make Such Wonderful Hinges?
As with all our DIY tutorials, if you create one of our projects please send us a picture – We Love Seeing Your Creativity! If you use Instagram or Twitter please use the hashtag #SomethingTurquoiseDIY and it will show up on our Get Social page. Happy Crafting!
DIY Tutorial Credits
Photography + DIY Tutorial: Jen Carreiro of Something Turquoise // All wood and ribbon: Michaels // Glue Gun: Amazon // To learn how to letter all these signs visit this post // Nail Polish: OPI – Withstands the Test of Thyme
Shop The Supplies:
Find the supplies you’ll need for this project from our affiliate links below:

Comments