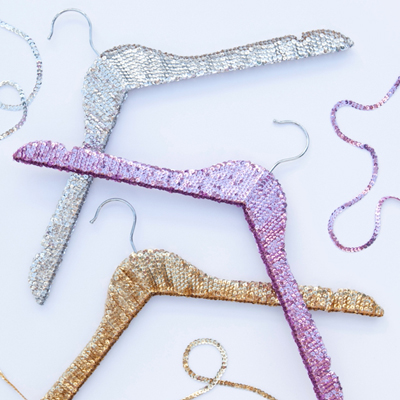

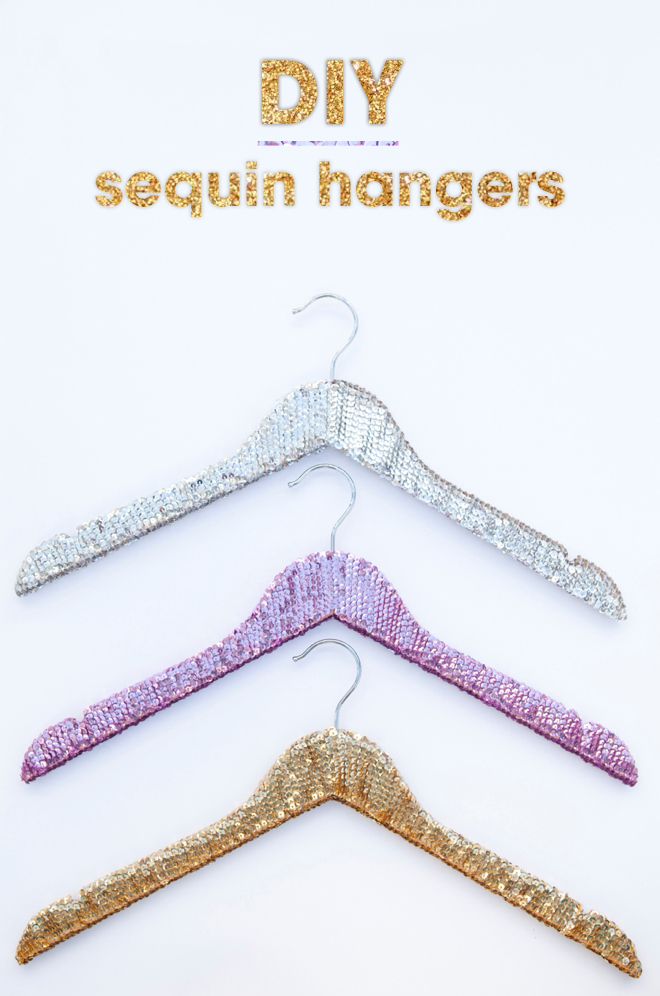
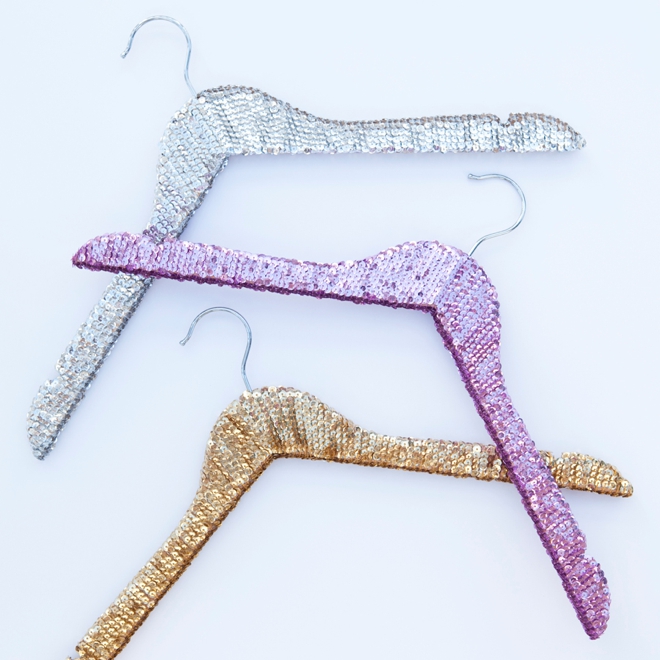
DIY | Sequin Wedding Hangers
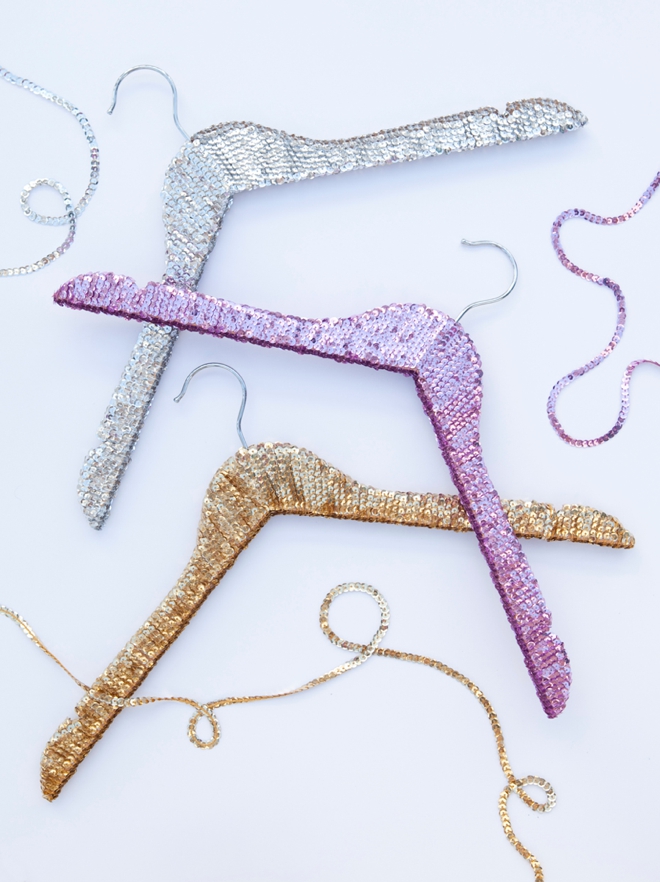
I love everything that is sparkly and I know that most of you do too! Wedding hangers in general are a huge, huge trend because they are beautifully useful and they make the most adorable photos. Today I’m sharing a fun and simple (but time consuming) project for creating your own sequin wedding hangers! Each hanger will take about 45 minutes to complete, but if you enjoy yourself, sip some wine, and put on your favorite music or tv show – in no time you’ll have a stunning way to display your wedding dress or any special article of clothing that you made with your own two hands. I already had my glue gun but bought the sequin trim and hangers from Amazon, and since I have Prime – it made this project about $2.50 for each hanger, such a pretty deal!
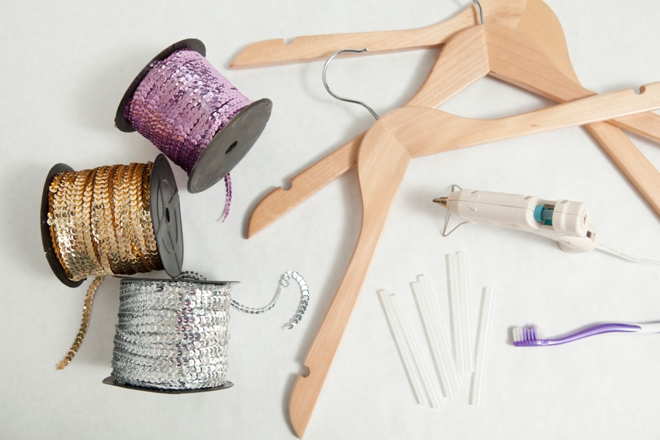
SUPPLIES:
- Wood Hangers
- Sequin Trim (15 feet for each hanger)
- Hot Glue Gun (4 sticks per hanger)
- Toothbrush
- Scissors
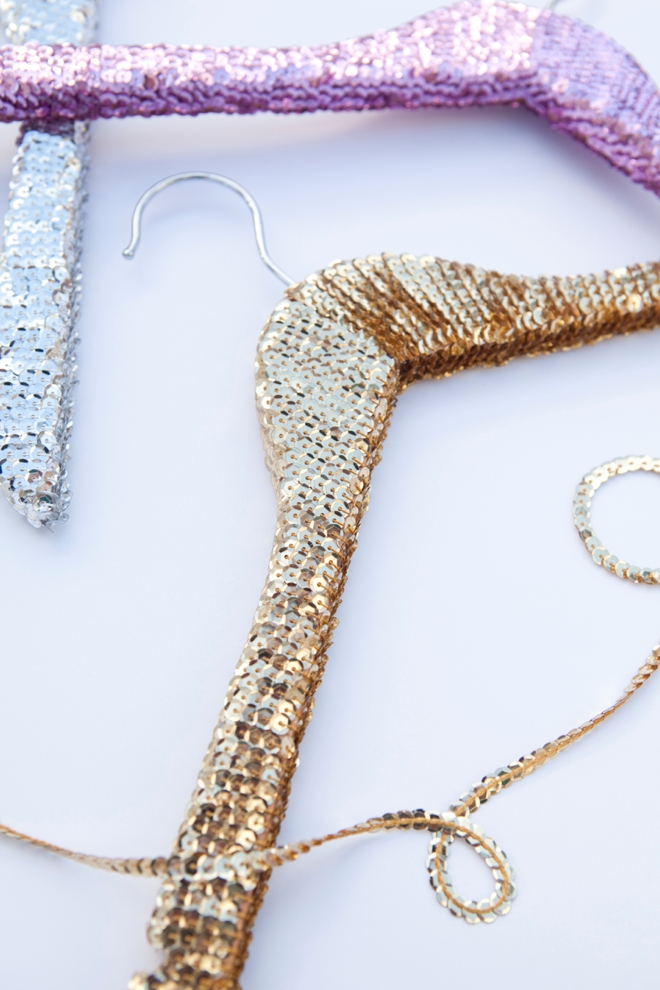
I used 15 feet of single sequin trim for each hanger. The sequin trim rolls I pictured here have 80 yards on them which means they can make 16 hangers each, and they come in 20 different colors. Yes there are wider sequin trims available, especially in 1″ but getting fine hanger detail like wrapping in the strap notch wouldn’t work.
Make Your Hanger Shine!
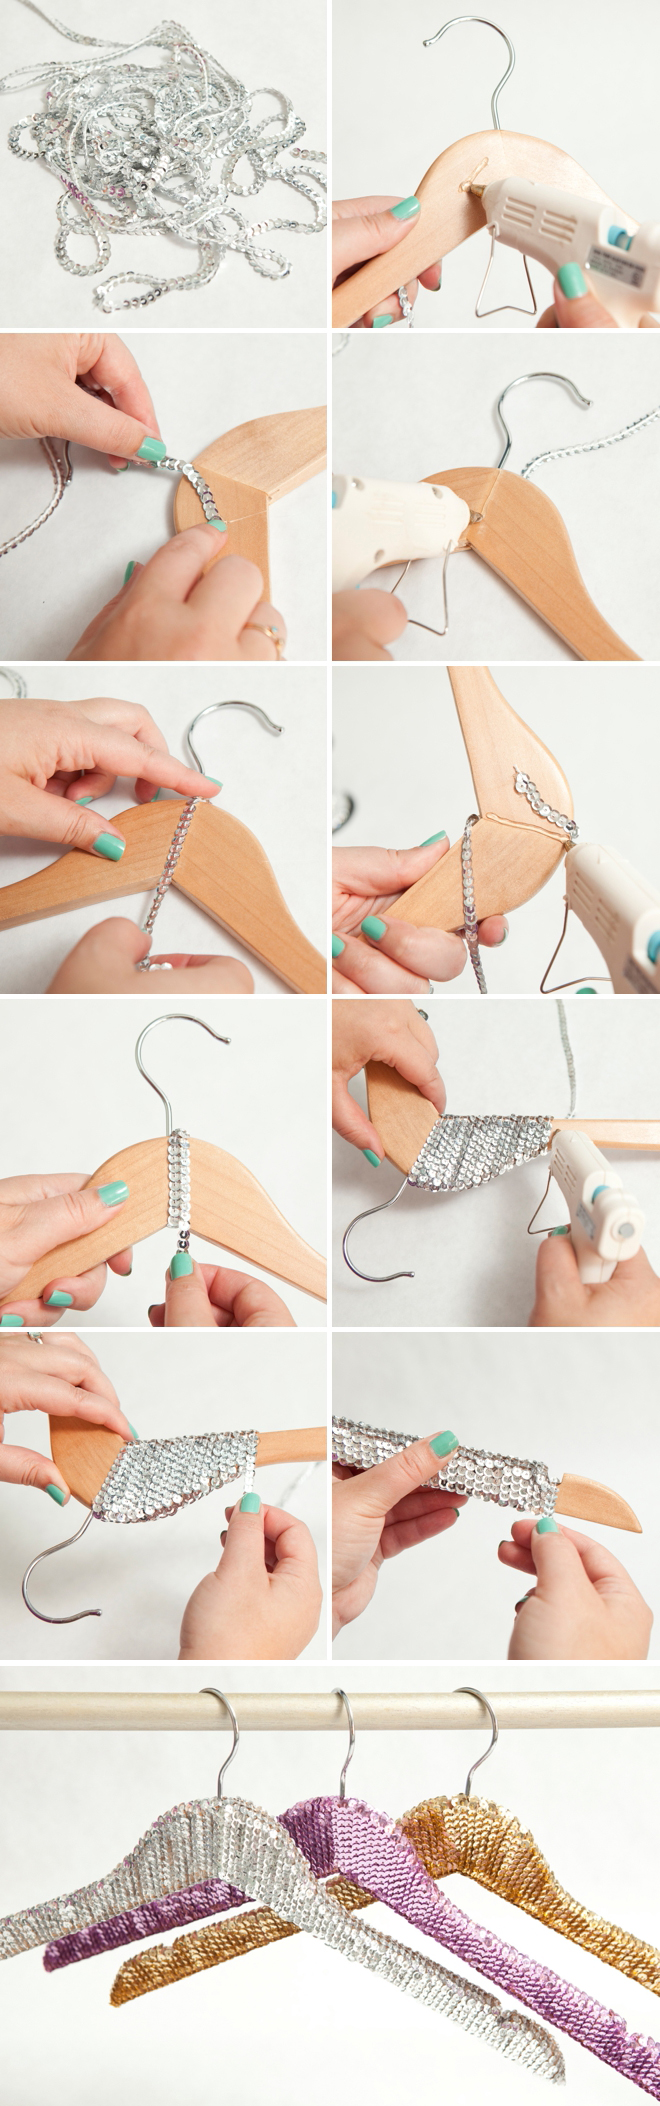
This project is fairly simple but it requires that you take your time, if you do they will look stunning! Start at the center of your hanger (or the end if it makes you feel more comfortable) and glue the end of the sequin trim at an angle, so that you can cover it up with subsequent wraps. From there, carefully glue and wrap, that’s all there is to it. Once you get to the strap indent, you can wrap in there as well. When you get to the end just wrap the sequins in a circle and glue to finish. Again, it’s simple but takes some time…
- Add a little hot glue and then wrap!
- Each wrap should have glue underneath of it.
- Use the hot glue gun on high heat.
- Don’t pull or fuss with hot glue strings, we have a solution for you!
- Try not to touch the hot glue or it will become matte, you can either cut excess glue away once it’s dry or reheat the glue by pressing the hot tip of your glue gun into it.
One hanger took me about 45 minutes, I was going slow and making sure each wrapped strand was fully glued down and secure. To me, hot glue is the only way to go – if you use a wet glue, the drying process will take too long and you won’t be able to touch previously wrapped areas as you are working. Hot glue isn’t my favorite adhesive but it’s perfect for this project.
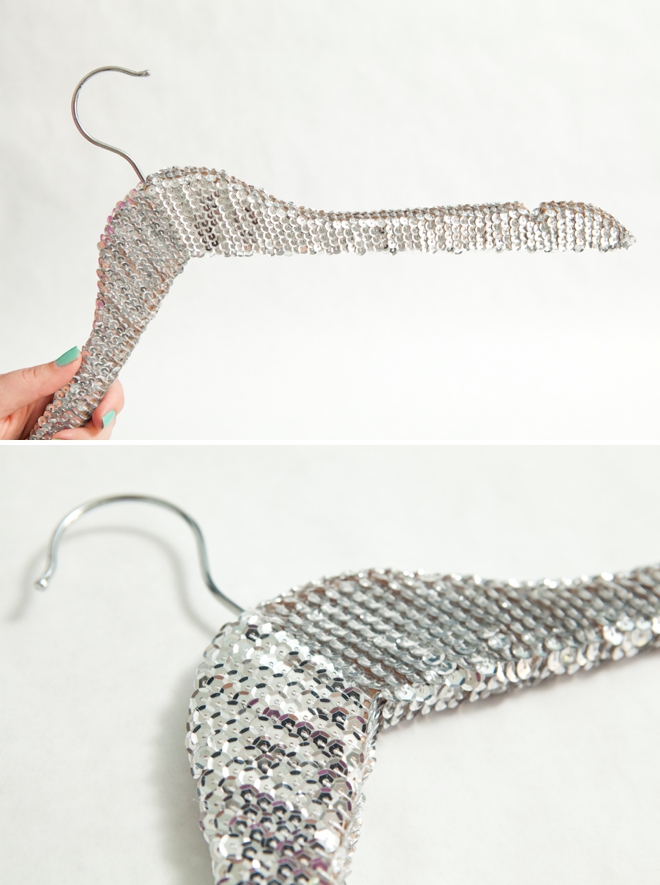
Toothbrush Tip!
After you wrap this hanger with all those sequins and hot glue, you are going to have tons of hot glue strings and mess. The best way that I found to clean this all up at once is to brush the surface with a dry toothbrush! The bristles work like a charm to free up any glue strings and will even alert you to areas that might need to be re-glued. Win-win!
Hanger Tips:
- Hot Glue + Wood Hangers work great!
- Hot Glue + Plastic Hangers aren’t a good idea, they could melt, not stick or peel off easily.
- If you want to use a fabric hanger you’ll need to use a fabric glue.
- Most wide sequin trims have some type of fabric on the back, you’ll need to test it out to see if the hot glue will hold it to your hanger, or if you’ll need to go with the fabric glue.
- Real wood hangers work best for items like wedding dresses, since they can handle the heavy load!
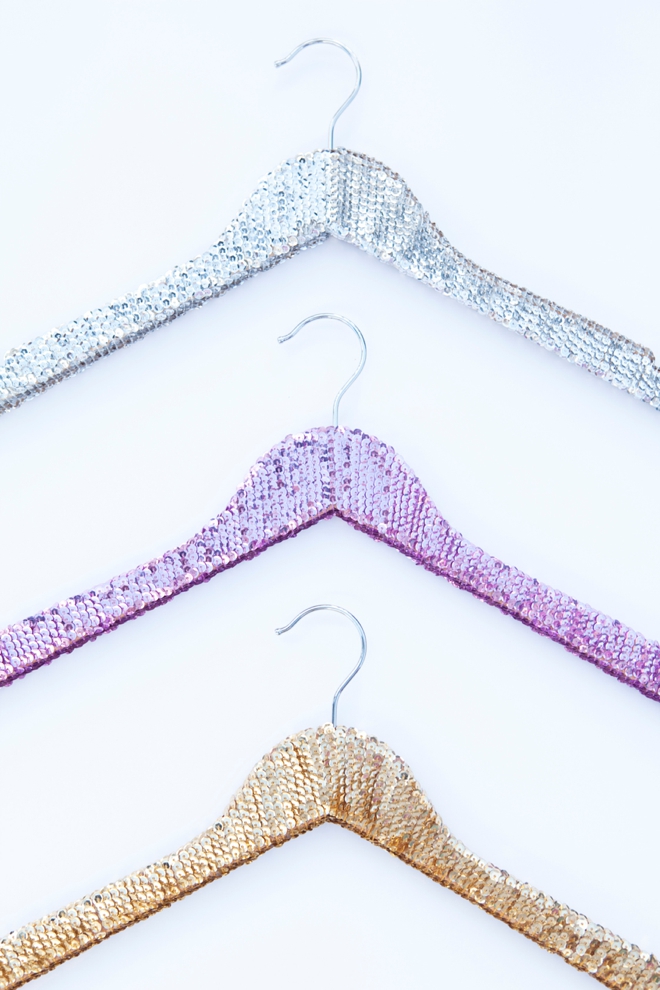
As the bride, you can make one for all your bridesmaids (and don’t forget about Mom!) or you can throw a craft party and invite everyone to make their own!

These are a wonderful addition to any closet and can be used for years to come; sequins make any outfit look extra fab – from pajamas to a wedding dress!
As with all our DIY tutorials, if you create one of our projects please send us a picture – We Love Seeing Your Creativity! If you use Instagram or Twitter please use the hashtag #SomethingTurquoiseDIY and it will show up on our Get Social page. Happy Crafting!
DIY Tutorial Credits
Photography: Something Turquoise Photography for SomethingTurquoise.com // DIY tutorial: Jen | Something Turquoise // wood hangers and PepperLonely sequin trim (pink, light gold and silver): Amazon // Martha Stewart Crafts Glue Gun: Michaels // nail polish: OPI – Withstands the Test of Thyme
Shop The Supplies:
Find the supplies you’ll need for this project from our affiliate links below:

Comments