
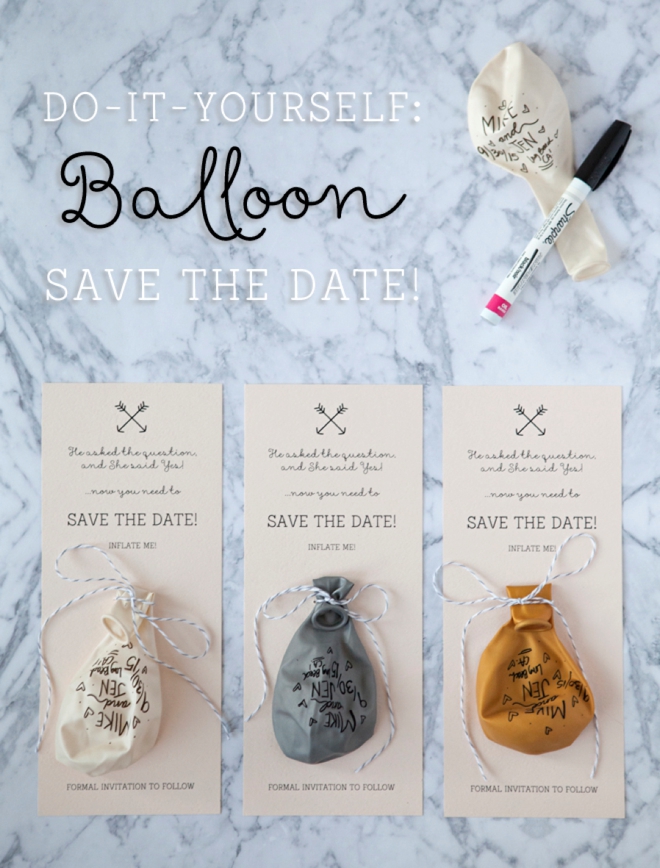
DIY | Sharpie Balloon Save The Date
I live for DIY Friday. Each and every Friday morning I get butterflies in my stomach just waiting to see what your reaction is to my project for the week… and I just know you are going to be head over heals for this one! I’m a fan of birthday cards and this year I’ve been sending out something very similar to this project, it’s actually what inspired this idea! For each birthday in my family I write a fun personalized message on a balloon and send the special wish on it’s way. Since everyone has been loving them I decided they would make a killer save the date idea that will cost less than half of having custom balloons printed! I’m also sharing a free printable design so that you can recreate this idea with ease. Yes, it will take some time and you might get super tired of writing the same message over and over – but it will totally be worth it because these Sharpie Balloon Save the Dates are beyond adorable!
This fabulous technique can of course be used for ANY type of special message you want! Thank you cards, birthday cards, bridal shower or baby shower invites… and so much more!

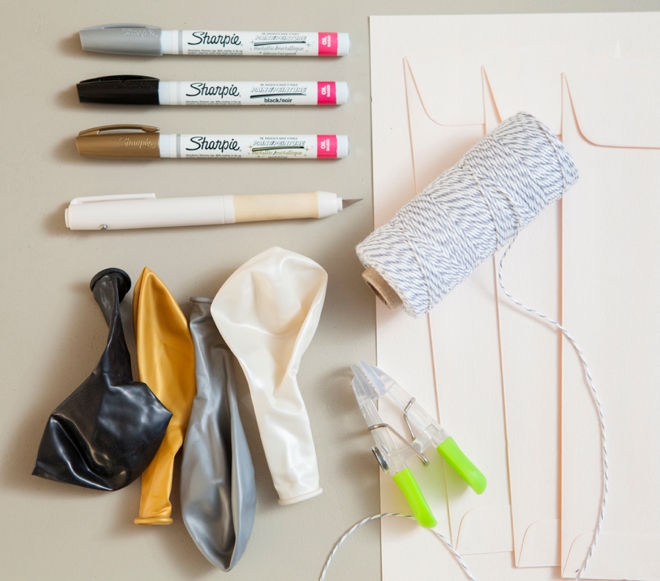
SUPPLIES:
- 8.5″ x 11″ cardstock
- #10 sized envelopes
- Balloons
- Sharpie Oil Paint Pens (not the regular pens!)
- Craft Knife
- Strong chip clip
- Twine
At the bottom of this post you will find links to all these items!
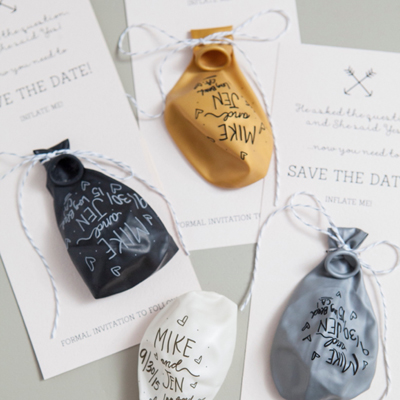
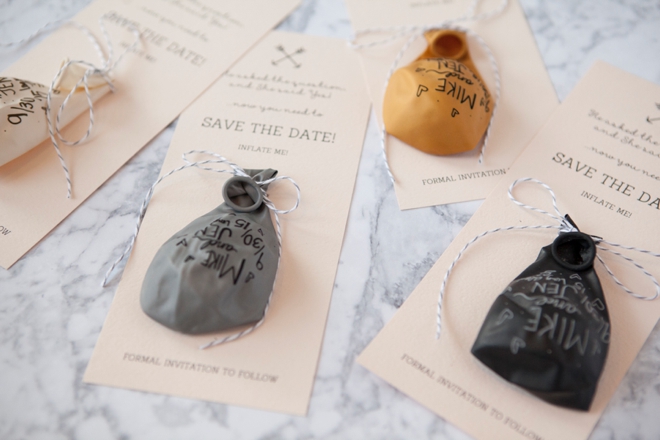
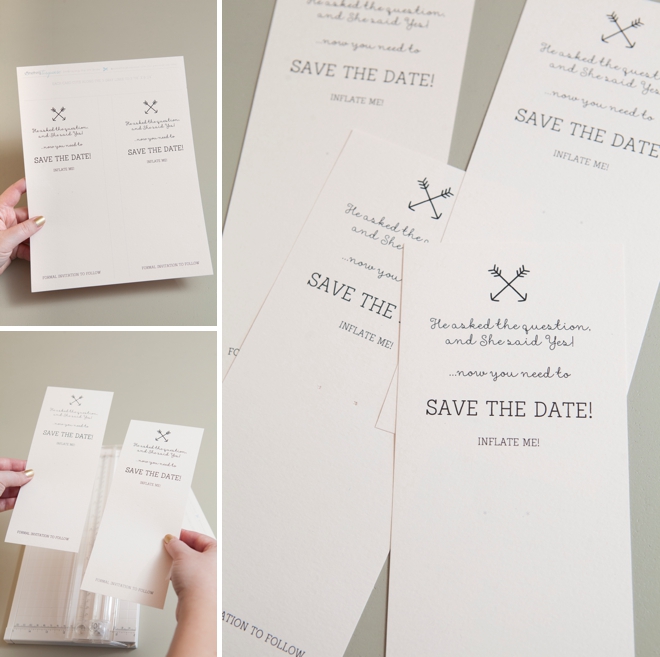
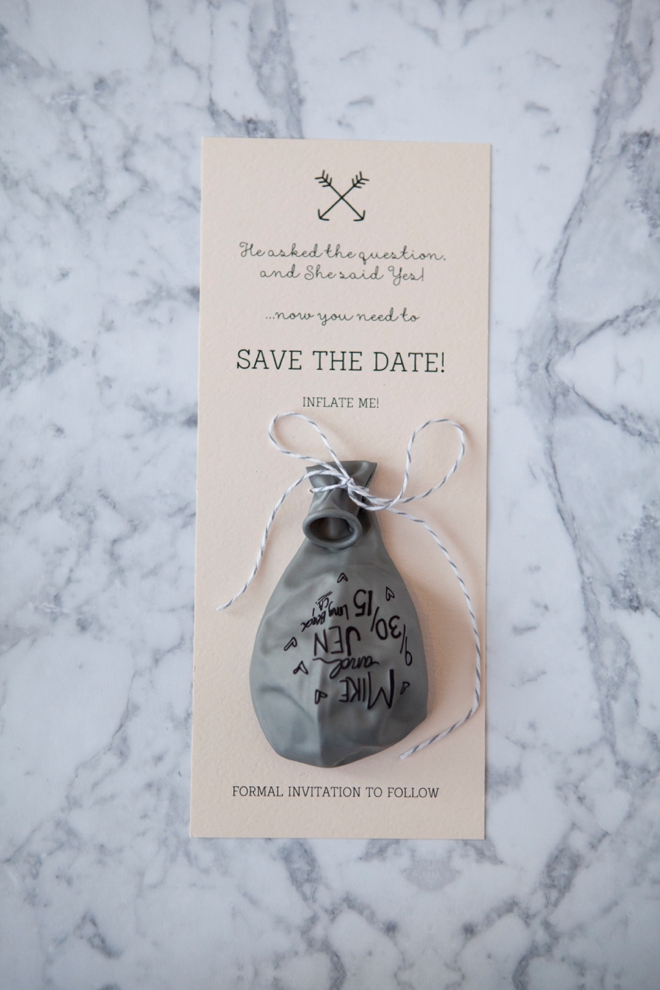
Download and print our FREE invitation design (available at the end of the post) onto 8.5″ x 11″ cardstock. I used coverweight paper from Paper-Source in Luxe Blush. Then cut them as the instructions reads; you’ll get two per sheet.
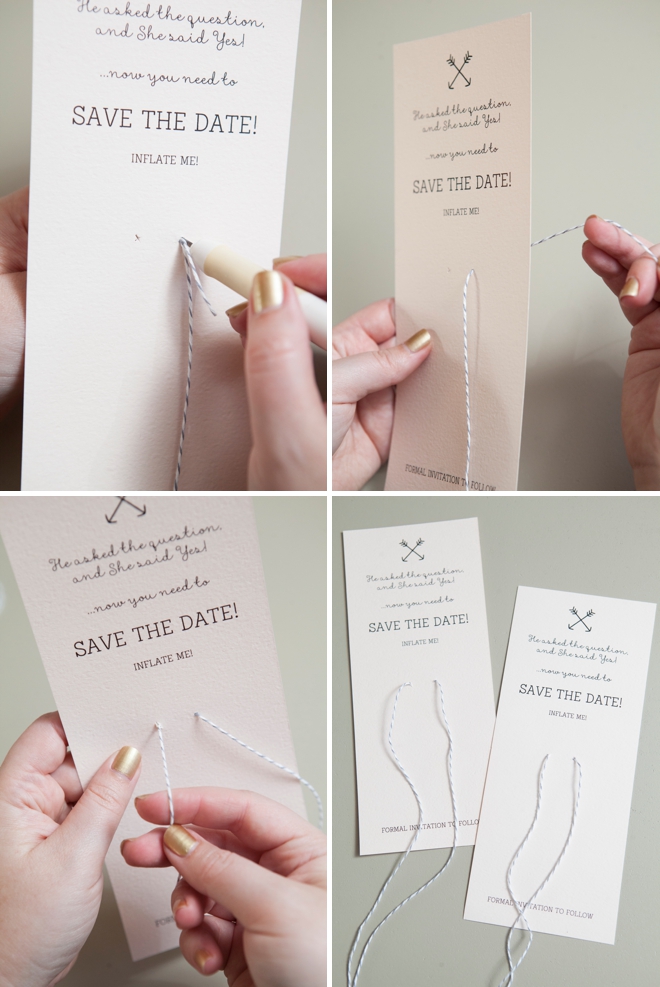
Using a craft knife, pierce holes on the stars that I’ve pre-marked for you.
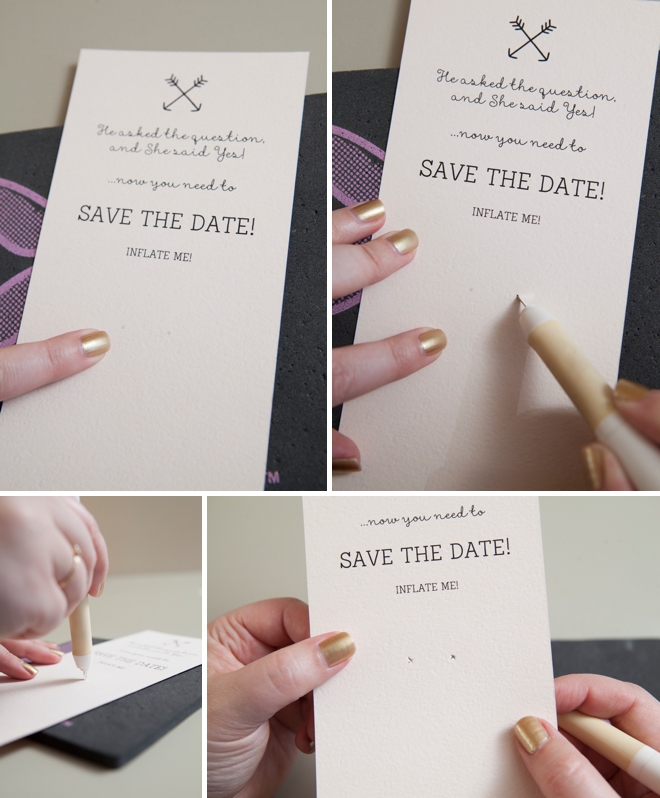
You’ll need 18″ of twine for each invitation.

Carefully thread the twine through the punched holes. It might help to press it through using your craft knife.
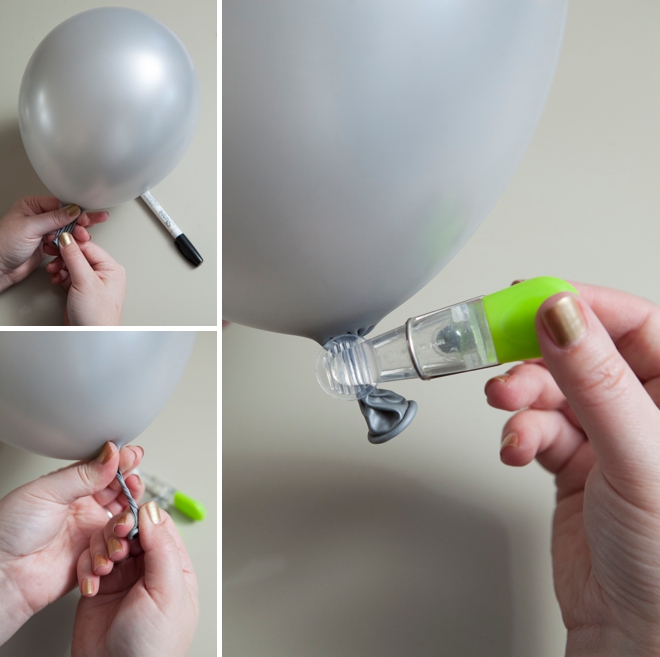
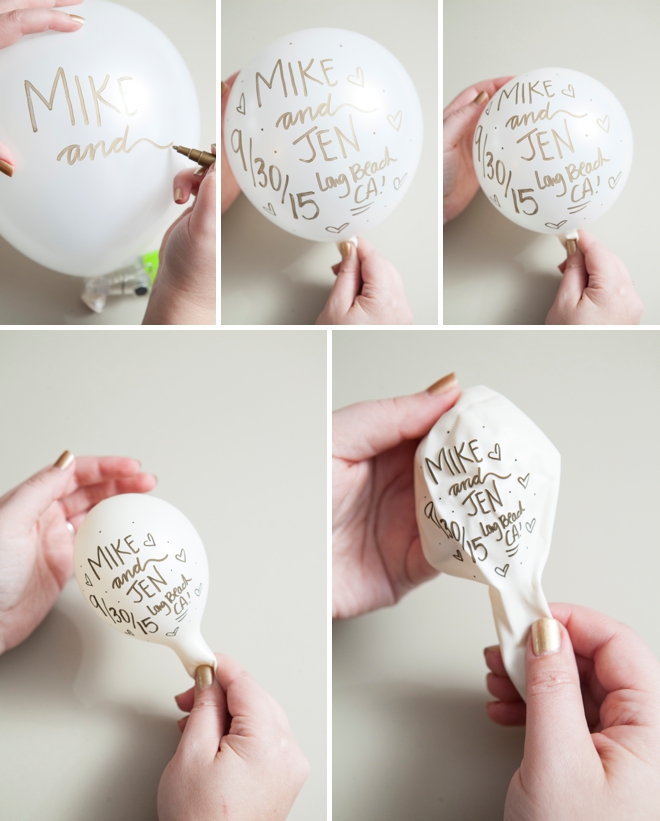
Writing On Your Balloon:
Blow up your balloon, twist the end and clip with a strong chip clip. If this is too much work and you feel comfortable, you can always just hold the end with one hand; your choice.
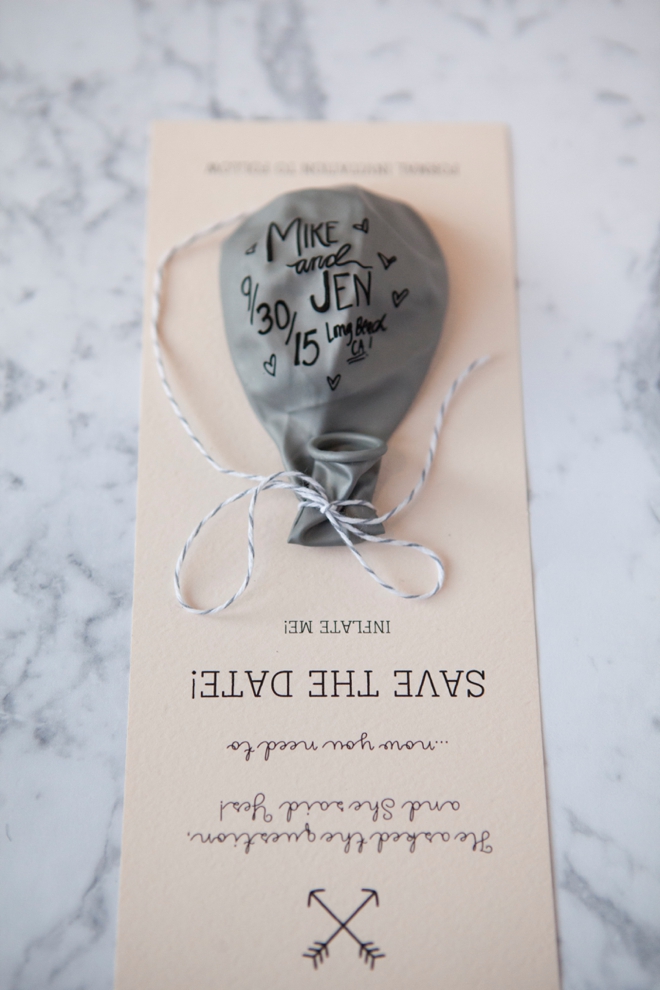
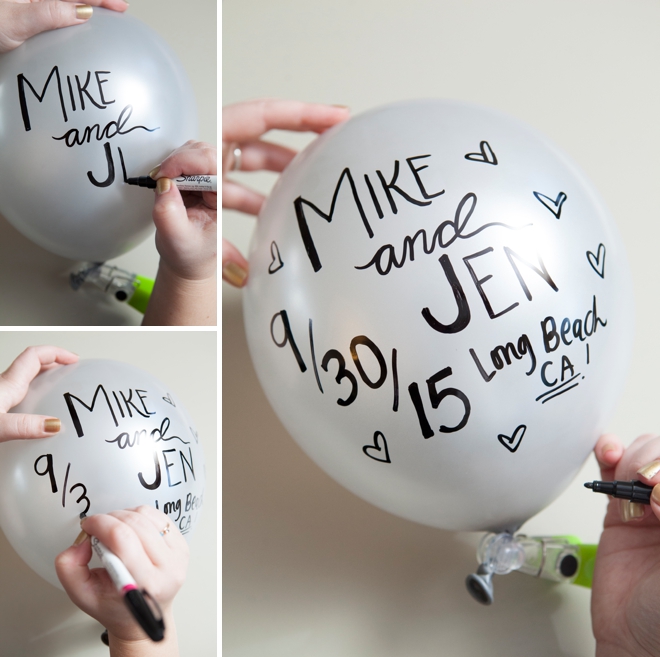
Write your sweet “Save the Date” message! Things to include would be:
- Your names
- The date
- The location
Practice on a sheet of paper until you get your design to where you are happy with it. Make sure your writing is dry before you deflate. Use only a Sharpie Oil Paint Pen, regular Sharpies won’t hold up to handling!
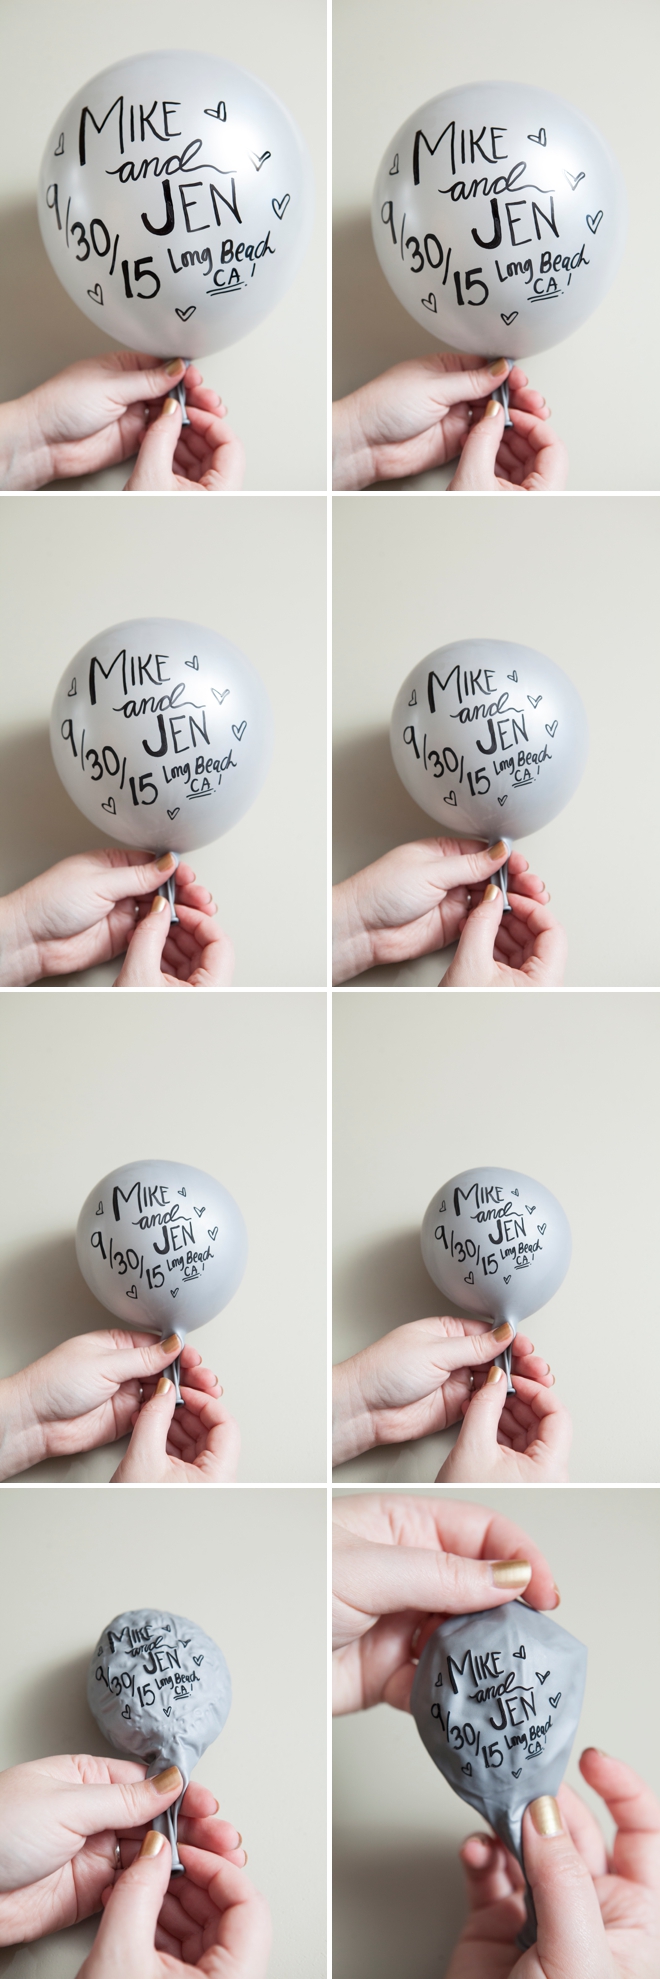
Deflate Your Balloon
This is where the magic happens!!! Your simple Sharpie message turns into what looks like a custom, printed balloon message! It’s seriously amazing!!!
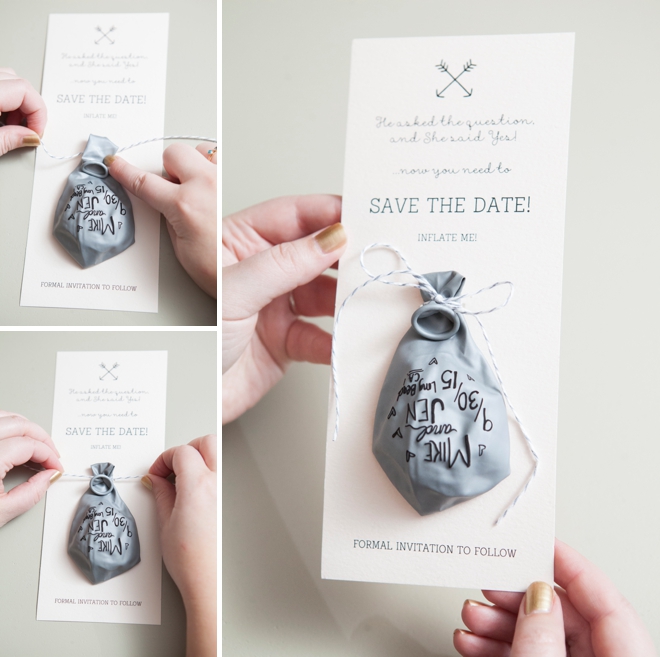
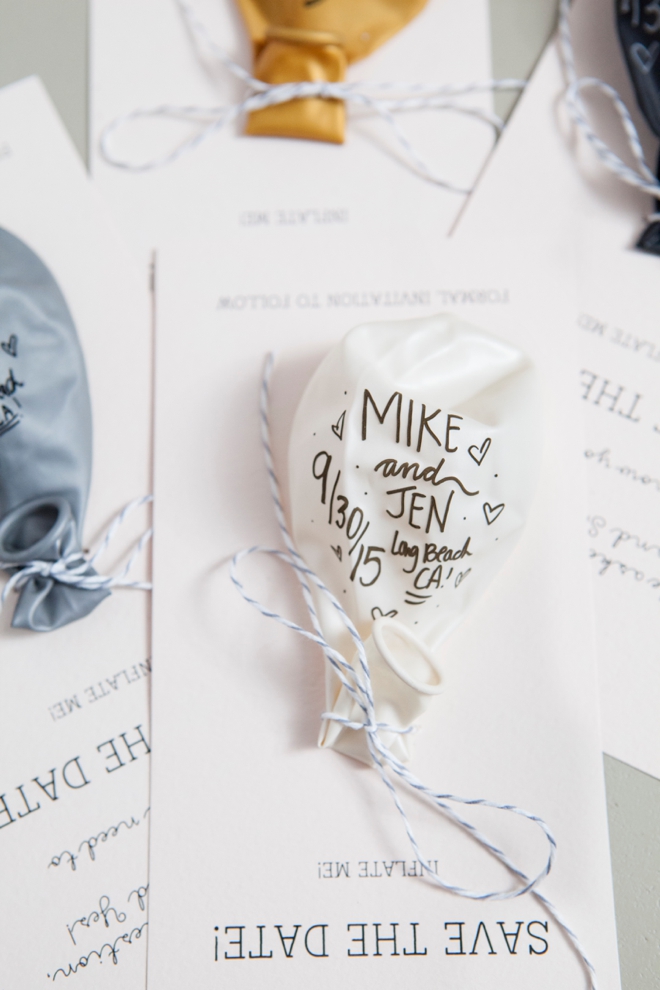
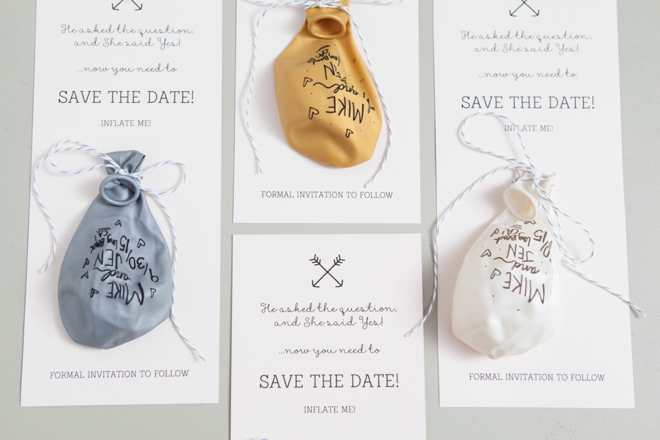
Envelope Stuffing
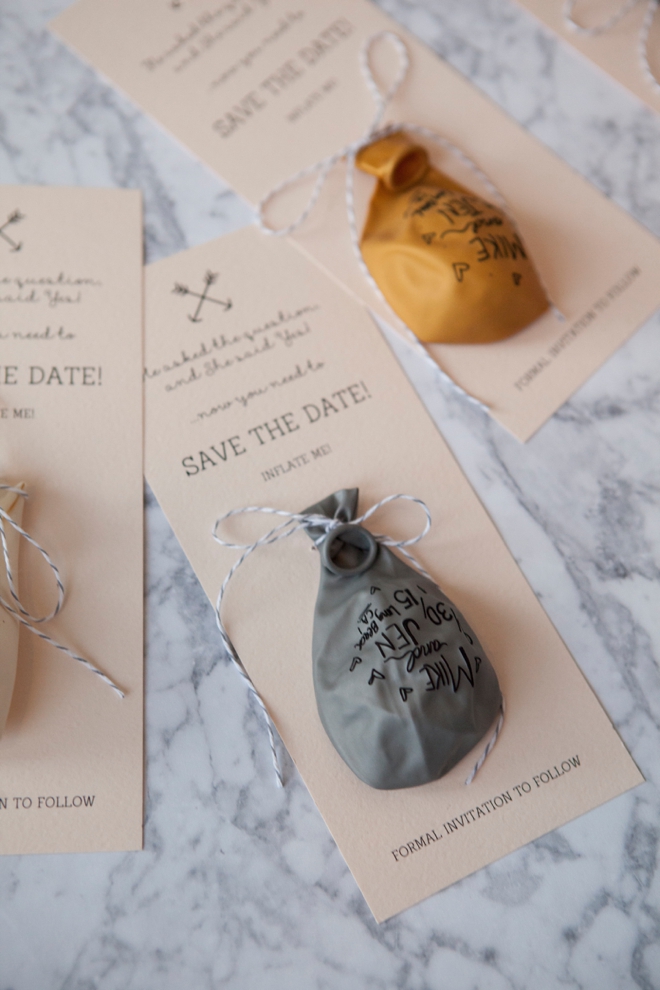
Now simply tie the balloon onto your Save the Date card! It’s best to wait 72 hours after drawing on the balloon to place them into their envelopes. As I said above, I’ve been sending these out as birthday cards for my family and I tested them a bunch. 72 hours seemed to be the sweet spot for the balloons being able to touch and rub against the inside of the envelope without any smudging. I even mailed them to myself to check!
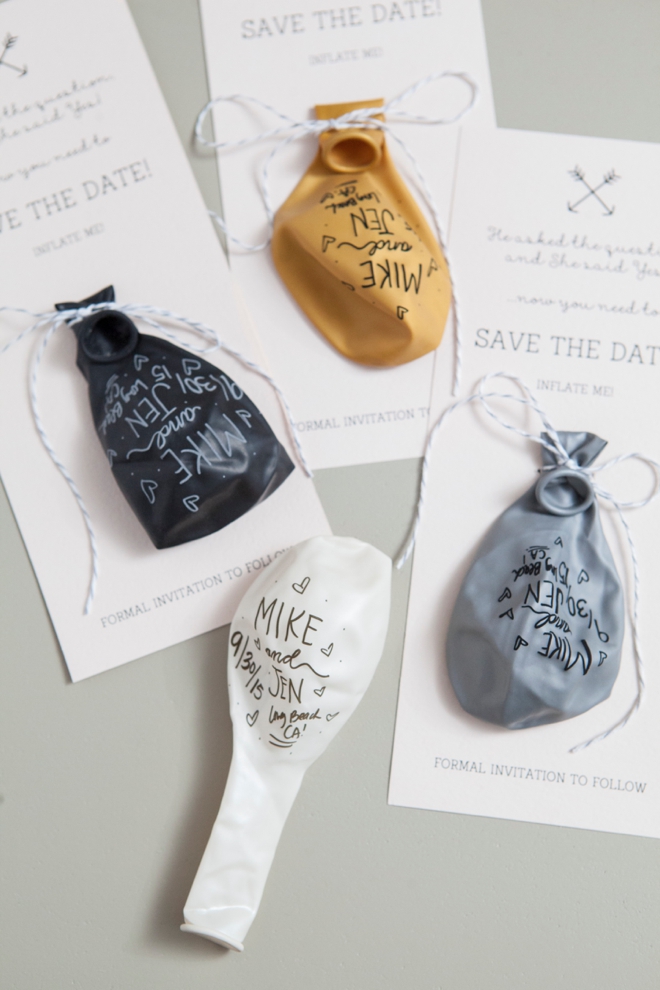
Different Sharpie colors will look different combined with the color of the balloon and deflating. Here the gold looks gold while inflated but more like khaki once deflated. Keep in mind that most colors usually get darker as they deflate.
Got a large balloon?
If your balloon stays inflated for too long, once deflated it might be larger than it was to begin with. To get it to return to it’s original size simply blow it up again slightly and deflate again. It’s weird but I promise it totally works!
Inflate Me!
If your guests “choose” to inflate these darling balloons (even though they technically won’t have to in order to read the information) keep in mind the paint doesn’t look as fabulous as it did when you first wrote it. Some will look great and some will crack a bit. I’ve tried to figure out if it’s the balloon, the color, the dry time, etc. and I can’t nail it down. Some inflate beautifully and some just don’t. They all still look fantastic after they are deflated again and no matter what you can easily still read the information.
Mailing Cost
Just exactly as these are, they have been costing me $.70 to mail. However, if you use different paper, ribbon and etc. it might be different. I am not recommending that you take that $.70 to the bank. Please confirm the cost to mail at your post office with a finished version of your invitation. Also, as time goes on and this post remains – postage will go up!
Not into the Sharpie idea? You can still use this free printable invitation with custom printed balloons!

As with all our DIY tutorials, if you create one of our projects please send us a picture – We Love Seeing Your Creativity! If you use Instagram or Twitter please use the hashtag #SomethingTurquoiseDIY and it will show up on our Get Social page. Happy Crafting!
DIY Tutorial Credits
Photography: Something Turquoise Photography for SomethingTurquoise.com // DIY tutorial: Jen | Something Turquoise // Paper and envelopes in Luxe Blush and metallic balloons: Paper-Source // Sharpies and twine: Amazon
Shop The Supplies:
Find the supplies you’ll need for this project from our affiliate links below:

Comments