
DIY | Embellished Invitations with Wedding Paper Divas
-Sponsored Post-
Due to the extreme success of the last two {one – two} DIY posts that we shared on how to easily embellish “store bought” wedding invitations from Wedding Paper Divas – we knew we had to share another! They have a combined total of 115,000+ repins on Pinterest, so it’s safe to say that you all enjoyed them. Today we have 3 new simple techniques for you; hand-glittering, pearl stickering, and burlap mounting! These ideas make it easy to take your wedding invitations to the next level… happy crafting!
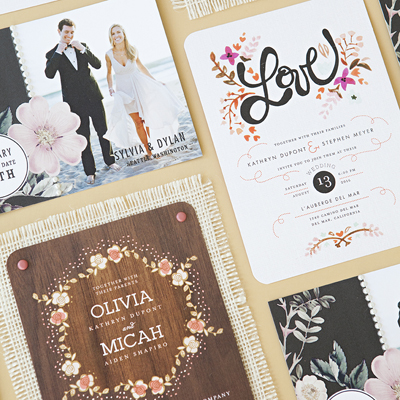
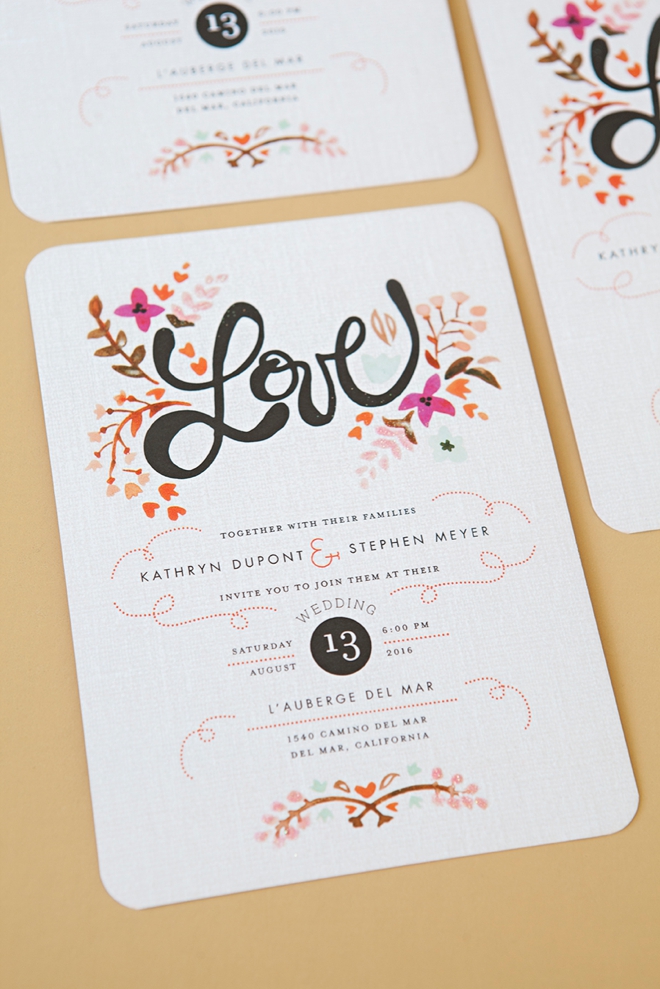
Design: Just Lovely Wedding Invitation in Blaze
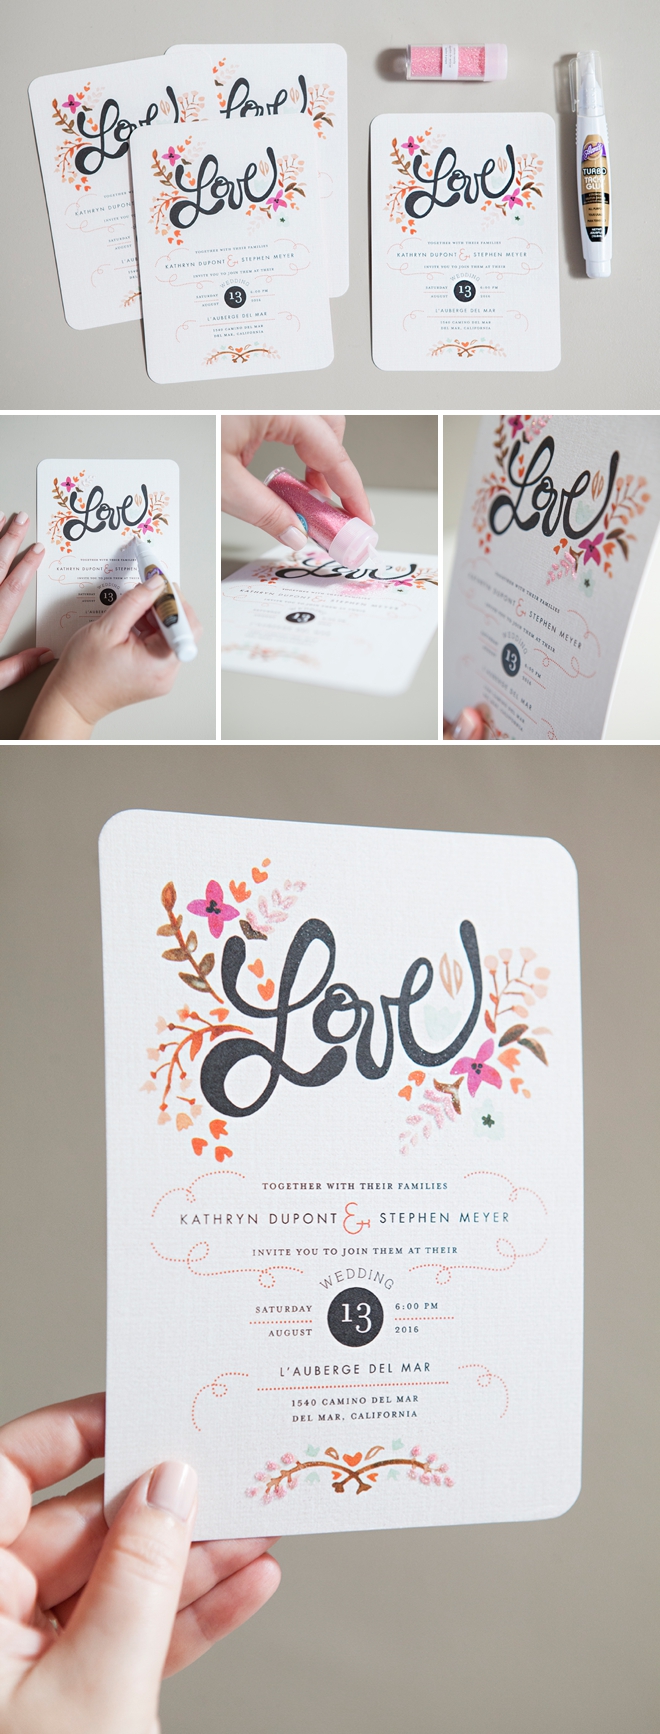
Technique #1 – Glitter
This is a terrific way to add sparkle and dimension to existing beautiful designs. Simply choose one or two elements that you would like to glitter. Try to match your shade of glitter to the design if you can. Add a little glue to the area and then shake the glitter over the wet glue. Make sure the glue is entirely covered with glitter and shake off the excess. Let dry on a flat surface.
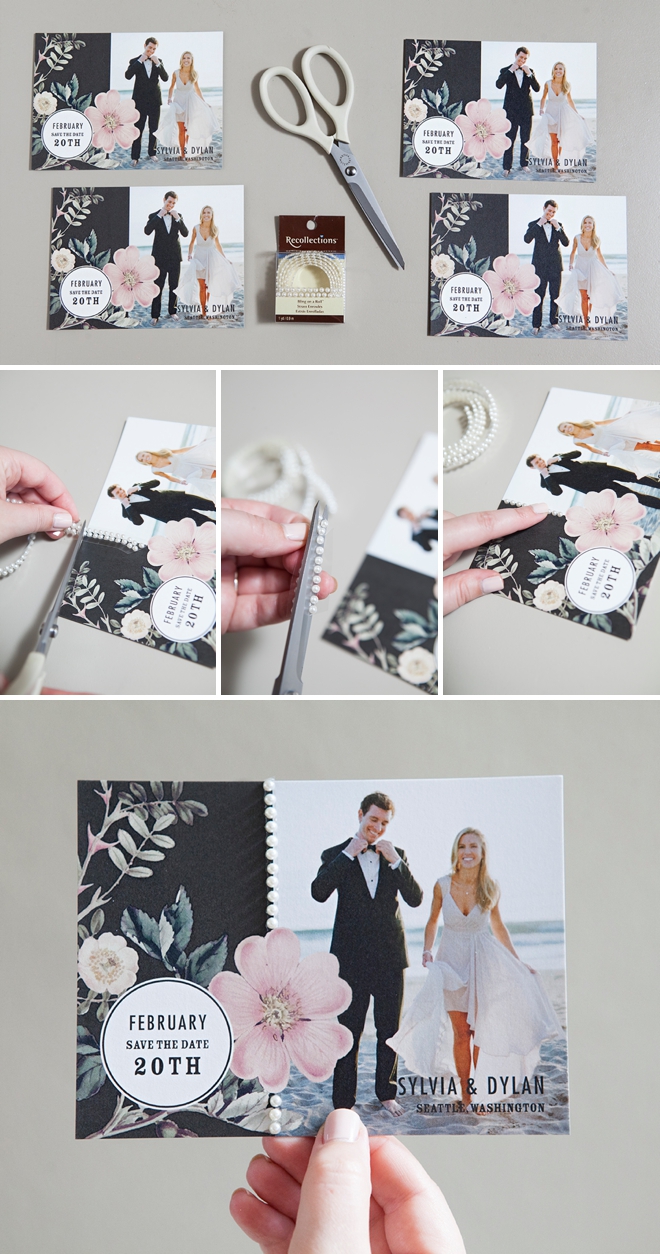
Design: Night Blossoms Save the Date in Black
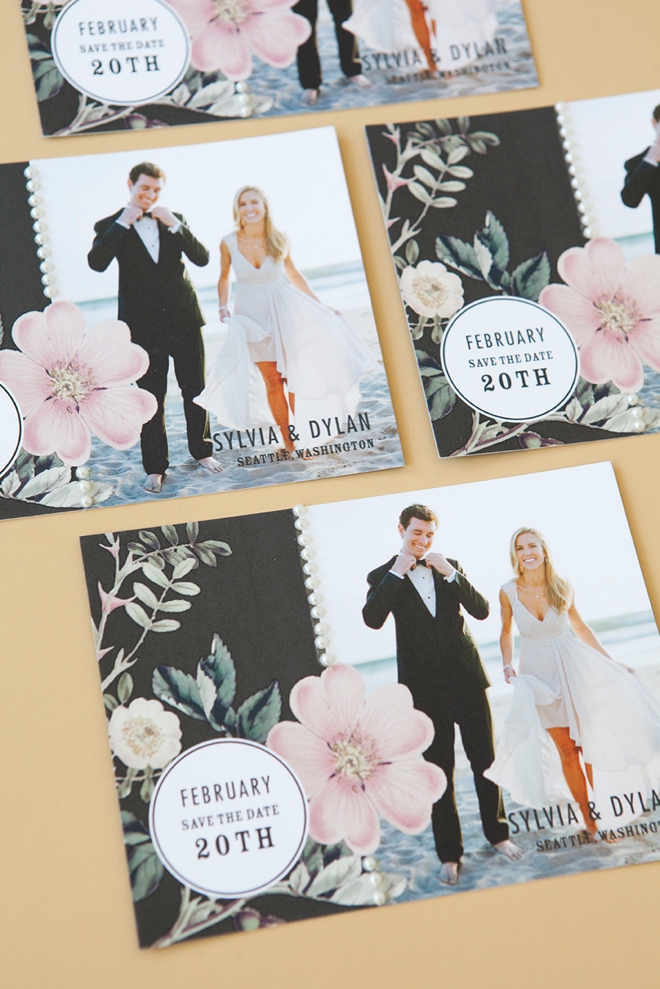
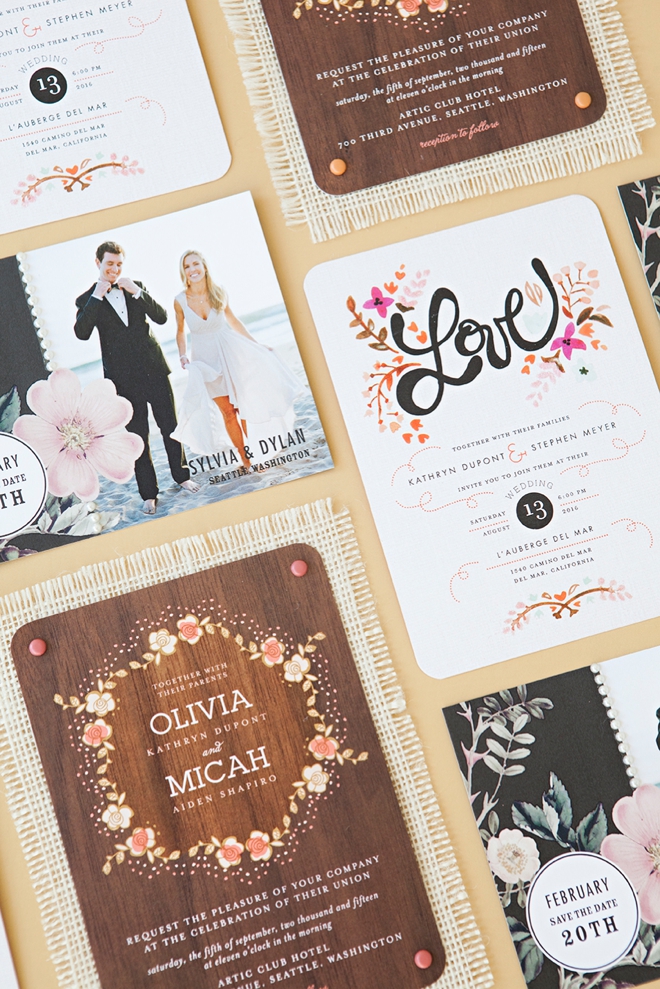
Technique #2 – Bling on a Roll
Using any type of ‘bling on a roll’ – ours happens to be pearls, cut strips and add to line breaks in your invitation design. See how we placed the pearls along the edge of the black design and the picture… almost like the pearls were supposed to be there.
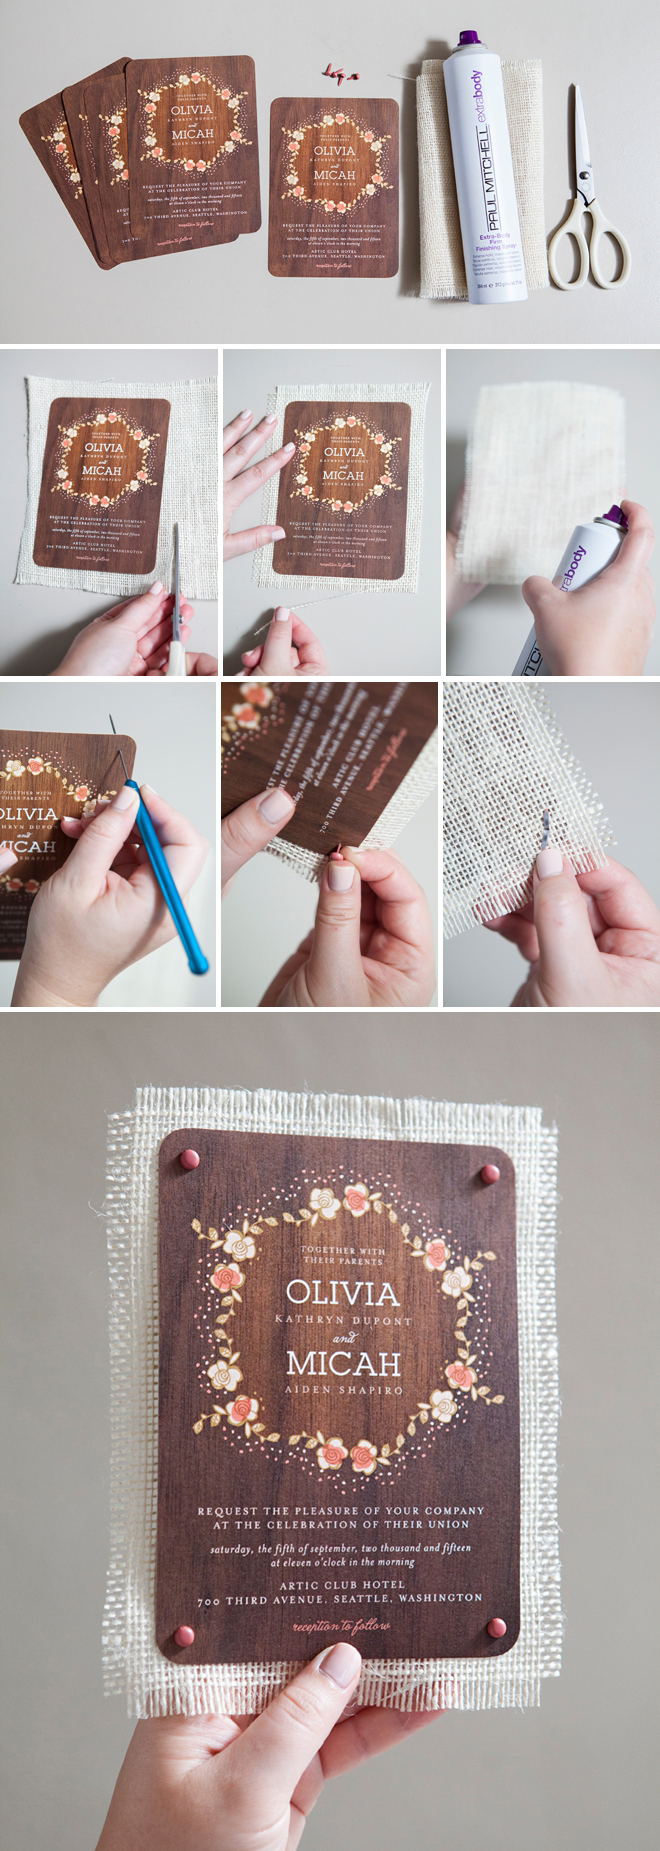
Design: Retro Wreath Wedding Invitation in Sorbet

Technique #3 – Burlap
Our favorite of all three techniques! Since everyone is crazy about burlap, take your rustic wedding invitation and mount it on a piece! Cut pieces of burlap that are 1″ larger than the height and the width of your invitation. Pull three strands of burlap away from each side to get the frayed look. Spray a coat of strong hairspray on each side of the burlap to easily keep it from fraying. Pierce each corner of your invitation and place a brad through the invitation and burlap. Just a few steps to a achieve this stand-out design. Keep in mind you will need a larger envelope for mailing!
CRAFTERS TIP // Cutting along one woven thread of burlap will always ensure a straight cut and less fraying – like you were taught in school, stay within the lines.
As with all our DIY tutorials, if you create one of our projects please send us a picture – We Love Seeing Your Creativity! If you use Instagram or Twitter please use the hashtag #SomethingTurquoiseDIY and it will show up on our Get Social page. Happy Crafting!
DIY Tutorial Credits
Photography: Something Turquoise Photography // DIY tutorial: Jen | Something Turquoise // sponsored by: Wedding Paper Divas (invitations: Night Blossoms Save the Date, Just Lovely Invitation, Retro Wreath Woodgrain Invitation) // white burlap: Jo-Ann // colored brads, pearl ‘bling on a roll’, Turbo Tacky Glue, and Martha Stewart Crafts glitter in Cotton Candy: Michaels // nail polish: OPI – Mimosas for Mr and Mrs![]()


Comments