
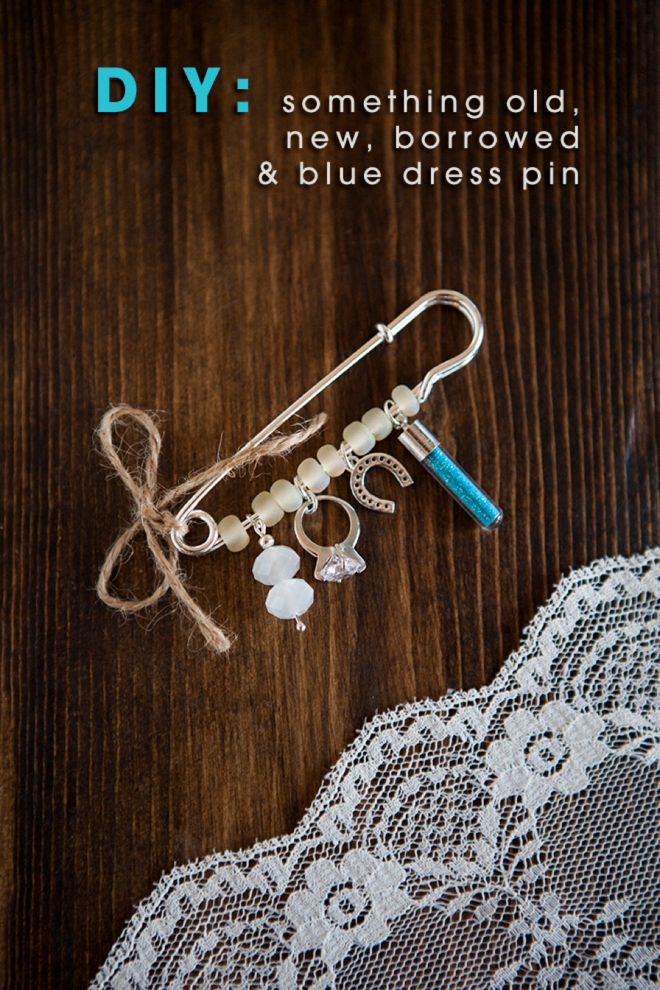
DIY | Something Old, New, Borrowed + Blue Pin
My tiny obsession with the “something old, something new, something borrowed and something blue” tradition was the ultimate inspiration for the name of this blog. You see, my “something blue” wasn’t blue at all – it was turquoise because it’s my favorite color. Hence the name Something Turquoise. I absolutely love hearing everyones interesting stories behind all of their special items. Did you know that we ask each bride of every wedding we feature, what her items were? Such great stories! Today I wanted to share a fun little idea for a kilt pin full of special little trinkets that you can pin under your wedding dress. I have a few ideas for you below, but I am sure that my simple ideas will only inspire great ones in you.
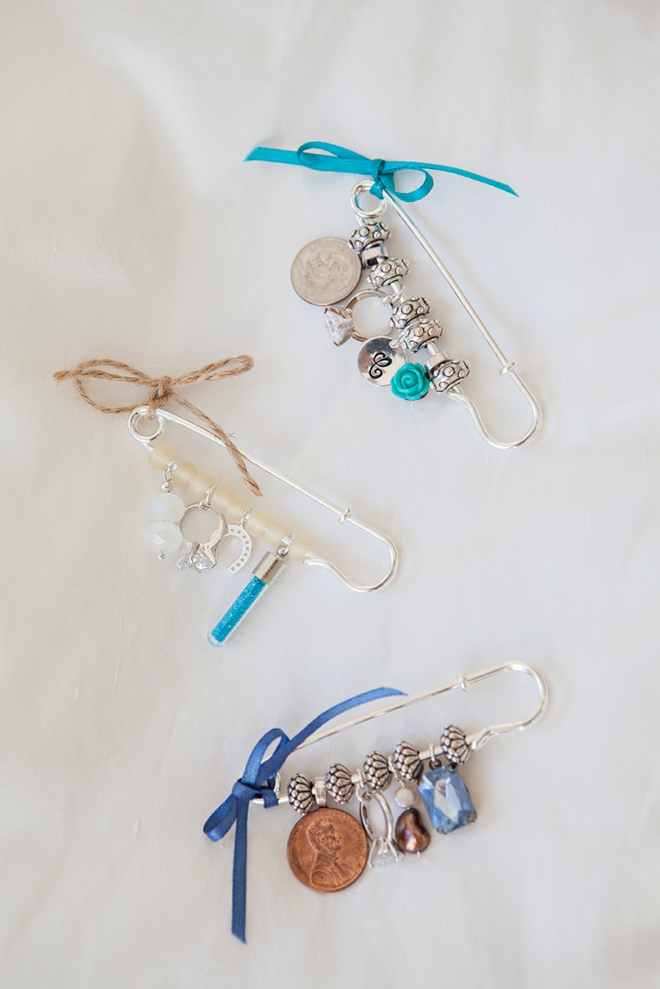
We have three different styles for you…
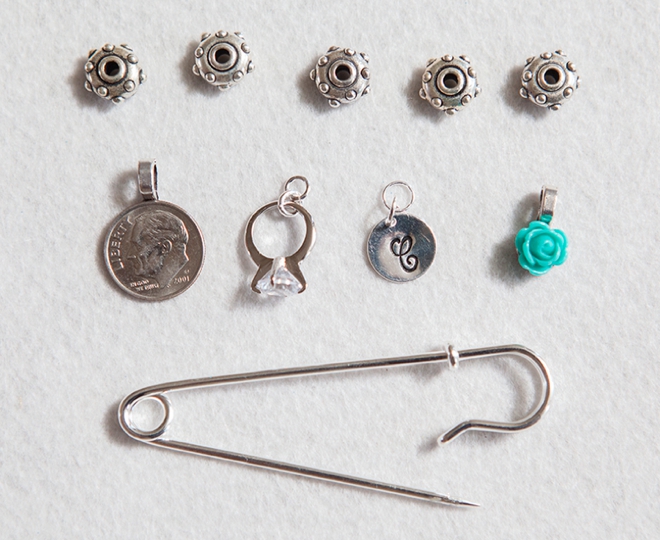
SUPPLIES: (will depend on your personal project)
- 3″ silver kilt pins
- jewelry pliers
- glitter (Martha Stewart Crafts, blueberry slush)
- krazy glue
- E600 glue
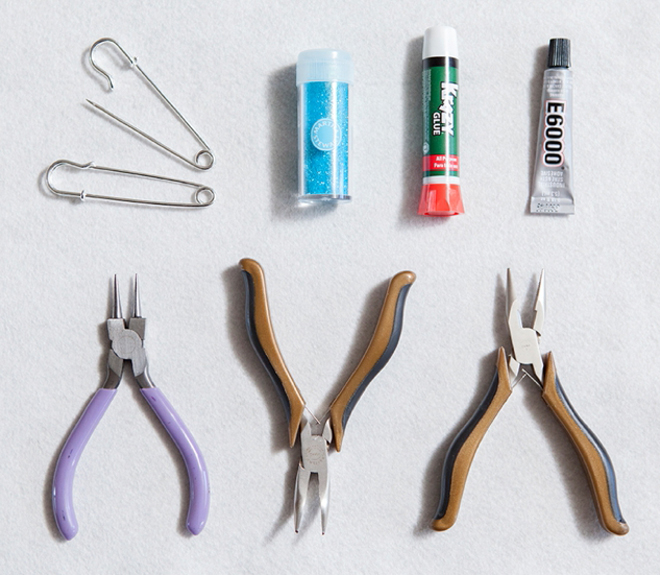
BEAD OPTIONS: (will depend on your project)
- open jump rings
- large hole spacer beads
- old, new, borrowed and blue trinkets!
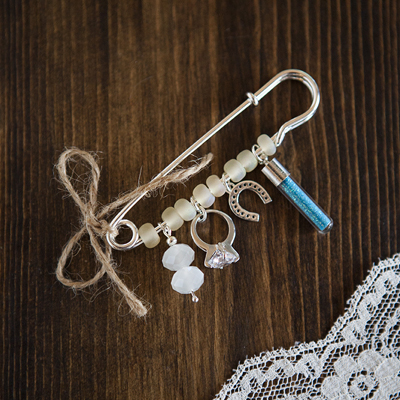
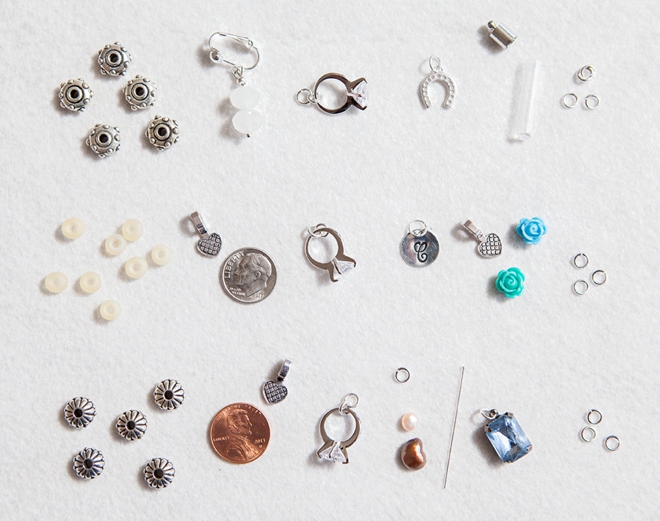
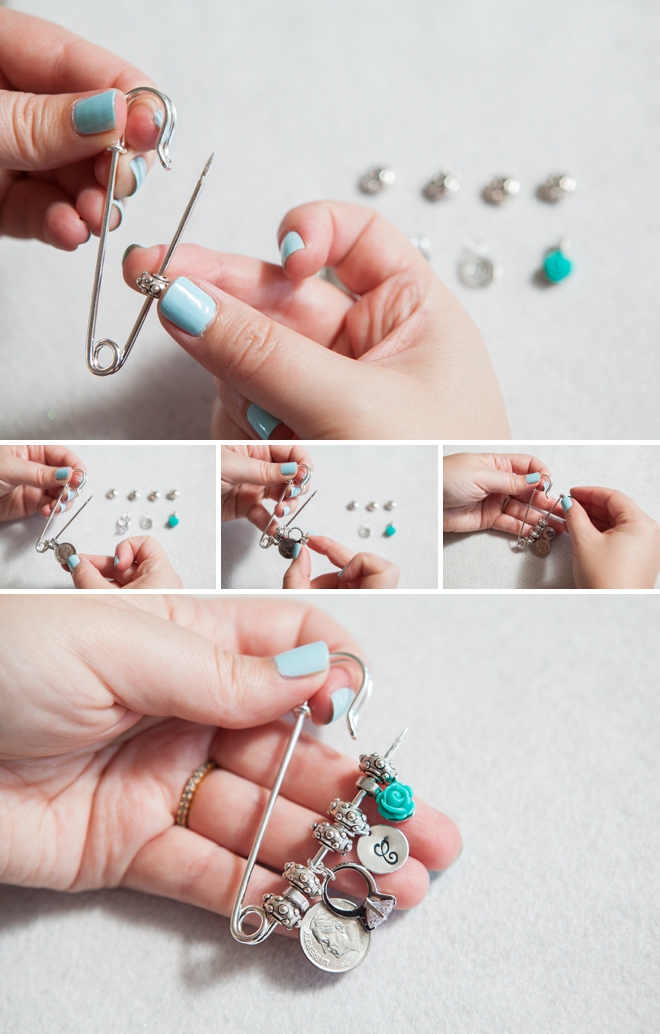
Old ideas: penny or dime from the year you first met, grandmas earring, old charm
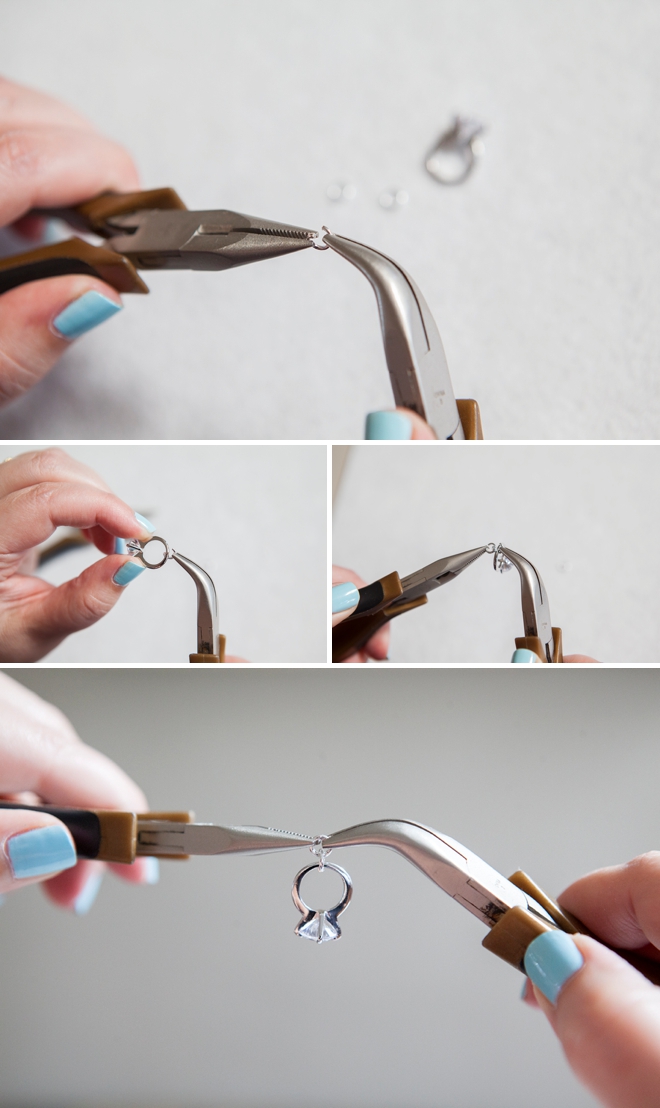
New: darling cubic zirconia engagement ring charm!
Borrowed: initial from your soon-to-be last name, pearls from the ocean, luck
Blue: flower charm, glass stone, vial of glitter
***All the items in this picture are credited at the bottom of the post!
Below we are sharing a few different jewelry making techniques so that no matter what style charm pin you choose to make – we’ve got you covered.
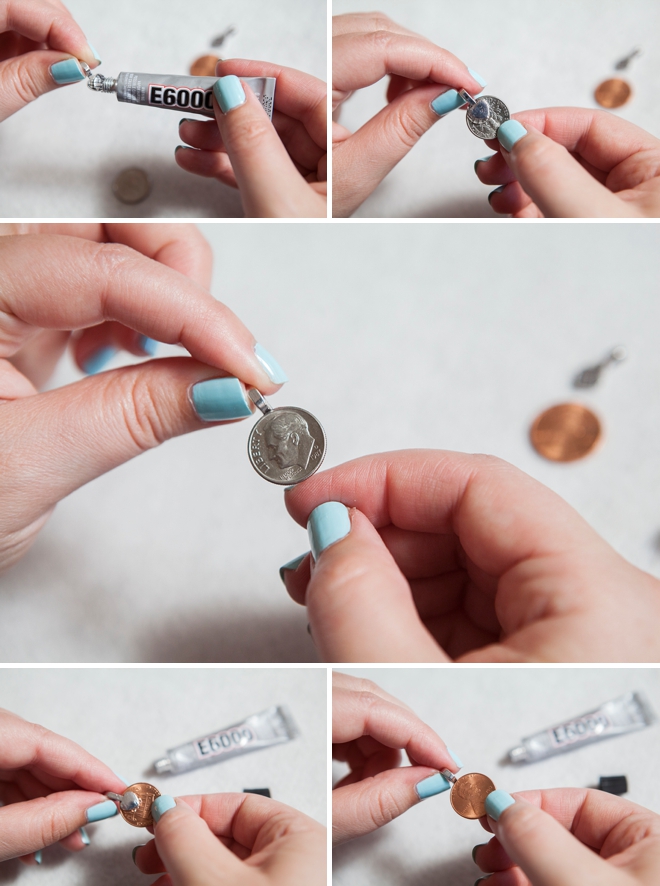
Old Coins. So the idea here is that you find a dime, nickel, or penny from the year that you and your fiancè first met! Awwweeee…. using a strong glue like E6000, glue the coin to a flat bail so that you can add it to your kilt pin!
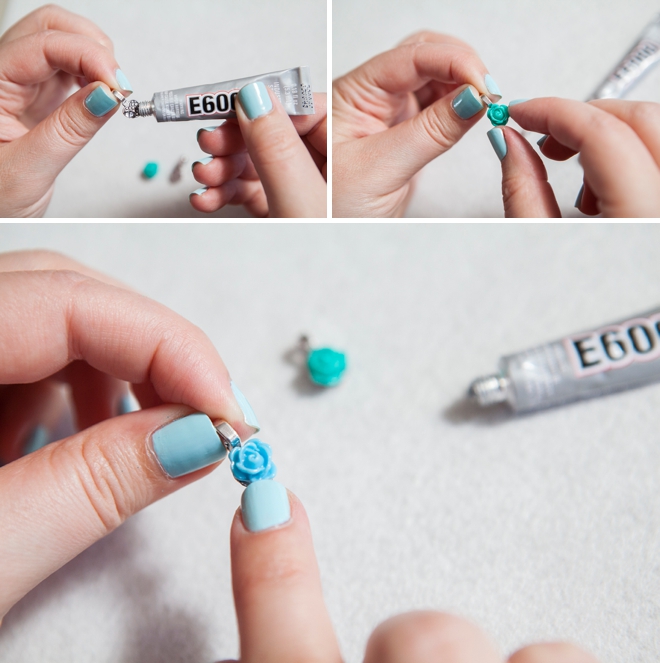
Flower Child. If you want to make a cute little flower charm like this your “something blue”, you’ll need to glue it to a flat jewelry bail with a super strong glue like E6000. Just like the coin above. I made one that was blue and one that was turquoise!
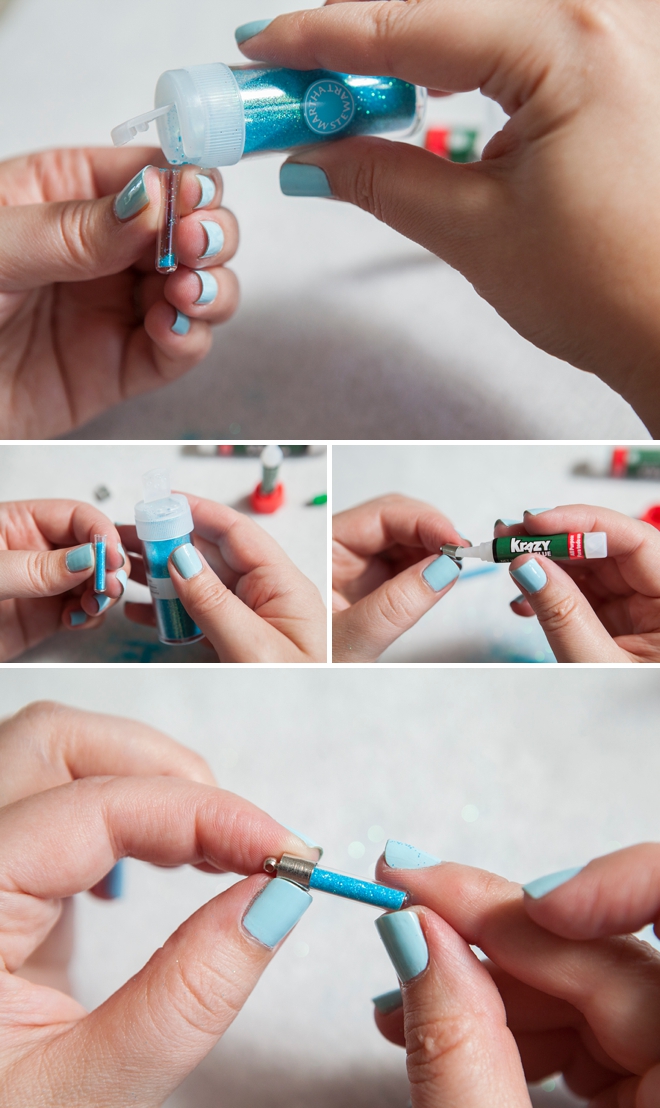
Ohh the vial of glitter. I know you are obsessed!!! Fill with glitter, add a tiny bit of Krazy Glue to the silver top and glue the top and glass pieces together. Make sure to let it dry on a flat surface so the glitter doesn’t slide into the glue and vice versa.
***beyond this project a vial of your favorite glitter would be such a fun necklace!
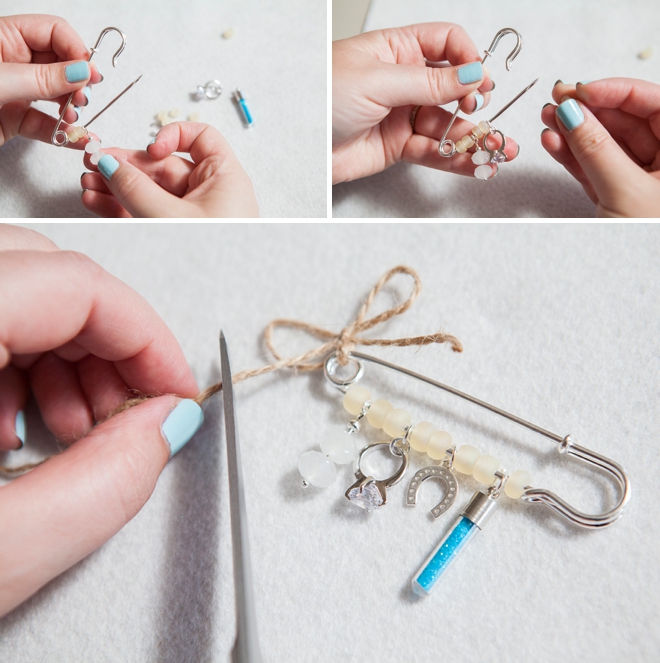
Adding jump rings. Many of your different charms will need 1 or 2 open jump rings (circle ring that isn’t soldered closed) added to extend the charms or make them easily attach to the kilt pin. Open them up with two pliers, add to your charm and close.
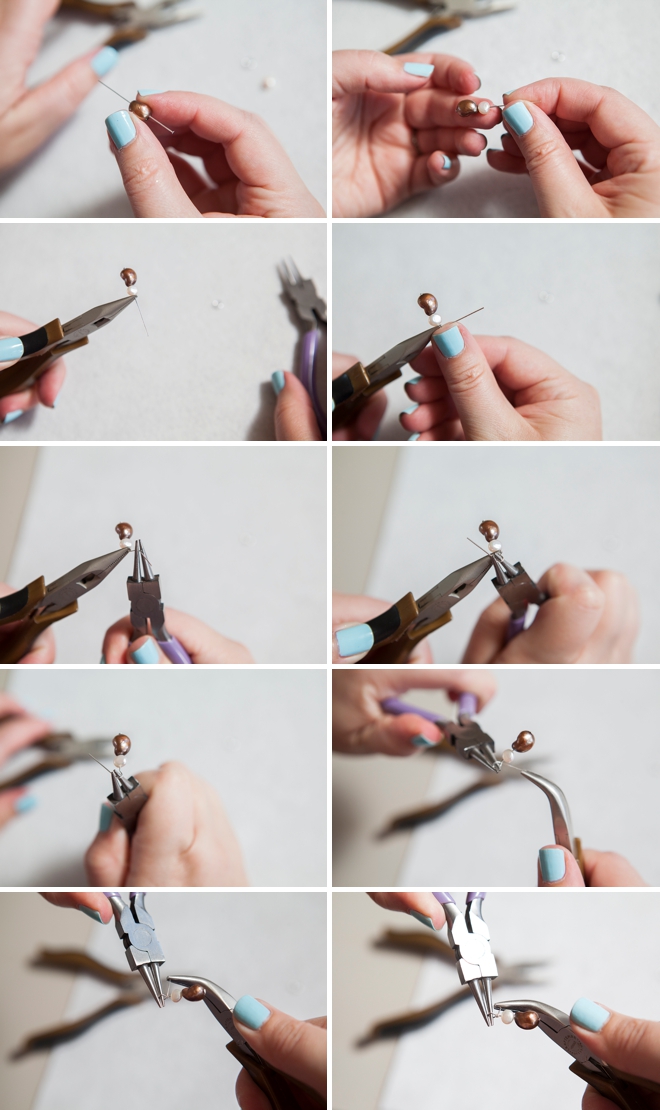
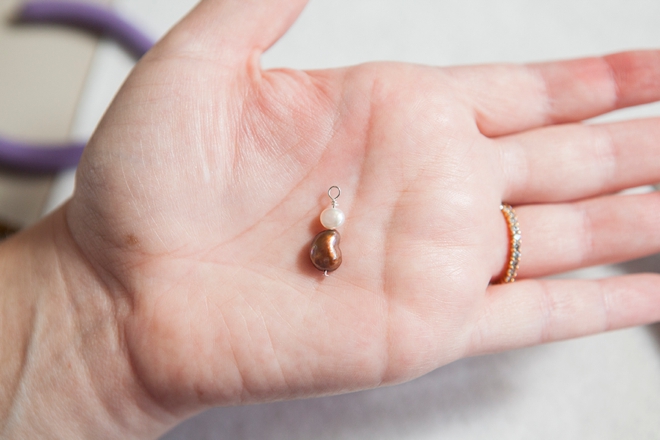
Wire wrap jewelry. I had loose pearls and I needed to make a charm out of them. To do so you will need 1 head pin, regular pliers and round nose pliers. Add your beads to the head pin. Hold at the top with a pair of pliers and push the head pin off to the side at a 90 degree angle. Grab the head pin with the round nose pliers and roll back towards yourself, creating a loop. Switch the pliers – hold the loop with the round nose and the end with the regular pair. Grab the end and wrap the head pin around itself. Cut excess wire. This wrap technique creates a very strong charm and is the basis for all jewelry making.
Deconstruct an earring. Here I have one of my grandmothers earrings, which will be a “something old”. It’s really easy to pull apart most earrings, simply look for an opening in the metal and pull apart with a pair of pliers to remove the beads. You might have to add a jump ring to make it work on the kilt pin.

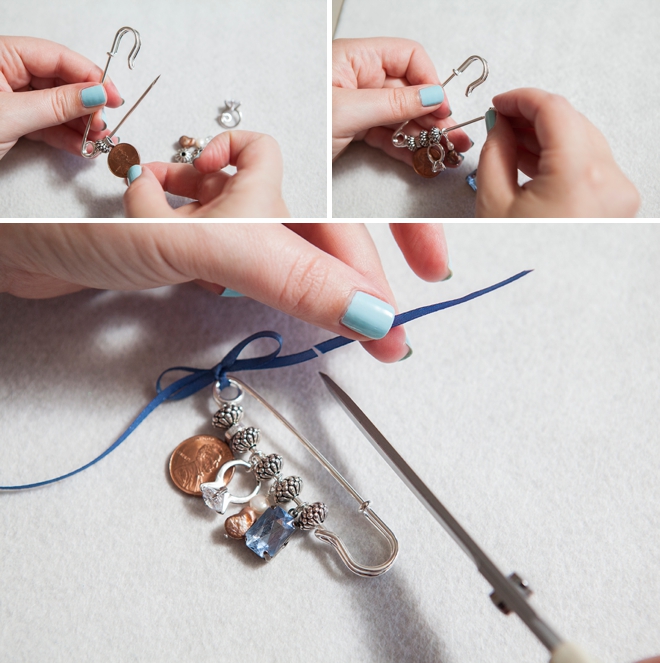
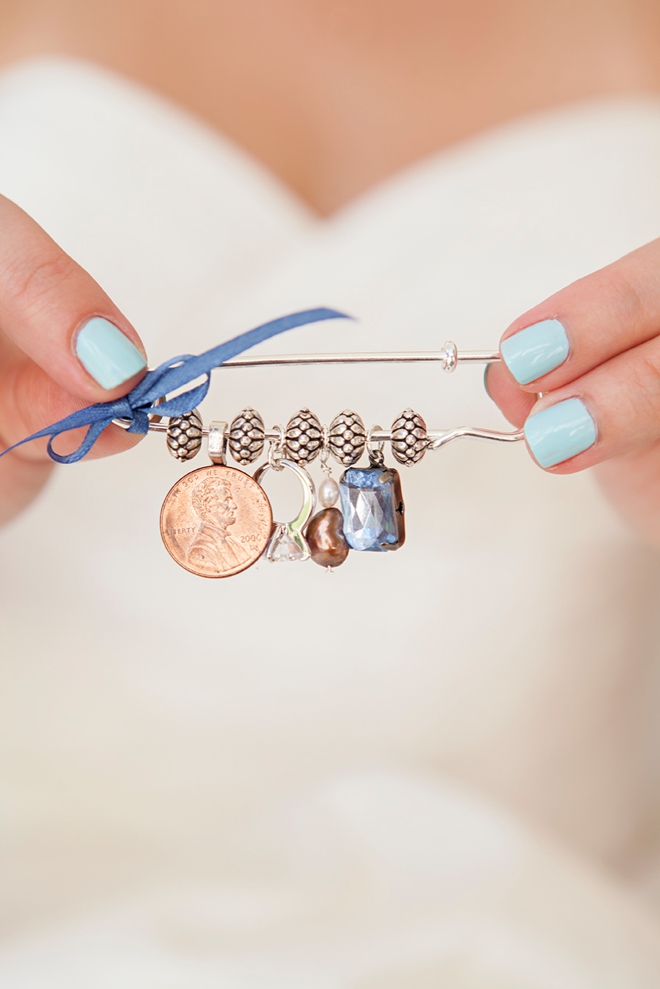
Now for the fun part! Putting together your pin! If you use these exact large kilt pins you will need spacer beads that have really large holes.

Here are the ingredients for our first pin…
Simply add all the spacer beads and trinkets like so…
Close the pin and add a little ribbon if you’d like.
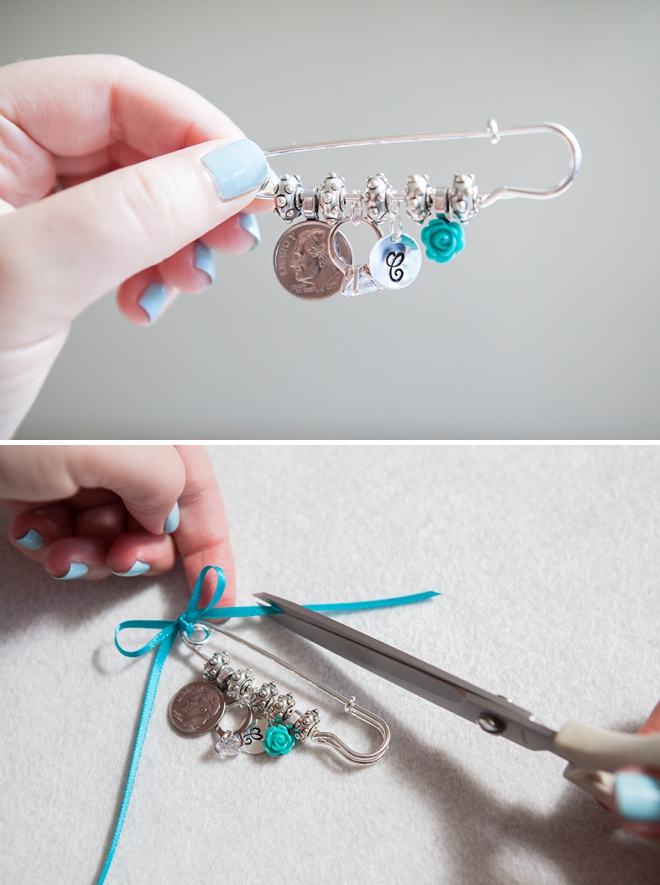
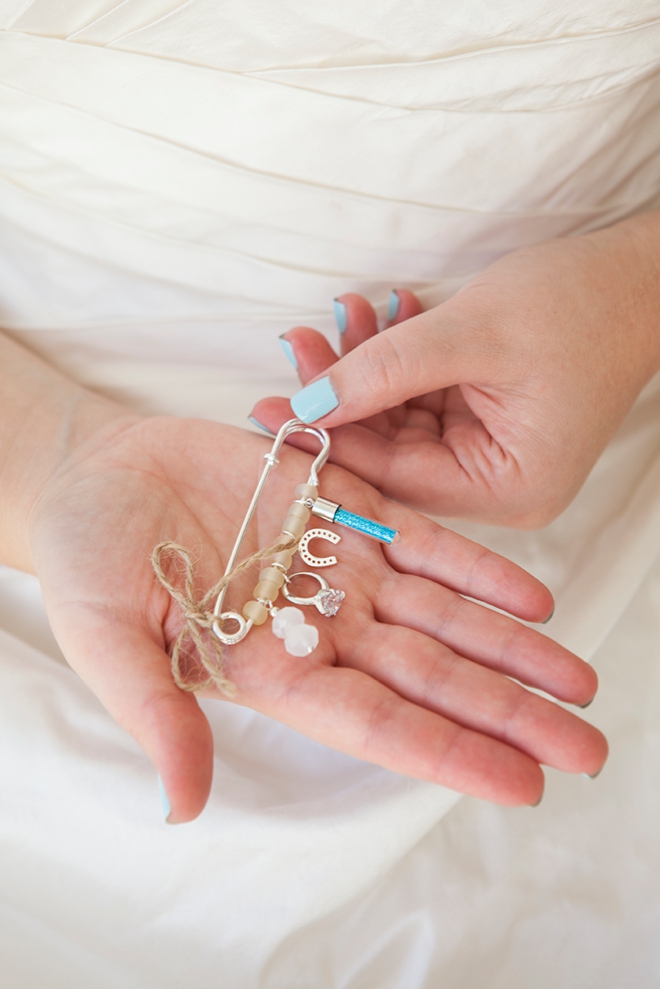
Then pin in your wedding dress!

Here is a different version…
..and for the last version.
Totally obsessed with this version and I cannot wait to see what this project inspires in you!
As with all our DIY tutorials, if you create one of our projects please send us a picture – We Love Seeing Your Creativity! If you use Instagram or Twitter please use the hashtag #SomethingTurquoiseDIY and it will show up on our Get Social page. Happy Crafting!
DIY Tutorial Credits
Photography: Something Turquoise Photography // DIY tutorial: Jen | Something Turquoise // gorgeous wedding dress: courtesy of Justin Alexander (#8635) // 3″ silver kilt pins: 24 Hour Creatives via Etsy // 8mm cubic zirconia engagement ring charms: EverLuxe via Etsy // sterling horseshoe charm and round initial charm: CY Supplies via Etsy // 16mm x 18mm silver colored flat bails and 9mm flower beads in sky blue and teal: Whimsey&Pop via Etsy // glass vial charm: Happy Supplies via Etsy // open jump rings, loose pearls, large blue stone, large hole glass beads and large hole 10mm silver spacer beads: Ruby Tuesday // nail polish: Essie Mint Candy Apple

Comments