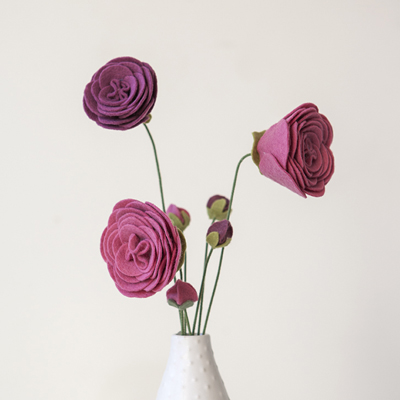

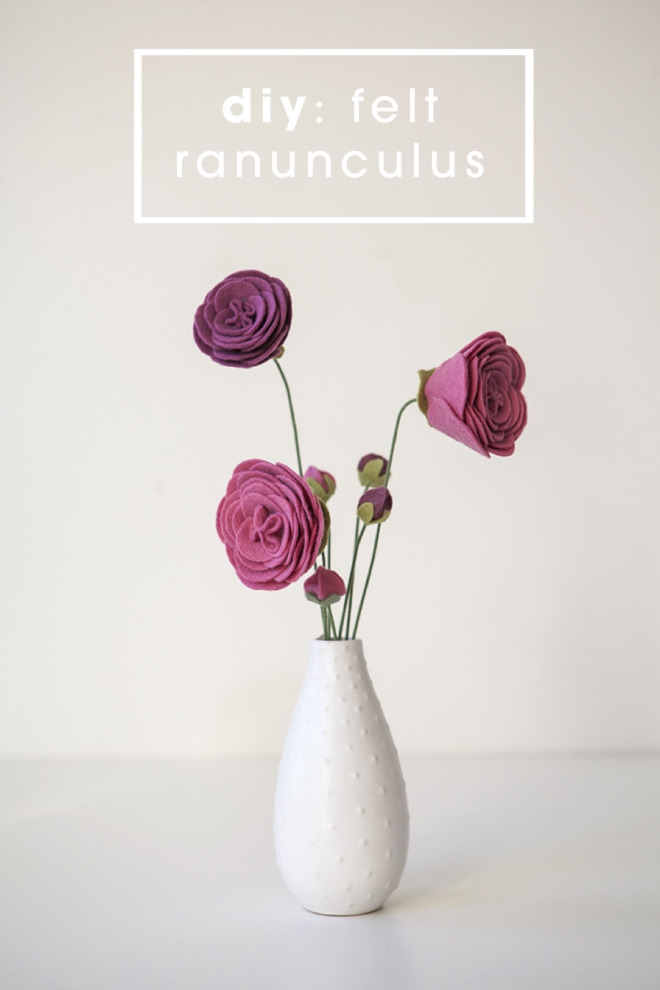
DIY Felt Ranunculus
This post is the seventh of 8 amazing felt flower tutorials that I’m sharing this week — culminating in a gorgeous felt wedding bouquet!!! These projects aren’t for the faint of DIY heart, although I break these flowers down step by step to make them as simple as possible – they will take some time and creativity. The energy spent will be well worth it in the end – trust me. Flowers that don’t die are awesome!
In talking about handmade flowers – we are singing the praises of felt. Unlike paper, felt flowers are thick, sturdy and can withstand all that your wedding day could throw at them. Paper can rip and crumple in a flash – but not felt! There is something so old-school crafty about felt… and I love it. So without further ado, here is our seventh felt flower – the beautiful ranunculus.
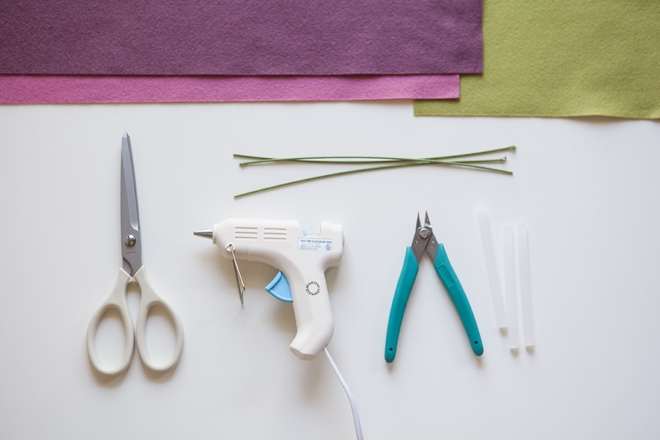
SUPPLIES:
- wool felt (colors: rose, mulberry and fern)
- good scissors
- hot glue gun – that does “low heat”
- 18 gauge floral wire
- wire cutters
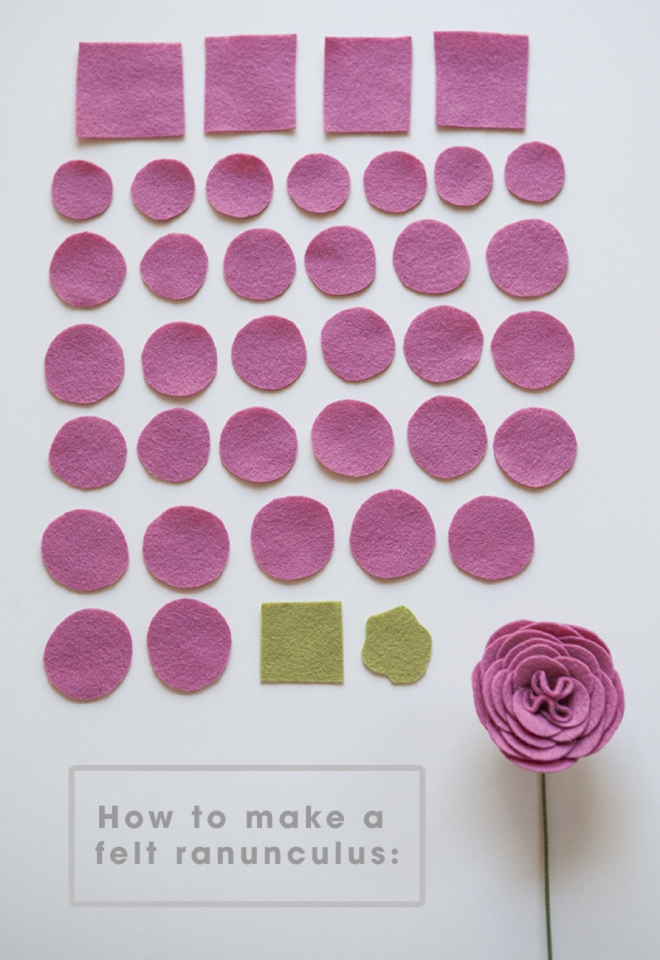
Below is a chart of all the felt clippings you’ll need to make for the ranunculus flower. Starting with squares… cut 32 circles that very gradually get larger. I’m not sharing a specific size because the size is up to you! If you cut large circles you’ll get a large flower – and vice versa. We now have a free printable flower pattern available at the end of the post!
- 1 circle center petal
- 31 circle petals
- 1 wavy circle leaf
UPDATE: May 21st, 2018: You no longer have to cut all these petals and leaves by hand! We have the Cricut .SVG cut file for this flower available in our shop for only $1.99! Cutting these shapes with the Cricut is a HUGE time saver!

Start by making your flower center. Cut a slit in the center of a circle petal, slide onto the floral wire, add some hot glue and squeeze all the corners together… forming the perfect flower center.
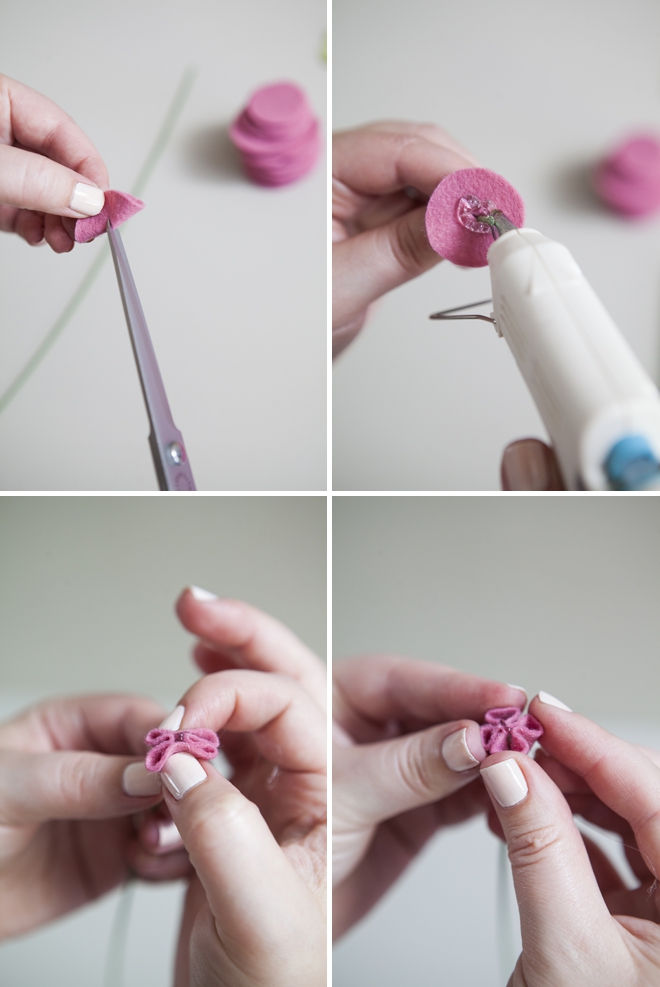
This flower is super easy to make… just simply keep adding circle petal after circle petal – working evenly around the flower until you are happy with the size.
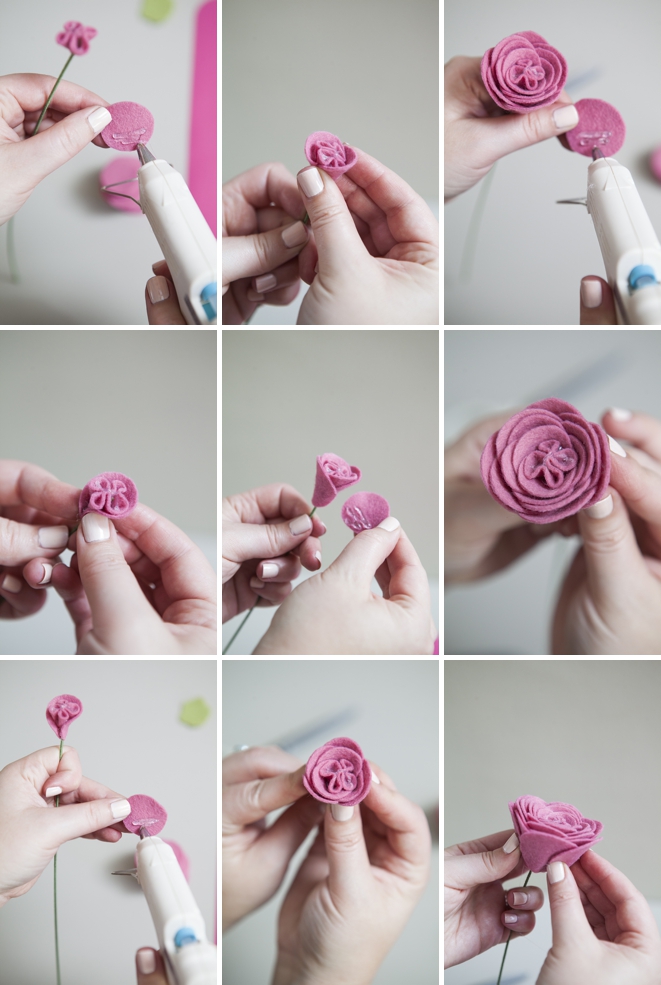
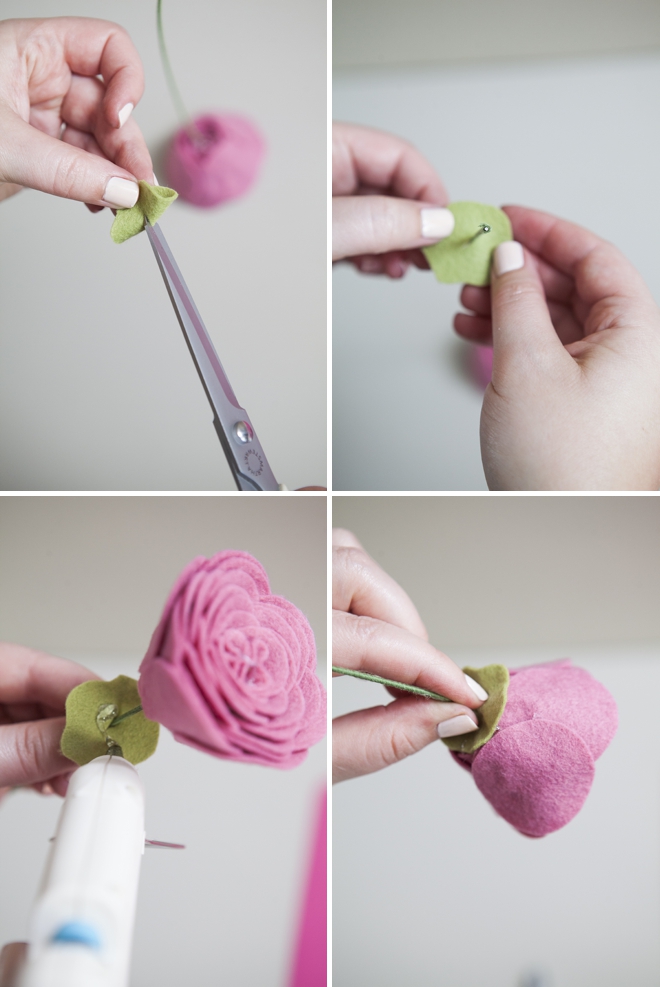
Just like you made the center, now you can finish the flower off by adding the green leaf to the bottom.
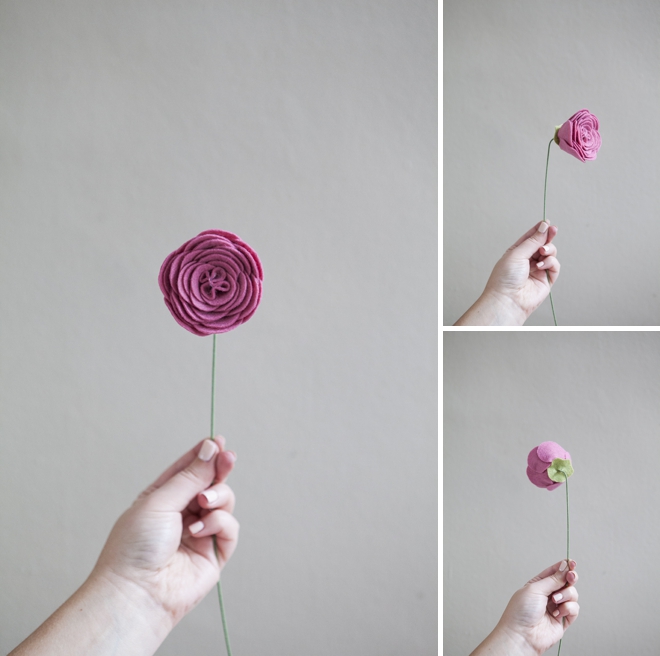
That’s it! Lots of circles to cut but overall super simple!
Here’s a little added bonus: how to make ranunculus flower buds!
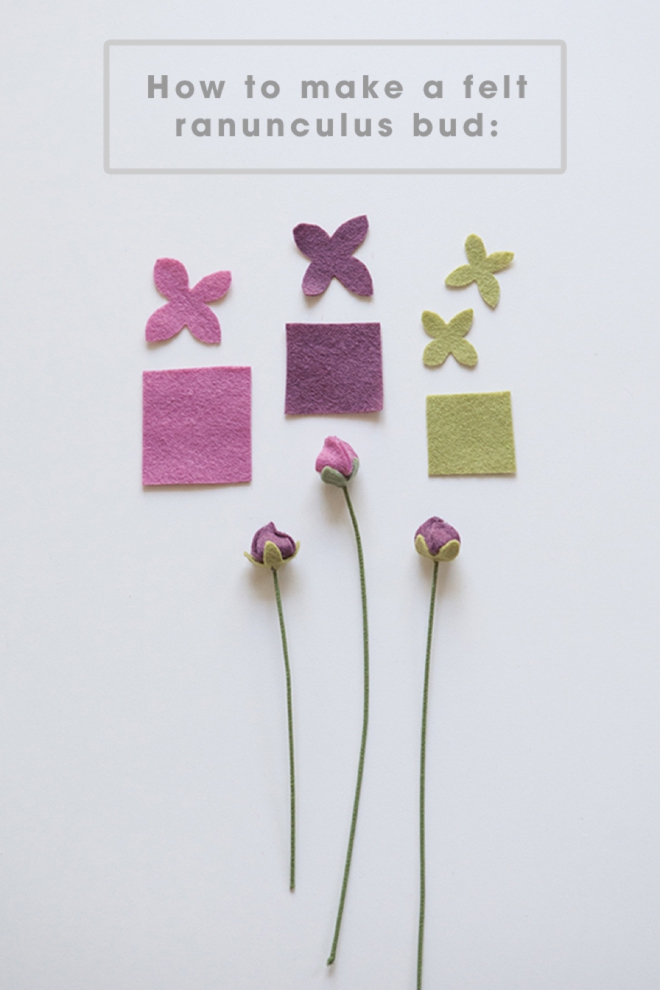
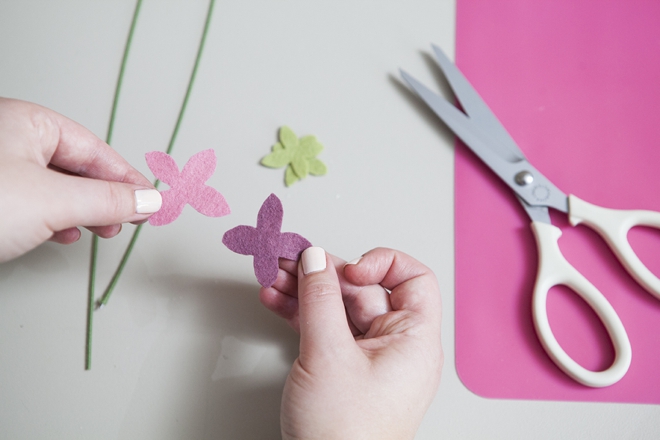
Each flower will need two of these rounded plus signs – one petal and one leaf. Colors here: rose, mulberry and fern.
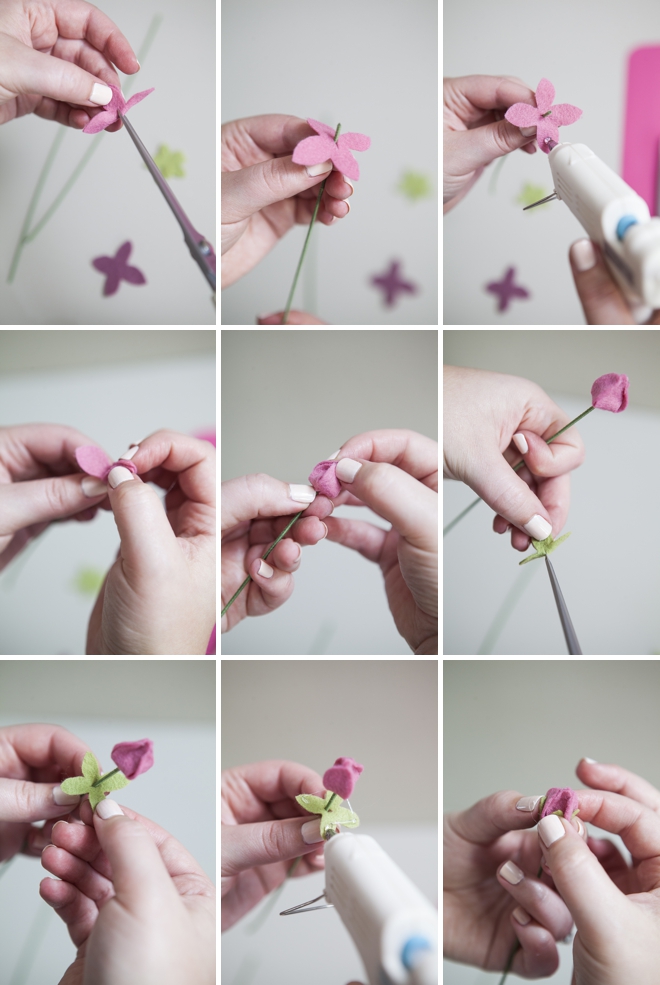
Cut a slit in the middle of your plus sign petal, slide onto your floral wire, add a little hot glue to one petal leaf and press together with the leaf opposite, at the top only – keeping air within the bottom area. Then add glue to the tip of one of the other petals, and press to the top of the already glued petals. Finally do the same with the fourth petal… and repeat all steps with the leaf petal. Making a sweet little ranunculus bud!
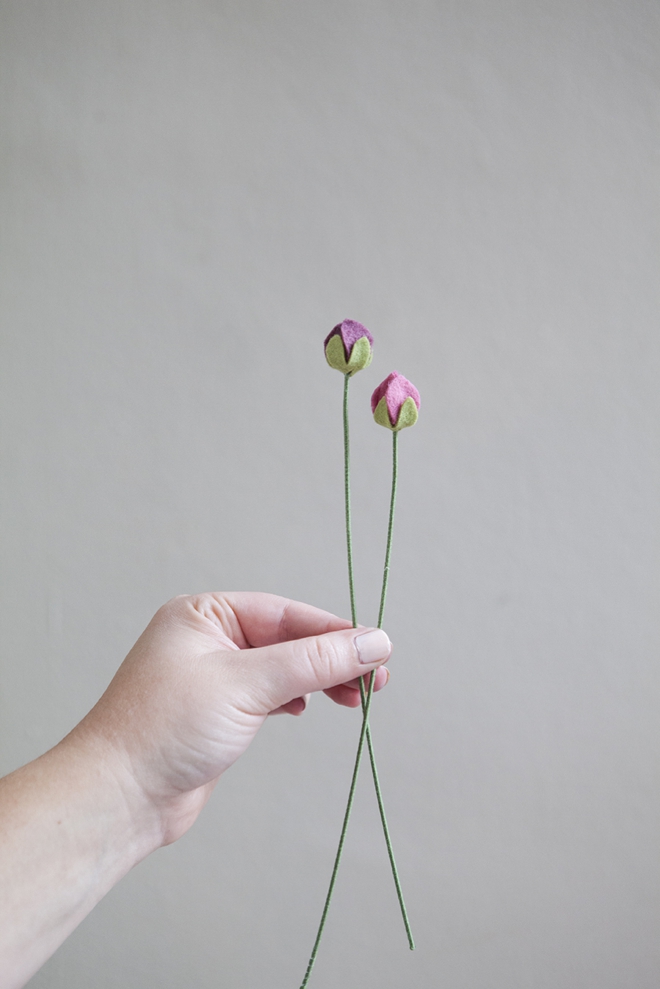
These are the perfect touch to take a wedding bouquet or arrangement to the next level!

As with all our DIY tutorials, if you create one of our projects please send us a picture or a trackback – We Love Seeing Your Creativity! If you use Instagram or Twitter please use the hashtag #SomethingTurquoiseDIY. Happy Crafting!
DIY Tutorial Credits
Photography + DIY Tutorial: Jen Causey of Something Turquoise // // gorgeous wool felt: Benzie Design // Martha Stewart Crafts mini glue gun and scissors, all floral wire, wire cutters and ModPodge glue gun mat: Michaels // nail polish: OPI – Mimosas for Mr & Mrs

Comments