
DIY | bath bomb favors
I throughly enjoy a relaxing soak in my tub… and bath bombs (or fizzie’s) always make bath time more enjoyable!!! Never again will I spend money on bath bombs because they are EXTREMELY easy to make, very inexpensive and I get to pick the scent and color. These would make absolutely fabulous bridal shower favors and since they set up fairly quickly you could even have your guests make them at your shower as a fun project!

SUPPLIES:
- measuring cup, bowl and wisk
- Baking Soda
- Citric Acid
- Water-free Witch Hazel (in a spray bottle)
- Fragrance oil
- Water-free colorant (La Bomb colorant from Bramble Berry)
- Pipettes
- Mini-muffin pan
- Wax paper
- Sticker Paper + Take Out Boxes for packaging
All of these supplies can easily be purchased online from BrambleBerry.com.

These are SO easy to make… I cannot wait for you to try them! The recipe below explains the proportions, except the fragrance and color amounts will be completely up to you!
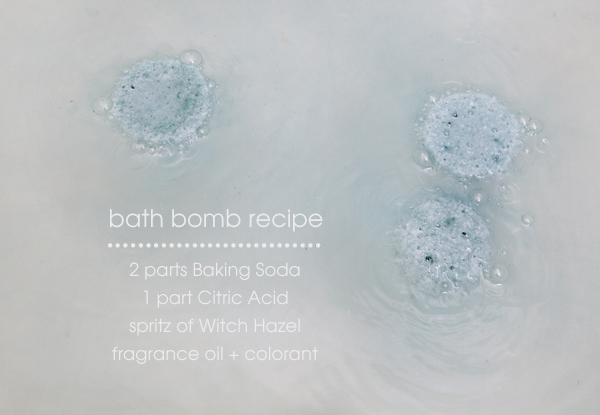
The batches we are making use 1 cup of baking soda to 1/2 cup of citric acid – which makes exactly 12 mini-muffin bath bombs. If you use the large 2lb baking soda that we are using here, and the 1lb citric acid bag from Bramble Berry – it will make exactly four, 12 mini-muffin batches – or 48 bath bombs! Making the average cost about $0.25 a bomb!!! Start by adding one cup of baking soda to your mixing bowl and work out all the clumps. You can sift or use the food processor if you’d like!

Next, add one half cup of citric acid to the baking soda – thoroughly mix and break up any clumps. The smoother your mix – the smoother your bath bomb!

Now for the fragrance oil – the amount is completely up to you. I used about three milliliters of Island Coconut per 1.5 cup batch. To get the right amount for you, smell your batch – if you can’t smell the fragrance enough add a little more. Remember, your bath water will dilute the fragrance oil so adding a little more isn’t a big deal. Thoroughly mix into the powders.

Now add your colorant. You can ONLY use non-water based liquid color. If you use a liquid color that has water in it, the water will prematurely activate the bubbling of the bomb mixture. The La Bomb colors from Bramble Berry are specifically made for making bath bombs, so I would stick to using those. With the colorant, less is more. If there is too much color it can actually turn your bath water (although for kids – that would be a lot of fun!) and I think pastels make prettier bombs. Thoroughly mix into the powders, using your fingers to break up color clumps if need be… *also keep in mind the next step brings out the color a little!

Now for the witch hazel – which you need to add using a spray bottle. The amount is determined by your location. For arid climates, you will need more witch hazel – for humid climates you might not need any at all. I live in Southern California and I needed about 4 spritzes to get my mixture to clump in my hand (like below) when I squeezed it… which is what we are looking for. As soon as your mixture makes a nice clump – it’s ready!

Add the mixture to your choice of mold! There are so many fun molds out there… the choice is up to you! But when making favors you need to be able to make a lot at one time – so a mini-muffin pan a perfect choice…

Make sure to REALLY pack the mixture HARD into your mold. Push until you can’t push anymore – this is what will keep your bomb together!

When the tray is completely packed – set a timer for 10 minutes and let them sit.

After the time is up, carefully turn them onto a sheet of wax paper to let them fully dry. You might have to give the tray a little tap-tap to release them. These need to dry for a few hours before moving them.

Your dry time, again, will be different based on your area. Mine where absolutely perfect once they dried overnight. Yours might take a little longer or a little less.

GET CREATIVE!
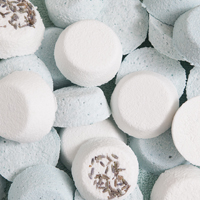
Make different shades of bombs for a fun ombre look or maybe add a few lavender buds to the tops of the bombs for an aromatherapy effect! I’ve even seen sprinkles added to them! You can also mix different colors of powder in the same bombs!

Just remember to REALLY press the mixture as hard as you can into the mold!

Aren’t they super cute!!??

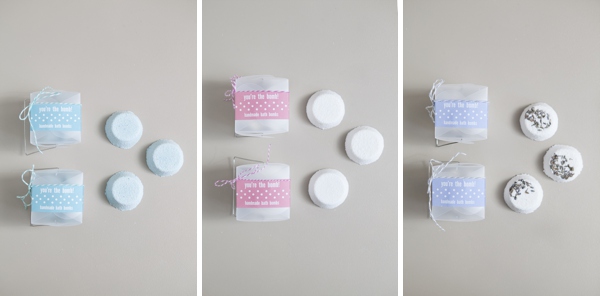
Now for a little fun favor packaging!

turquoise /// pink /// purple /// gray
Download and print the labels above onto sticker paper. You can also design your own!

Cut them out, add some cute twine and you’ll have a darling – and relaxing – favor!

Your the bomb. So are these.

As with all our DIY tutorials, if you create one of our projects please send us a picture – We Love Seeing Your Creativity! If you use Instagram or Twitter please use the hashtag #SomethingTurquoiseDIY and it will show up on our Get Social page. Happy Crafting!
DIY Tutorial Credits
Photography: Something Turquoise Photography for SomethingTurquoise.com // DIY tutorial and free downloads by: Jen | Something Turquoise // all “bomb” supplies (citric acid, fragrance oil, La Bomb colorant in teal, and pipettes and witch hazel): BrambleBerry.com // Large baking soda: Target // Wilton mini-muffin pan, lavender buds, frosted chinese favor boxes and twine: Michaels // sticker paper: Amazon // nail polish: OPI, Fly – and Morgan Taylor in Glitter and Gold
Shop The Supplies:
Find the supplies you’ll need for this project from our affiliate links below:

Comments