
DIY | cross-stitch table numbers
I was lucky enough to have spent last week in NYC, attending ALT Summit, meeting fabulous people and enjoying the city. Martha Stewart hosted the event and so of course I was in heaven! We spent the morning having breakfast and crafting projects from her latest book, Martha Stewart’s Favorite Crafts For Kids – sounds funny that we were making ‘kids’ crafts but it was so much fun! My favorite project ended up being the cross-stitch portraits… you can check out the one I made of myself here. Inspired by that craft, today I am sharing how to cross-stitch your table numbers… and maybe even a bridal portrait too!!!
SUPPLIES:
- graph paper
- Aida cloth (cross-stitch cloth)
- embroidery floss and needle
- embroidery hoops
- colored pencils
- scissors

Cross-stitching is incredibly easy, all you do is make an ‘X’ over and over! Cross-stitch is done on a special type of fabric called ‘aida cloth‘ which is an open, even-weaved fabric that lends perfectly to stitching. It’s available in many different sizes (and colors!), the smaller the number the larger the weave, meaning the larger each ‘X’ will be.
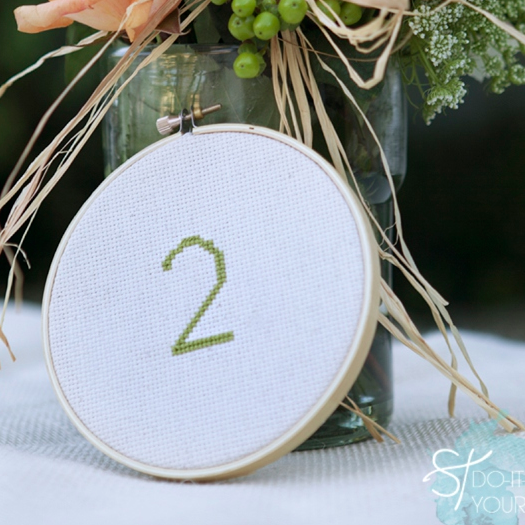
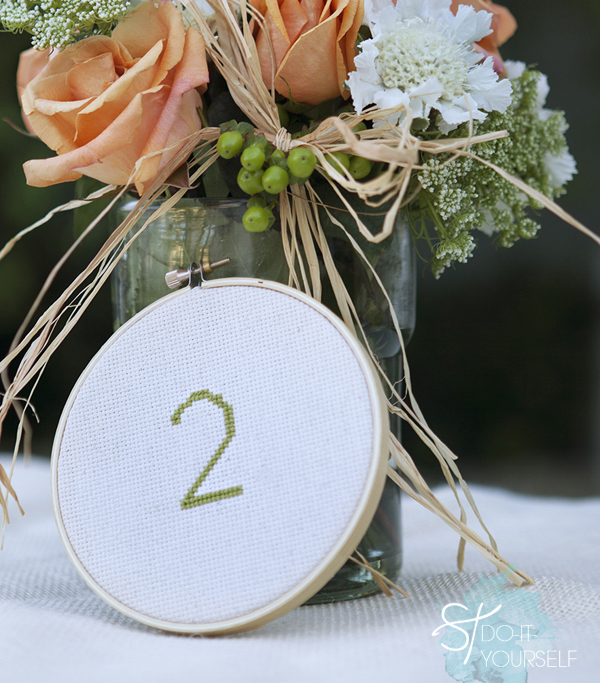
Using an embroidery hoop makes stitching easy to hold and see, plus it’s the perfect way to display each of the table numbers. The hoop is made of two pieces – the outer ring which is adjustable and the inner ring. Place the cloth over the inner ring, then place the outer ring on top of the cloth and press them both together. Using the tension knob on top, tighten the outer ring to hold the fabric snug.

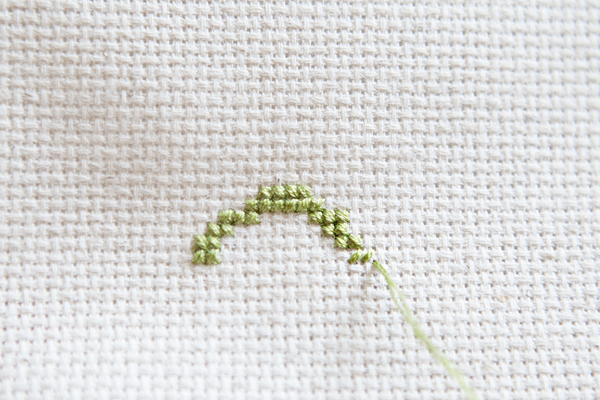
Now this is the fun part! Using graph paper, you literally get to draw you own number – it can look how ever you want! Trace first or eyeball your way through.. each square will represent one ‘X’ stitch. Since the ‘X’ on the aida cloth will be significantly smaller than each graph paper square, draw your number about three times larger than you actually want it. If you are concerned with size, simply count the squares.

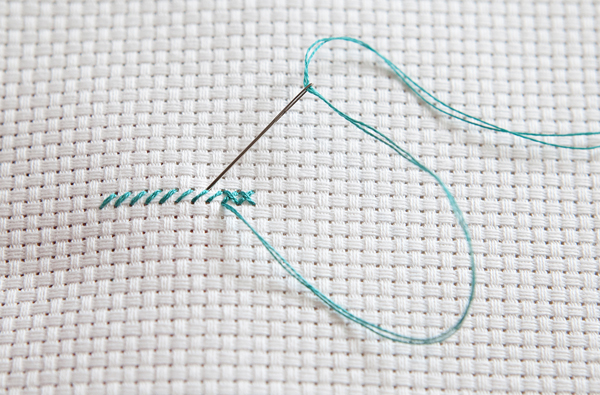
Embroidery floss comes with six strands wrapped into one. For most cross-stitch patterns you only sew with 2 or 3 strands at a time – so you will need to separate them before you begin. Start with about 18″ of floss. Then start sewing your pattern! You can begin wherever you feel comfortable, at the top, side or bottom of your design.

If sewing individual stitches you can just make a regular ‘X’, but if you have a whole row of the same color to do – start with just one stitch / / / / / and then work your way back across the row to finish the ‘X’s.

Cross-stitching is not a quick project but it’s very relaxing!


Once you are finished with your number, you can cut the excess fabric away from the hoop and give the knob a little tighten. ***if you are preparing these months in advance, before you cut the fabric you can glue the fabric to the hoop. This will ensure that during the time leading up to your wedding the hoop won’t loosen and the fabric won’t slide out.

The best part about this project is that you get to design your own font! You can have whatever you like… in any color that you can imagine! There are seriously hundreds of colors of embroidery floss to choose from. Below I decided to do an ombre…

I started at the bottom with the darkest shade and worked my way up!

Wouldn’t these be perfect for a nautical wedding!?!

If you are looking for a little something different… you can always outline your numbers instead of actually cross-stitching them!

This takes hardly any time at all!

Spray paint the embroidery hoop as an added touch! …this one is metallic gold!

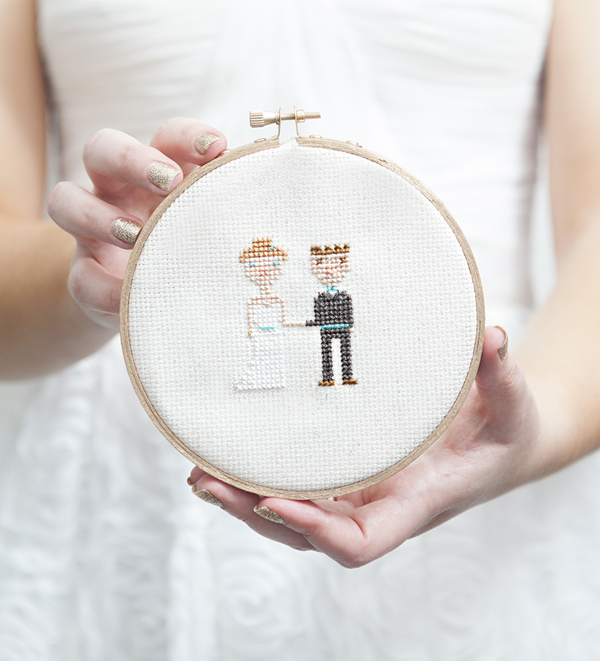
I couldn’t help myself… I just HAD to cross-stitch a bride and groom!!! Simply draw you and your groom on graph paper and start stitching!
Below is the ‘family portrait‘ craft featured in the new Martha Stewart’s Favorite Crafts for Kids… I don’t have kids but I am definitely holding onto this gorgeous book for when I do!

How cute would this be sitting at the head table, hanging out by the guest book or leaning on the cake table… it would be darling pretty much anywhere at your wedding!
![]()
As with all our DIY tutorials, if you create one of our projects please send us a picture or a trackback – We Love Seeing Your Creativity! If you use Instagram or Twitter please use the hashtag #SomethingTurquoiseDIY. Happy Crafting!
Photography: Studio 11 Weddings // DIY tutorial by: Jen | Something Turquoise // Martha Stewart’s Favorite Crafts for Kids Book: Editors at Martha Stewart // all supplies (embroidery floss, hoops, needles and Aida cloth) purchased at: Michaels // free graph paper: PrintFreeGraphPaper.com // wedding dress: Nordstrom // nail polish: OPI, Fly – and Morgan Taylor in Glitter & Gold

Comments