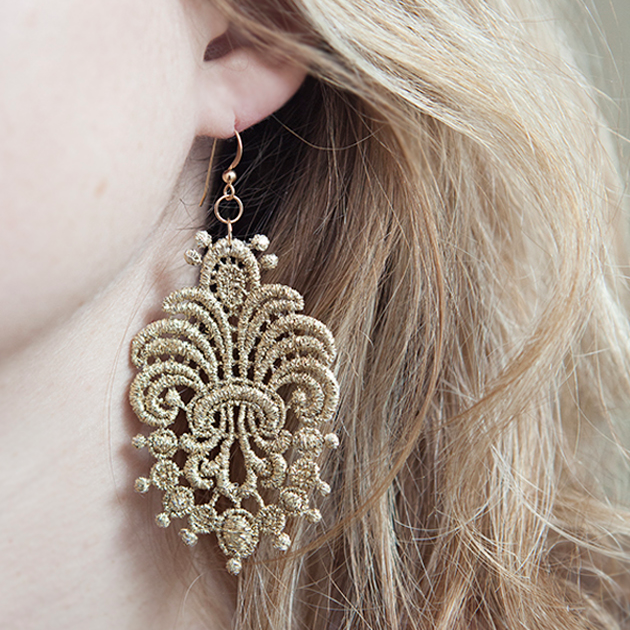

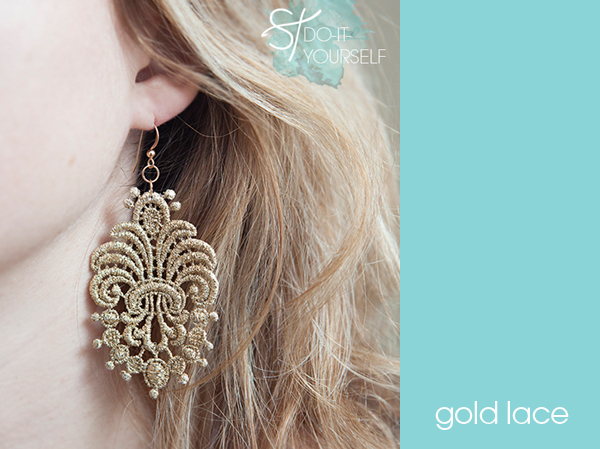
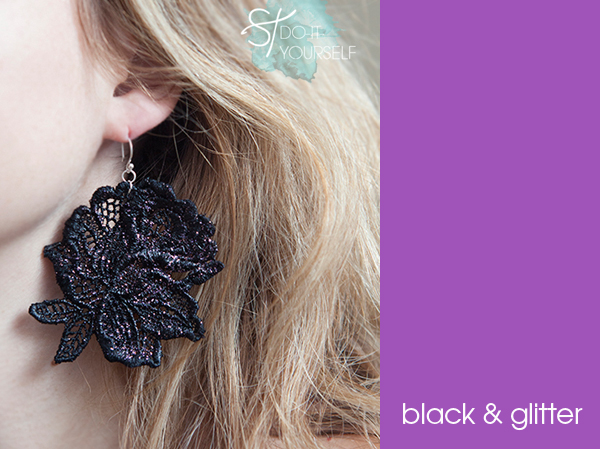
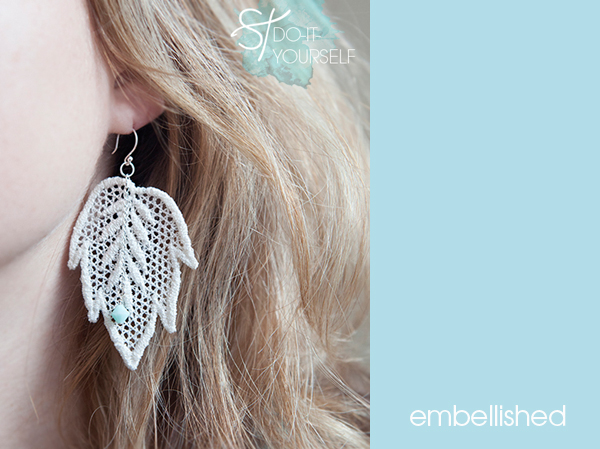
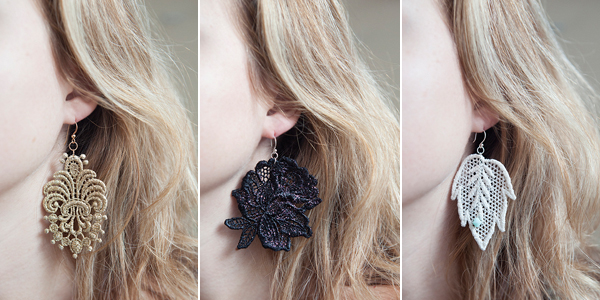
DIY | lace applique earrings
Today’s super fab DIY does double duty; these darling earrings will make absolutely perfect bridesmaid gifts that your girls can wear as their wedding day jewelry! Below are three different designs, the first two are extremely simple and the last will take a little extra work – all can be completed in a few hours – I only say hours because of the drying time needed. These incredibly lightweight stiffened lace applique earrings can be personalized to fit any wedding theme… and can be worn long after your special event. I created this tutorial exclusively for Green Wedding Shoes and was honored to have it published there this week!
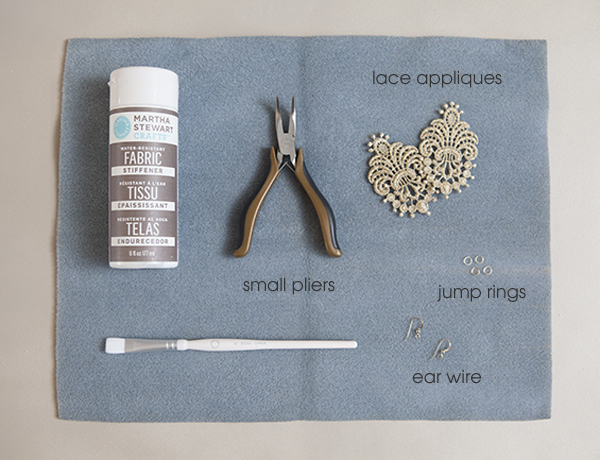
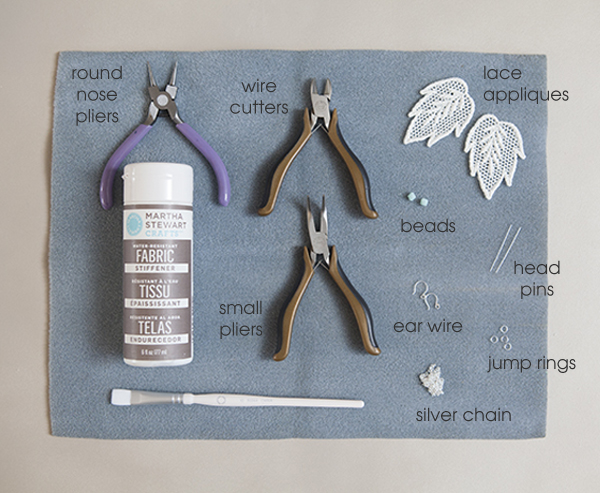
SUPPLIES:
- Martha Stewart Fabric Stiffener
- Two beautiful lace appliques purchased from Mary, Not Martha via Etsy
- Small paint brush
- Small pliers
- 4 open jump rings (jump rings come in two forms, open and closed, meaning one can be opened and the other is a solid piece of metal)
- Two ear wires
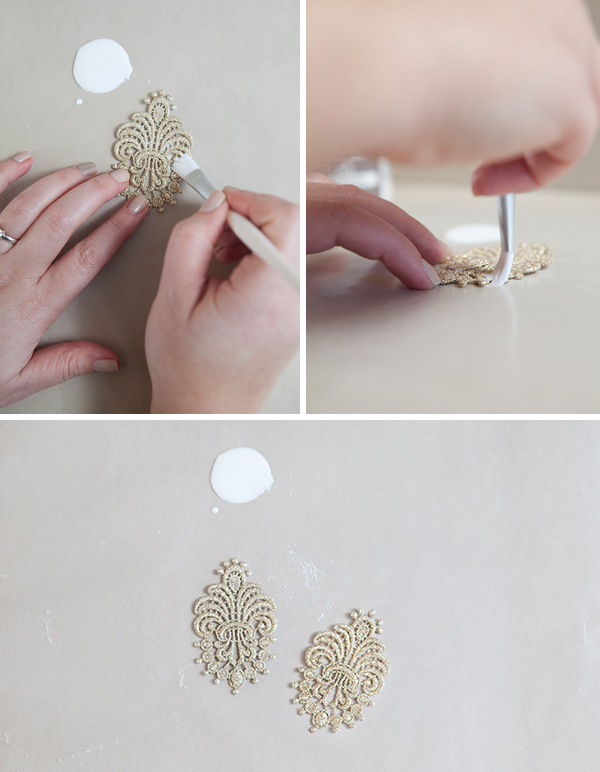
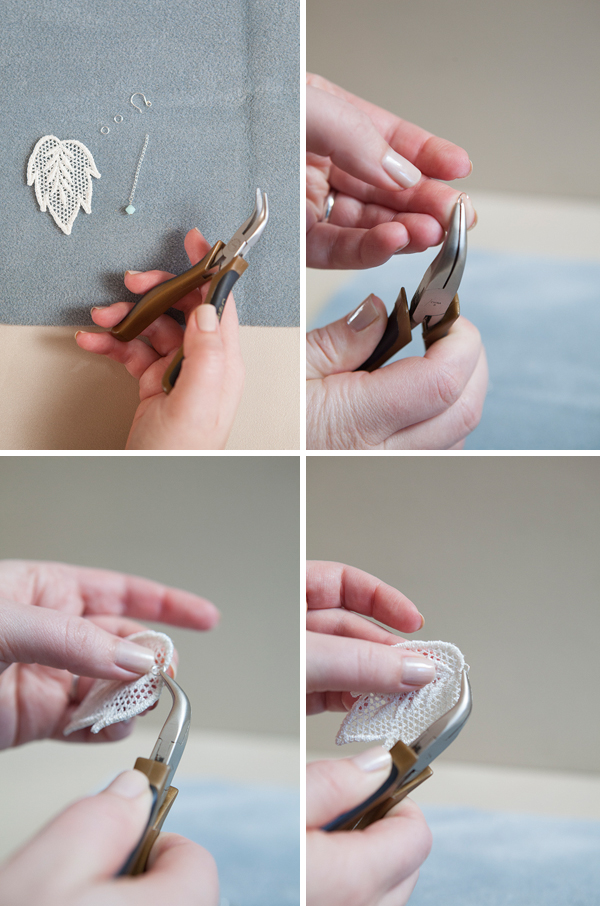
The first step is to stiffen each lace applique, which is so easy! Set up a workspace for yourself that is covered in wax paper…
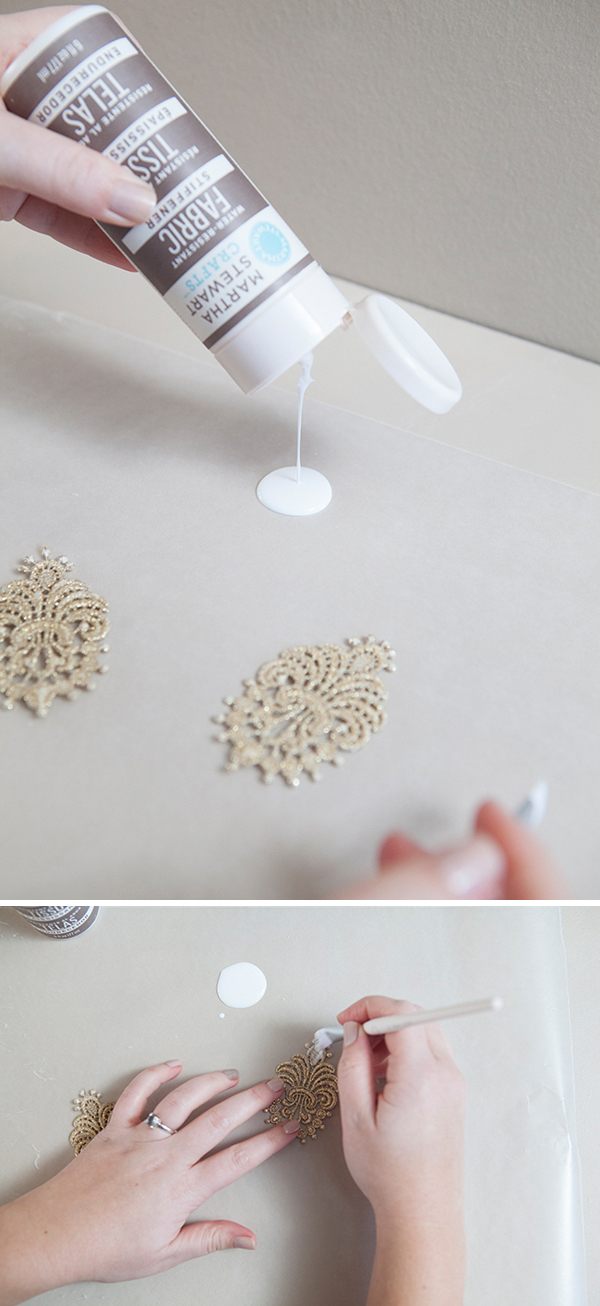
Thoroughly paint the front and back of each piece of lace with Martha Stewart Crafts Fabric Stiffener and let dry completely on the wax paper – which usually takes an hour or so. Sealing your beautiful lace with fabric stiffener ensures that while you are wearing these earrings the lace won’t become damaged, it will stay perfectly flat and won’t be stained by makeup.
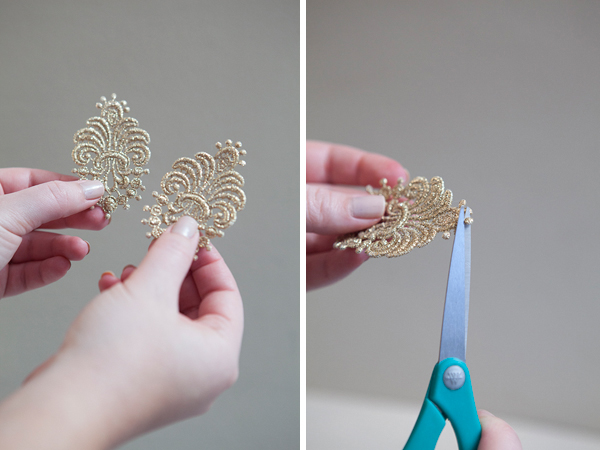
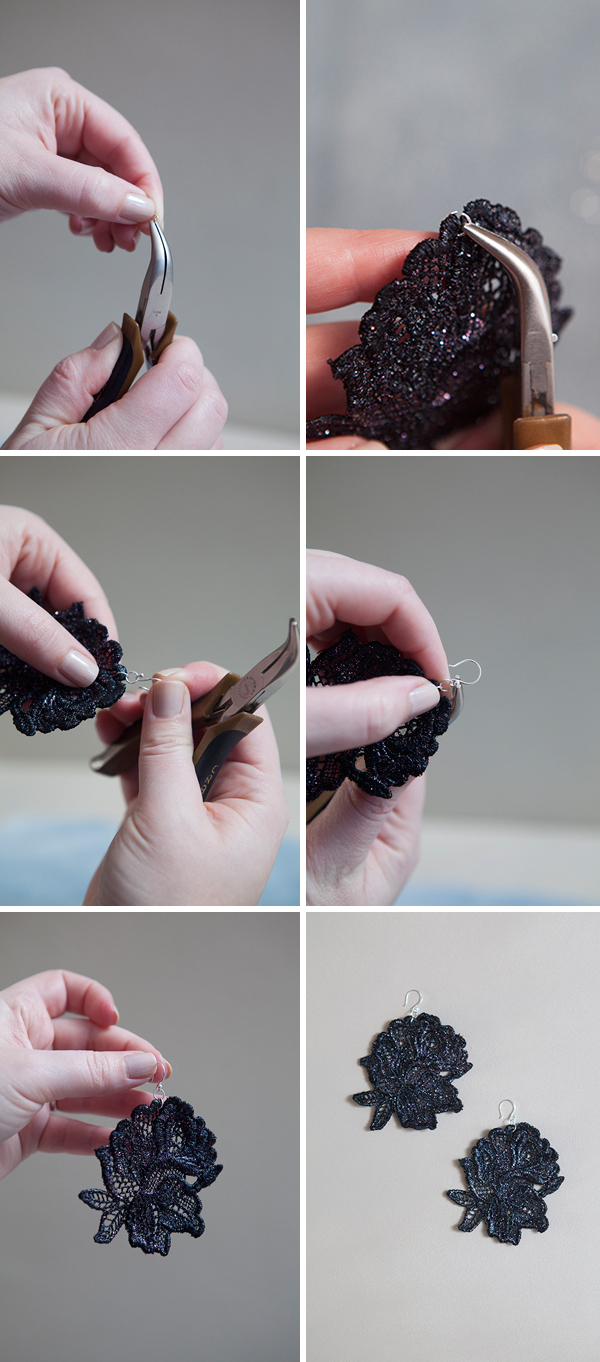
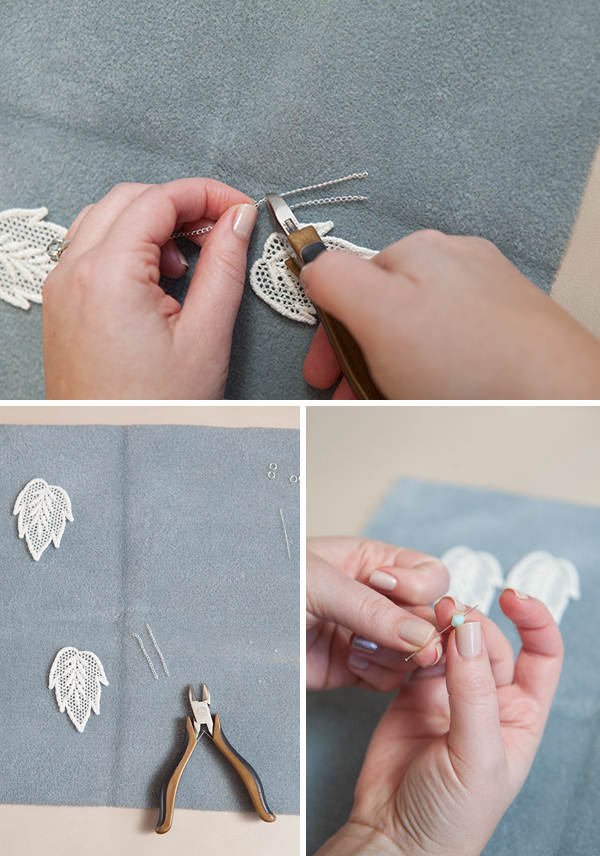
When turning the lace into earrings, some appliques might need a little snip here or there to better accomodate the space needed for the ear wire…
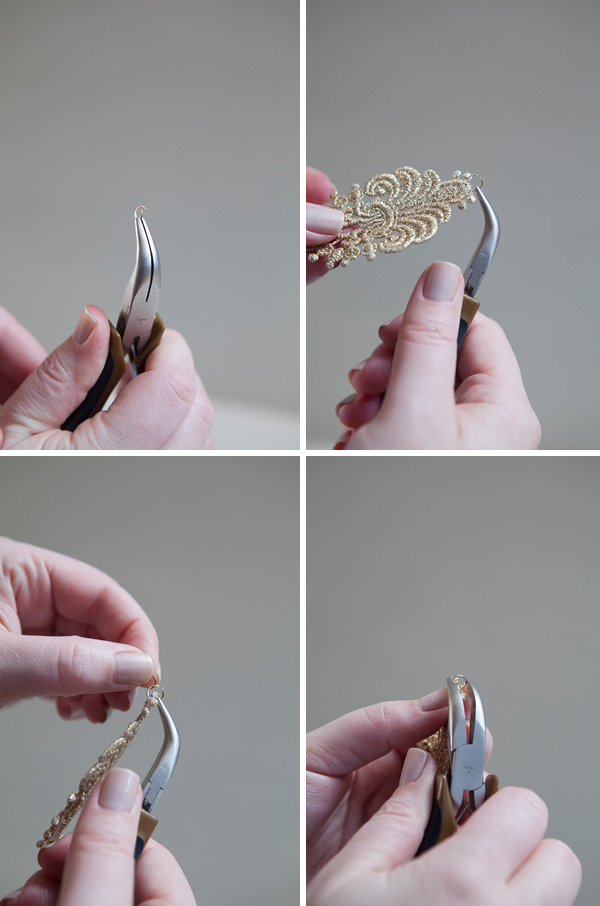
Using your pliers slightly bend one jump ring open and slip it through either the stitching of your applique or through an open space in the design and then pinch that jump ring closed. Add a second jump ring onto the first, which makes a bit of a chain and close that jump ring as well.
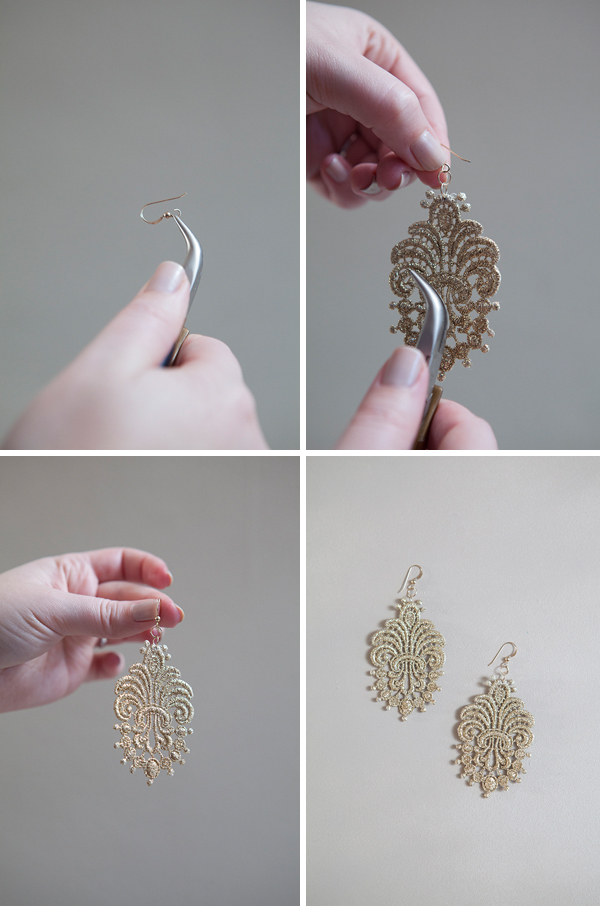
Next, slightly open the loop at the end of your ear wire and thread it onto the last jump ring, then carefully squeeze the ear wire closed. That’s it! That’s all it takes to make an earring!
Design number two uses the same steps as above except adds a coat of glitter paint!
SUPPLIES:
- Martha Stewart Fabric Stiffener
- Martha Stewart Glitter Paint – amethyst
- Two beautiful lace appliques purchased from Mary, Not Martha via Etsy
- Small paint brush
- Small pliers
- 4 open jump rings (jump rings come in two forms, open and closed, meaning one can be opened and the other is a solid piece of metal)
- Two ear wires

After you have used the above steps to ‘stiffen’ your appliques and they have dried completely… add your choice of gorgeous Martha Stewart Crafts Glitter paint to make it sparkle!
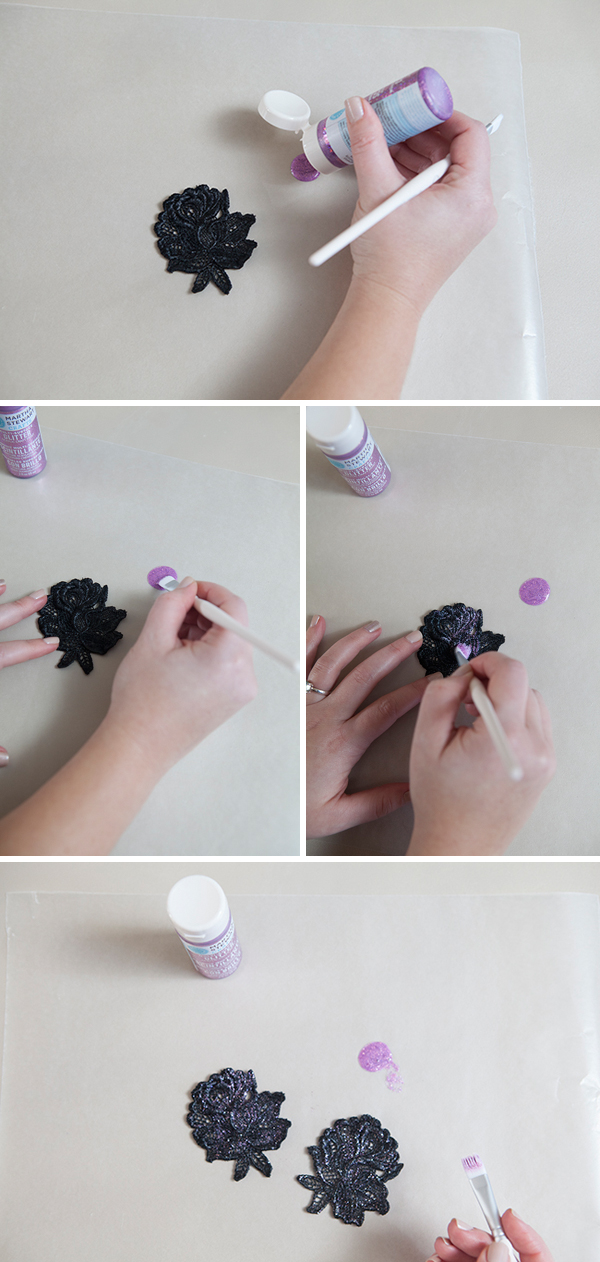
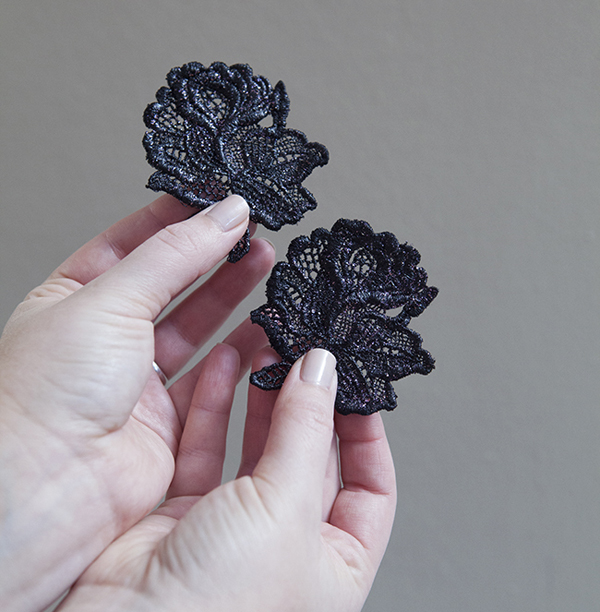
These earrings have only one coat of glitter paint, two and three coats will almost cover the color of the applique itself – add as much glitter as your heart desires! If you want to use loose glitter instead, you can easily add it to the Fabric Stiffener before you stiffen the appliques and it works perfectly. Once dry, these gorgeous appliques are ready for their ear wires!
Again, using the same steps as above… add two open jump rings and your ear wire… and in almost no time you will have a beautiful pair of personalized lace earrings!
Now for the third and most difficult design… how to add a wire wrapped bead and chain to your beautiful new lace earrings…
SUPPLIES:
- Martha Stewart Fabric Stiffener
- Two beautiful lace appliques purchased from Mary, Not Martha via Etsy
- Small paint brush
- Small pliers
- Round nose pliers
- Wire cutters
- 2 beads
- 2 head pins
- Silver chain
- 4 open jump rings (jump rings come in two forms, open and closed, meaning one can be opened and the other is a solid piece of metal)
- Two ear wires
Start by using your wire cutters to cut a small length of chain that will hang in front of your lace applique, the length is completely up to you.
How to wire wrap an earring:
Starting with one head pin (which is flat on one end to keep the bead on the wire) and one bead, hold the head pin with your small pliers just above the bead and using your thumb push the head pin into a 90 degree angle. Grab the head pin about 1/4″ above the bend with your round nose pliers and bend the wire back towards you, creating half a loop – let go with your small pliers.
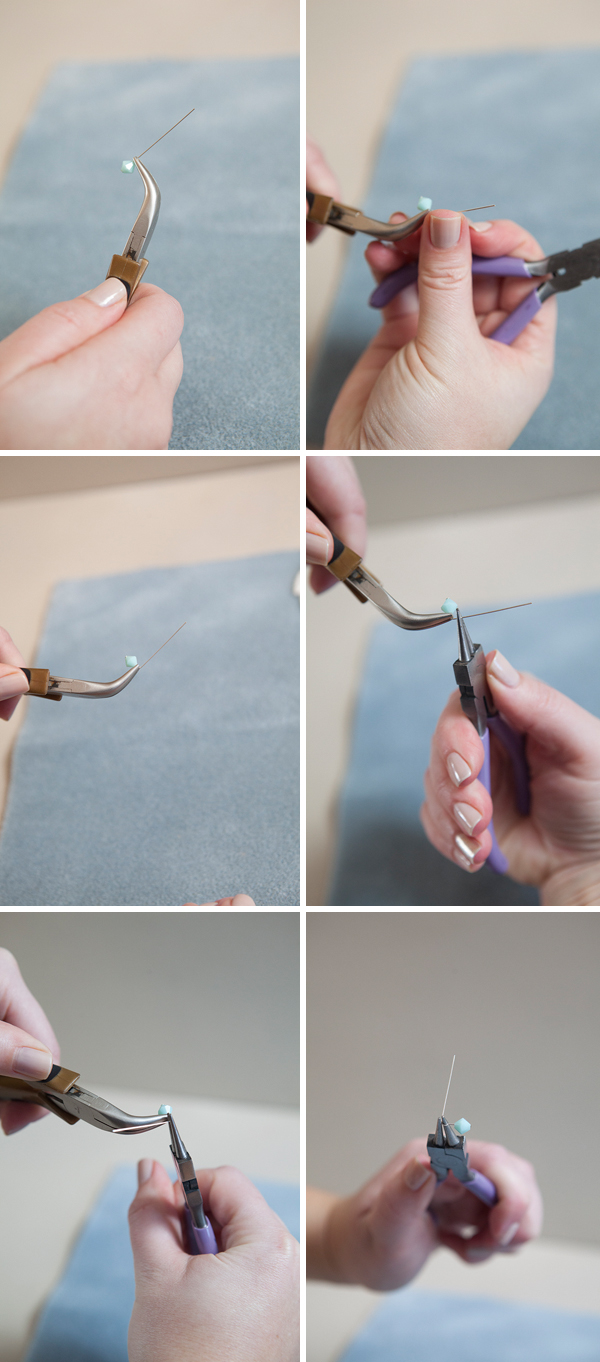
Next, keeping hold with your round nose pliers inside the loop, add your cut chain and let it dangle at the inside of your loop. Taking your small pliers, grab the free end of your head pin and quickly wrap it around the small 1/4″ space between your bead and the loop at least two times. Making sure that your chain is at all times inside the loop, if it isn’t your bead will not hang from it! Cut the excess wire length off the wrapped area as close as you can to the bead… and there you have it!
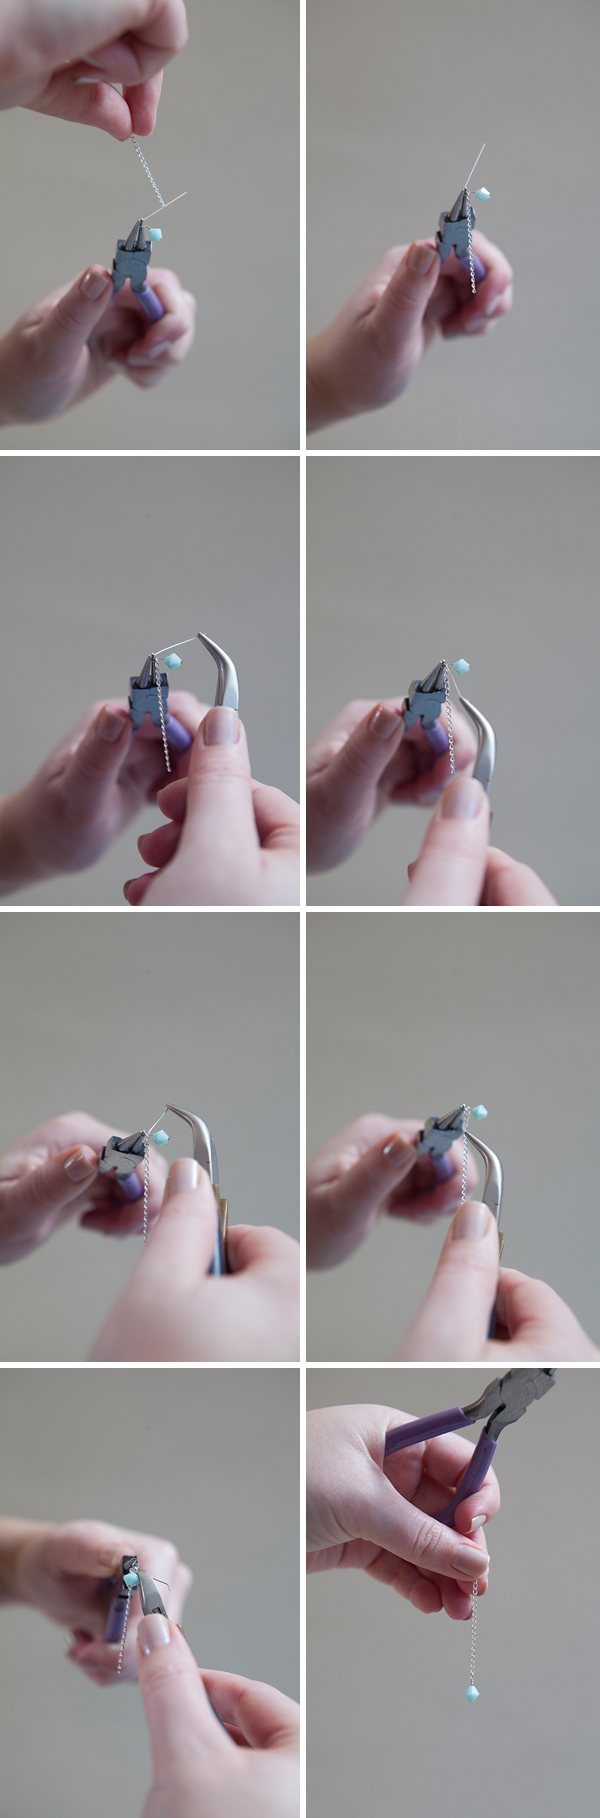
Now, you get to put your beautiful earrings together! Using the same steps as above – combine the stiffened lace, the chain and bead, two open jump rings and the ear wire. Start by opening and adding your first jump ring…
Before you close your first jump ring add the chain to the front side of your applique – then close the first jump ring. Open, add, and close the second jump ring onto the first… and then open, add, and close the ear wire onto the last jump ring!

Making earrings is just this easy and after you have done it once, this whole process can be completed in minutes – these steps above can also be used for fixing broken jewelry!
If you have created a project inspired by one of our DIY tutorials please share it with us!!! You can share by email, trackback or via Instagram, Pinterest or Twitter using the hashtag: #SomethingTurquoiseDIY. Happy Crafting!
![]()
Photography: Studio 11 Weddings // DIY tutorial by: Jen | Something Turquoise, created exclusively for Green Wedding Shoes // beautiful lace appliques shown above and many, many more: Mary, Not Martha via Etsy // all earring findings were purchased at Ruby Tuesday Bead Co. store in Long Beach // Craftsman mini-plier set: Sears // you can find round-nose pliers almost everywhere: Fire Mountain Gems // Martha Stewart Fabric Stiffener, paint brush and Martha Stewart Craft Paint in Amethyst: Michaels // nail polish: OPI – Get me to the Taj on Time and OPI Designer… de Better!

Comments