
DIY | bleach bride t-shirt
I have such a fun DIY tutorial to share with you today!!! How to easily make your own bridal party tank tops (or t-shirts… or sweatshirts, or sweatpants…)! This project is so simple that you could literally be done in less than 20 minutes!
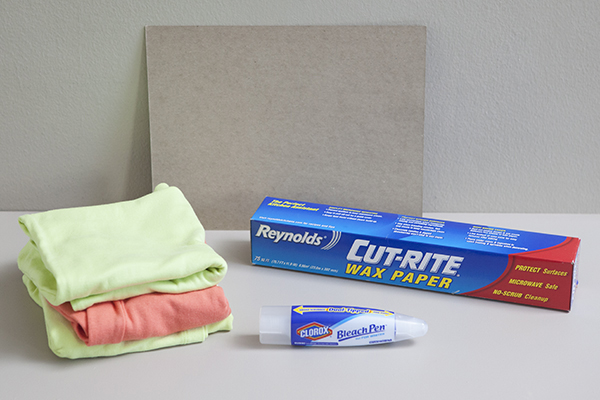
SUPPLIES:
- Clorox Bleach Pen
- wax paper
- piece of cardboard
- your choice of t-shirt or clothing
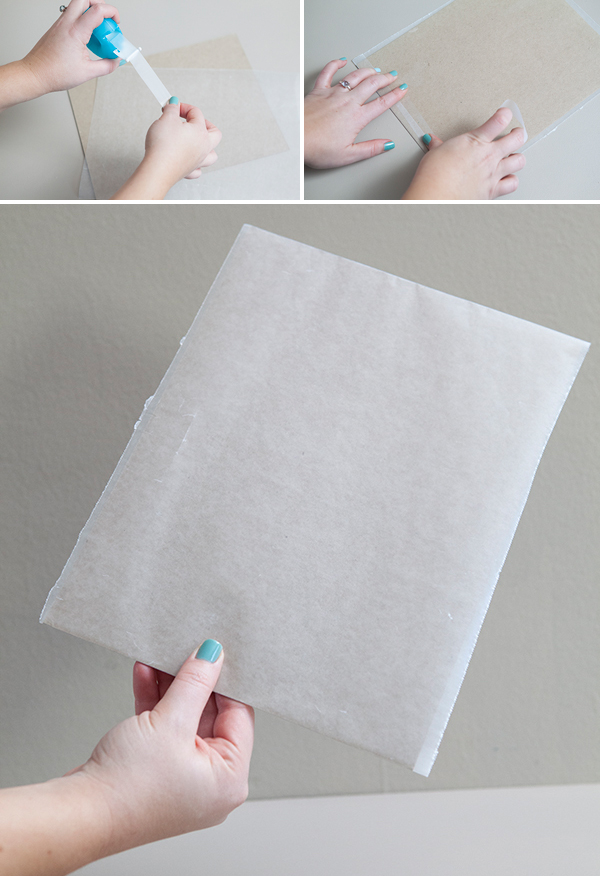
Start by covering a small piece of cardboard with a sheet of wax paper…
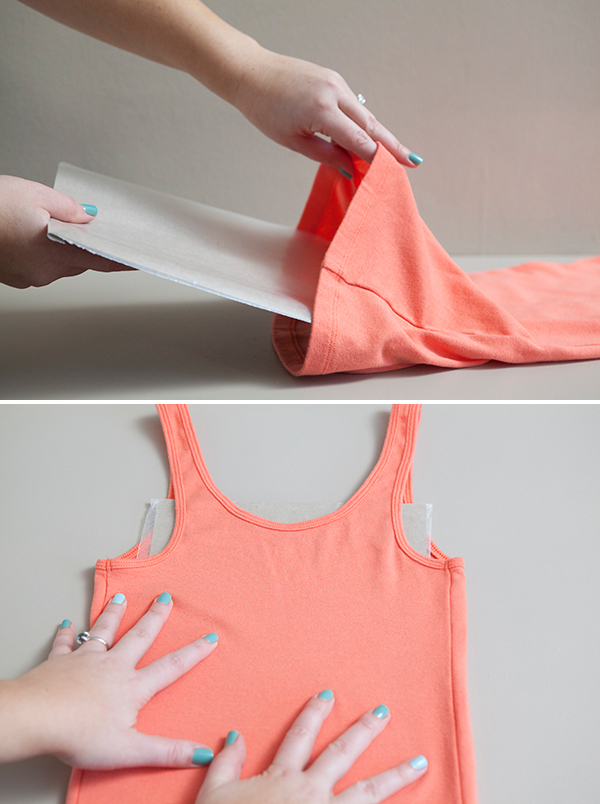
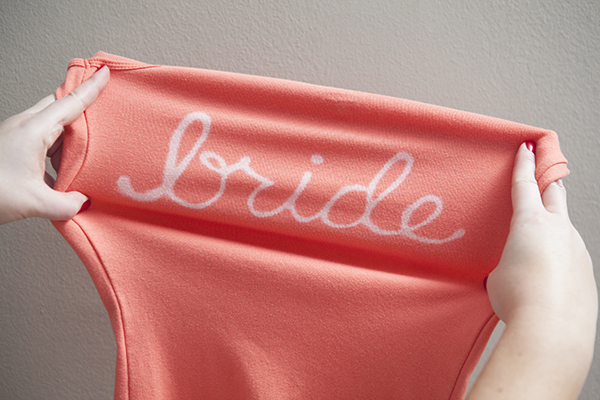
Place the wax paper wrapped side of the cardboard facing the layer of material that you will be bleaching to protect the rest of the shirt from excess bleach. Then smooth your shirt over the cardboard making sure that it is laying perfectly flat and even across the board.
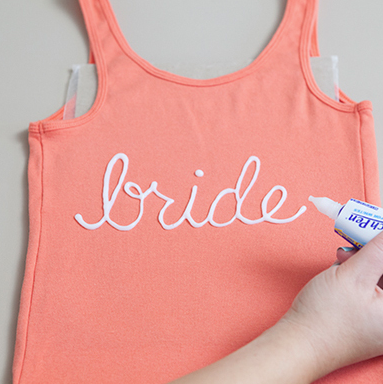
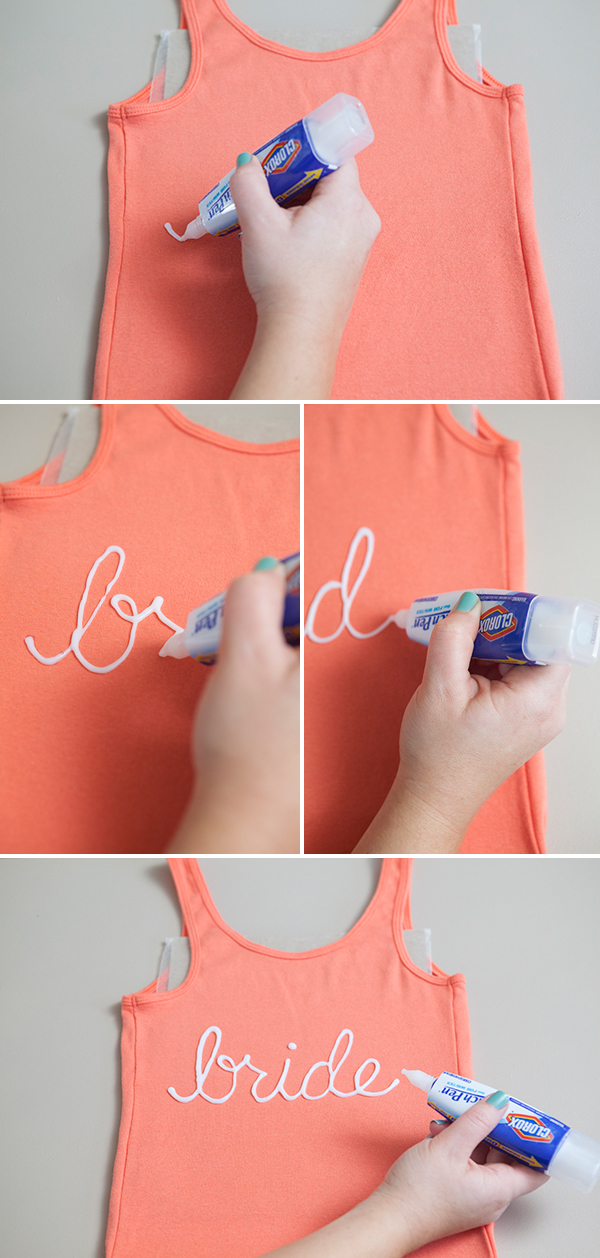
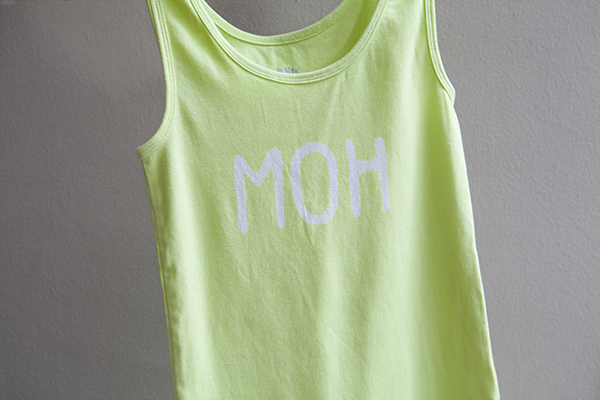
Using your Clorox bleach pen, carefully write Bride or Bridesmaid or MOH (maid of honor) or MAID or… anything that you would like! Try to keep the line of bleach as thin and even as possible. Go back over lines that ended up sparce – to make the bleach design even. The bleach will spread a bit so fine details are not easy to create. Keep it simple. If you feel uncomfortable doing this freehanded, you can trace your design with chalk first – but sometimes that can be difficult with stretchy materials. Also, this technique works best with clothing that is tightly knit, larger knits will cause the bleach to spread too much and could negatively effect your design. *Please read the color tips below!!!
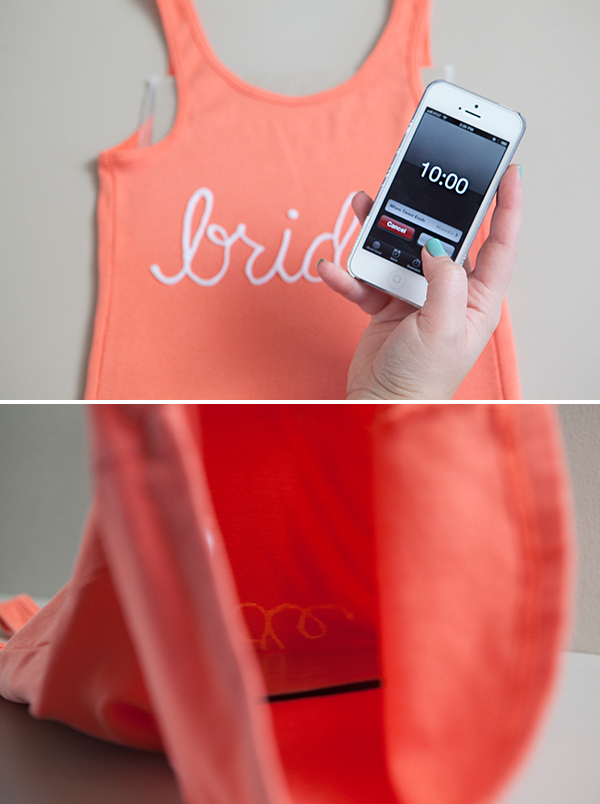
Once you are finished with your design, start the timer at 10:00 minutes.
/////// TIMING TIP ///////
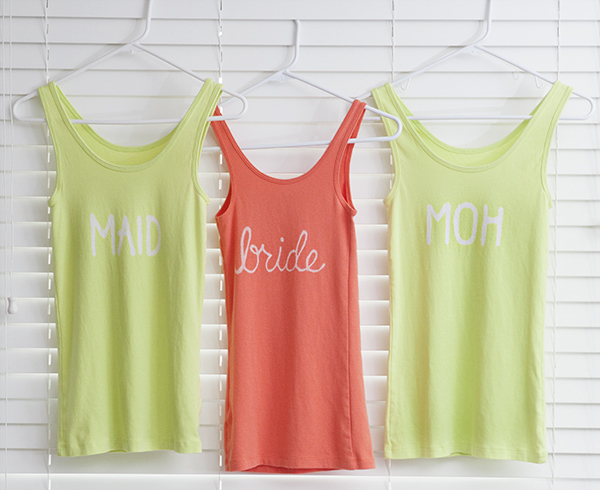
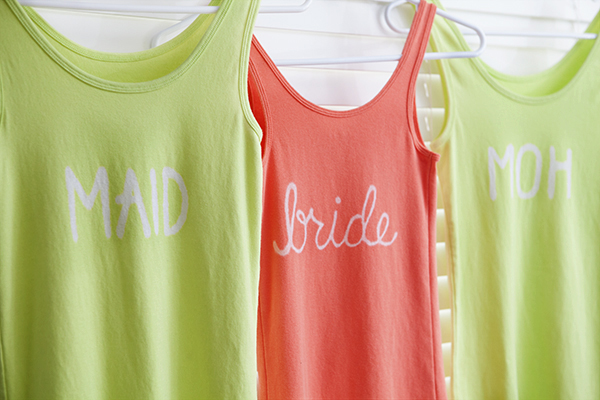
This tank and the green tanks only took 10 minutes, but my sweatshirt took 20 minutes – it all depends on the fabric! If you can’t see the shirt changing colors from the edges of the bleach, carefully lift up the shirt and look at the underside. When it looks close to white it is done! ***Since all materials are greatly different, I recommend doing a test spot inside your chosen shirt – on a seam – to find out exactly what color your shirt will bleach up to OR how long to bleach it for!
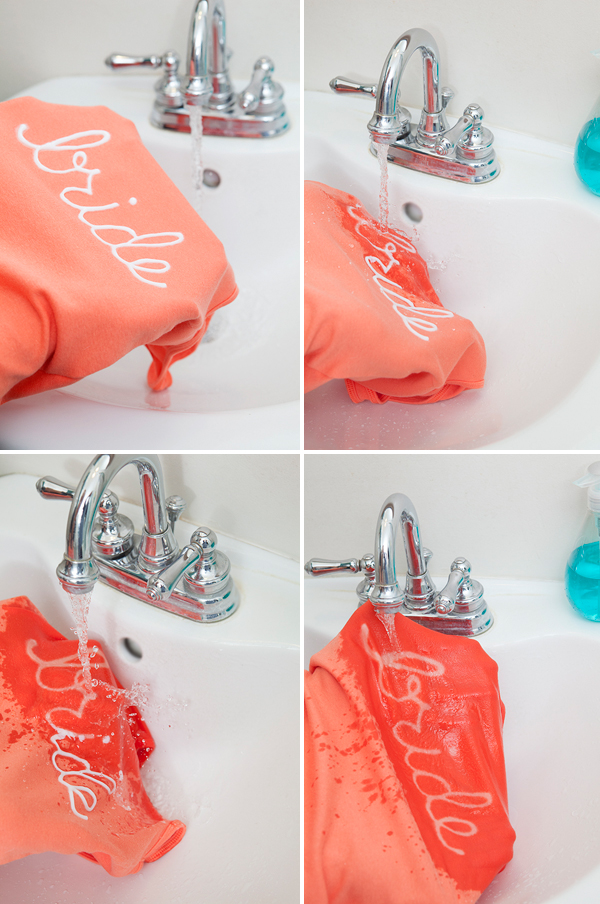
Carefully remove the cardboard and wash the bleach off the material. Making sure not to let the bleach touch any other areas of the material – it is bleach and will do what bleach does best. Wash with a hard steady stream of water until there is no bleach residue left.
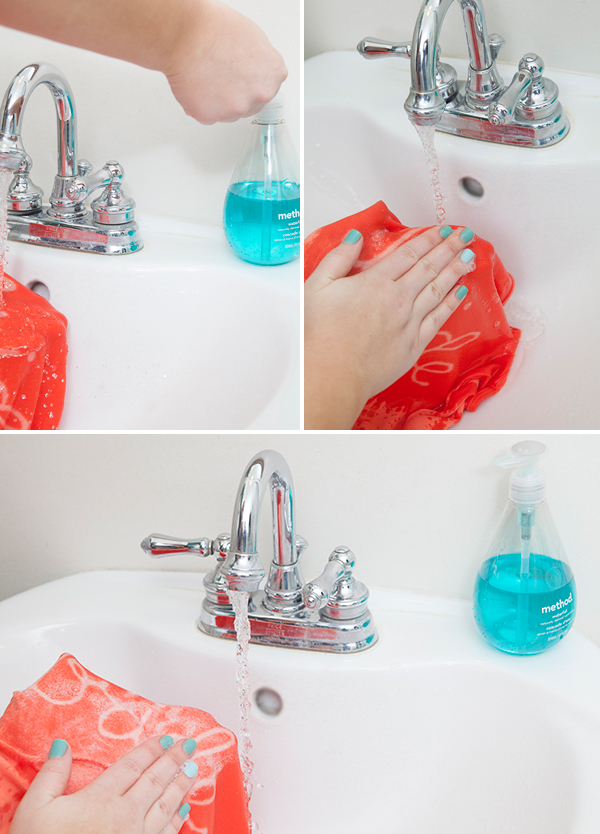
Using hand soap or the like, thoroughly wash the bleached area of your shirt and then wash it like regular in the washing machine. After you have used soap and water to clean the bleach from your shirt, there is no worry of it continuing to bleach or bleaching something else in the washer with it.
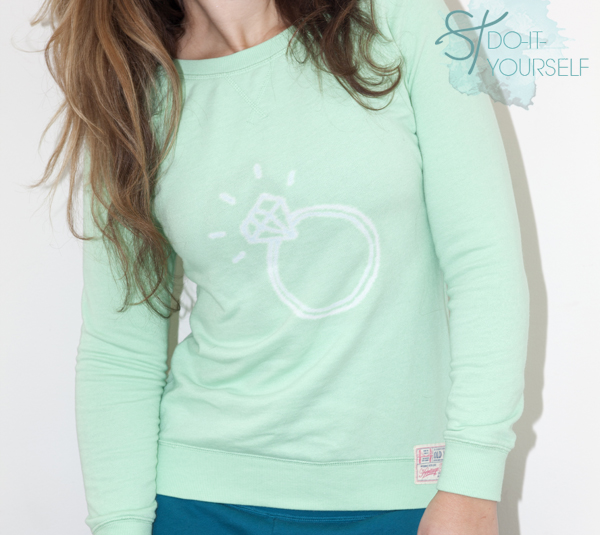
Aren’t they just adorable! So easy, so quick… and you can literally draw anything (like my diamond ring above) with these bleach pens – they are so easy to use!
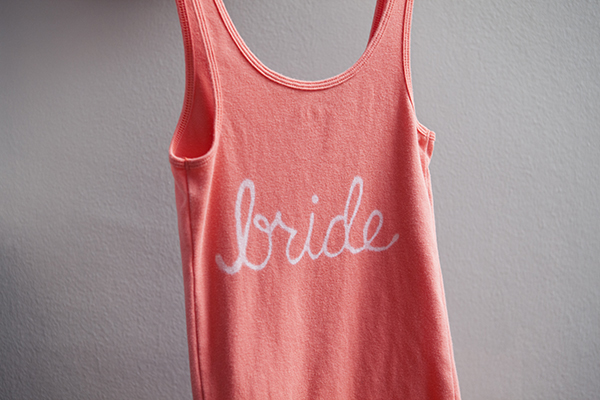
Unlike paint that might crack, a great thing about using bleach is that when the fabric is stretched – nothing happens. You actually bleach the fibers of the fabric so it morphs perfectly with any kind of stretch.
//////// LETS TALK ABOUT COLOR ////////
The darker the shirt the darker your bleach design will be. For example a navy blue or black fabric will (in most cases) not bleach up to white – it will bleach up to an orange-ish color. If that is what you want, then great – if not, choose lighter shades of material. Bright tees, tanks and sweatshirts like these have the perfect depth of color to bleach up to white. If you are concerned about what color your shirt will bleach up to OR how long to bleach it for, do a test spot on a seam inside your shirt! ***Some types of fabric are ‘bleach safe’ and don’t lend well to this project! Please to a test spot inside each shirt to determine this before hand!
As with all our DIY tutorials, if you create one of our projects please send us a picture or a trackback – We Love Seeing Your Creativity! If you use Instagram or Twitter please use the hashtag #SomethingTurquoiseDIY. Happy Crafting!
DIY Tutorial Credits
Photography: Studio 11 Weddings // DIY tutorial by: Jen | Something Turquoise // tank tops and Clorox Bleach pen: Target // mint sweatshirt: Old Navy // nail polish: Essie in Turquoise & Caicos and Mint Candy Apple

Comments