
DIY | Martha Stewart Glittered Glass Jars
I absolutely love DIY Friday’s… especially when I get to share a super easy (and gorgeous!) project with you like this one. How to quickly turn glass jars into glamours and glittery works of art! These would make the perfect addition to almost any wedding decor, they would be wonderful for bridal showers and even better decoration for Valentines Day!
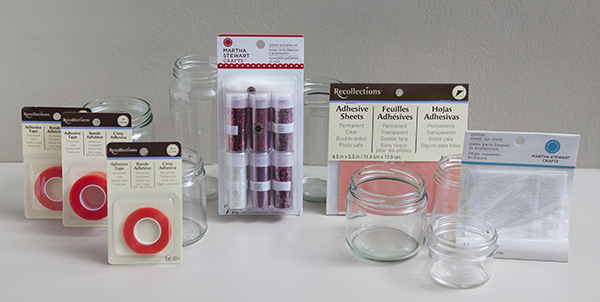
SUPPLIES // gorgeous Martha Stewart Crafts glitter – my set below is themed for Valentines Day, straight-sided glass jars, double sided craft tape, and Martha Stewart glitter clean up cloth is totally optional but your boyfriend or hubby will thank you for using it!
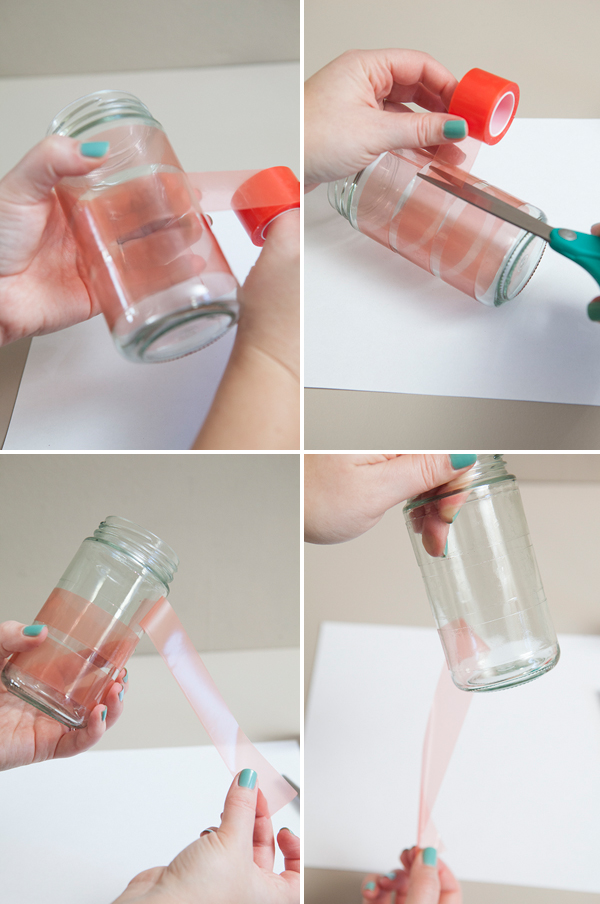
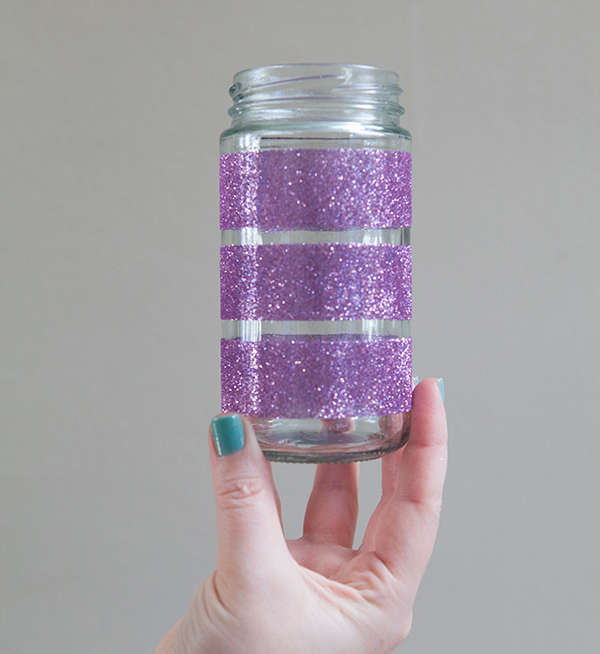
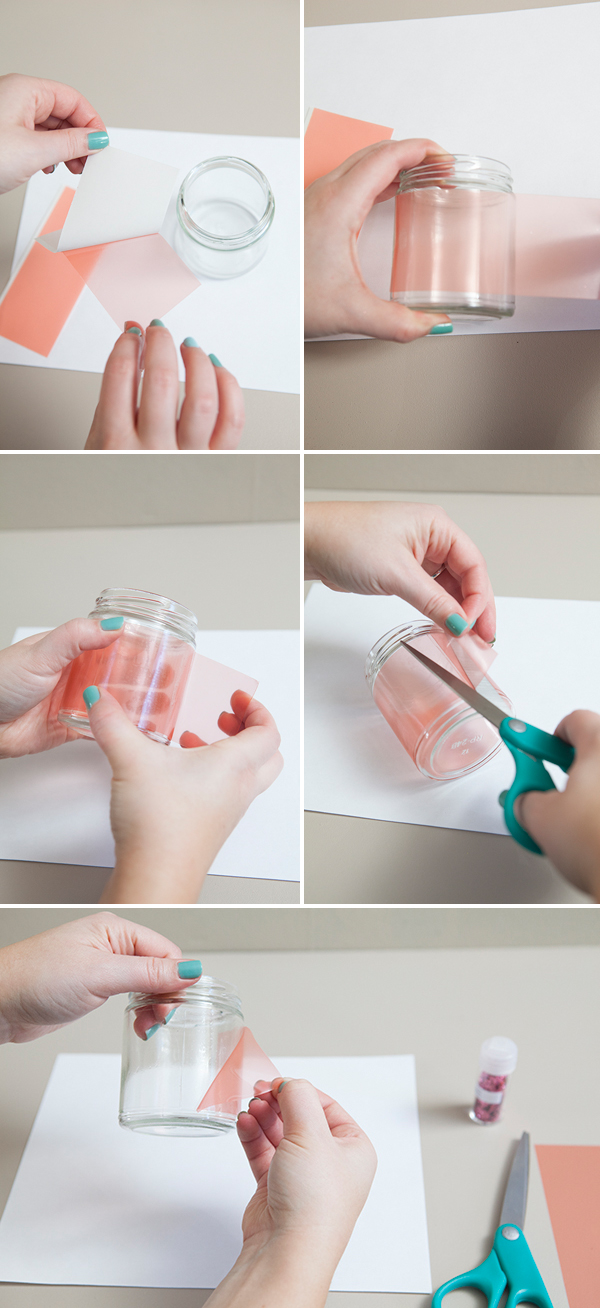
The first step is to apply your double stick tape to your clean glass jar. There are so many different sizes of tape and so many different designs that you can make with it!
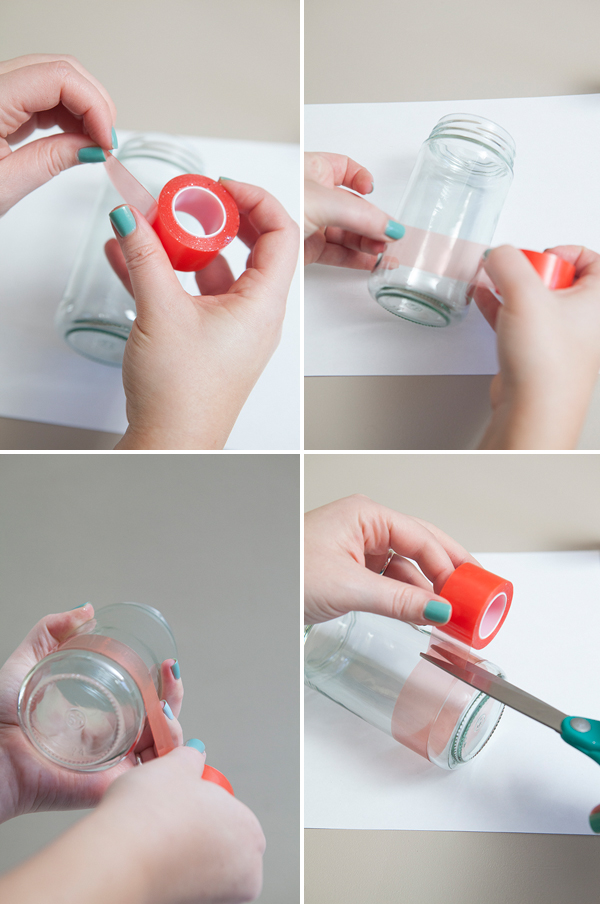
I prefer a double-sided craft tape like this one that has a backing to it, which protects the surface of your tape until you are ready for the glitter. You can of course use regular old double stick tape but it is much more difficult to work with.
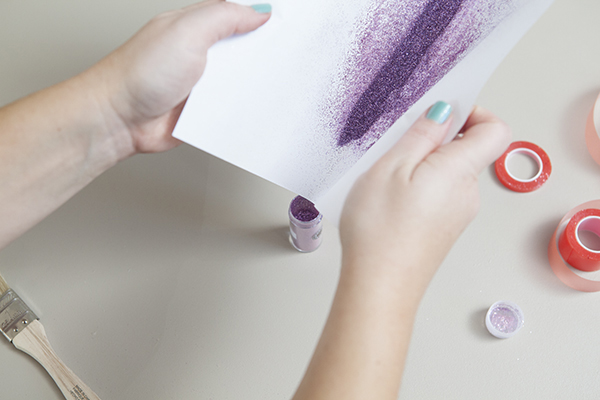
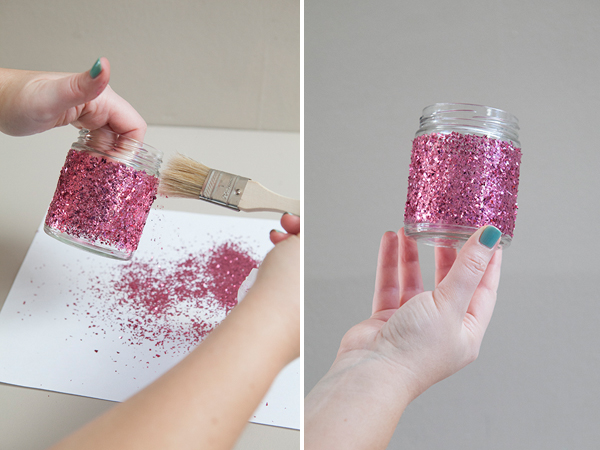
Once you peel the protective backing from your tape, add your choice of glitter!!! Martha Stewart Crafts glitter is by far my favorite… and if you want to regularly make fabulous holiday decor, they always come out with holiday themed sets like the one I am using.
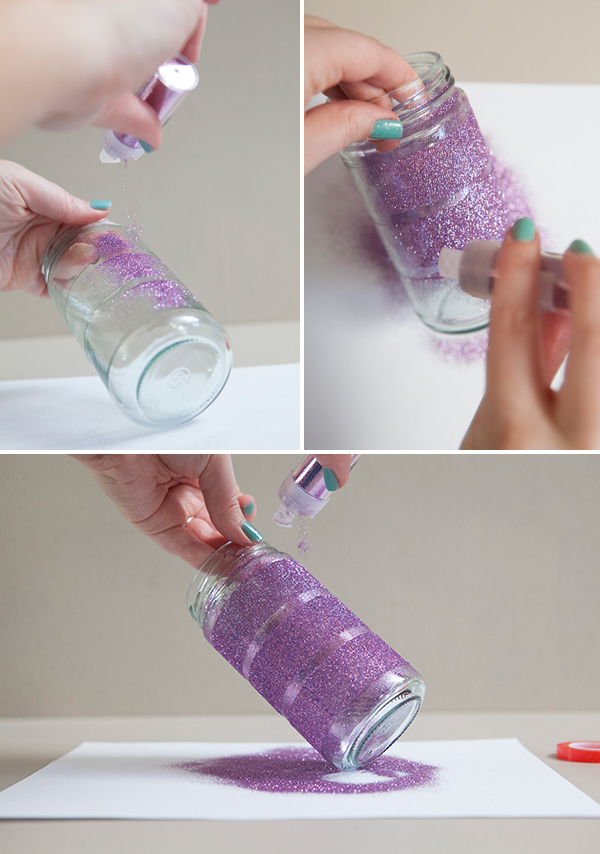
Once the tape is covered in glitter, carefully press the loose glitter into the tape – if you see any bare spots, go back and add a little more. Don’t worry too much about full glitter coverage, the beauty of this project is the candle light showing through the glittered tape.
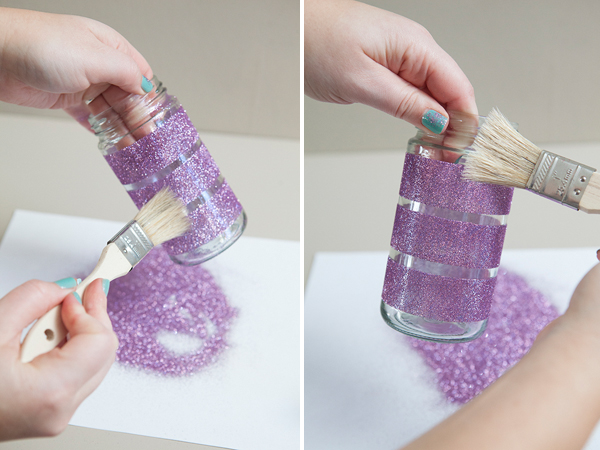
Then using a loose bristled brush, gently brush the excess glitter off your jar…
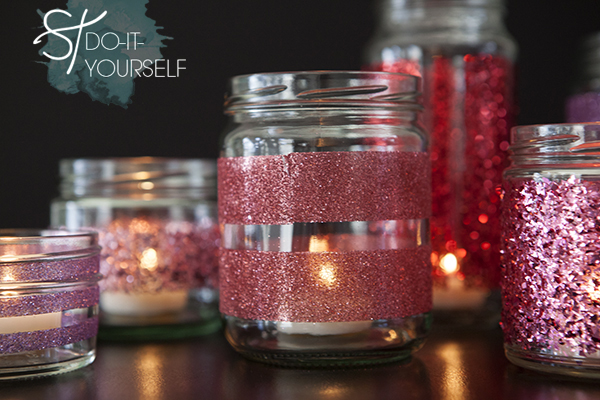
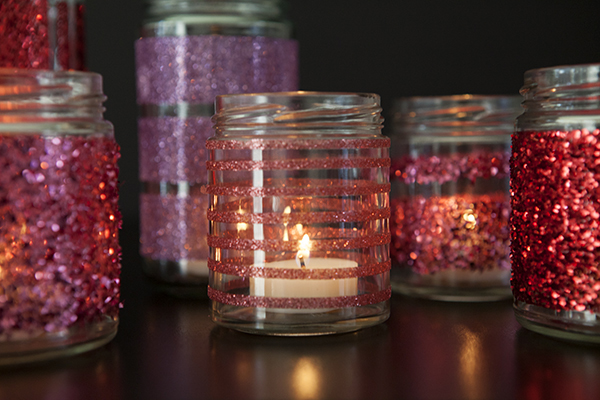
Aren’t these just gorgeous! They seriously take minutes to create and you might even have all the supplies at home… isn’t there an old jar of jam or olives in your fridge that needs new life?
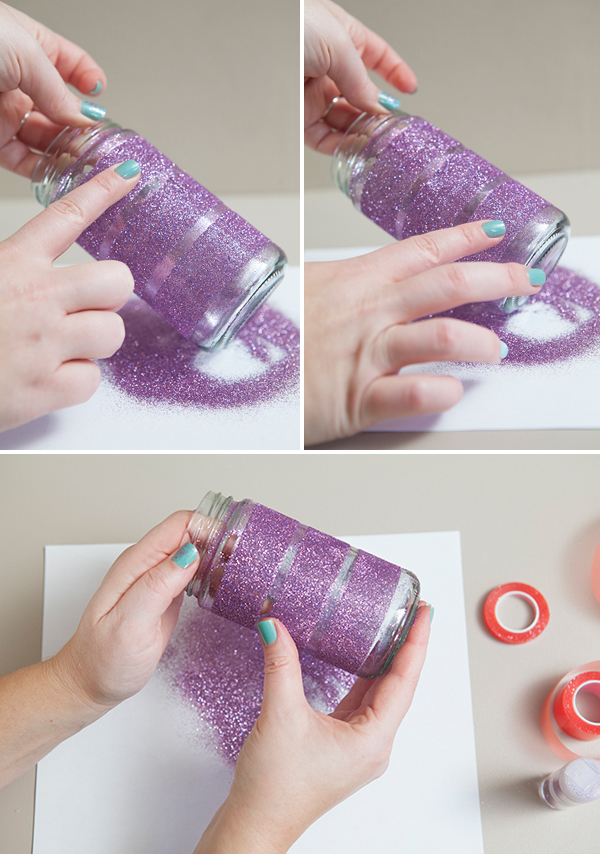
Don’t waste glitter! Save what you can…
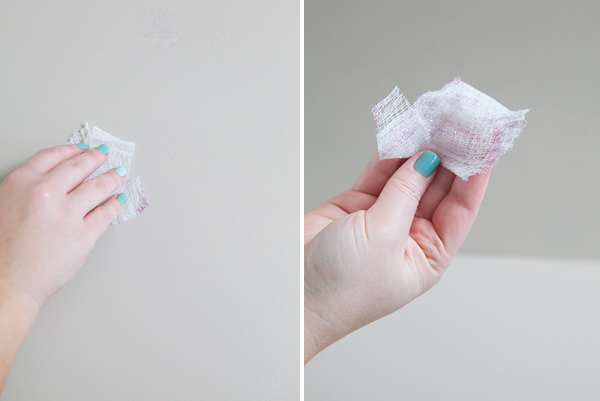
…and easily clean up the rest with Martha Stewart Crafts glitter clean up cloth. It’s tacky to the touch and magically picks up loose glitter – the man in your life will thank you.
Now for the whole sheet of double-sided tape… I wanted this jar to be completely covered in glitter, so measure your jar and cut accordingly.
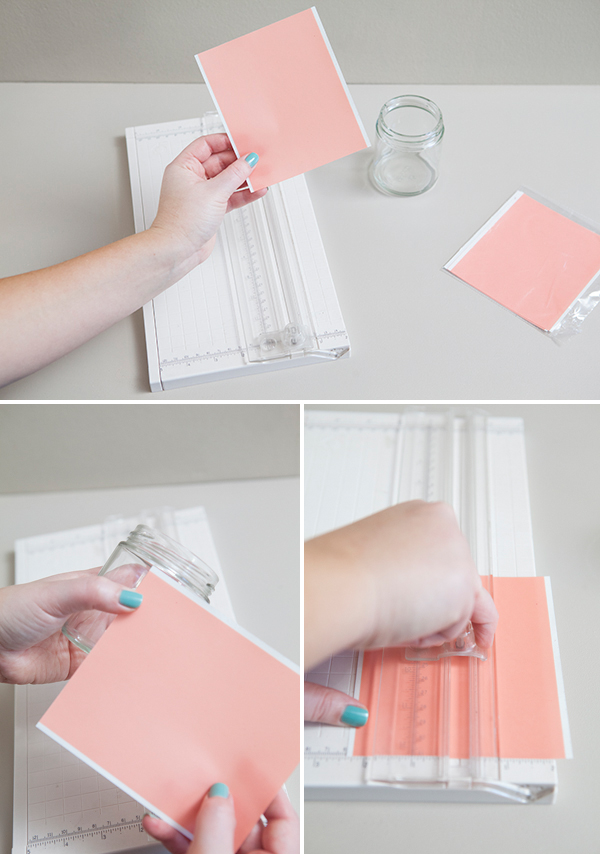
For this size jar I was able to cut the sheet in half and ended up needing almost all of both pieces to completely wrap the jar.
Then cover with GLITTER! I am obsessed with this coarse, flake style glitter… it adhered very well to the tape. Carefully pat the glitter into the tape…

…and gently brush off the excess! Done and fabulous!
What’s wonderful about these, besides the fact that they take minutes to create, is that they aren’t permanent if you don’t want them to be. Simply rip the tape off the jar and make them into something else when you want to! There are so many different designs and patterns that you can make with the tape… not to mention all the different shades of glitter that you can use… the possibilites are endless!

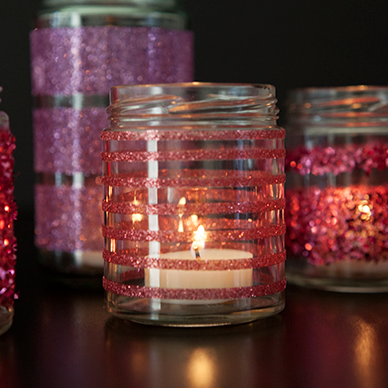
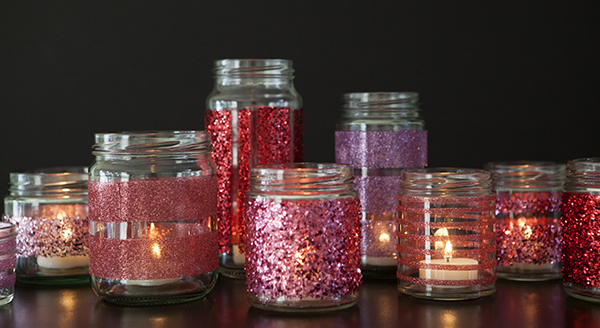
And now for the candle light… so romantic…
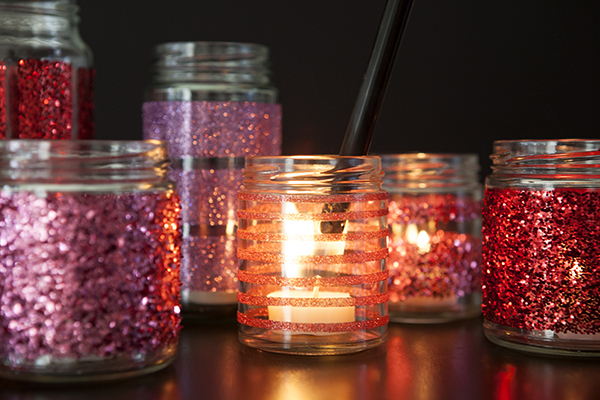


These will definitely be on my Valentines dinner table, how about yours?
I have some huge crafty news to share!!! Martha Stewart Crafts has chosen their favorite craft bloggers to participate in a special year long program called “12 Months of Martha” – and Something Turquoise is one of them! Each and every month, we will be receiving an amazing box full of the latest Martha Stewart Craft products with the expectation of creating a DIY tutorial from the supplies within each box. I’m absolutely thrilled to be a part of this crafty program and I’m really looking forward to a new monthly challenge! This tutorial is officially our very first ’12 Months of Martha’ post… but I was actually so inspired by the products I received this month that next Friday’s post will also be a ’12 Months of Martha’ tutorial. From now on, look for the logo above to denote a ’12 Months of Martha’ tutorial.
As with all our DIY tutorials, if you create one of our projects please send us a picture or a trackback – We Love Seeing Your Creativity! If you use Instagram or Twitter please use the hashtag #SomethingTurquoiseDIY. Happy Crafting!
Photography: Studio 11 Weddings // DIY tutorial by: Jen | Something Turquoise // Martha Stewart Valentine’s Theme Glitter and Glue Set: Martha Stewart Crafts // all these adorable clear straight glass jars : Specialty Bottle // Recollections Double Sided tape, Martha Stewart Paper Trimmer and Martha Stewart glitter clean up cloth: Michaels // nail polish: Essie in Turquoise & Caicos and Mint Candy Apple

Comments