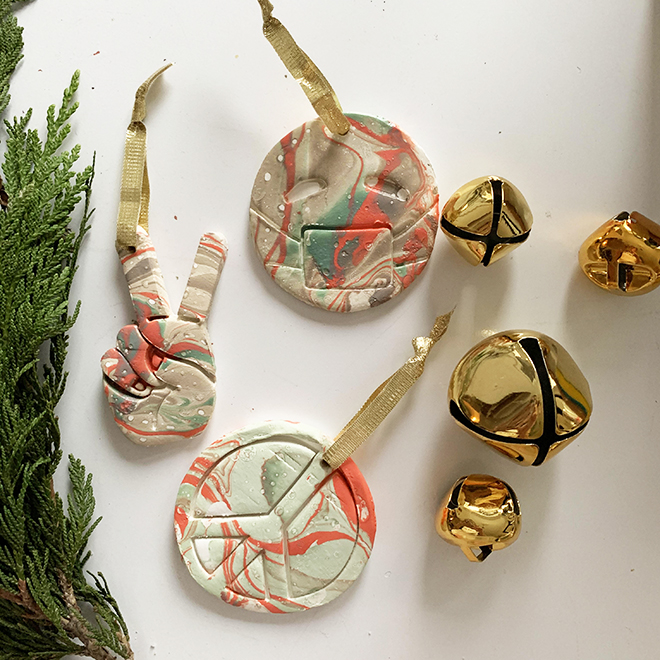

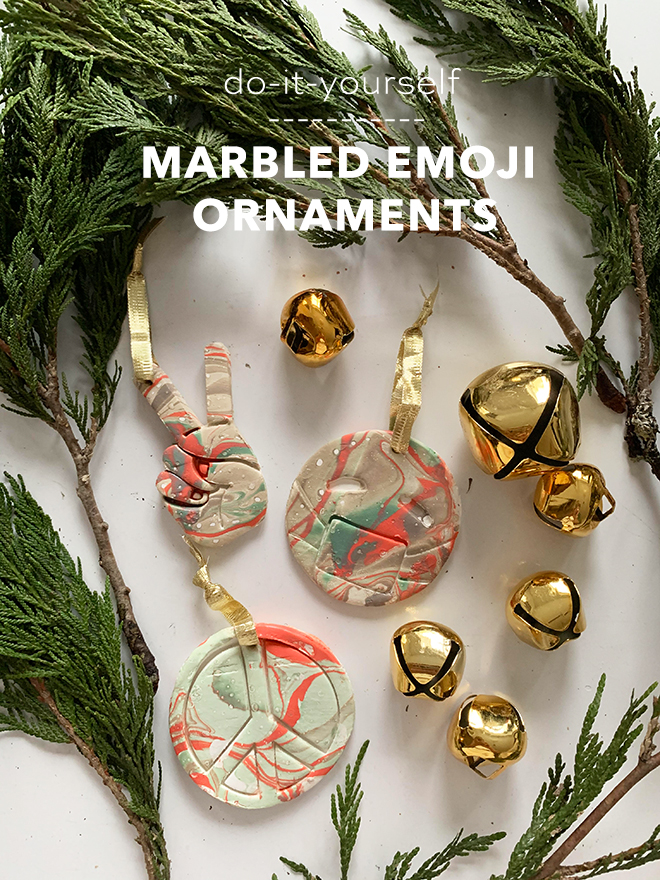
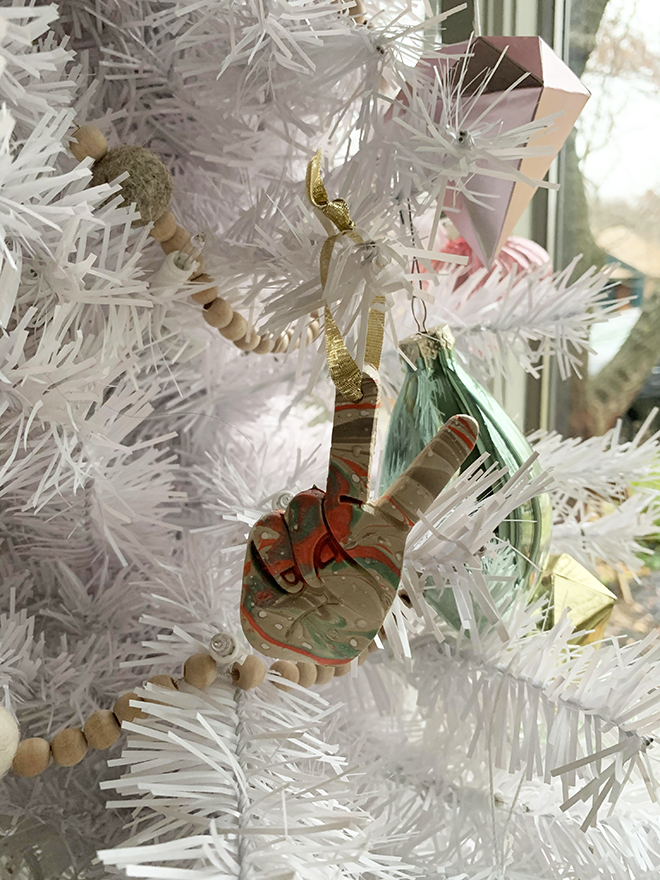
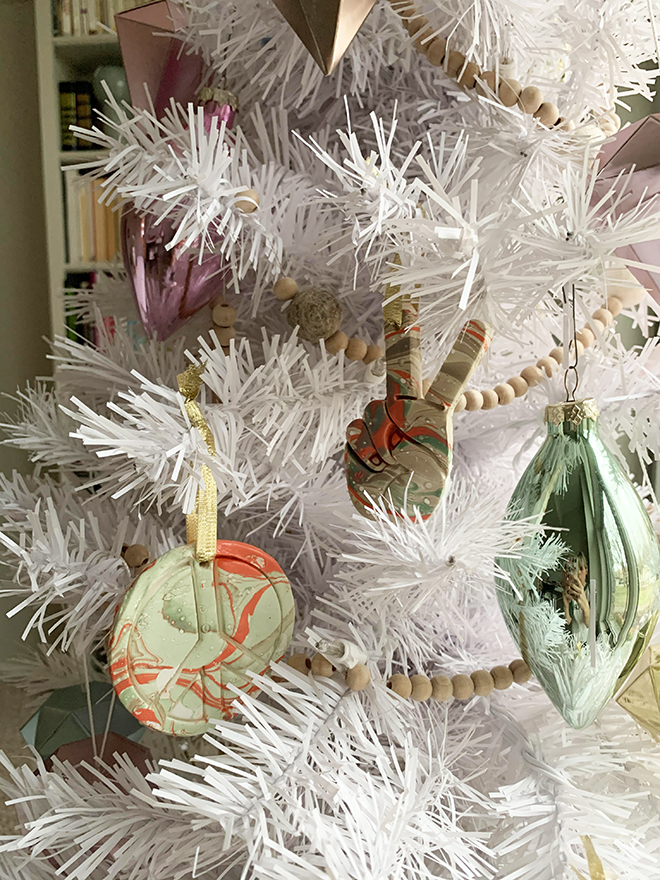
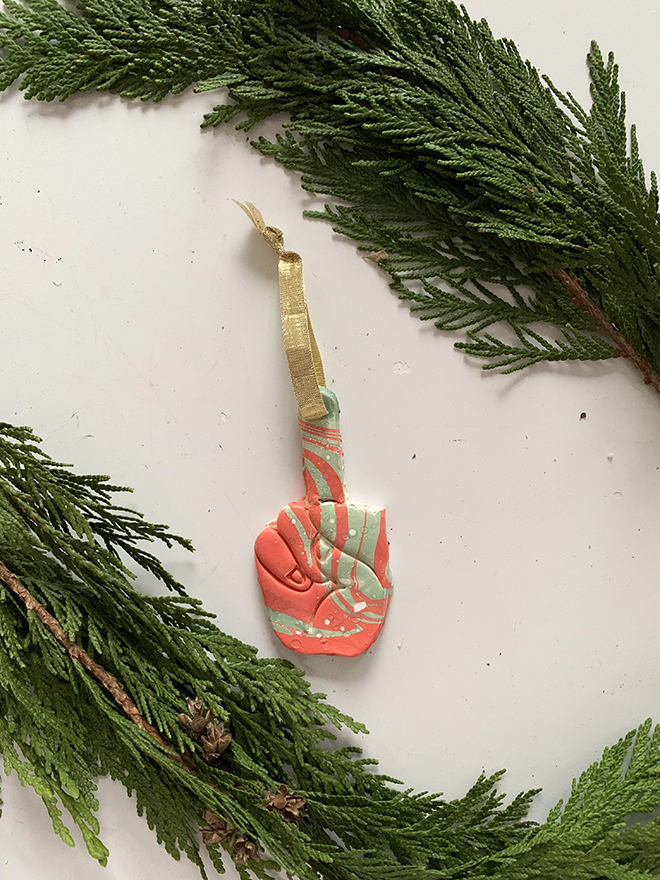
DIY Marbled Emoji Ornaments
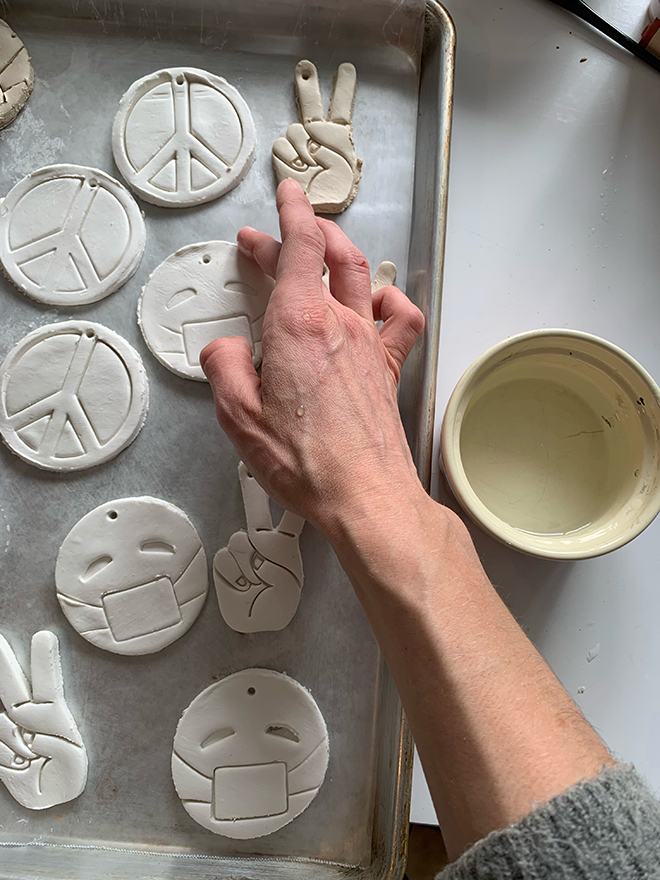
Every year my son and I make ornaments for everyone in our family. We love to tie them to their gifts as a little added bonus. This year I wanted to come up with something that represented the year we’ve had. I found a few emoji ornaments on Amazon Handmade that I felt like captured 2020 – peace signs because of the divide and unrest we’ve all felt, and the masked smiley face for obvious reasons, of course you could also use Christmas or any other shape. I also wanted to find a beautiful and unique way to color them that wasn’t just using basic acrylic paints. This marble technique was just the thing I was looking for. Using materials I already had – nail polish and water – I not only transformed the ornaments with color, they have a beautiful sheen that makes them look so much more elevated than painted clay. Do you make ornaments for your tree?
SUPPLIES:
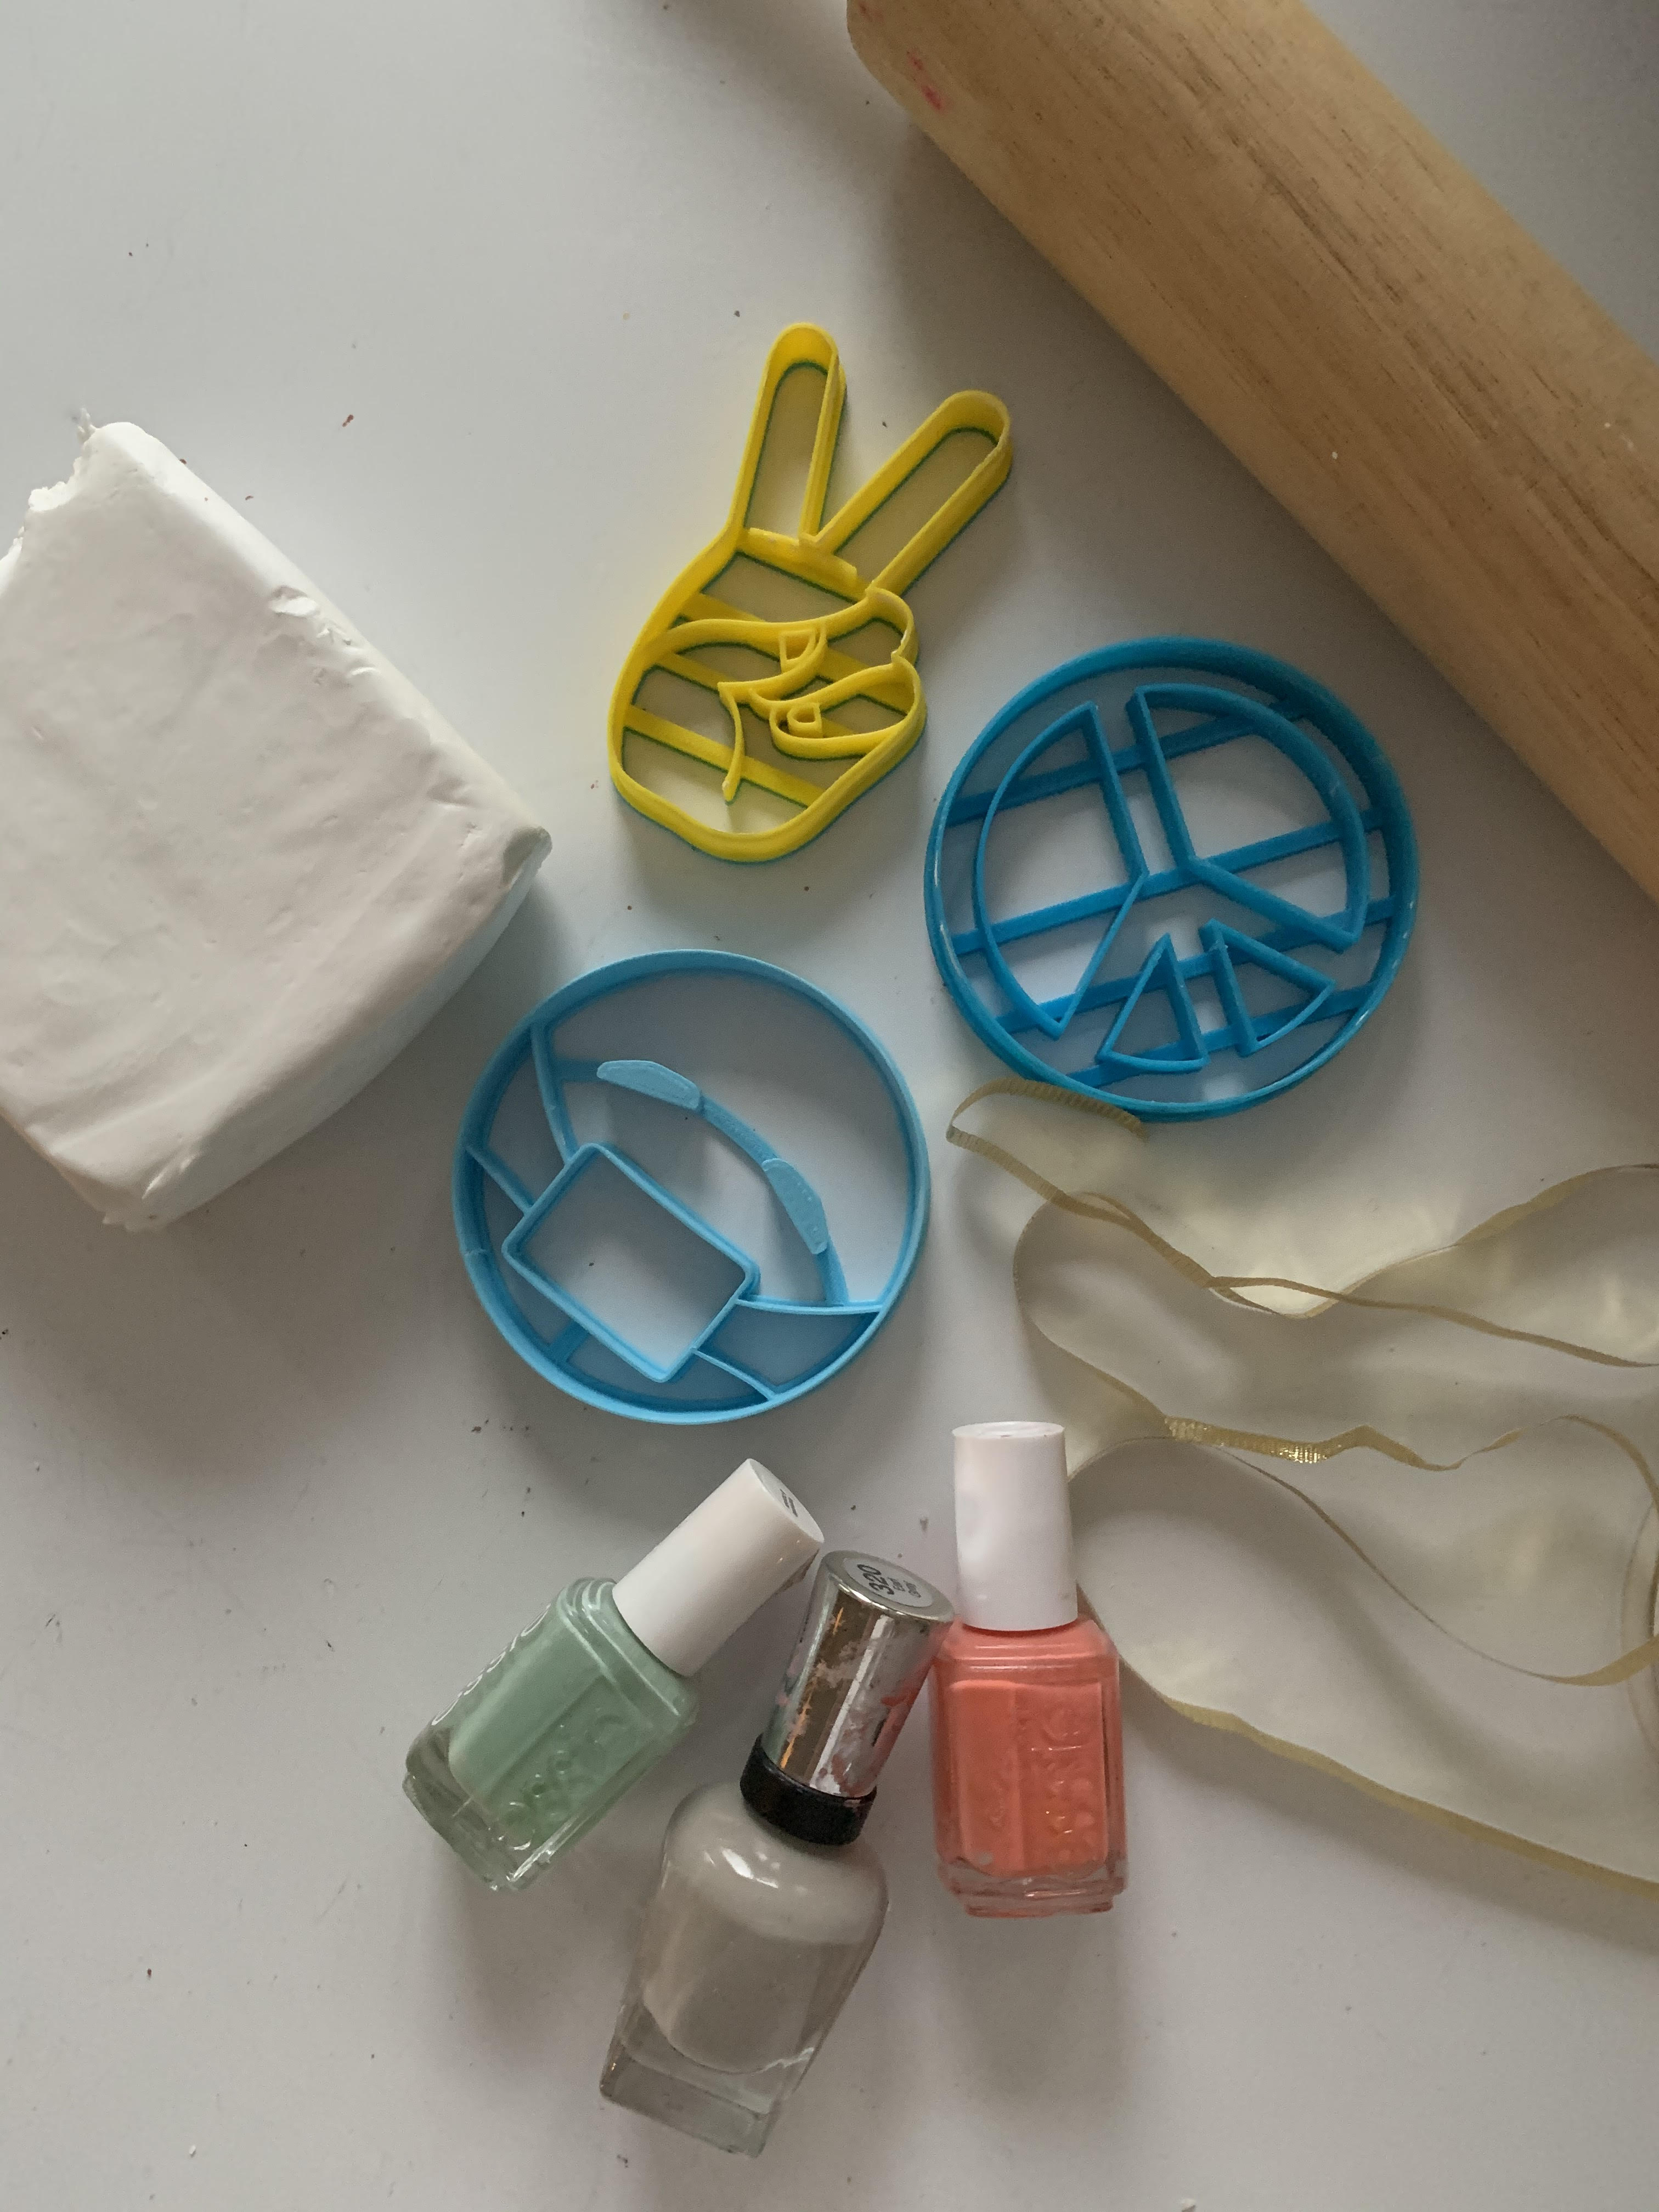
- air dry clay
- emoji cookie cutters (I used two peace signs and the mask emoji)
- rolling pin
- spatula
- cutting mat
- distilled water
- nail polish in various colors
- ribbon
- nail polish remover (for clean up)
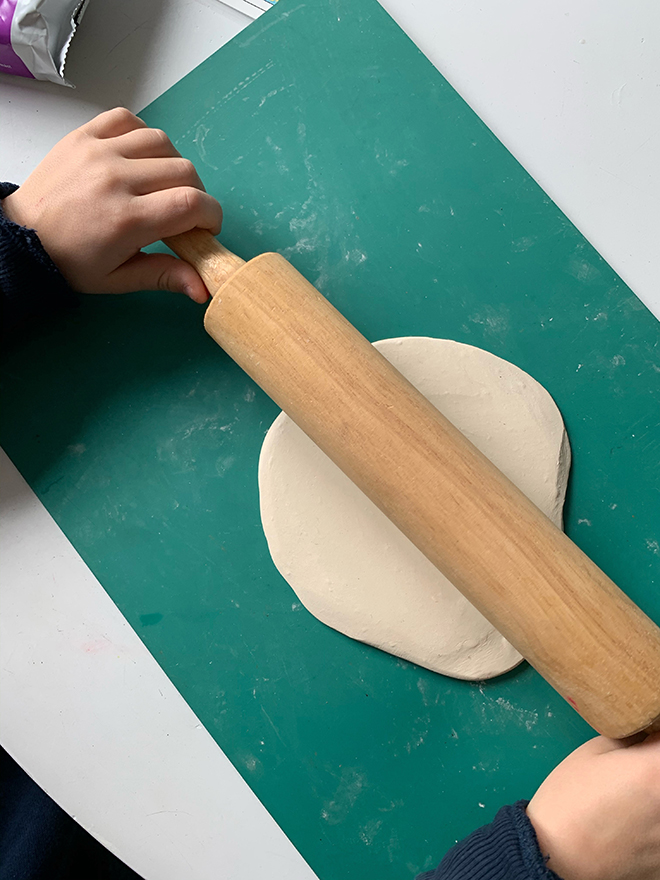
ROLL OUT CLAY
Roll out your clay. I advise using a cutting mat or something that is pliable to help peel off successfully. This is a great part of the project to involve your littles!
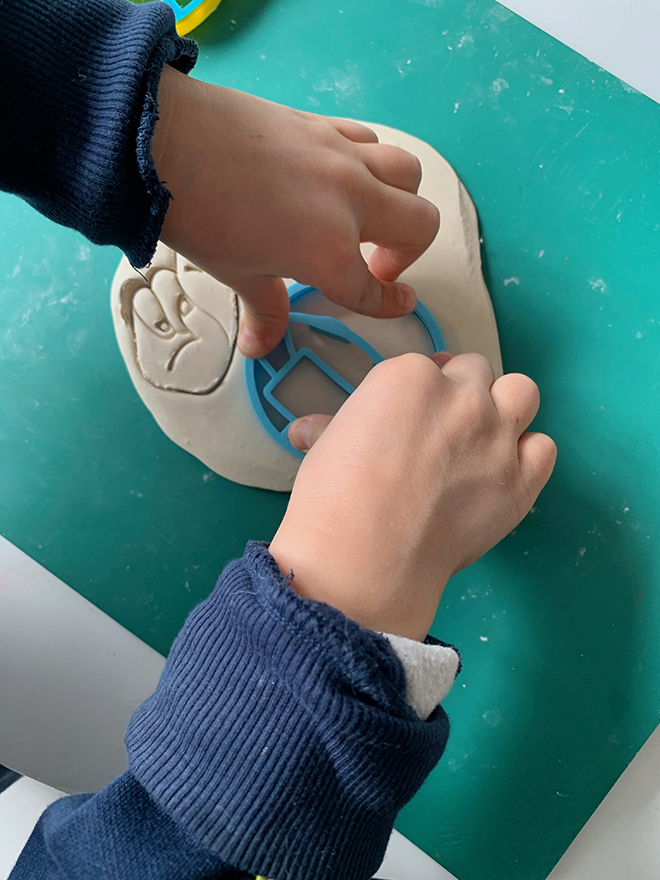
CUT SHAPES
Use your cookie cutters to cut shapes, then peel away the excess.
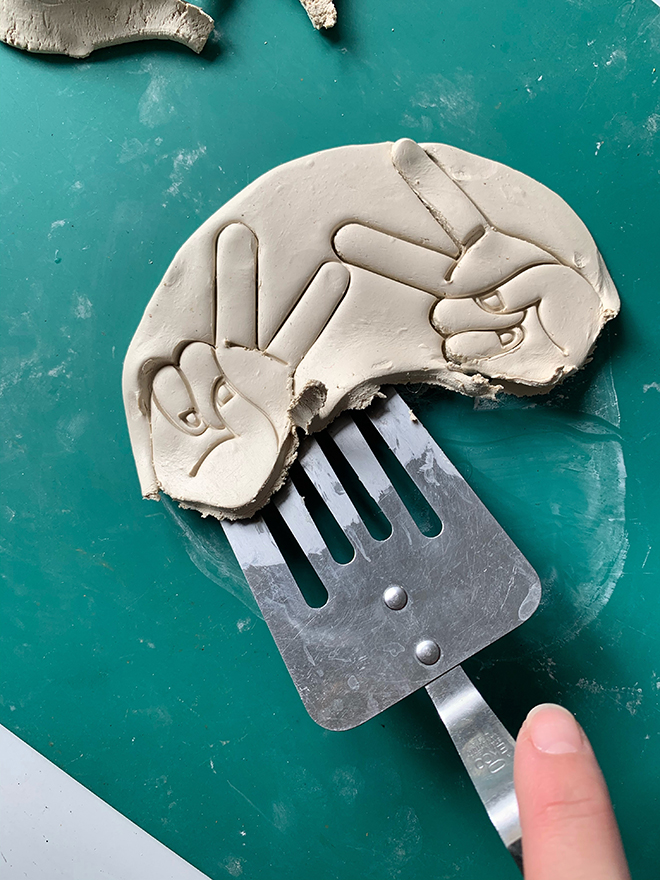
TRANSFER TO WAX PAPER
Use a spatula to carefully transfer shapes to wax paper or even better a cooling rack to help dry faster.
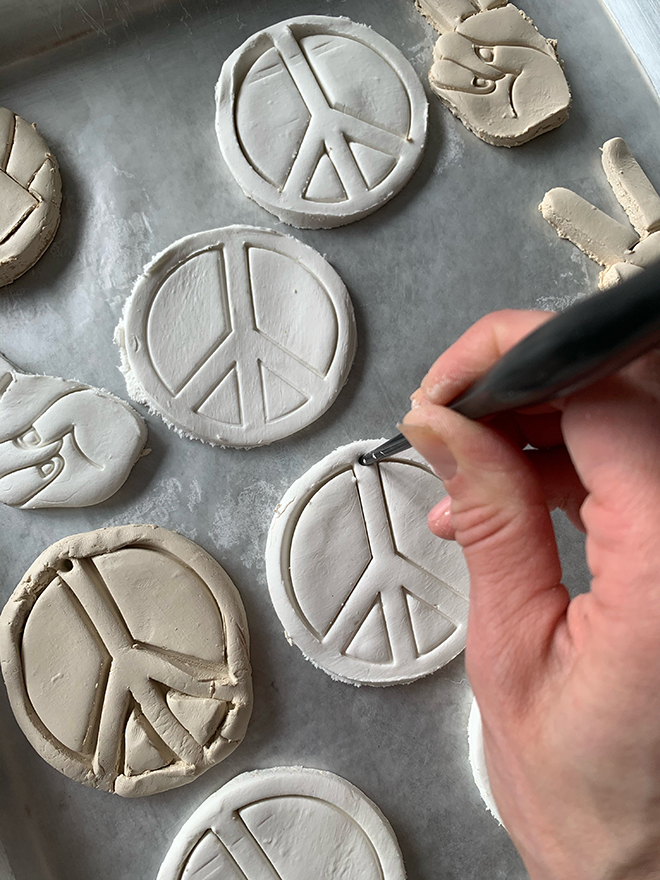
MAKE HOLES FOR HOOKS
Use the end of a paint brush or a skewer to make the holes for the hooks.
SMOOTH EDGES
Dip your fingers in water and run your finger around the edges to smooth out.
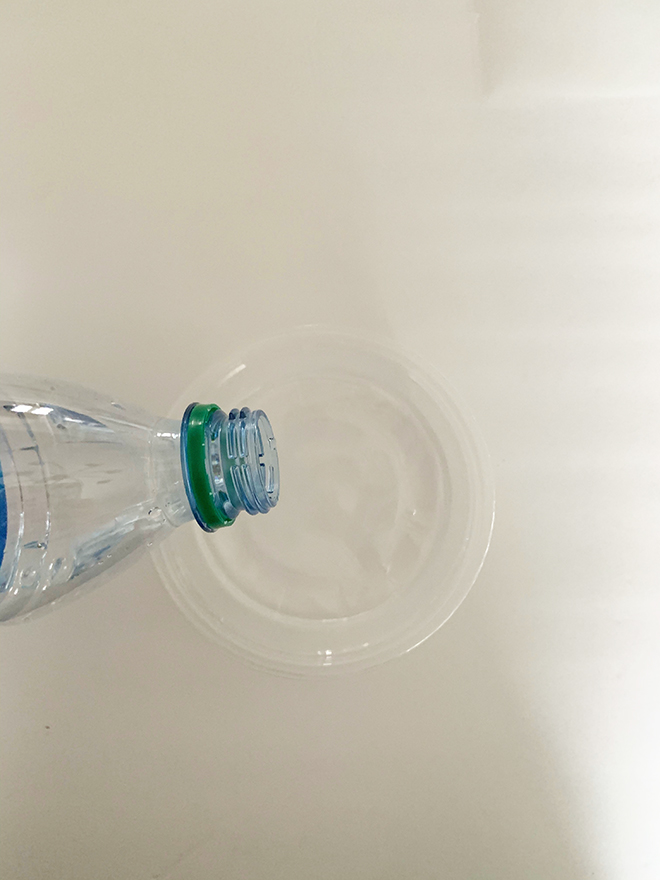
MAKE COLOR BATH
Pour distilled water into a disposable bowl or container.
ADD NAIL POLISH
Carefully pour a few drops of nail polish into your bath. Add additional colors, but I advise not using too many (I limited mine to three), or the colors could look “muddy.” For best results pour close to the surface.
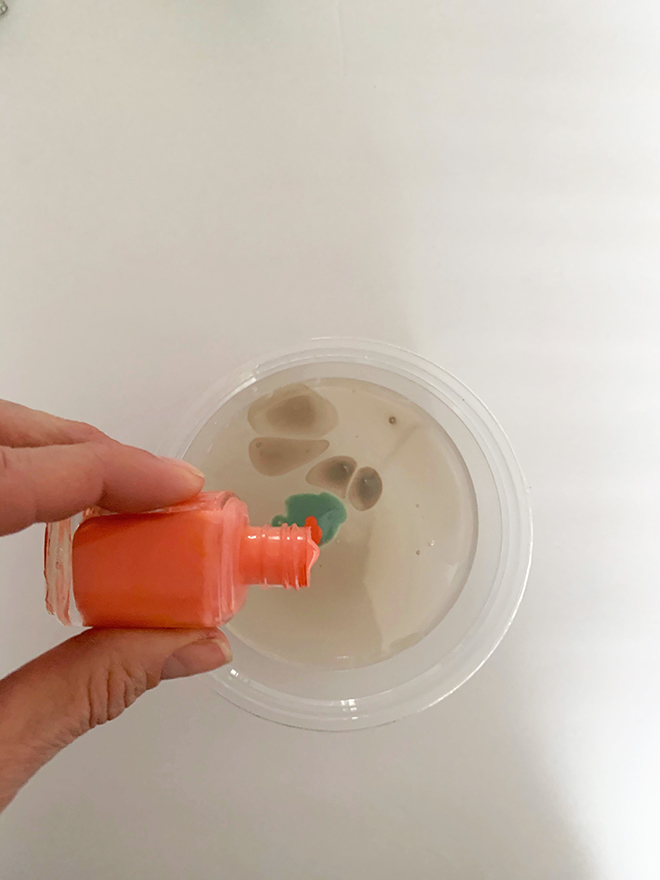
MARBLE COLORS
Swirl color together gently. Color should cover surface area of the water at least the size of the ornament.

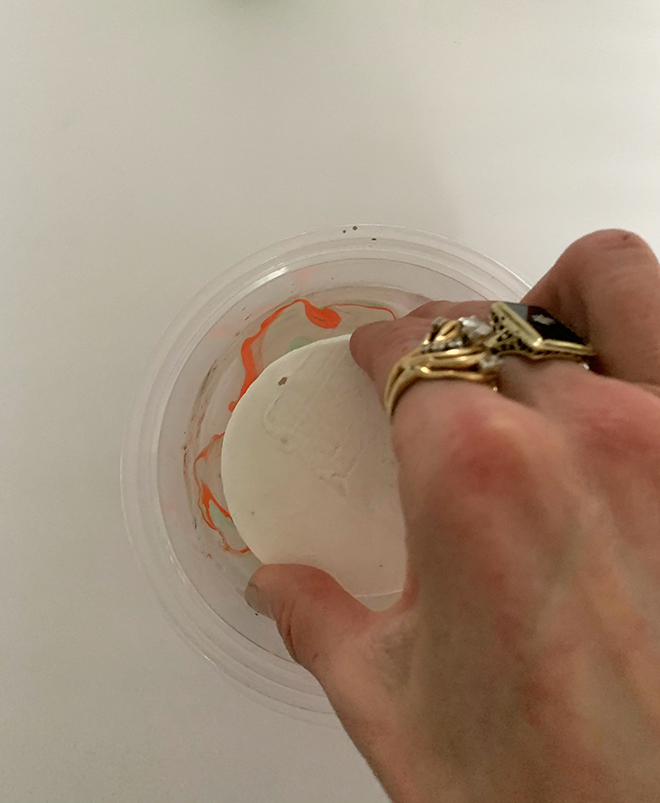
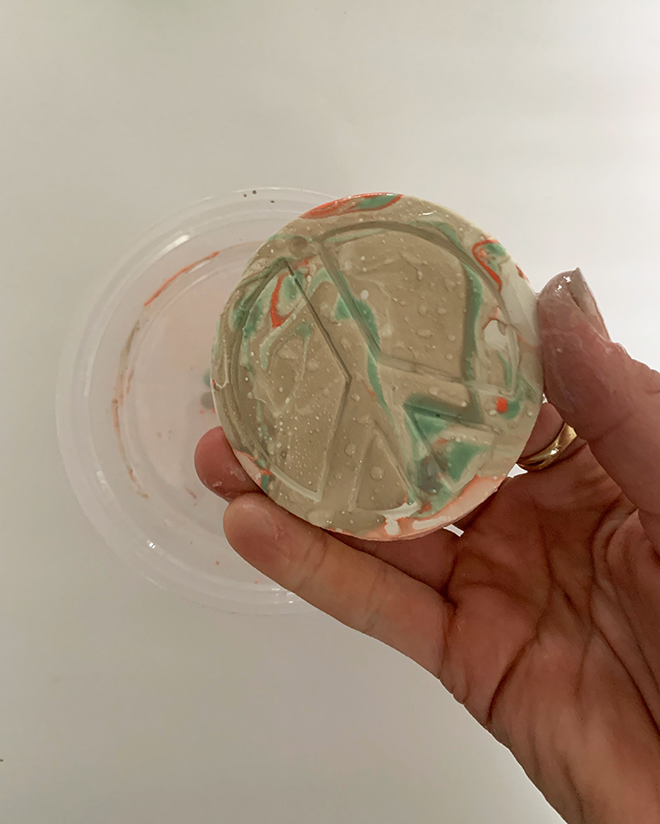
DIP ORNAMENTS INTO COLOR BATH
Quickly dip ornament into bath and pull out. Because the ornament is made out of clay you want to submerge the top surface fully, but work quickly as to not get rewet the clay too much.
LET DRY
Place back on the wax paper or cooling rack. Re-puncture the hole for the hook if necessary. Use skewer to clear the excess color from the surface of the water before adding more color to dye the next one. String and tie ribbons.
MARBLING TIPS
- use distilled water
- pour nail polish close to the surface, so the maximum amount of color stays on the surface
- gently marble the colors as to not over mix
- make sure color covers the entire area where you will be dipping your ornament
- when submerging clay work quickly. If left wet for too long it will soften back up
- I learned that you should wear gloves or use tongs when dying the ornaments, or you will get lots of nail polish on your fingers.
AND BECAUSE 2020…
Of course a finger broke off of my favorite peace emoji. So 2020.
DIY TUTORIAL CREDITS
photography + DIY tutorial: Lauren Koster of Lauren Koster Creative // air dry clay // peace sign cookie cutter // peace emoji cookie cutter // mask emoji cookie cutter // rolling pin // spatula // cutting mat // nail polish in various colors // ribbon

Comments