
DIY | Beach Wedding Terrariums
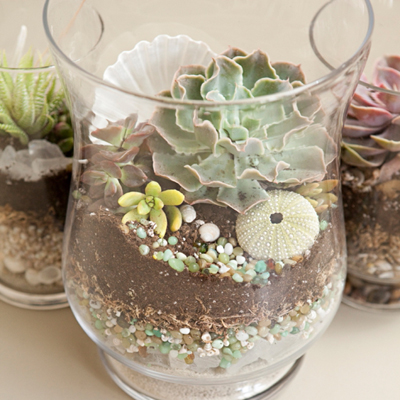
I love seashells, I love succulents and I love beach weddings. I also love that I’ve recently been seeing terrariums used as both decor + favors for weddings. What’s wonderful is that they are living and will continue to live well beyond your special day or special event. Another thing that’s great is they can be made well before your wedding, leaving less to do right before (just make sure you water them!). So I figured I would dive head first into learning about what it takes to make them, so that I could bring you the real scoop and the day has finally arrived! I challenge you to get creative with the ingredients – just like I did. Seashells + sea glass, rocks + pebbles – same thing! My take is a design for a beach wedding, but yours can be anything you please, using any colors and plants that you’d like. I want to give a special shout out to CereusArt and The Succulent Source for donating some of the ingredients! Don’t forget to share your creations with us by using the hashtag #somethingturquoisediy on Twitter and Instagram!
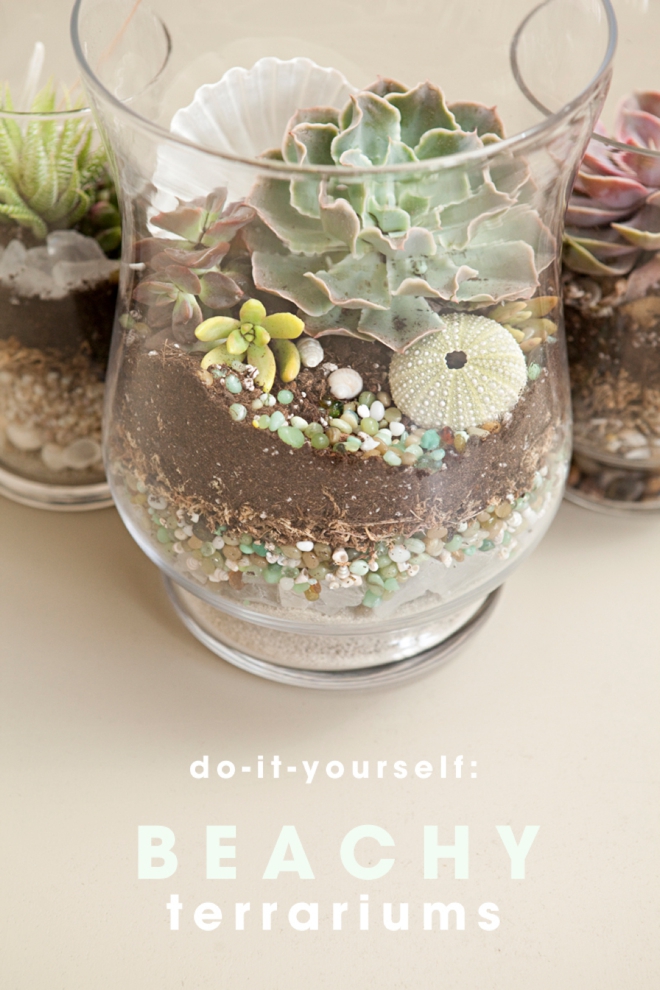
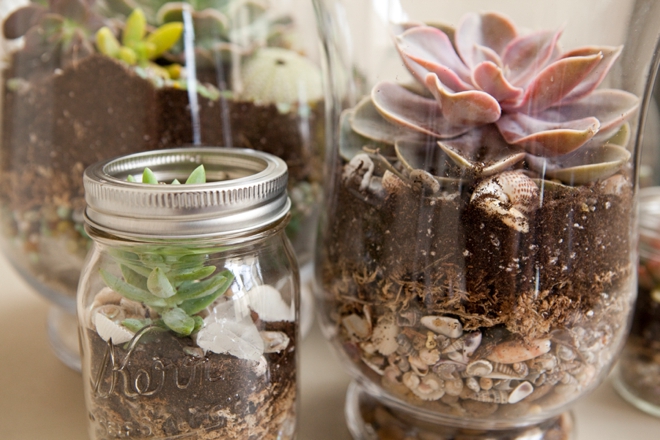
You can make centerpieces of any shape or size…
You can make mason jar favors; big or small…

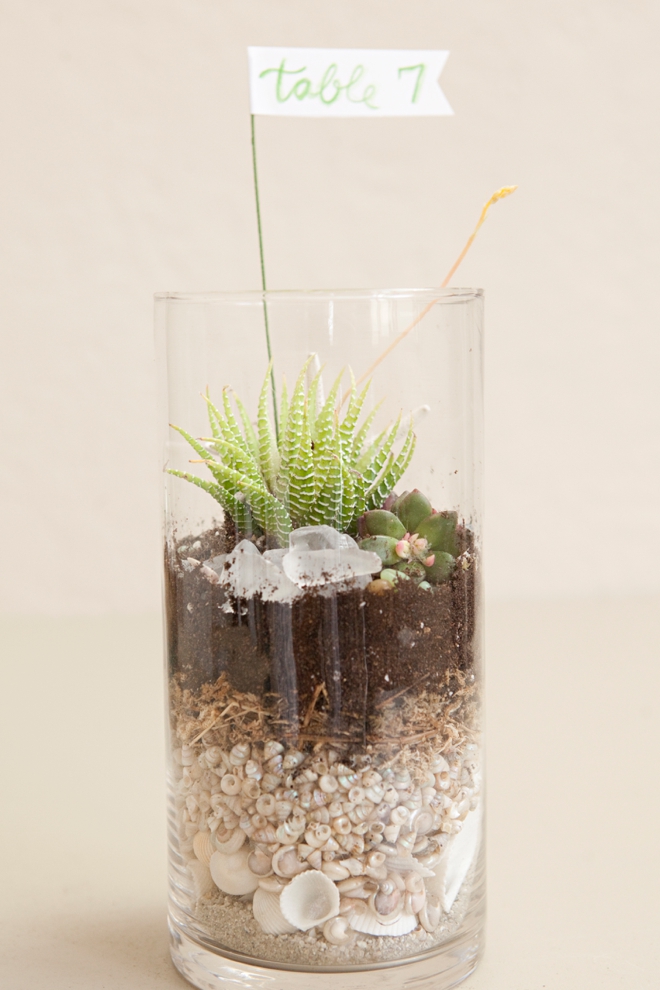
You can even add a table number to them…
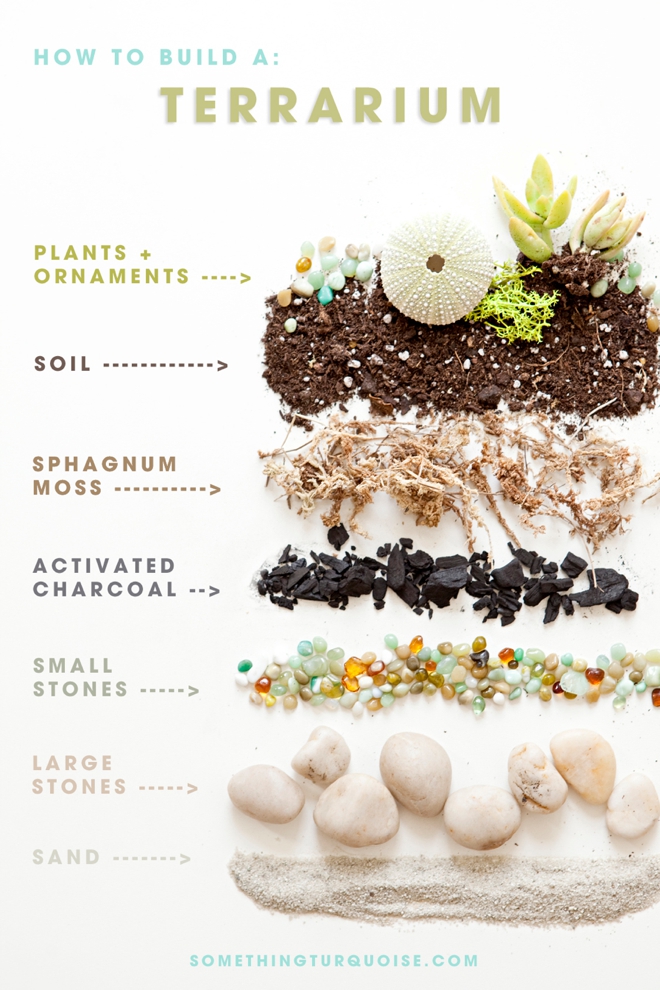
Terrarium Layers
These are the exact ingredients and layers it will take for you to build any size terrarium. Check out our shoppable widget at the end of the post to find links to all these items.
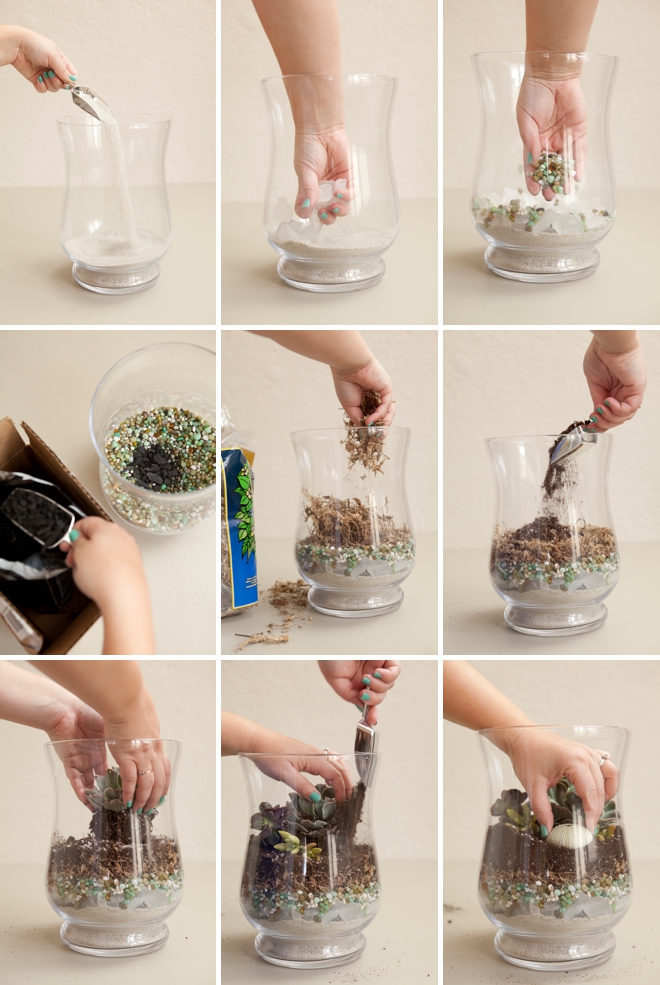
How to Build A Terrarium
Add each of these items, layer by layer, in any size glass jar or vase. Ok, you don’t have to use glass but then you won’t see all the pretty layers! Try your best to keep each layer clean and packed tight so that they are all defined, it can be difficult and messy. Here are my tips and info on each item:
1. Sand: Optional, for regular terrariums – but a must for beach wedding terrariums! Do not steal sand from the beach that has yucky bacteria and nasty things living in it. Buy “play sand” from your local hardware store, it’s crazy cheap!
2. Large Stones: Large stones, rocks, sea glass or seashells are the next layer. In some of the jars I used large seashells and in some I used sea glass. What this layer does is add air. The space in between all the rocks allows your potted plant to breath and drain properly without a hole in the bottom of the container. You can add as much or as little as you want, depending on the size of your container.
3. Small Stones: Small stones, pebbles, or tiny seashells are up next. In some of the jars I used small seashells and in some I used tiny beachy pebbles. This is another layer of air. The space in between all the seashells allows your potted plant to breath and drain properly. You can add as much or as little as you want, depending on the size of your container. If you don’t have a lot of large and small items just add what you have, as long as there is about an inch of space your plants will be fine.
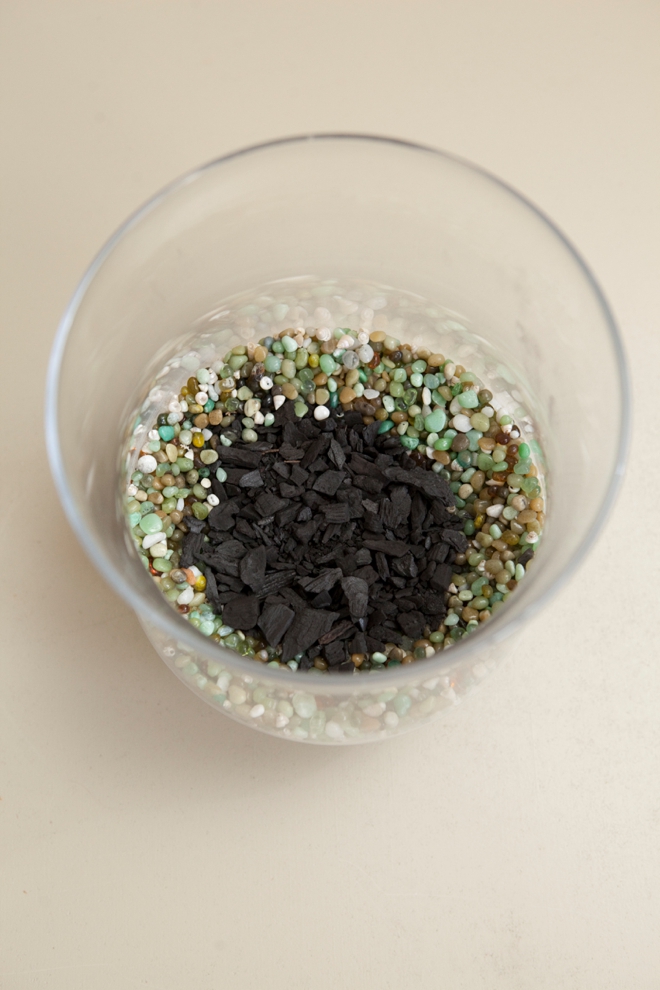
4. Activated Charcoal: Activated charcoal is a soil conditioner, it absorbs excess moisture and odors, improves oxygen levels for roots and is a great water filter. It is incredibly messy. Can you see the black smudge on my hand? Even the outside of the package was covered in black soot. Here’s the deal, it’s important for the life span of your plants but if you are able to buy “terrarium soil” you don’t need the charcoal, it’s already mixed in. You can also incorporate the charcoal into your regular potting mix instead of creating a separate layer. Your choice.
5. Sphagnum Moss: Sphagnum moss or peat moss is also a soil conditioner and can hold more than 10x it’s weight in water. Making for the perfect addition to a terrarium. Since it’s the layer right under the soil, it will grab runaway water and hold onto it; the soil can then absorb it naturally when needed. It also makes a nice little bed for the soil, holding onto most of it so it won’t fall through the cracks of your other layers.
6. Soil: Whether you use regular potting soil or terrarium soil, you should have the most of this layer in your container. This is where your plants will get all of their nutrients. Add a little, then add your plants and fill in with more soil.
7. Plants + Ornaments: Succulents are wonderful for terrariums as they require hardly any water and will grow in almost any environment. Some can even survive for months without any water. Indoor plants are also a great choice. Whether your terrarium is placed in the sun or shade will depend on the plants you purchase and what they prefer. By ornaments I mean large seashells, fun little spray painted animals, table numbers, pretty stones and any fun little trinkets to make your new environment pretty.
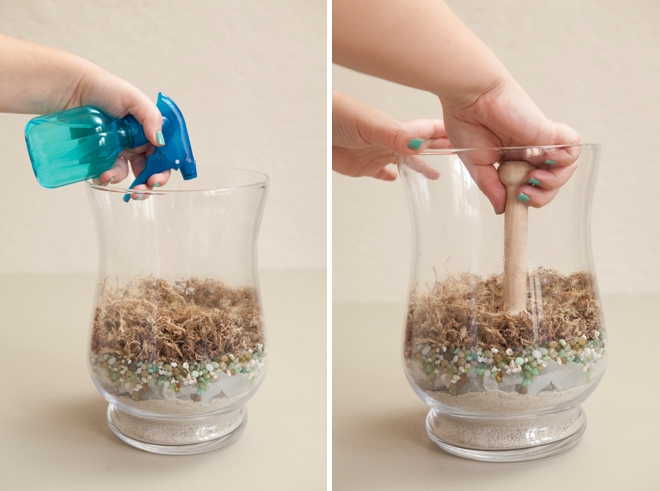
8. Watering: Water with a spray bottle, a few squirts at least once a week. Don’t over water. If you see a lot of moisture in the bottom of your pot – don’t water. If you see that everything is bone dry, maybe add a little more water than just a squirt.
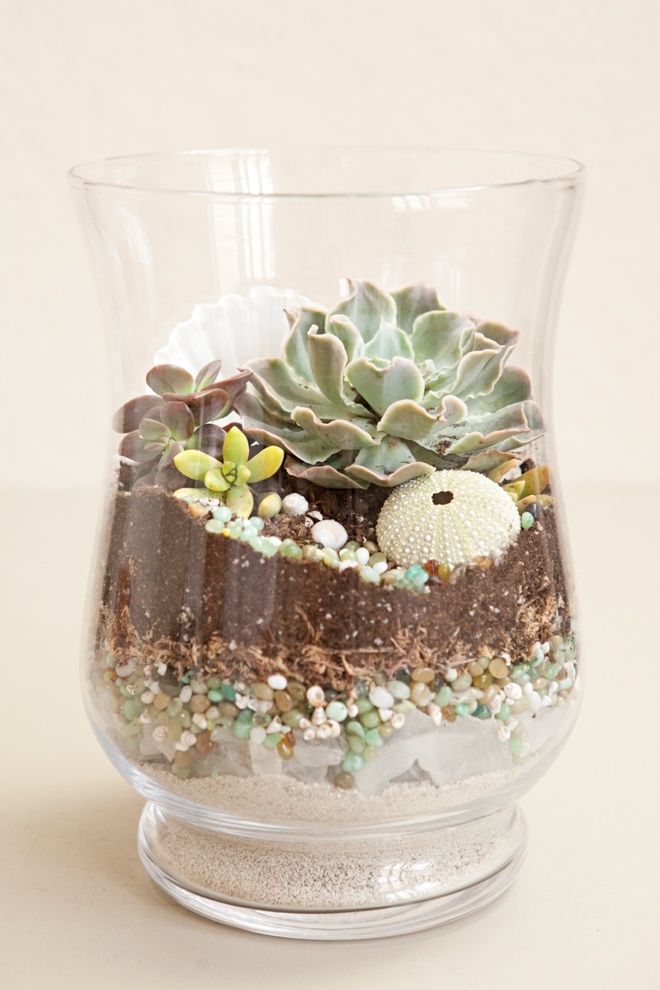
Done! I’m obsessed and have this very terrarium on my desk as I’m typing!
Sphagnum Moss Tip:
It comes very dry and kind of unruly. You can make it easier to work with if you wet it, before or after you place into your container. Here I sprayed it with water and used a dowel to press the layer firmly into the container. This compacts the moss and creates the perfect bed for the soil.
Activated Charcoal Tip:
As I said above, it’s messy – like really crazy messy, worse than BBQ coals. Use gloves or a scoop when adding to your container. Here I made a large indent bowl-like area in my small stones layer and filled it with the charcoal. For two reasons; 1. I didn’t like the look of the black layer 2. The soot from the charcoal gets on everything and doesn’t look nice with the rest of the layers. So I hid it. You can do the same or you can mix it into your potting mix. Your choice.
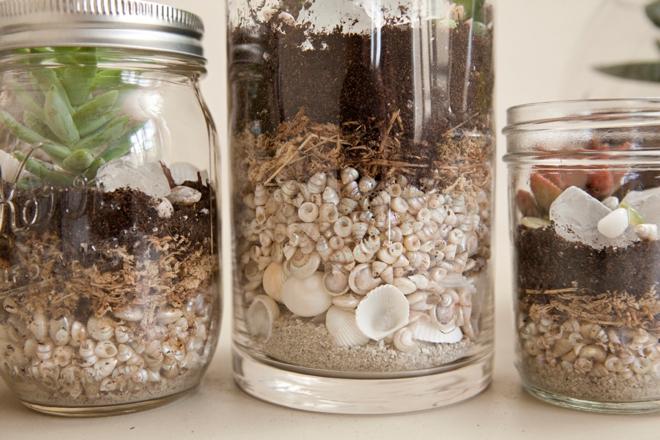
They are so interesting to look at…

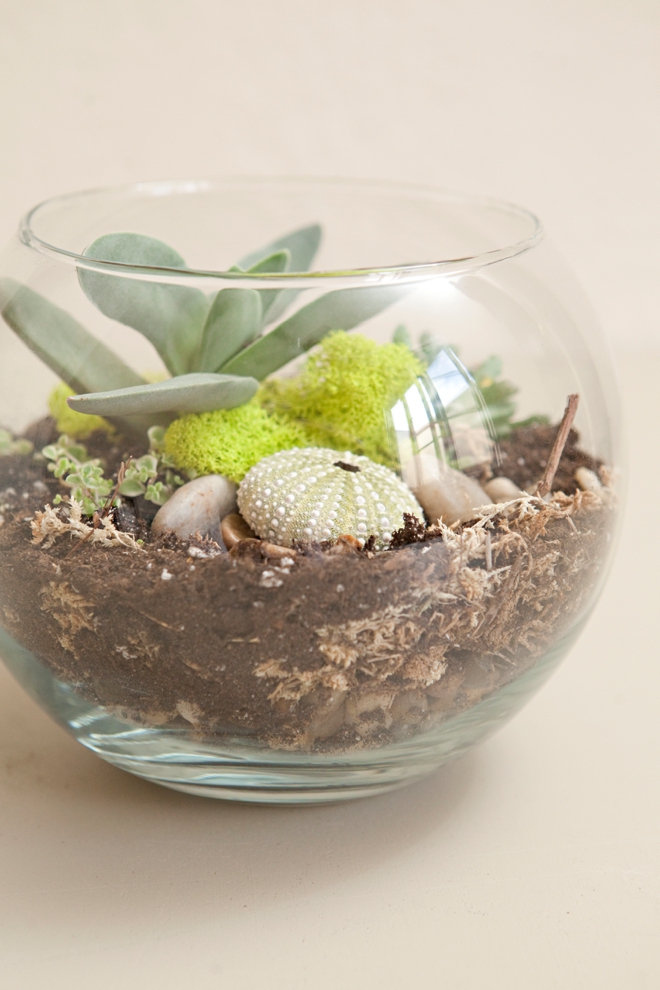
Remember; you can use stones or shells in your terrariums… but how gorgeous are these shells… I’m just in love!
As with all our DIY tutorials, if you create one of our projects please send us a picture – We Love Seeing Your Creativity! If you use Instagram or Twitter please use the hashtag #SomethingTurquoiseDIY and it will show up on our Get Social page. Happy Crafting!
DIY Tutorial Credits
Photography: Something Turquoise Photography for SomethingTurquoise.com // DIY tutorial: Jen | Something Turquoise // succulents: The Succulent Source via Etsy // all seashells and sea glass: CereusArt via Etsy // soil, sphagnum moss, sand, activated charcoal, hexagon punch: Amazon // nail polish: OPI – Withstands the Test of Thyme
Shop The Supplies:
Find the supplies you’ll need for this project from our affiliate links below:

Comments