
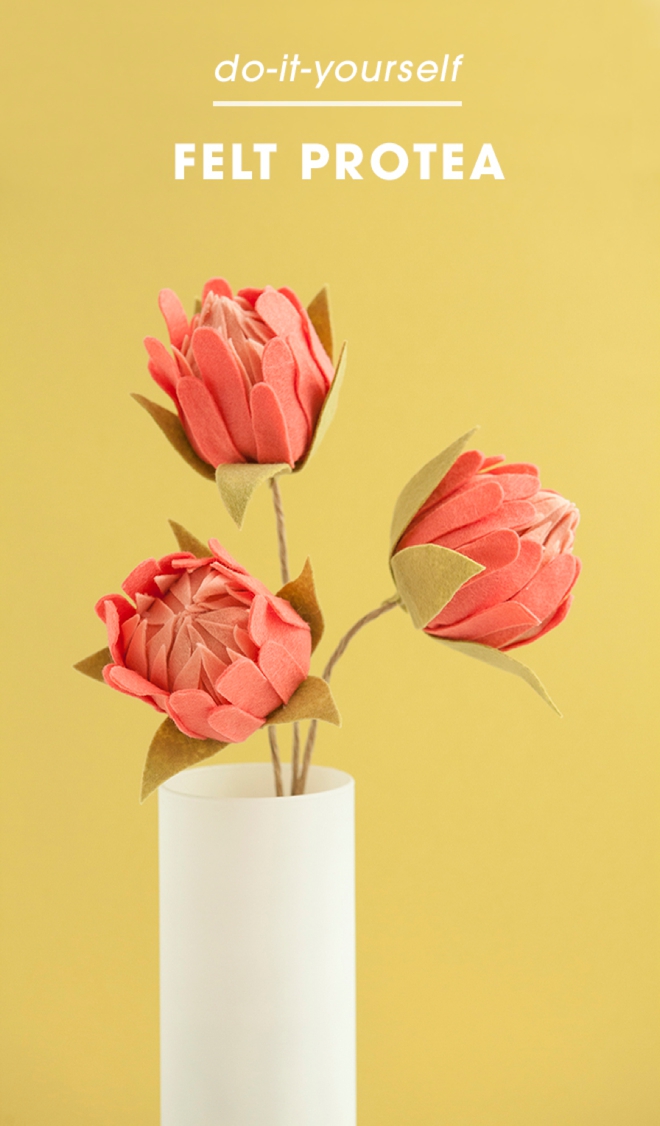
DIY Felt Protea
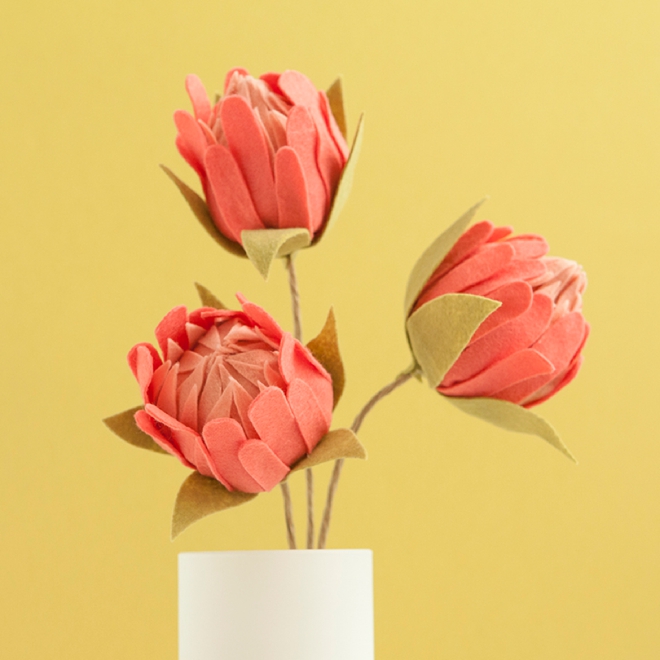
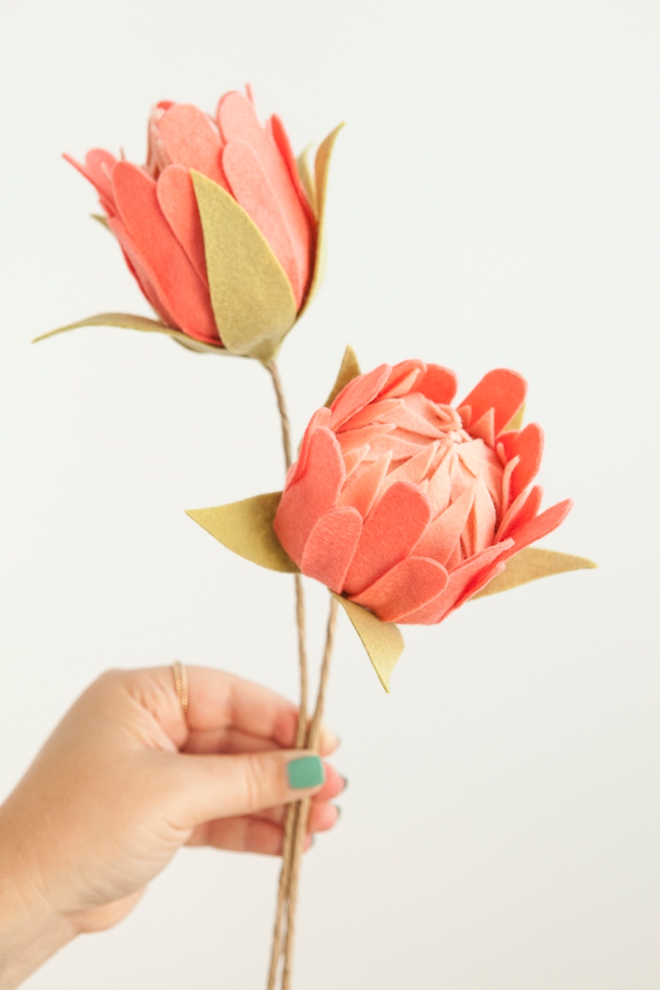
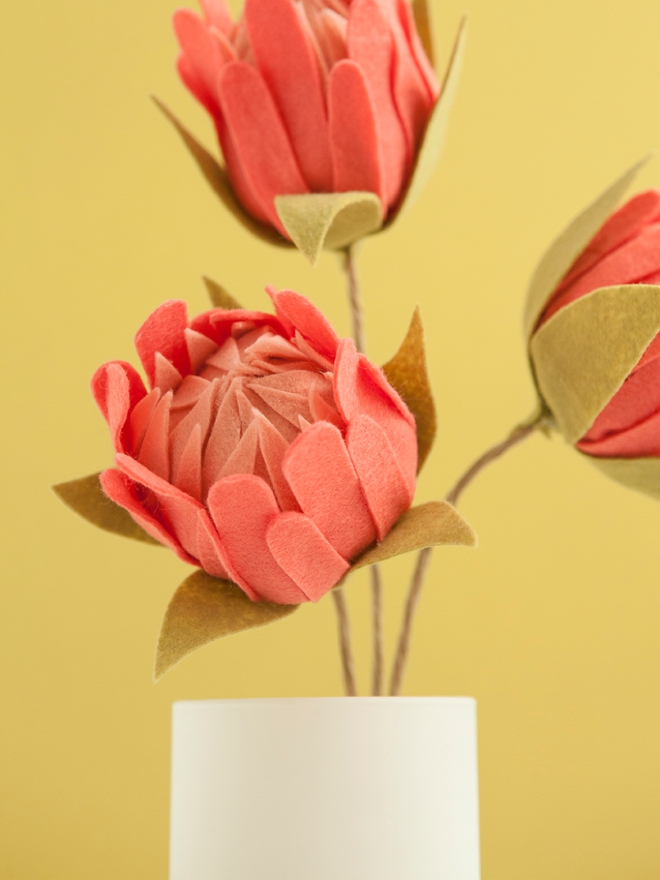
Hello and welcome to a downright fabulous Monday! Just a little over two years ago I shared an entire week of felt flower patterns, culminating in a beautiful DIY Felt Wedding Bouquet… and this week I’m doing it all over again! Each day I’ll be sharing a new flower pattern and then on Friday I’ll share the entire bouquet, and OMG… wait until you see it! To start things off, I had to share a pattern for one of my current favorite flowers: the protea. This tropical beauty will be the focal point of any felt flower arrangement, or can easily stand alone. It’s not a super quick felt flower to make – but is sure is stunning.
In talking about handmade flowers – I’m singing the praises of felt. Unlike paper, felt flowers are thick, sturdy and can withstand all that your wedding day could possibly throw at them. Paper can rip and crumple in a flash – but not felt! There is something so old-school crafty about felt… and I just love it. So without further ado, here is this weeks first felt flower design – the perfect protea.
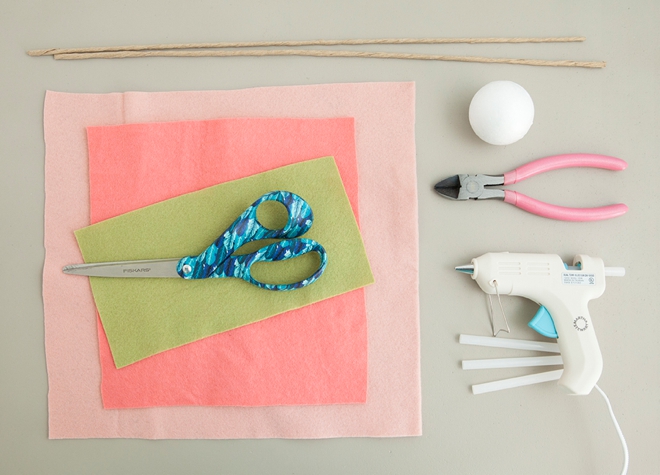
SUPPLIES:
- Wool Felt (shown here in coral, blush and fern)
- Styrofoam Ball (mine is 3″)
- Good Scissors
- Floral Wire (18 gauge)
- Wire Cutters
- Ribbon
- Hot Glue Gun (that does low heat)
You’ll be able to make one flower with: a 12″ x 18″ piece of felt in one color and a 6″ x 9″ piece of felt in a complementary color. You’ll need about a 4″ x 6″ sheet for the the leaves. However, you can make these flowers ANY size you like!
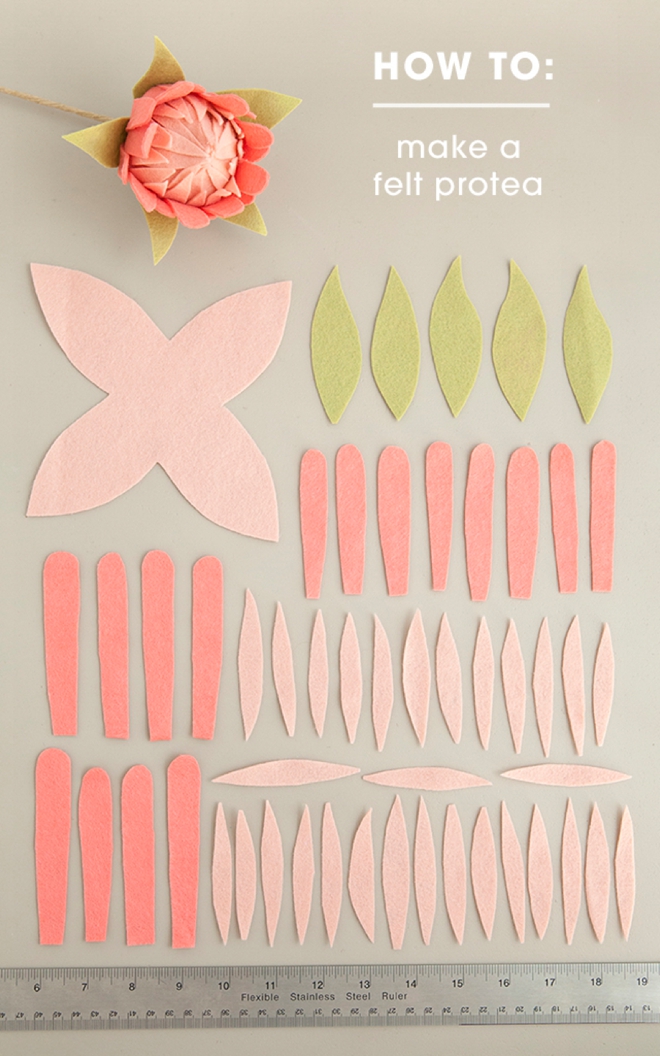
Cut Your Felt Petals
Below is a chart of all the felt petals you’ll need to cut out for this flower. You can gather the sizing from the ruler shown, but just know that you can create these petals in ANY size you’d like. The larger your petals the larger the flower and vise versa! We now have a free printable flower pattern available at the end of the post!
- 1x large styrofoam base cover
- 8x larger outer petals
- 8x smaller outer petals
- 30x slender inner petals
- 5x leaves
UPDATE: May 21st, 2018: You no longer have to cut all these petals and leaves by hand! We have the Cricut .SVG cut file for this flower available in our shop for only $1.99! Cutting these shapes with the Cricut is a HUGE time saver!

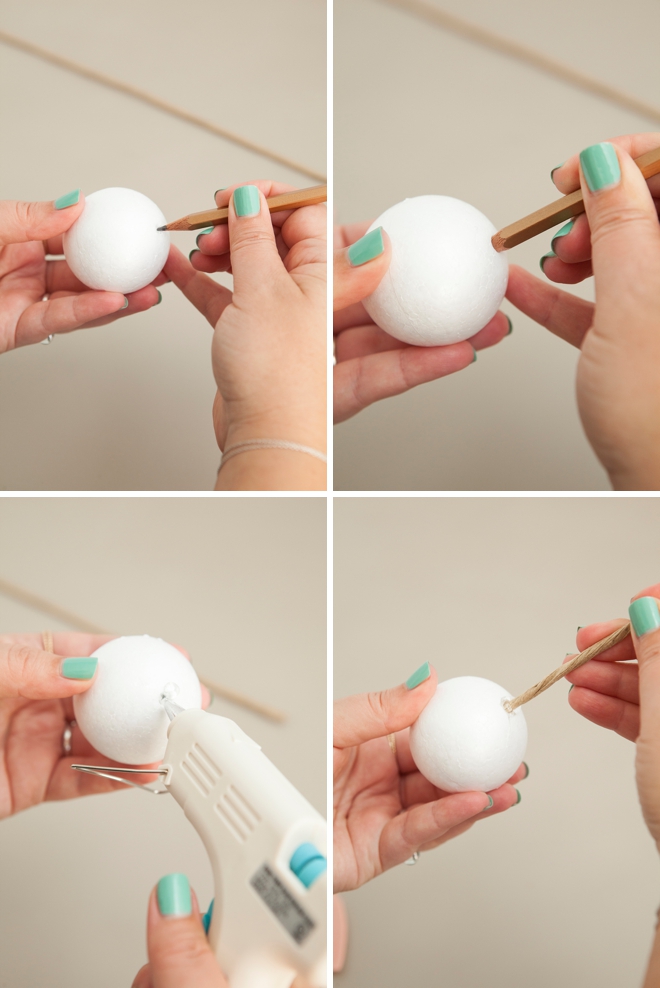
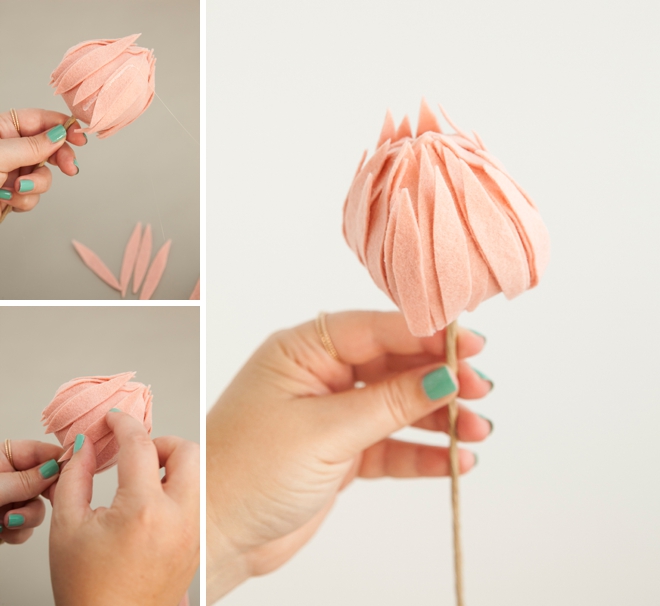
Create The Flower Base
The size of your protea starts with the base. Here I’m using a 3″ styrofoam ball to get that iconic volume of this lovely flower. In the boutonniere you’ll see below, I used a 3cm felt ball as the base.
Stab a hole in the styrofoam ball, add a little hot glue and then insert the floral wire. Normally hot glue can melt styrofoam but this hot glue gun from Martha Stewart does “low heat” which makes it work… and also doesn’t burn your fingers!
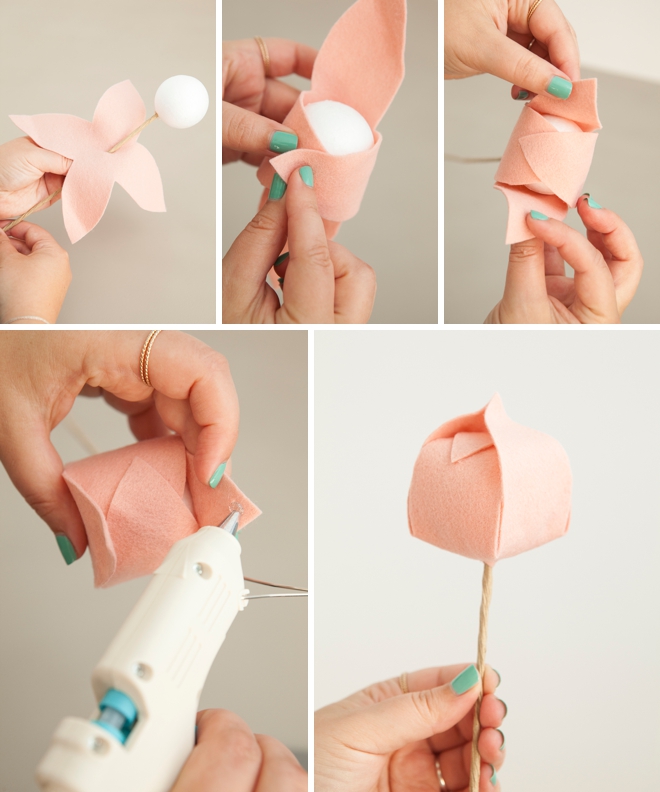
Cover the Styrofoam
Using your large base petal, wrap and glue it around the styrofoam ball creating a point at the top.
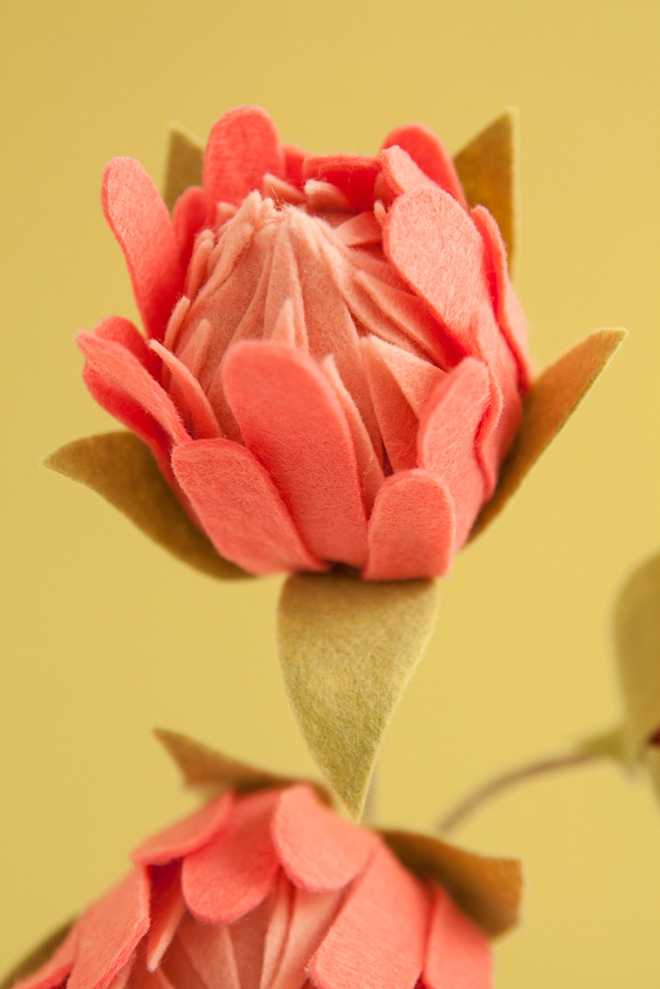
Add The Inner Petals
Carefully glue layer after layer of the inner petals onto the flower base. Glue some on completely and let the tips of others be free to resemble the natural look of this flower. Working evenly around the base, add all 30 petals.
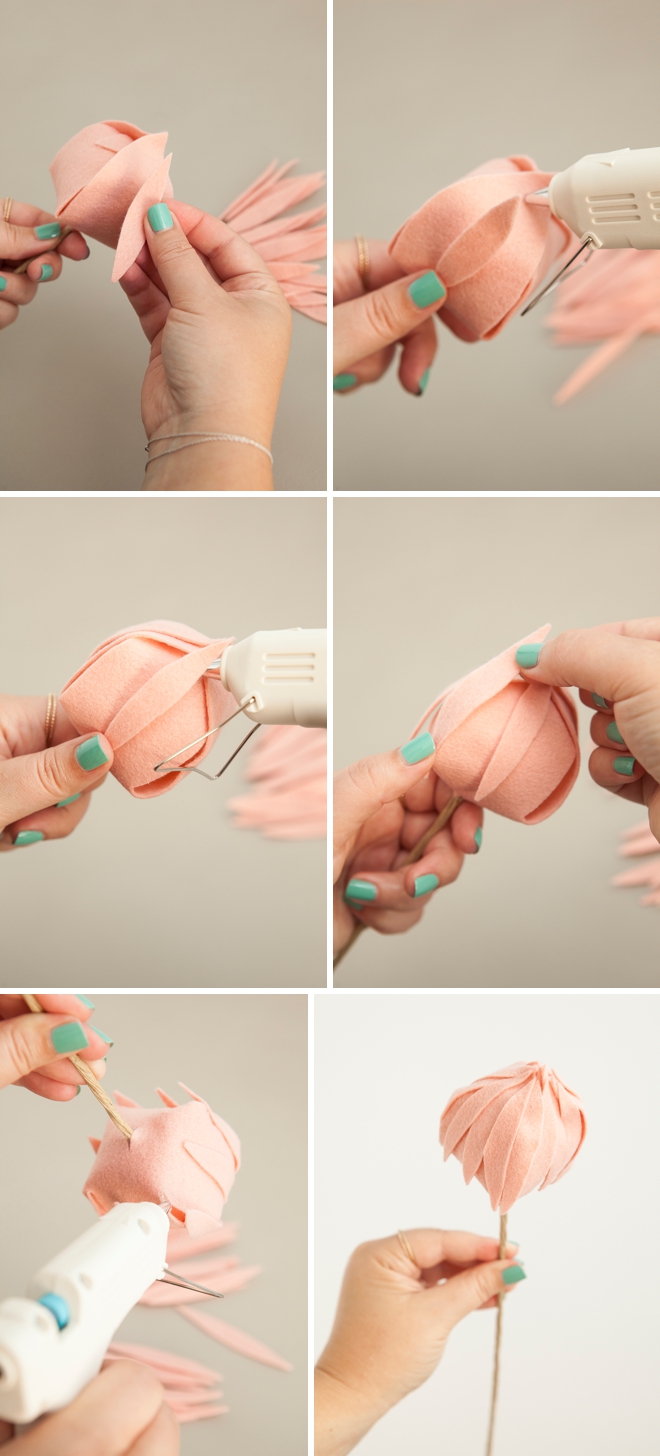
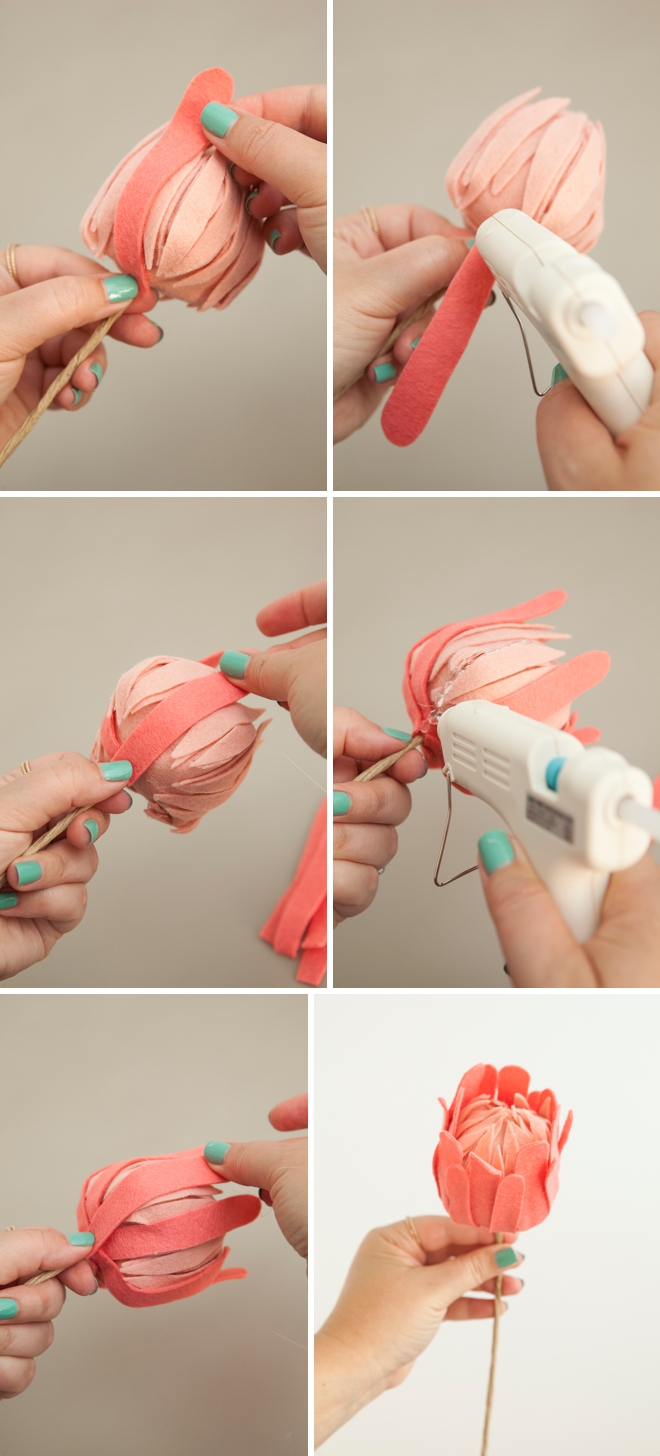
Add The Outer Petals
Working with the large outer petals first, evenly cover the flower base without adhering the tips of the petals. Once you have all 8 attached, add the smaller outer petals the same way but a bit lower on the base.
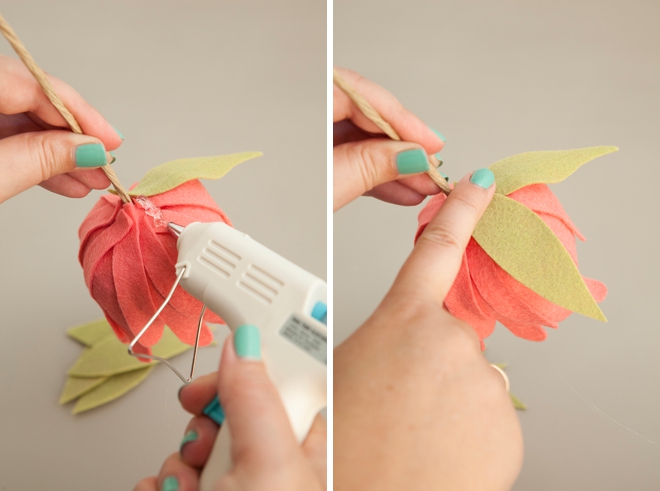
Add The Leaves
Glue the leaves right to the base. You can adhere one or two a bit higher up, while adding a few lower to hang naturally… and that’s it!
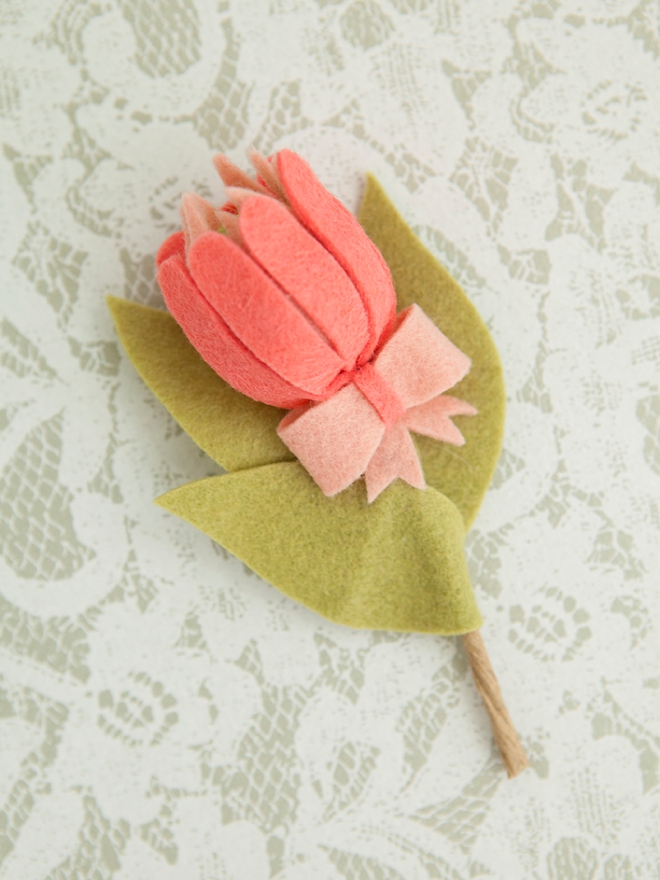
Felt Protea Boutonniere
Is this not the most adorable boutonniere you have ever seen, I’m dying over it!!! As I said above I used a 3cm felt ball for the base and I only added like 8 inner petals and 9 outer petals; creating it in the same way as the large flower. I embellished it with a cute bow and a few leaves. I hope this little preview is getting you excited about all the pretty that is to come!
Felt Flower Patterns + Projects:
Visit this link to find the many other felt flower patterns that I’ve shared… and keep checking back this week to find more!

As with all our DIY tutorials, if you create one of our projects please send us a picture – We Love Seeing Your Creativity! If you use Instagram or Twitter please use the hashtag #SomethingTurquoiseDIY and it will show up on our Get Social page. Happy Crafting!
DIY Tutorial Credits
Photography + DIY Tutorial: Jen Causey of Something Turquoise // All Felt courtesy of: Benzie Design on Etsy // Scissors: Fiskars // Floral Wire: all over; Amazon, Michaels, JoAnn // Glue Gun: Martha Stewart // Wire Cutters: Amazon // Nail Polish: OPI – Withstands the Test of Thyme
Shop The Supplies:
Find the supplies you’ll need for this project from our affiliate links below:

Comments