
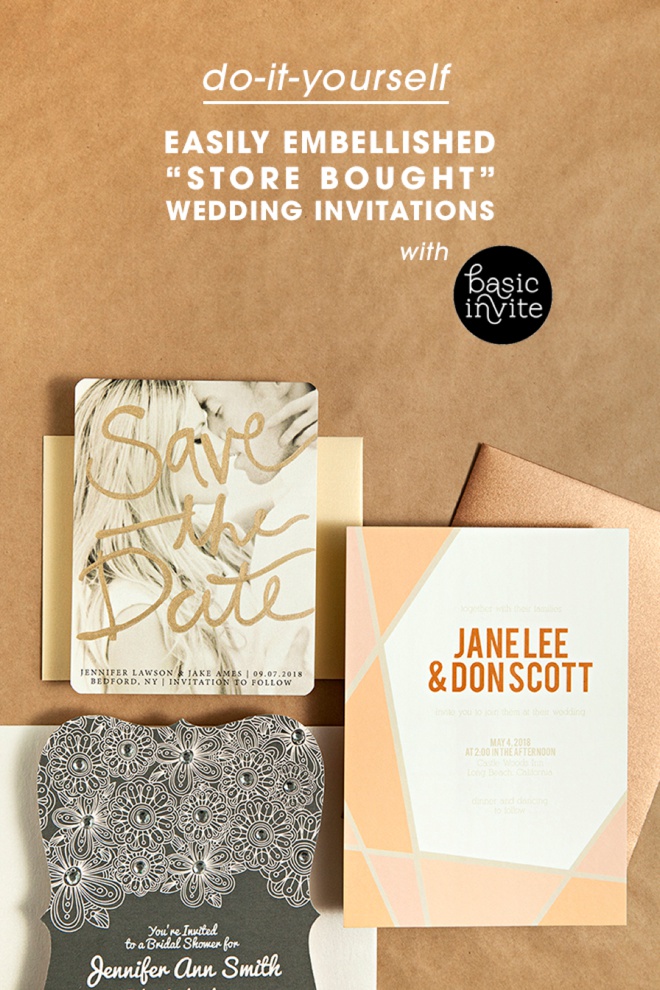
DIY | Easily Embellished Wedding Invitations With Basic Invite
-Sponsored Post-
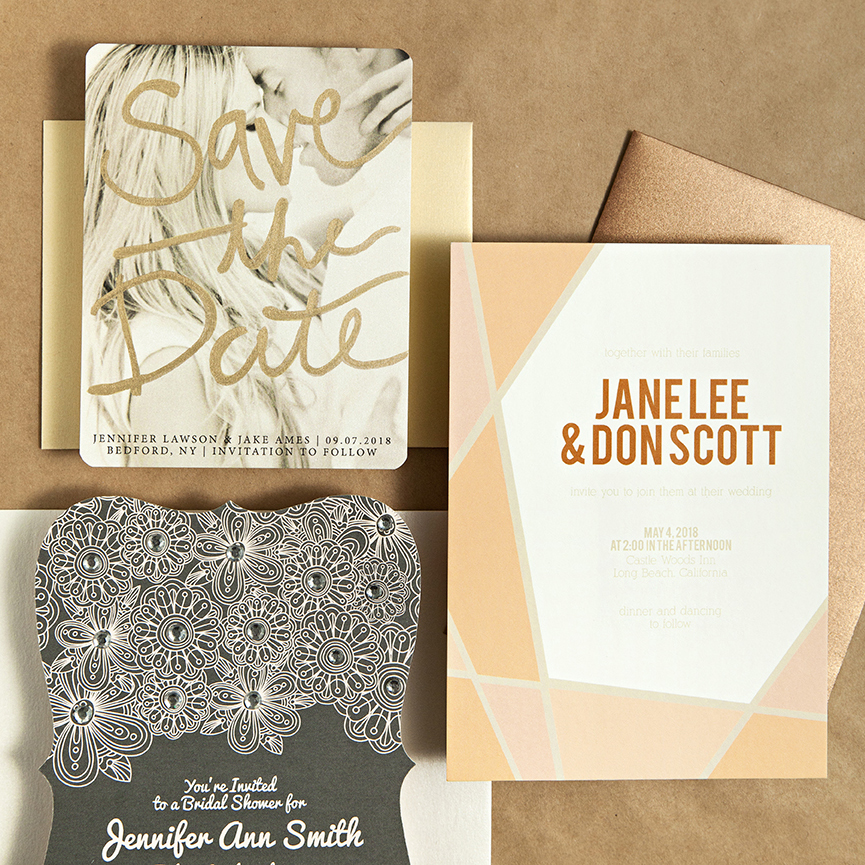
A big part of being a DIY bride is taking something you find at a store and embellishing it to truly make it your own. Whether it be adding a special sash to your wedding dress, painting bottles you found at the flea market or even embroidering a loving message into your grooms tux… and I think the same should go for your invitations! Each “store bought” save the date, bridal shower or wedding invitation has the potential to be taken to the next level with a waive of your magic DIY bride wand. Today I’ve partnered with Basic Invite to share 3 terrific examples of how this is possible. Ok, not only possible but totally fab! If you have any questions about these invitations (or the embellishing), don’t hesitate to ask me in the comments!
Customize To Your Hearts Content
I had a wonderful time browsing through all of the beautiful designs that Basic Invite offers but I had an even better time using all their customization tools! Literally almost every single element of every single invitation can be edited and changed by you, online. The perfect fit for the DIY bride!
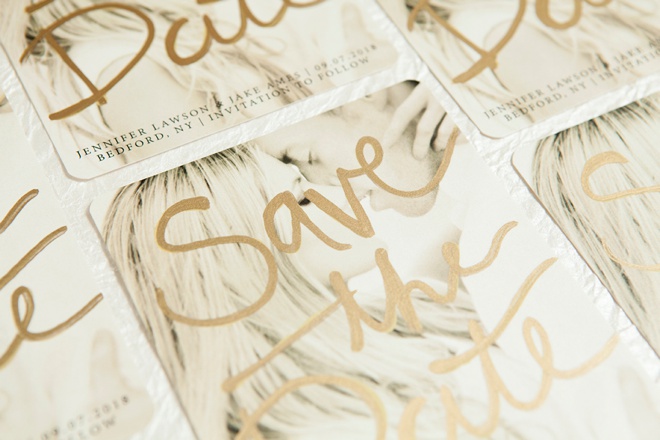
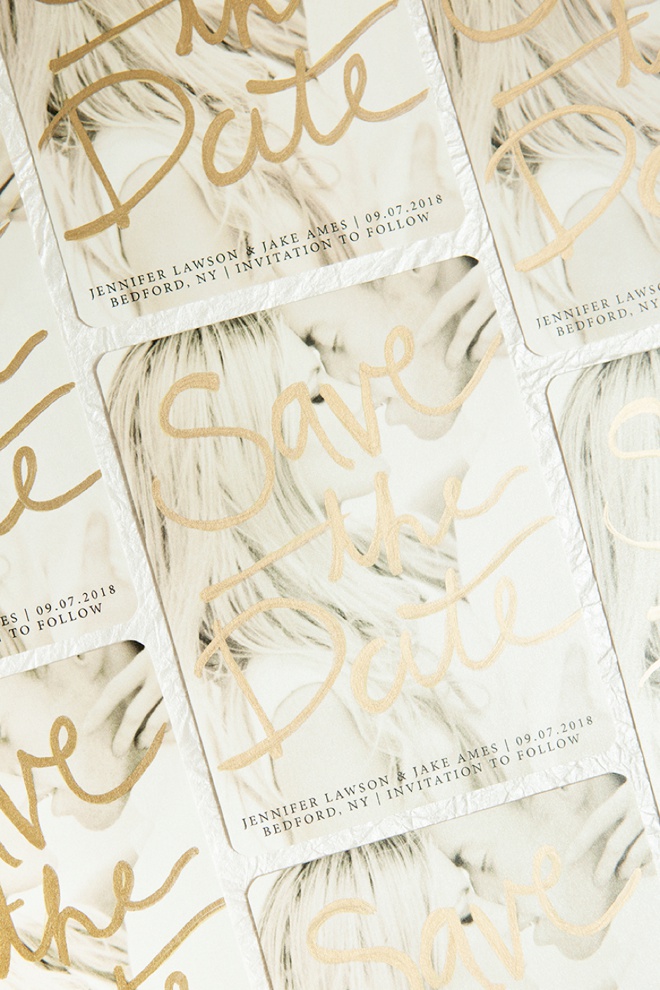
The Shinning Bright Save the Date
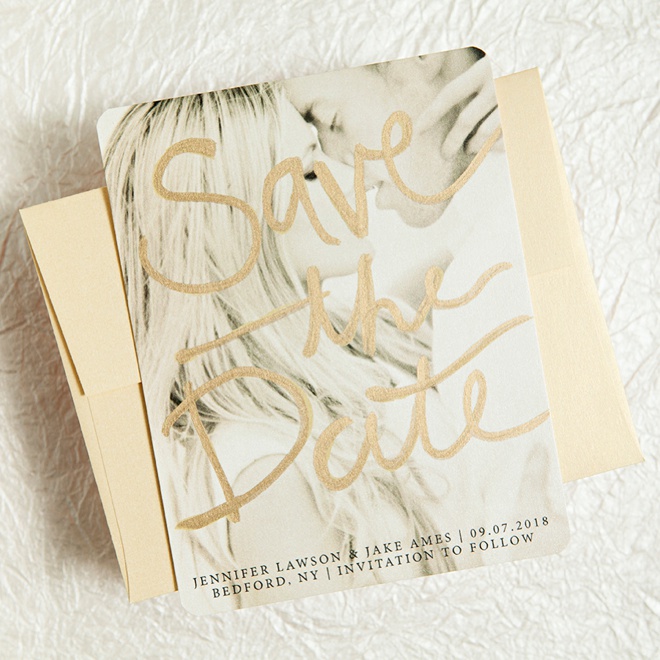
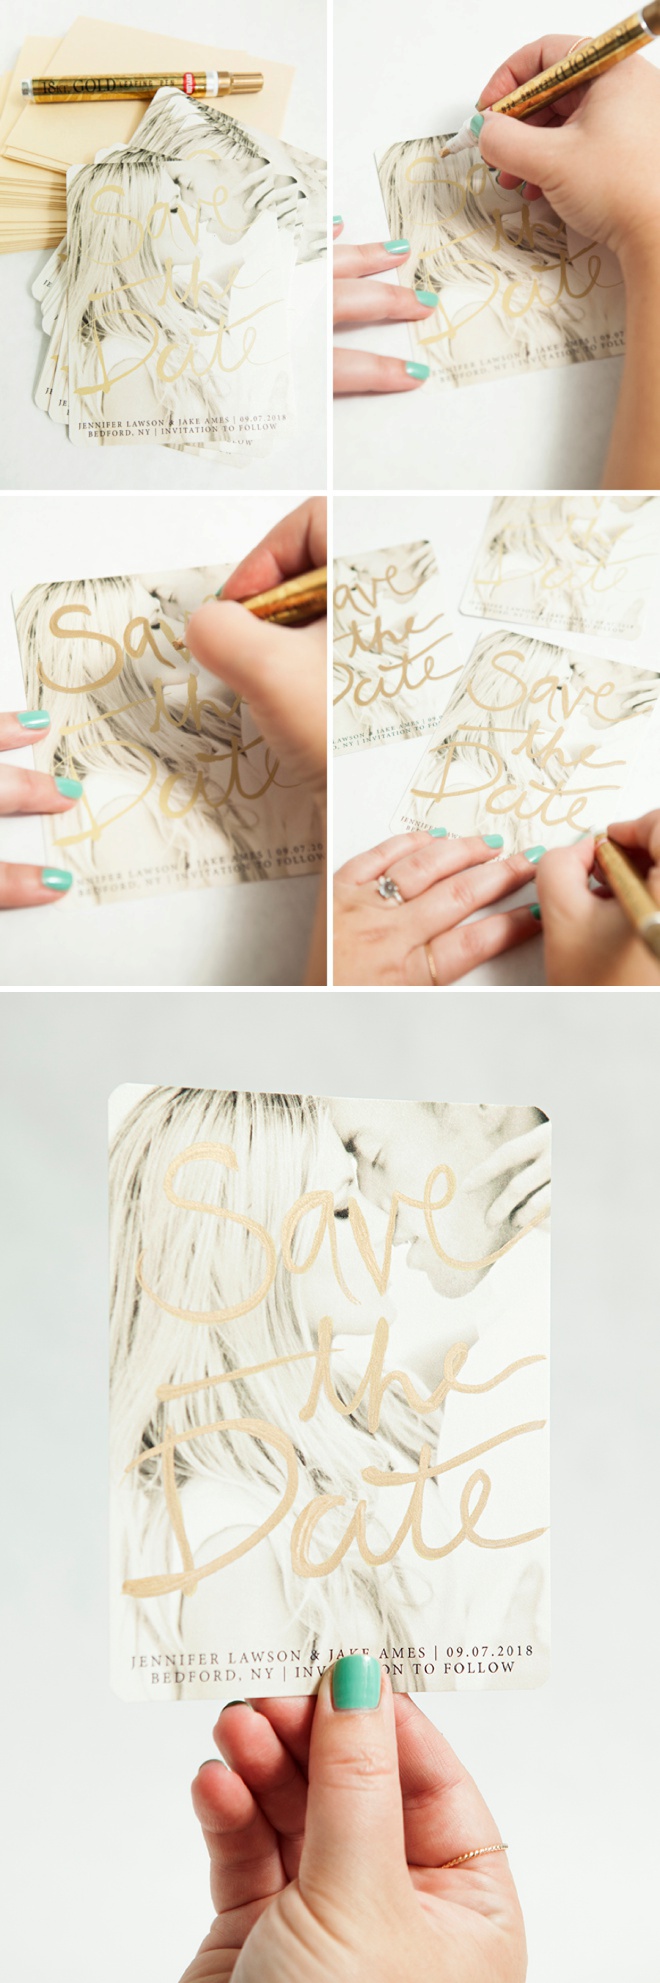
Gold Leaf Lettering
I was instantly drawn to The Shinning Bright Save The Date Card because of the hand lettering design. A monochromatic shot from your engagement session will look best for this design. I simply changed the text color to Pseudo Gold, left the card wording Black and rounded the corners. I paired the Premium Shimmer Paper with the Desert Shimmer envelope knowing I was going to add gold leafing to the design! The shimmer paper is to die for.
The only step I did here was trace the existing “Save the Date” design with a leafing pen. The handwritten style makes this really easy to do – and quick too! Giving you a gorgeous, metallic shine to each card for pennies compared to what you would pay for foil. The leafing pen is so strong that as long as you choose a light font color it won’t show through.
Visit this page to find more darling Basic Invite Save The Date Invitations!

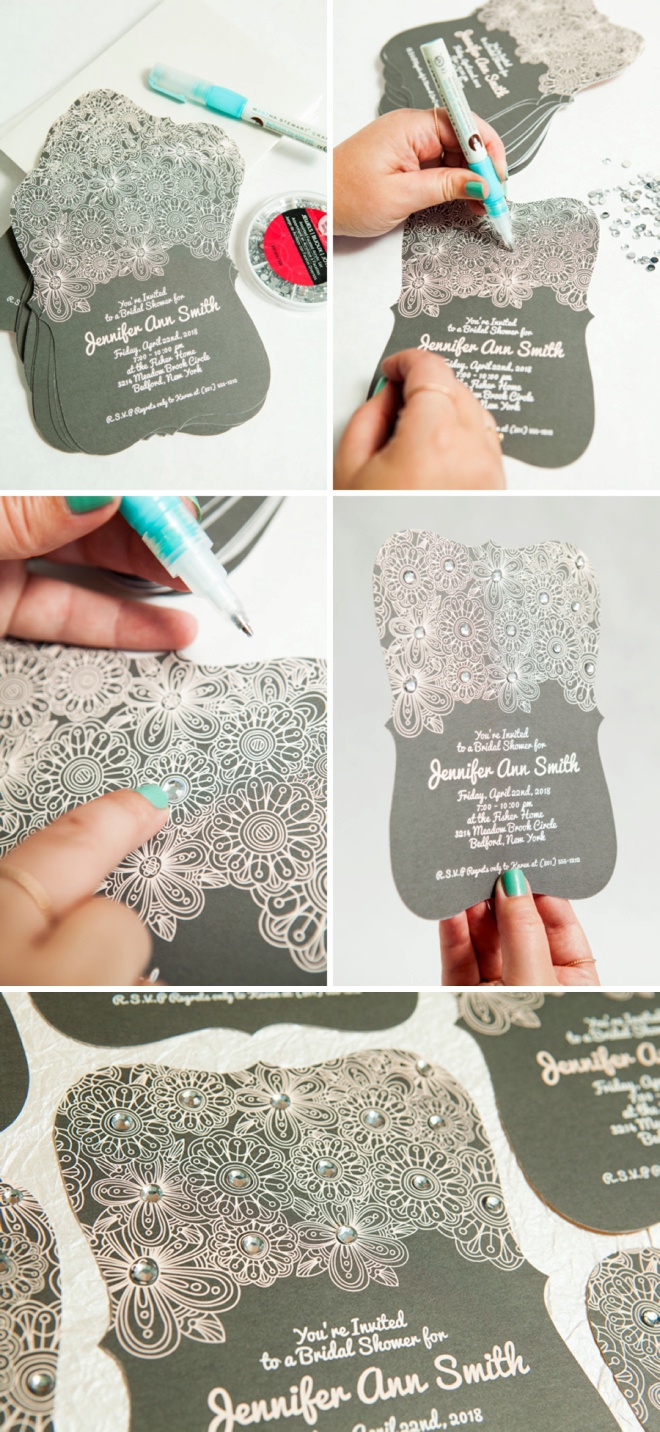
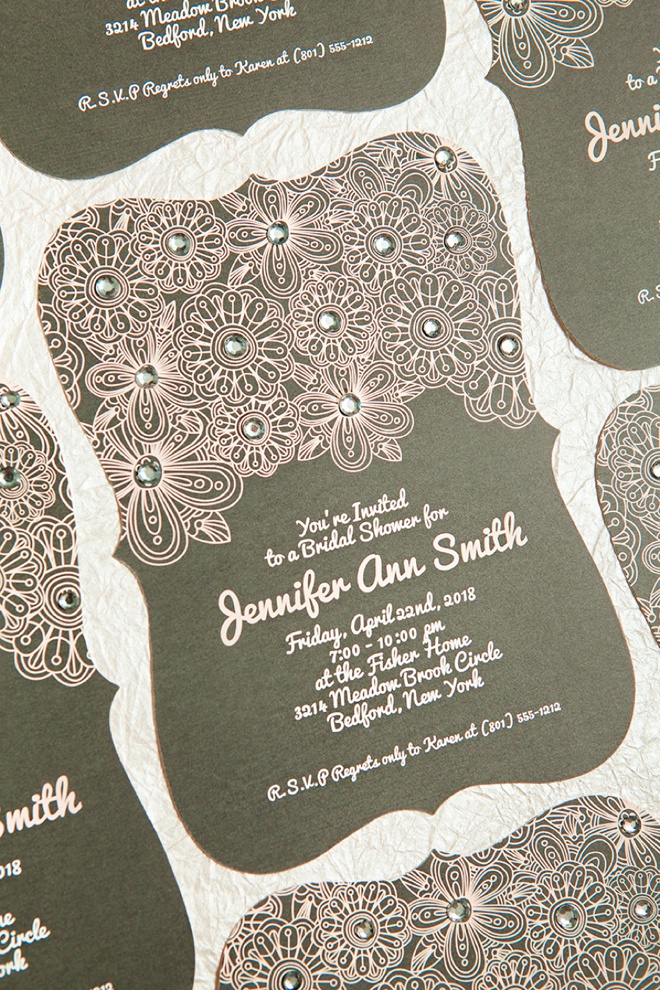
Rhinestone Flower Centers
For this Paisley Retro Flower Bridal Shower Invitation I changed the flower and name color to Light Coral – which I’m obsessed with. I decided on a bracket cut for the card along with a White Shimmer Envelope, which looked perfect against the Premium Matte finish paper.
Using an assorted set of crafting rhinestones and a ball point glue pen (which is better than sliced bread!) I added a rhinestone to the center of every single flower – making a sparkling statement! The glue dries clear in less than 10 minutes and really holds firm. The perfect idea for any glittery gals shower!
Visit this page to find more adorable Basic Invite Bridal Shower Invitations!
Spray Painted Edges
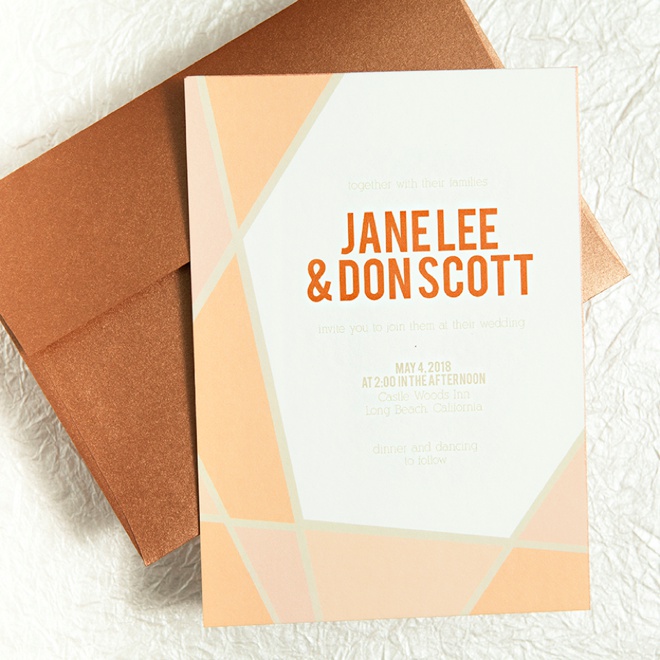
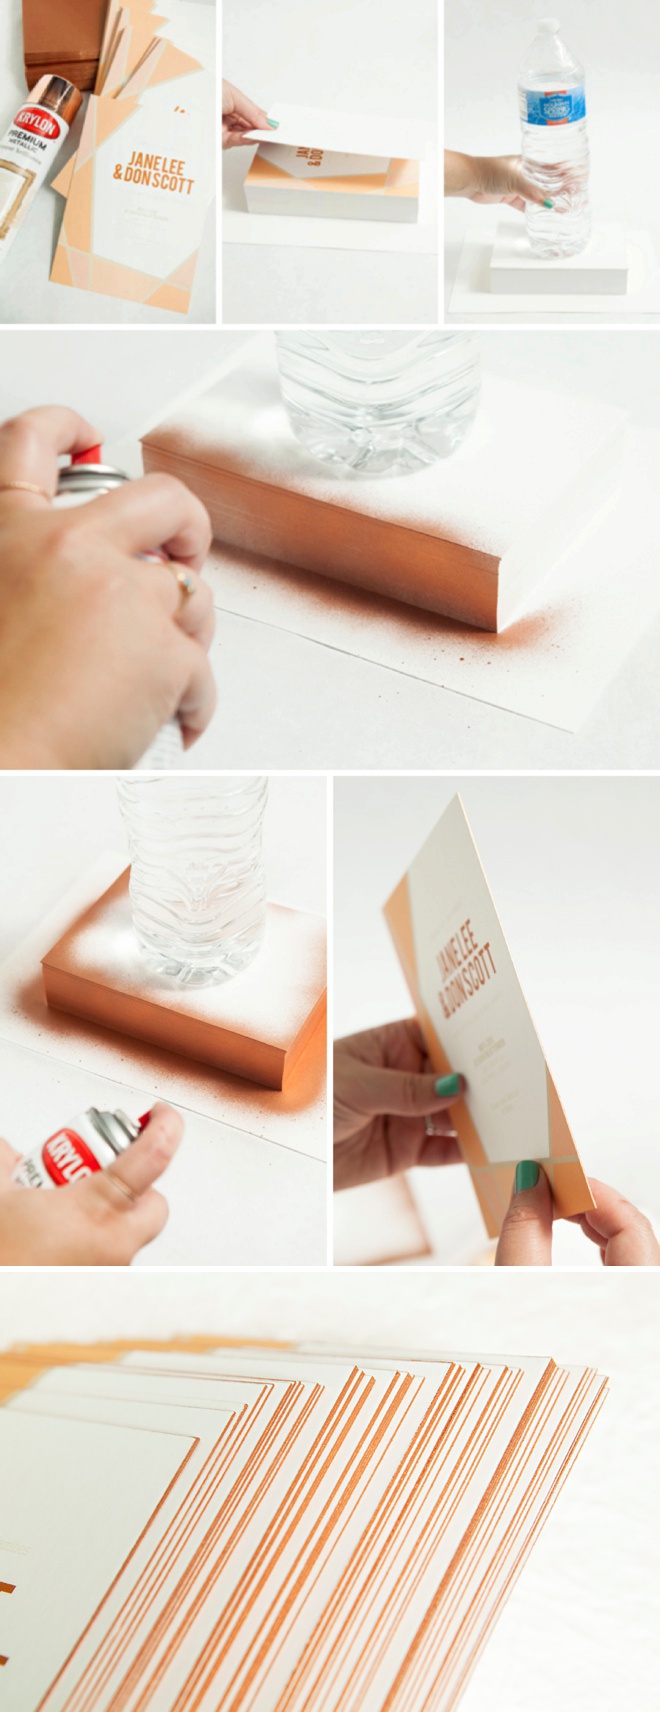
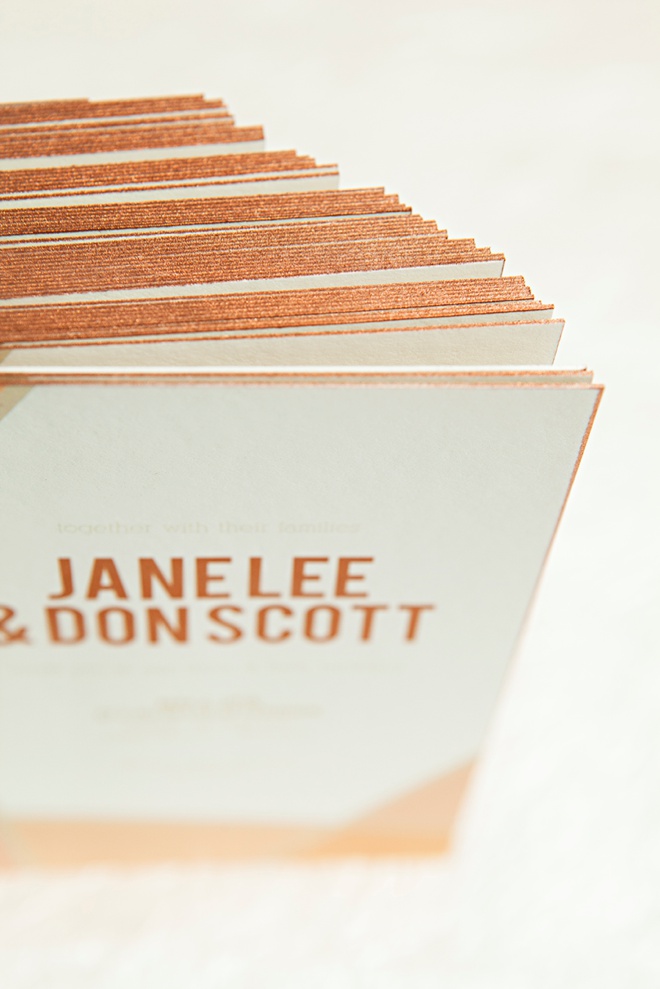
For those of you who regularly follow my blog, you know how obsessed I am with copper… and I am DYING over these edges!!! I took full advantage of the extensive customization options that Basic Invite offers and went to town on The Geometric Frame Wedding Invitation. Staying in the warm, earthy family I changed the color of every element on this invitation, kept the corners square and went with a Mohave Shimmer envelope. The Premium Double Thick paper is the key for this look.
Perfectly line up your invitations in a stack like you see here. On the bottom and top, place a few pieces of scrap cardstock cut to the same size as the cards. Place something that has some weight to it on the top, like a water bottle. Then spray! Make sure to cover all the sides evenly. Remove the bottle and cardstock and let them dry in the stack, which shouldn’t take more than 20 minutes. You might have to slightly peel them apart, but don’t worry they won’t rip. The result is a breathtaking metallic edge that matches this modern design perfectly.
Visit this page to find more beautiful Basic Invite Wedding Invitations!

DIY Tutorial Sponsored BY:
Basic Invite offers over 200 unique wedding sets that can be instantly personalized online to create a card that is unique to you. Choose from over 150 truly custom colors, use them to tailor our cards to match your wedding colors perfectly.
As with all our DIY tutorials, if you create one of our projects please send us a picture – We Love Seeing Your Creativity! If you use Instagram or Twitter please use the hashtag #SomethingTurquoiseDIY and it will show up on our Get Social page. Happy Crafting!
DIY Tutorial Credits
Photography + DIY Tutorial: Jen Carreiro of Something Turquoise // Shinning Bright Save the Date Card, Retro Flower Bridal Shower Invitation and Geometric Frame Wedding Invitation: courtesy of Basic Invite // Copper Spray Paint, Glue Pen, 18K Gold Leafing Pen: Amazon // Assorted Craft Rhinestones: Michaels // nail polish: OPI – Withstands the Test of Thyme
Shop The Supplies:
Find the craft supplies you’ll need for this project from our affiliate links below:

Comments