
DIY | Ripped + Ink Dyed Muslin Ribbon
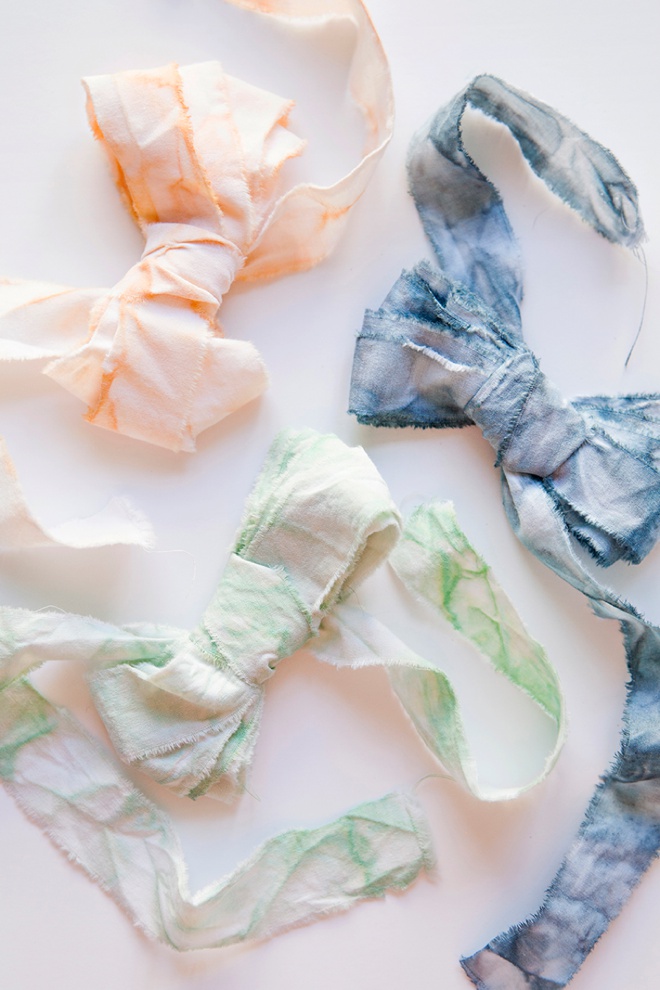
A few months back I put out a survey about these DIY projects I share, asking all my fabulous readers for their feedback and I promised that one lucky entrant would win a DIY tutorial of her choosing. So today’s special project is dedicated to Emily M. who was searching for a tutorial on how to rip and dye her own muslin ribbon! Let me start by saying this is not a typical “dyeing” tutorial. Those are all over the internet and I wanted to bring you something fresh and interesting today so we are dyeing with ink spray called Color Shine and the marbled result is fabulous! I am in LOVE with how this project turned out and I look forward to seeing this beautiful ribbon at Emily’s wedding and at your special event!

Marbled Ribbon Uses:
- Wrapped around your bouquet.
- Tied in a bow for a bridesmaid gift box.
- Tied on your favors, programs, etc.
- Tied in a waterfall on your reception chairs.
- Used in your decor or centerpieces
- A small “blue” piece tied under your dress for your something blue
- Ribbon for banners
- Tied on your invitations
SUPPLIES:
- White, Cotton Muslin Fabric 90″ wide or more (the inches wide will be how long your ribbon is)
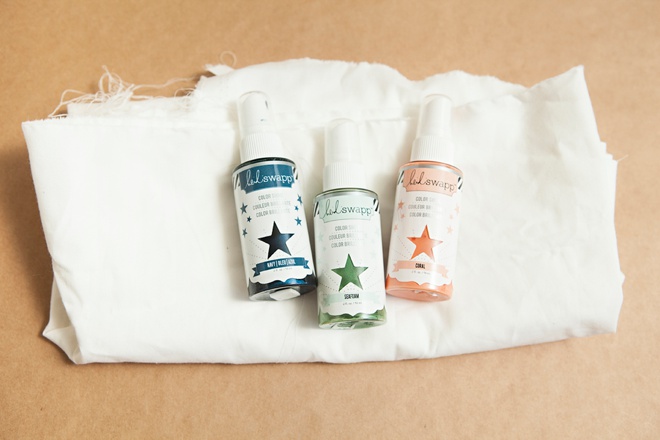
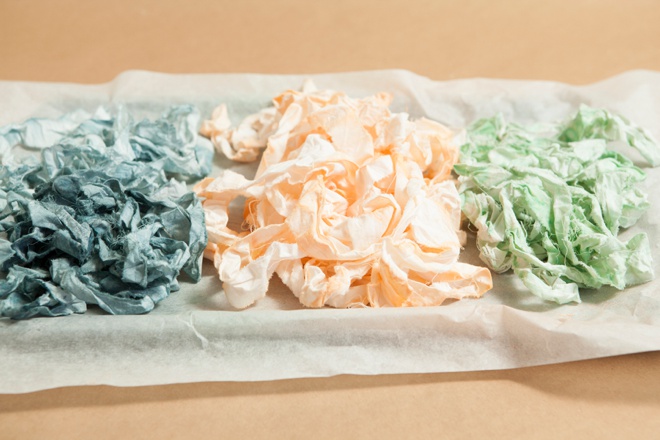
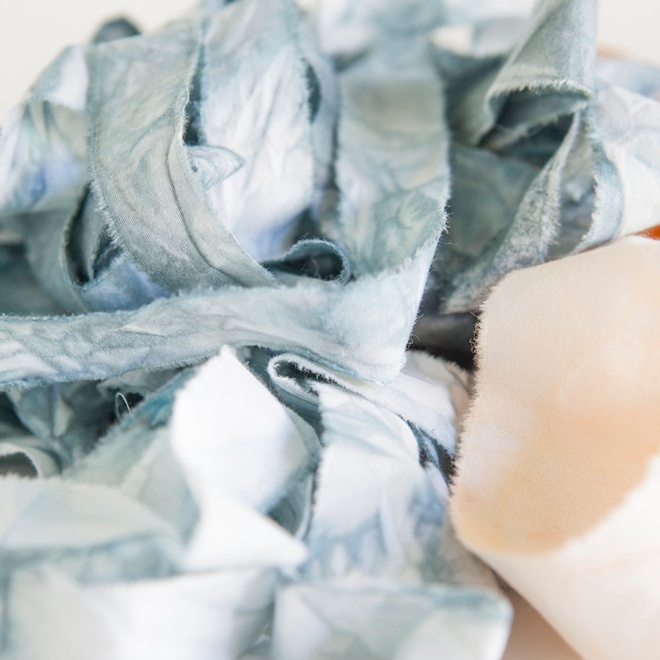
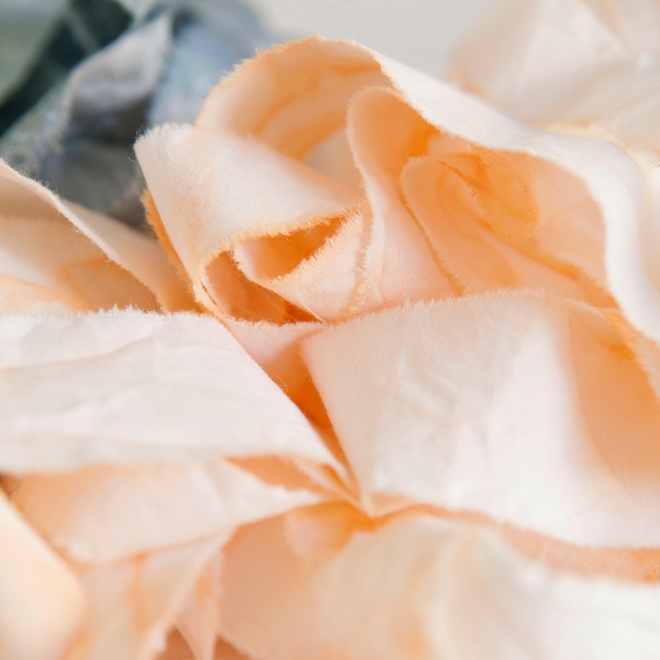
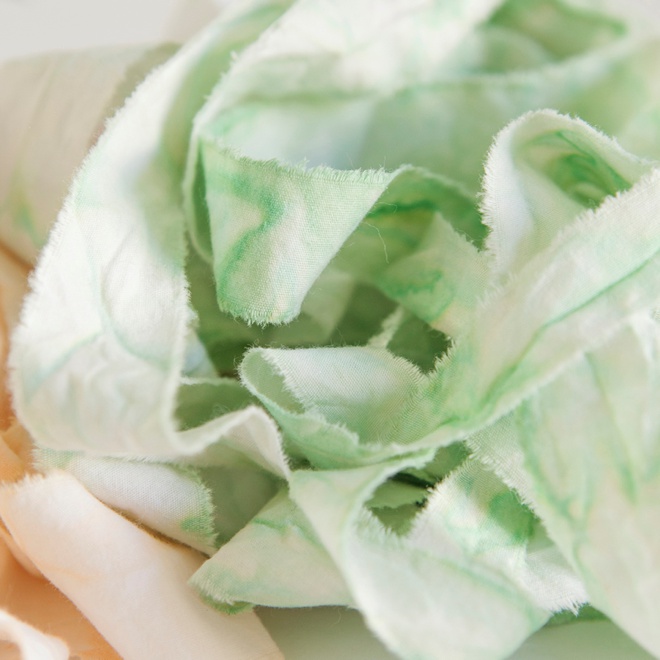
- Heidi Swap Color Shine in your choice of color (I used navy, coral, seafoam)
- Cookie sheet
- Wax paper or Parchment paper
- Glass 9 x 13″ baking dish
- Paper Towels
- Iron
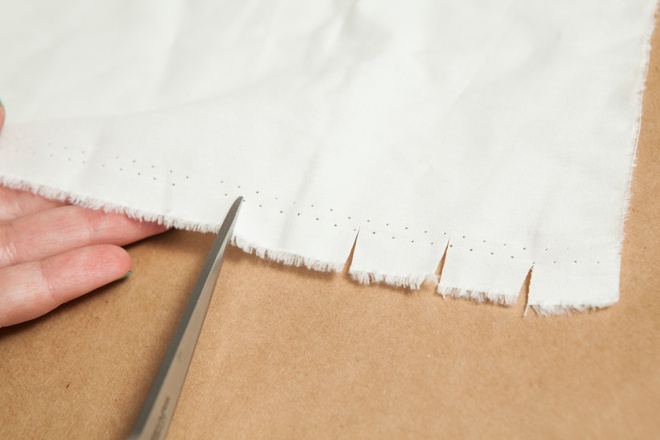
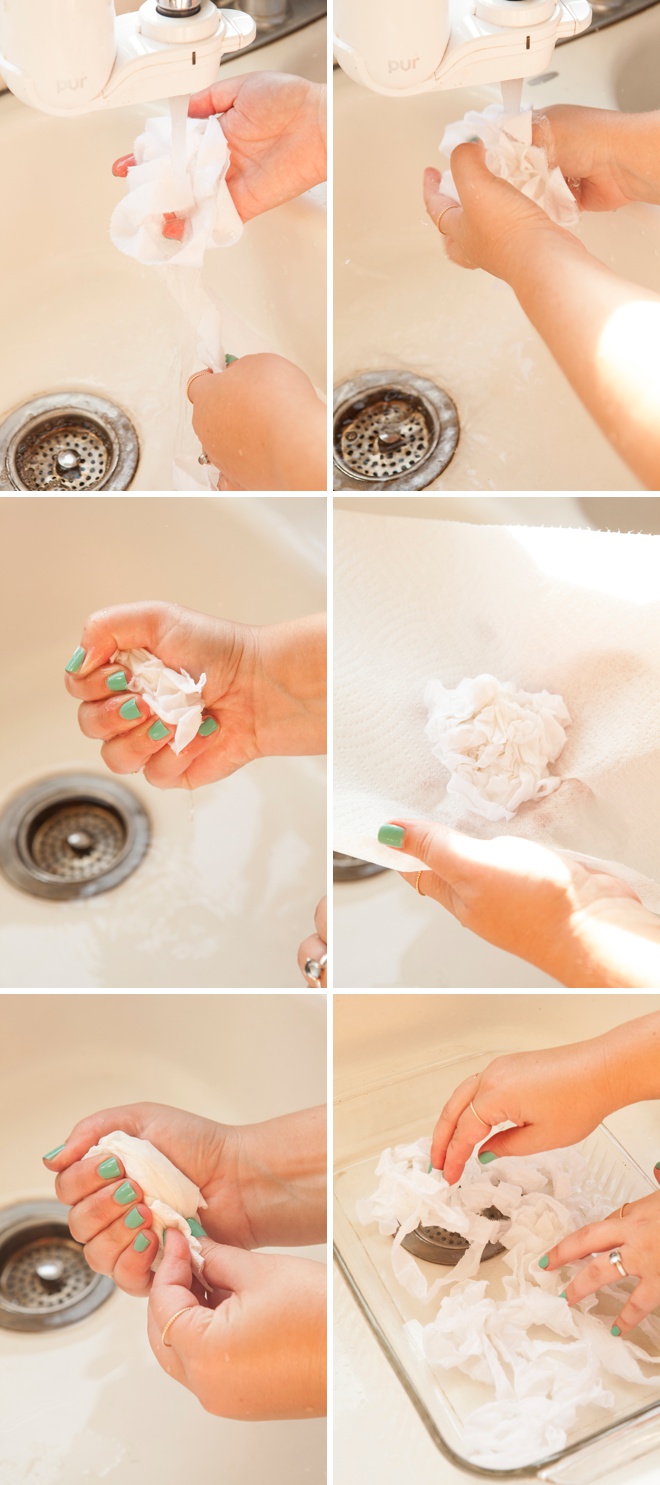
How To Rip Your Own Muslin Ribbon
At the “selvage edge” cut little slits in the fabric; this is going to be the width of your ribbon and it can be any size you wish.
The “selvage edge” of fabric is the finished edge that keeps the fabric from unravelling; so not the edge the worker at the fabric store cut for you.
After you have your notches cut, simply pull them apart and rip your into your ribbon strips. This requires no technique at all, the fabric will rip straight all the way down – it’s awesome.
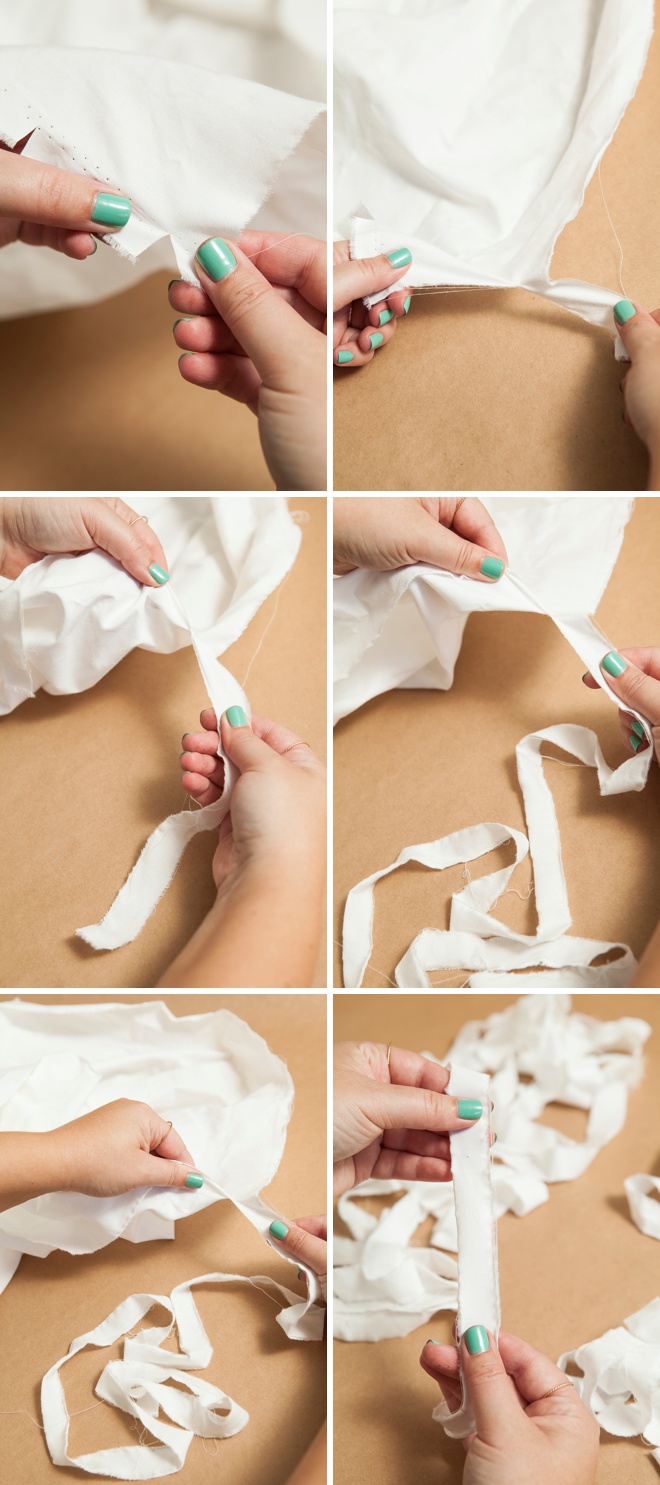
Clean up the stray strands
Ripping will cause strands of the fabric to unravel so pull them all off your ribbon pieces.

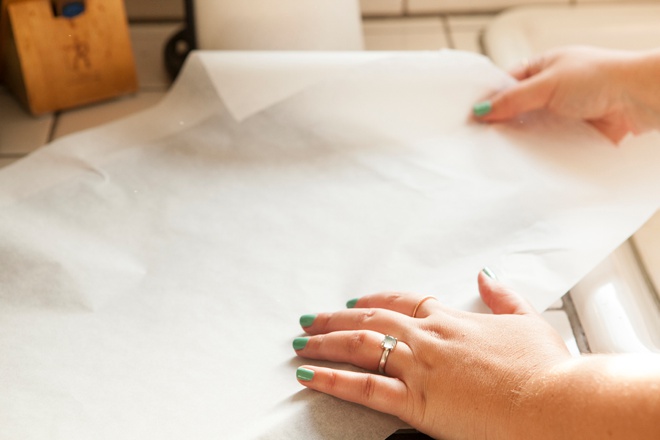
Set Up Your Drying Tray
Use a cookie sheet, cutting board or the like and cover it with wax or parchment paper. This is where you will let your wet ribbon dry.
Wet The Ribbon
Wet your ribbon first and then wring it out until it’s just a little damp. I even wrung it out in a paper towel to remove as much moisture as possible.
The water helps saturate the ink through the muslin and helps give it that marbled look- but it also dilutes the ink. The amount of water in your ribbon will directly effect the color outcome.
The next step is messy so I put all my moistened ribbon into a glass baking dish and then in my sink.
Shake + Spray
Shake the color shine bottle really well and spray onto your ribbon! Wipe the ribbon around in the dish, absorbing all the extra spray.
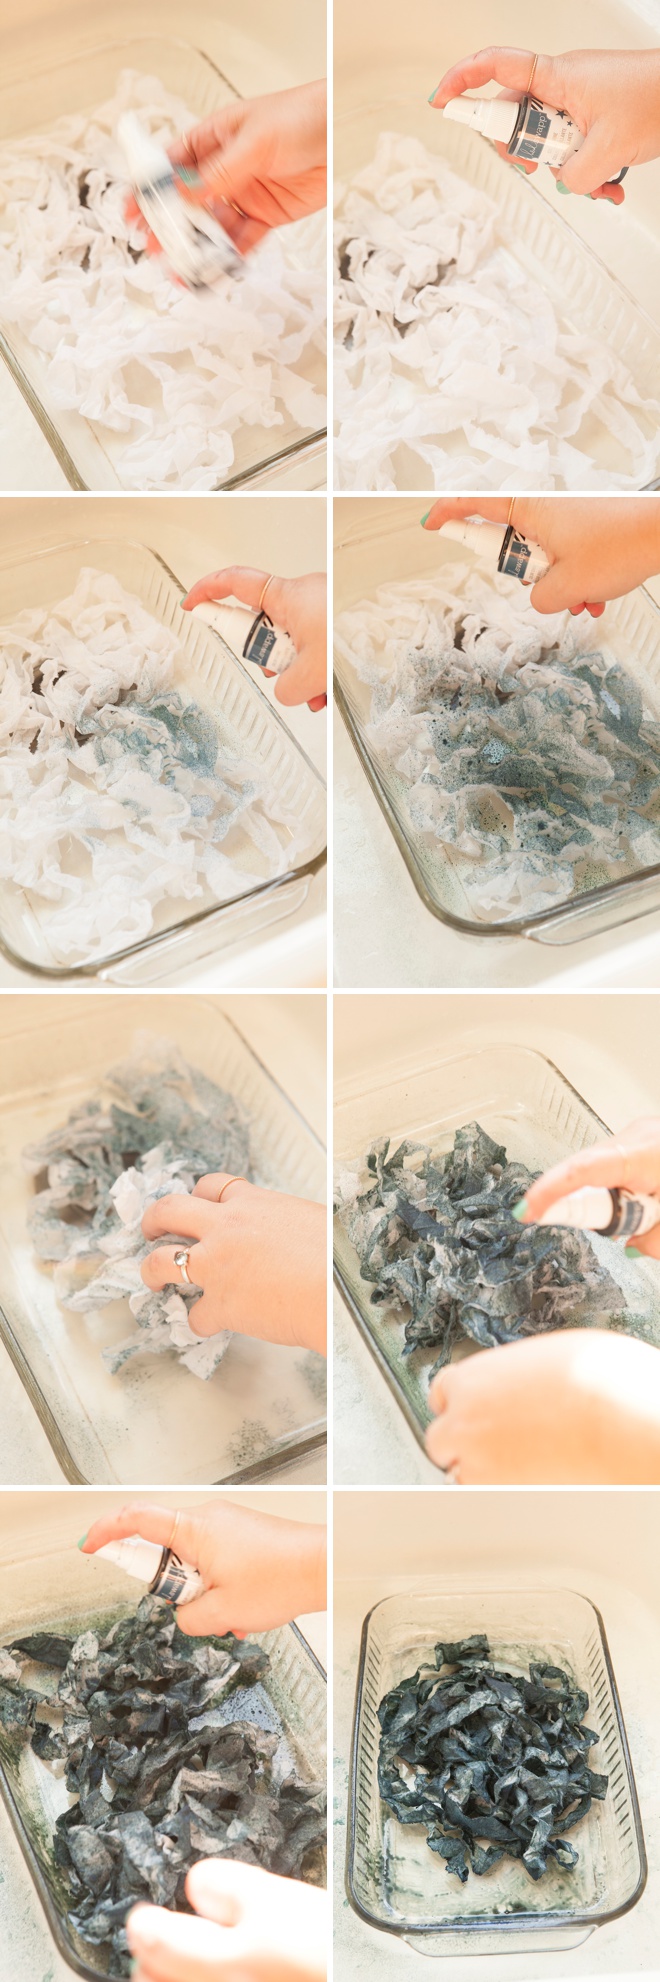
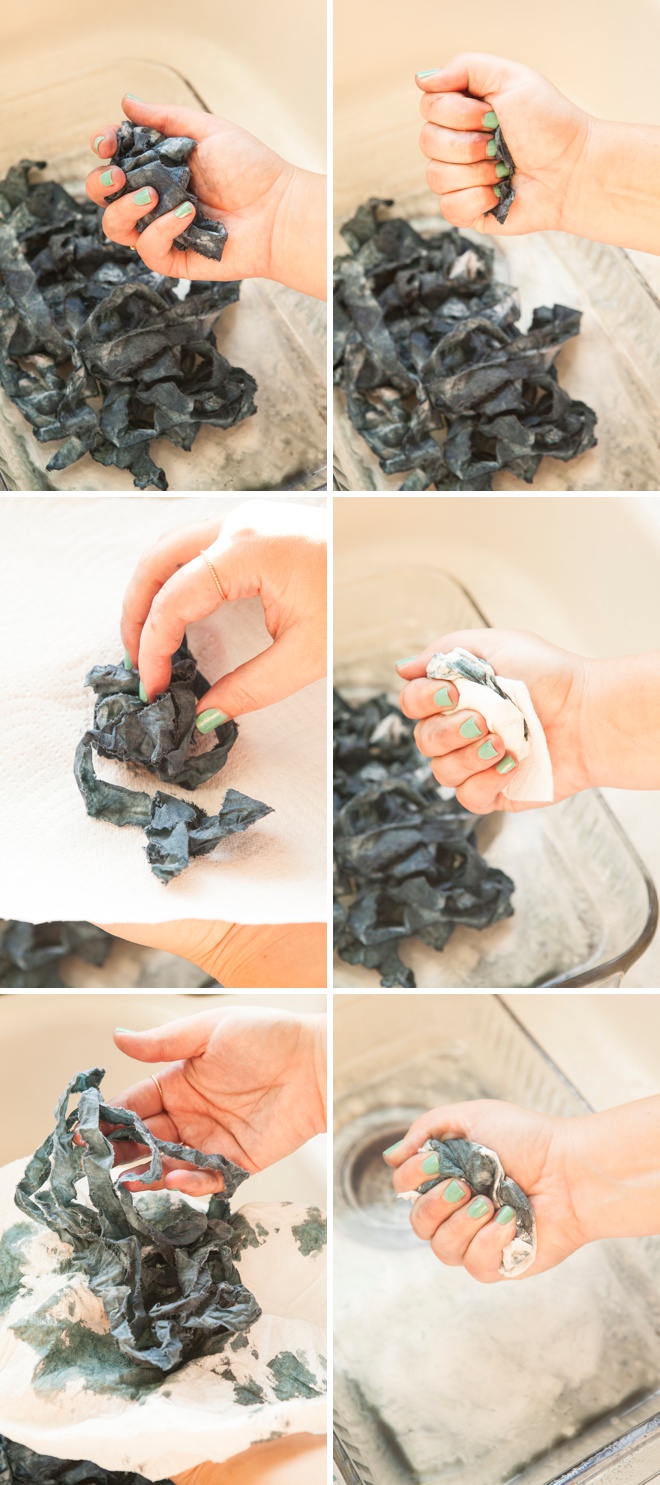
Squeeze the Color
To ensure that the color shine spreads throughout all the fibers of your fabric, squeeze it while it’s still wet. To remove color and make it lighter, you can even squeeze it out in a paper towel.
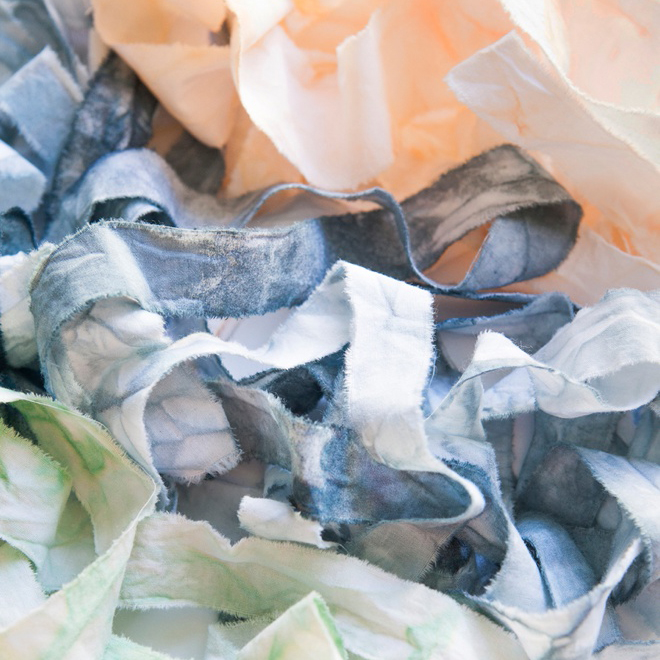
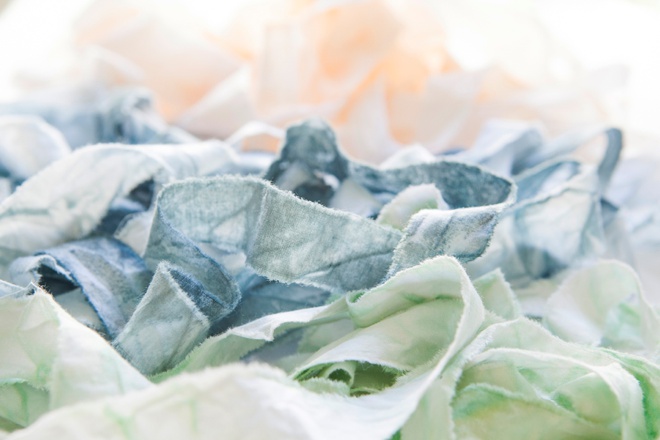
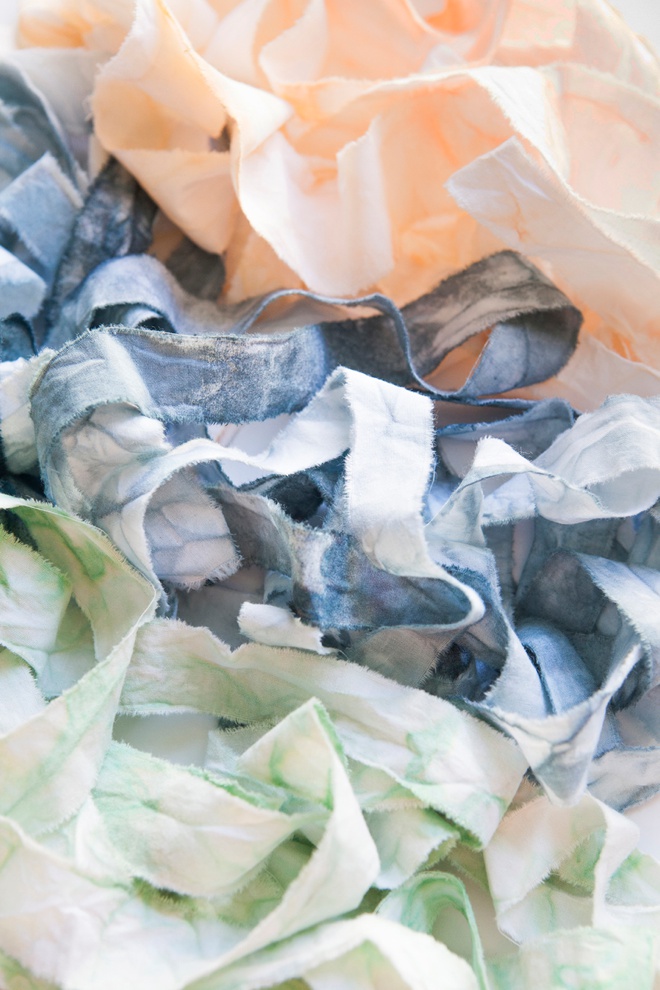
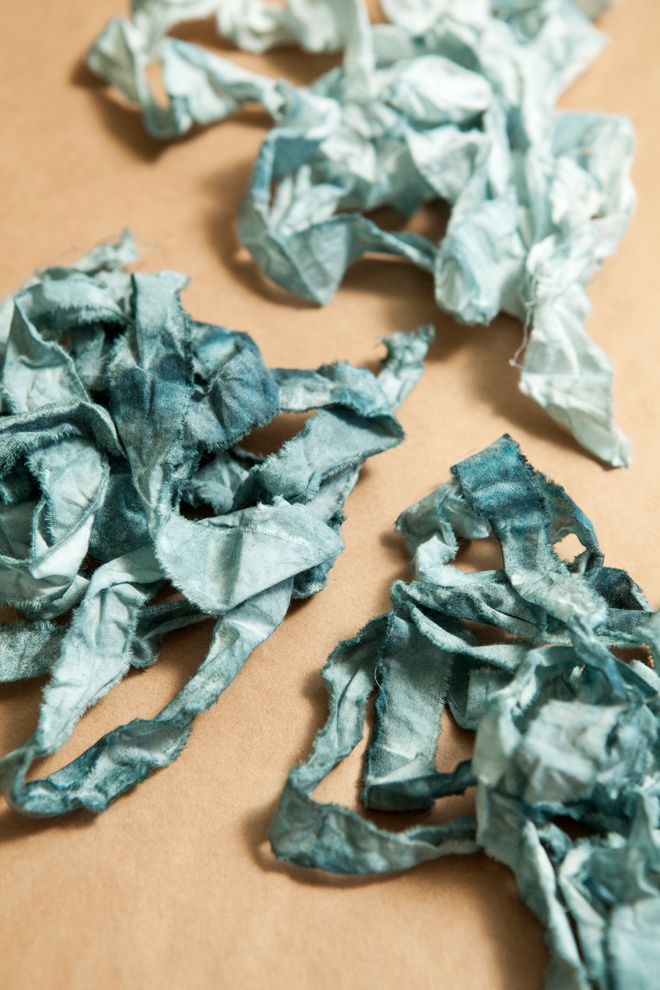
Make It Marbled
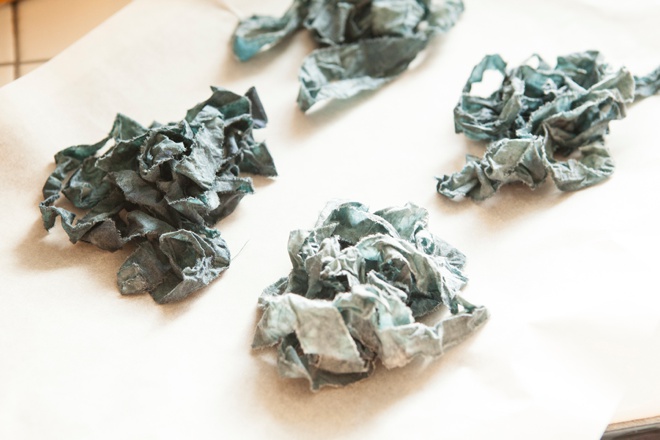
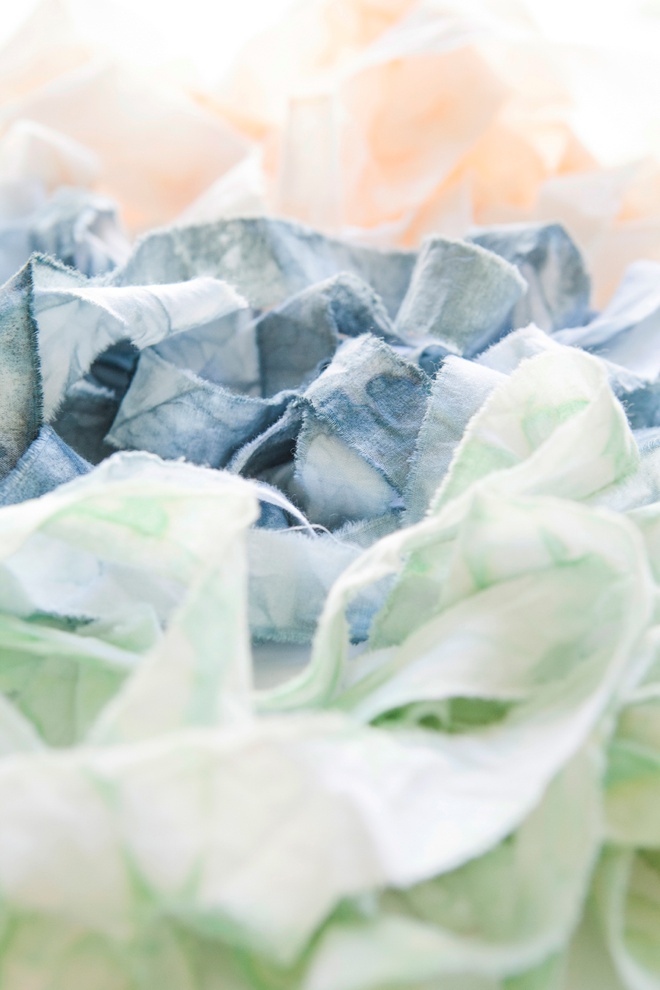
Place each strand of ribbon in a pile like this onto the wax paper and let it dry completely. This is where the marbling happens! As the ribbon dries, the water and ink is drawn into the wrinkles, so fab. Should only take a few hours, but if your ribbon was really wet it might take longer.
Ink Dyeing Tips:
- The wetter your ribbon is to start the less color will remain when it dries.
- The wetter your ribbon is to start the more dramatic your marbling might be.
- Yes, you can spray the color shine onto dry muslin, but the color will be more intense and there will be no marbling.
- The more spray you add the darker your ribbon will turn out.
- The more color you squeeze out of your ribbon with the paper towel the lighter your ribbon will be.
- As the ribbon is drying you can go back, check it out, flip it over and make sure you are happy with the color – if not add more.
- Some ink colors can stain your manicure, the navy stained my turquoise nails.
- DO NOT let different color ribbons touch each other as they are drying – they will run!
- There are about 20 different colors of color shine, one perfect for every color theme!
Beautiful right!?!
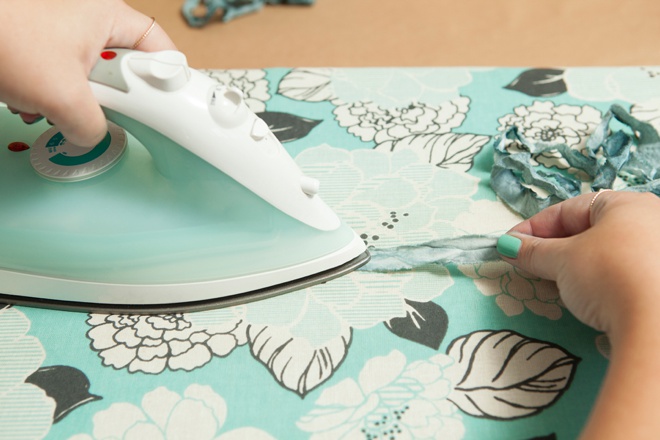
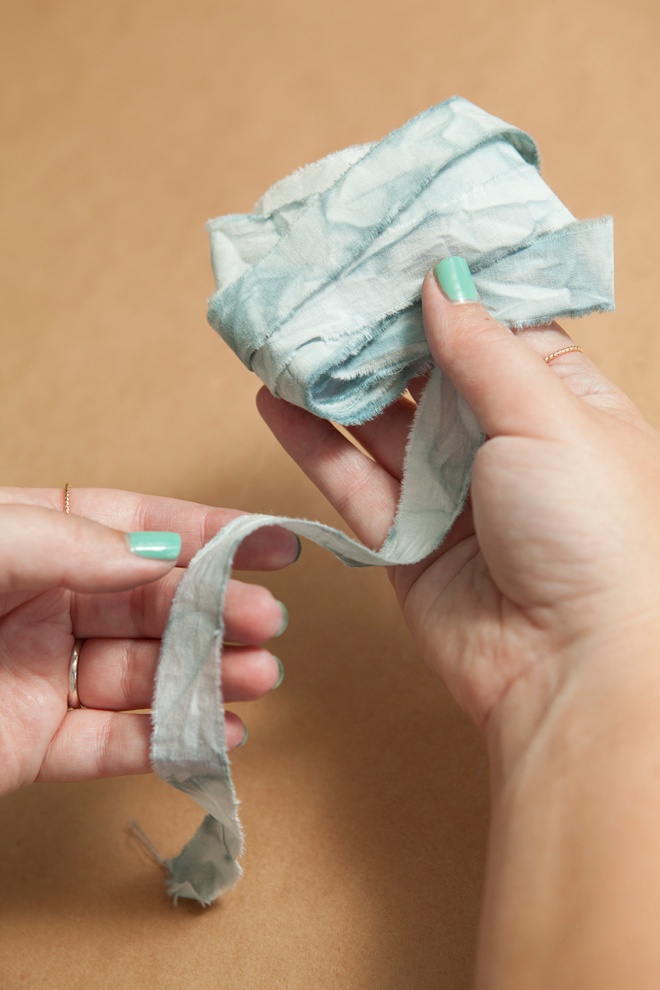
Iron Your Ribbon


As with all our DIY tutorials, if you create one of our projects please send us a picture – We Love Seeing Your Creativity! If you use Instagram or Twitter please use the hashtag #SomethingTurquoiseDIY and it will show up on our Get Social page. Happy Crafting!
DIY Tutorial Credits
Photography + DIY Tutorial: Jen Carreiro of Something Turquoise // 90″ White Cotton Muslin: JoAnn // Heidi Swapp color shine in Navy, Coral, and Seafoam: Amazon // Glass Dish: Amazon // Scissors: Fiskars // nail polish: OPI – Withstands the Test of Thyme
Shop The Supplies:
Find the supplies you’ll need for this project from our affiliate links below:

Comments