

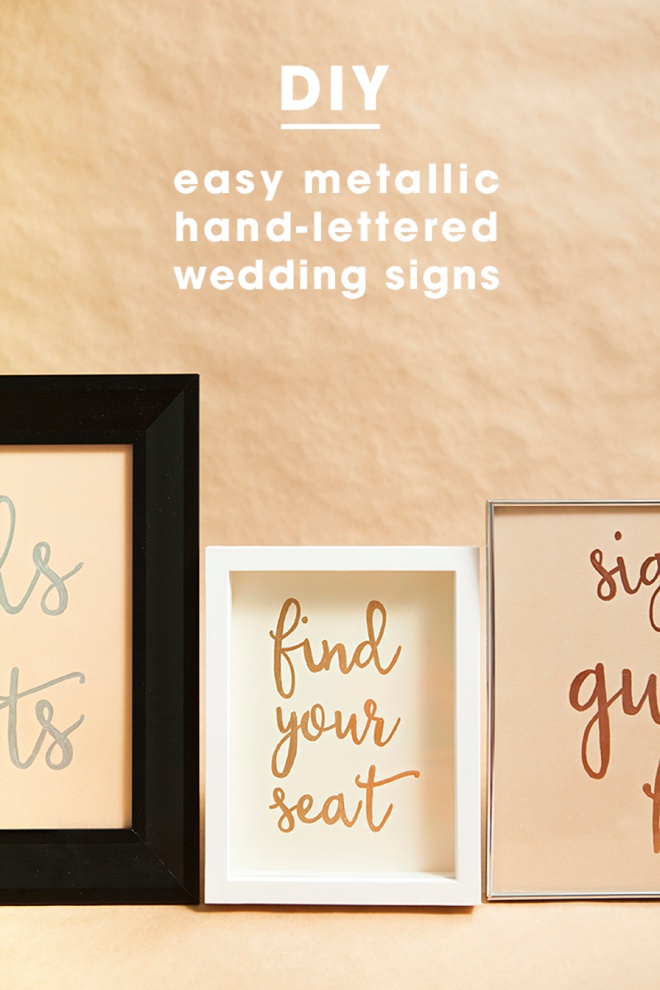
DIY | Easy Metallic Hand-Lettered Wedding Signs
-Sponsored Post-
During my Craft Room Reveal, you might have noticed that I am the proud owner of a Canon PIXMA iP8720 Wireless Crafting Printer. Why am I so excited about a printer you ask? Because it prints up to 13″ x 19″ – which means it can print on 12″ x 12″ scrapbooking paper!!! A total dream come true for any paper crafter or scrapbooker! The creative team over at Canon noticed how many free printables I offer for my readers and asked me to create 4 special DIY’s using this new printer – so you are in for a treat! Today’s project is simple and there are really only two skills that you need; ability to use your home printer and to trace simple designs. Here you will learn how to turn a printable design into a gorgeous metallic wedding sign in a snap. Keep in mind this technique works on just about anything you can print on!


SUPPLIES:
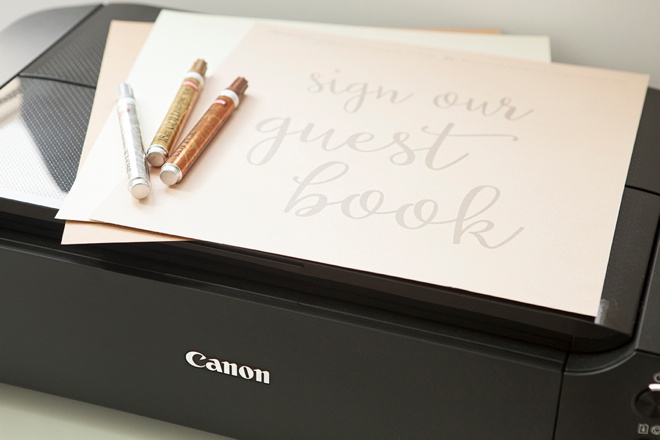
- Canon PIXMA iP8720 Crafting Printer (omg – it prints 13″ x 19″!)
- Krylon Metallic Gold Leafing Pens (Gold, Silver, Copper)
- 8.5″ x 11″ or 12″ x 12″ Cardstock
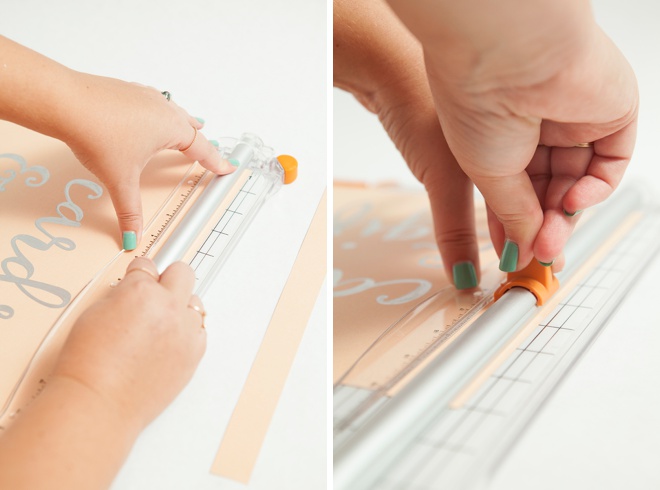
- Paper Trimmer
- Cute Frames
- Our FREE design downloads!
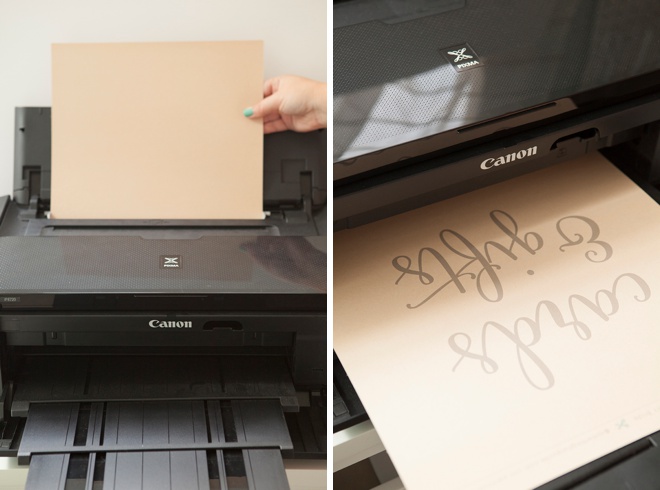
Download + Print
Download and print one of our simple designs at the bottom of the post OR design your very own!
This Canon PIXMA iP8720 Wireless Crafting Printer, actually prints up to 13″ x 19″! Which means that it will print 12″ x 12″ scrapbooking paper – my dream come true!
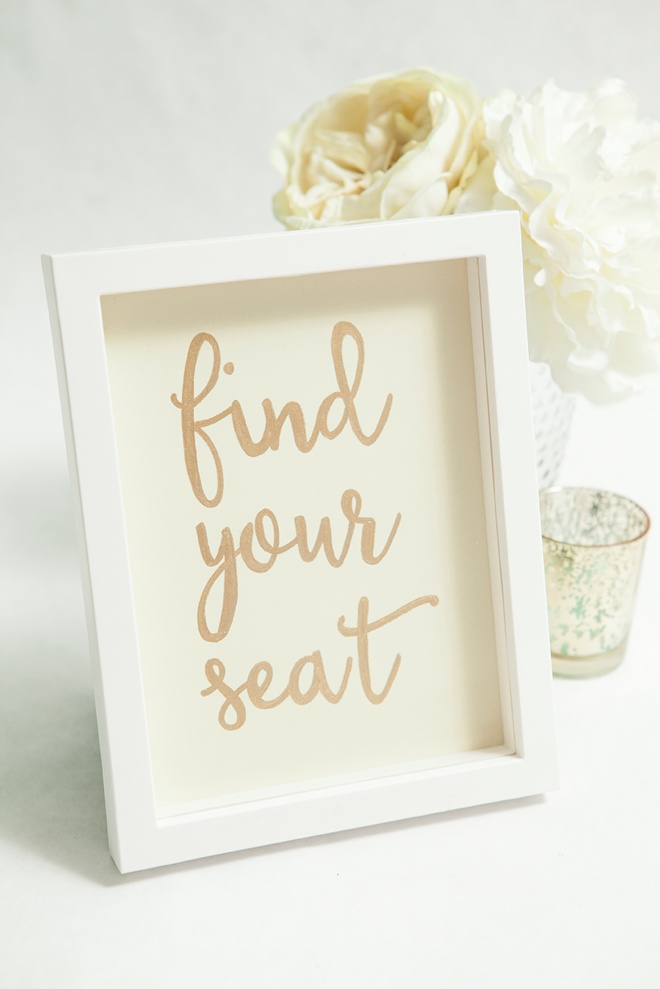
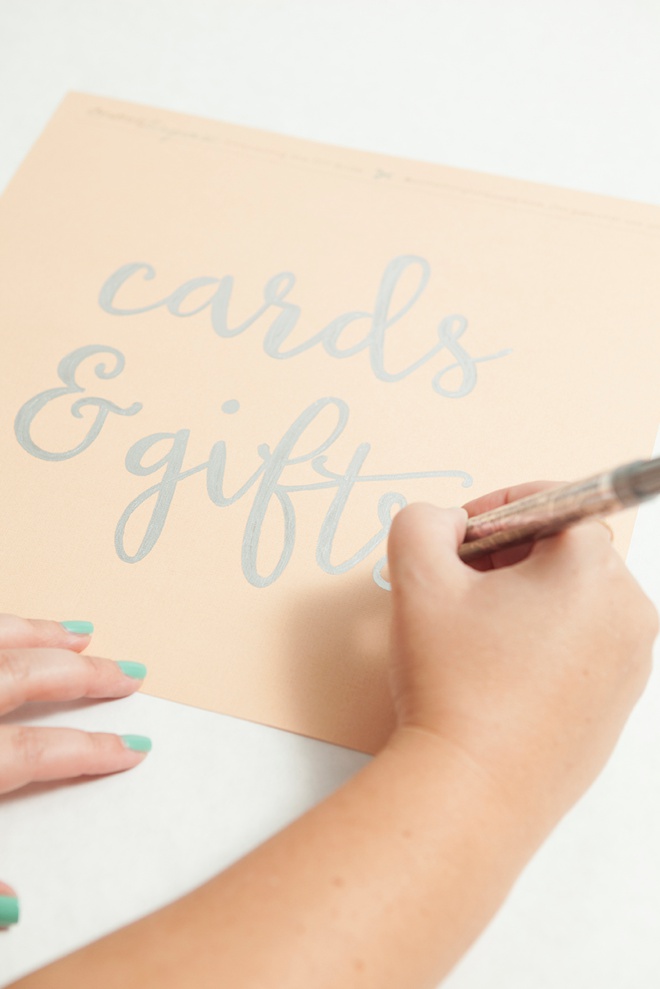
Trace In Metallics
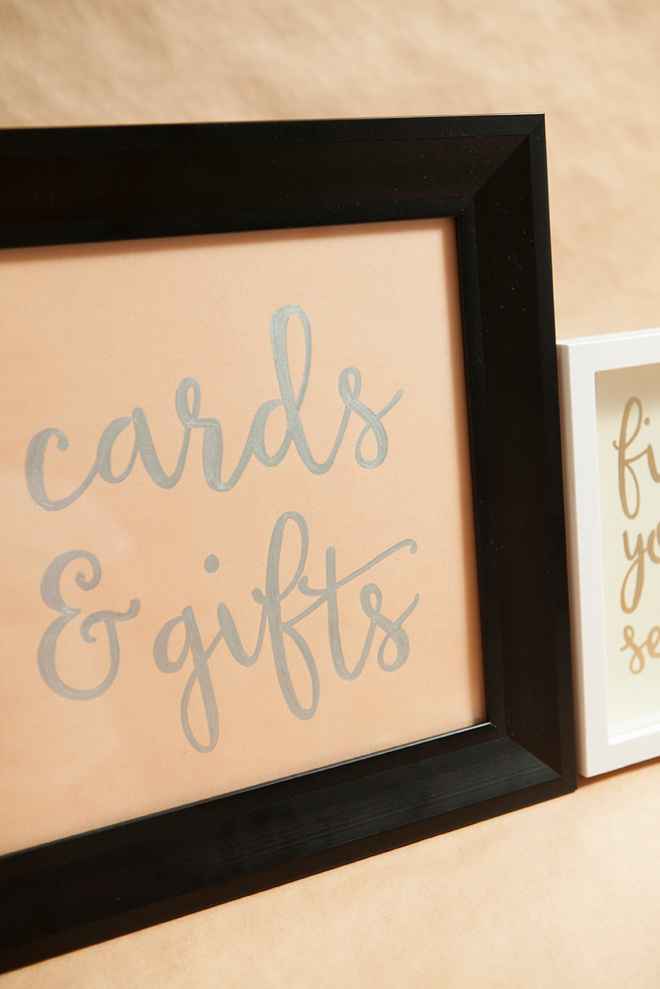
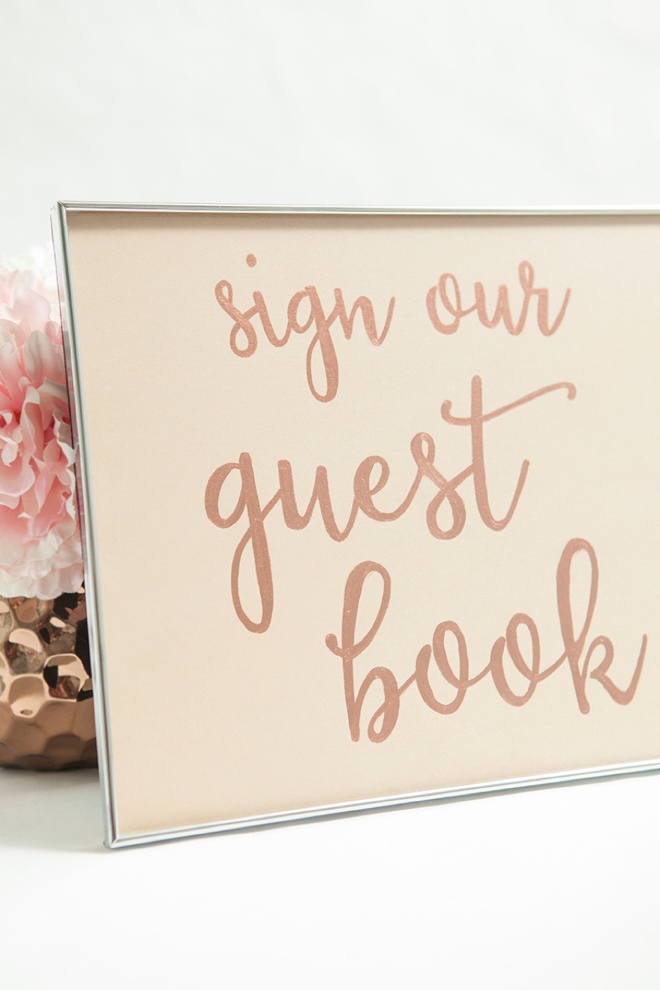
Ok, you are going to LOVE this – the only real step for this project is to TRACE. Carefully trace each design using a Krylon Metallic Leafing Pen, the color is up to you.
Crafters Note: I’ve created these downloads to print in soft gray so that the pens would cover the design, and you could also see the design if it’s printed onto semi-dark cardstock.
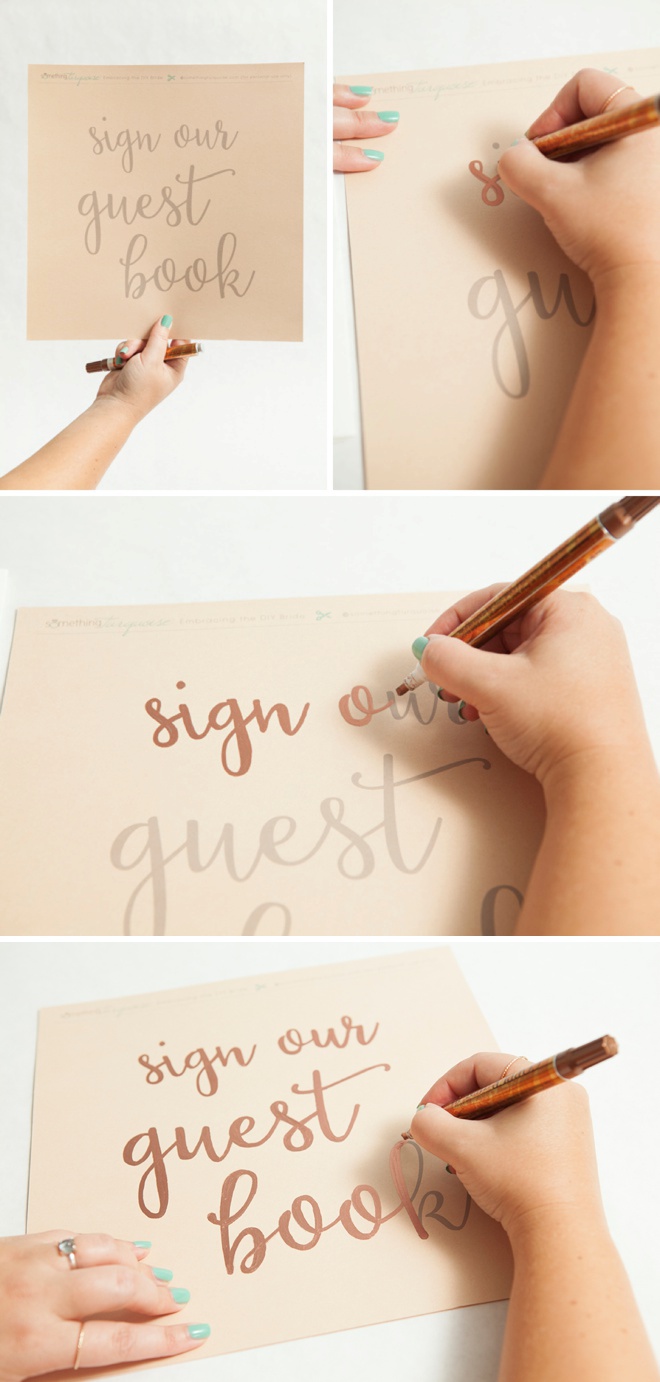
These pens give a gorgeous metallic finish to cardstock making the design truly stand out. ***I’m bending the paper here trying to show you the sheen of the metallic copper :-)

I don’t normally gravitate towards silver… but I love how this pen looks!!!
Other Pens?
Yes, other types of pens can be used to trace these designs to make them fit your theme.

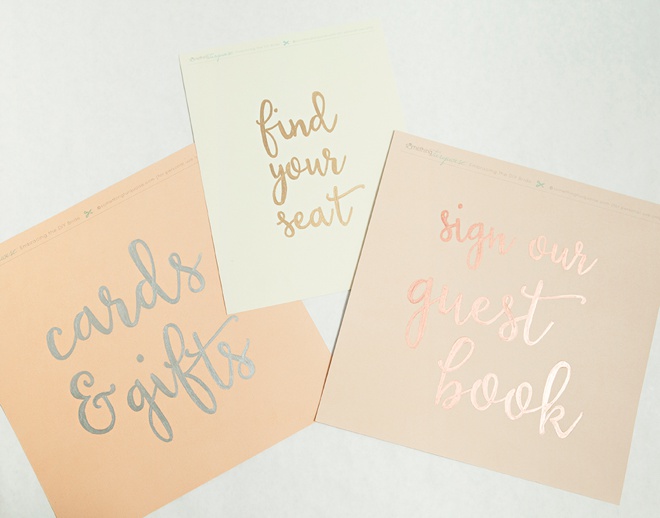
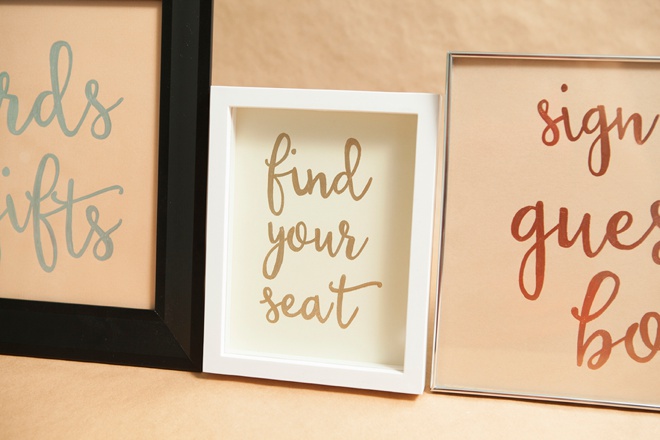
Two Sizes
I have created all three designs to print in two sizes. Choose the one that works for your printer and event.
- 12″ x 12″ (large) – Cuts to 10″ x 10″
- 8.5″ x 11″ (small) – Cuts to 5″ x 7″ and a little larger
Metallic Leafing Pen Tips:
The liquid inside these pens is actual metallic leafing which means…
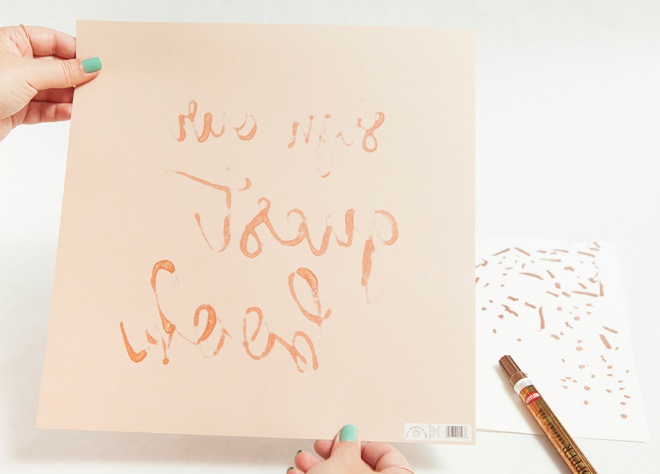
- You are essentially laying leafing down on paper, but through a pen – so take your time.
- They don’t write like other pens and get clogged easily. It’s ok, keep going. Use a scrap piece of paper to wipe excess and keep the liquid flowing.
- Some of the colors will seep through your cardstock, so write on a covered surface.
- If you get a heavy glob of leafing on the page, a clear-ish residue might seep out from your design. It will dry clear most of the time, but it might also have a slight metallic cast to it – no one will see it.
- Try not to go over areas that you’ve already traced too much, it can scrape up the leafing and form little balls. Which you can scrape off afterwards.
Trim + Frame
I didn’t put any boxes around these designs so that you have full control when choosing a frame that fits. Trim your sign using a paper trimmer or scissors.
Hand Lettering Love
Hand lettering on everything is a HUGE trend right now in weddings and parties – but if you don’t possess the skill needed… just print and trace!
DIY Tutorial Sponsored By:
Canon U.S.A., Inc. prides itself on allowing consumers to create and preserve beautiful imagery, from capture to print. With wireless technology and seamless printing capabilities, you can print your photos and printables with precision and ease.
8.5″ x 11″ Signs


12″ x 12″ Signs


As with all our DIY tutorials, if you create one of our projects please send us a picture – We Love Seeing Your Creativity! If you use Instagram or Twitter please use the hashtag #SomethingTurquoiseDIY and it will show up on our Get Social page. Happy Crafting!
DIY Tutorial Credits
Photography + DIY Tutorial + Free Downloads: Jen Carreiro of Something Turquoise // Canon PIXMA iP8720 Wireless Crafting Printer: courtesy of Canon – available at JoAnn // Cardstock: JoAnn // Krylon Metallic Leafing Pens in Silver, Gold and Copper: Amazon // Font Used: Sweet Peony // Frames: Target + JoAnn // Vases + Faux Flowers: Afloral // nail polish: OPI – Withstands the Test of Thyme
Shop The Supplies:
Find the supplies you’ll need for this project from our affiliate links below:

Comments