
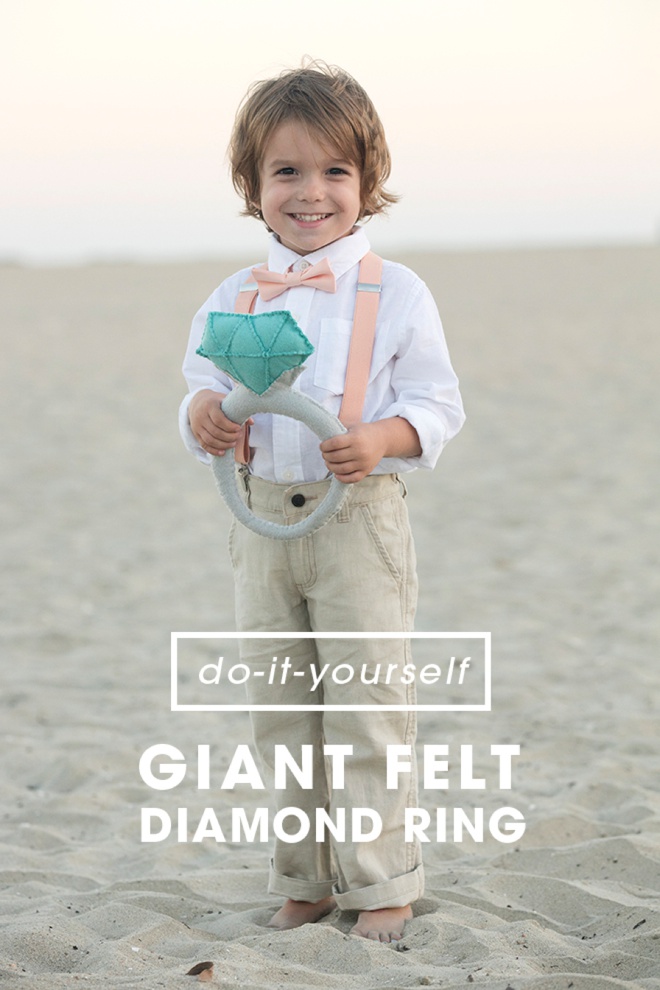
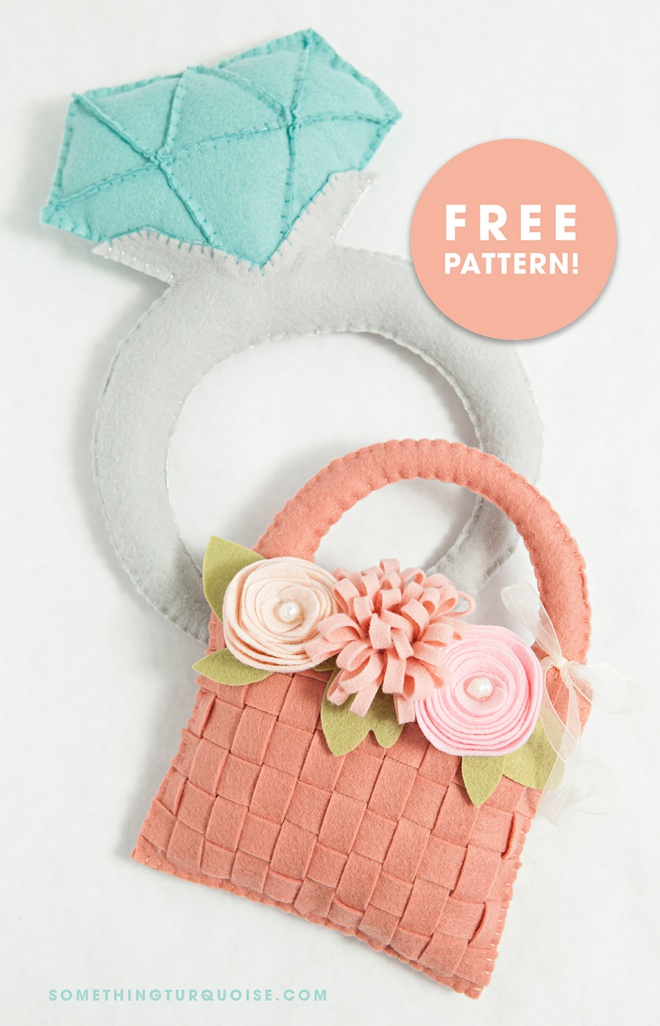
DIY | Giant Felt Diamond Ring For Your Ring Bearer
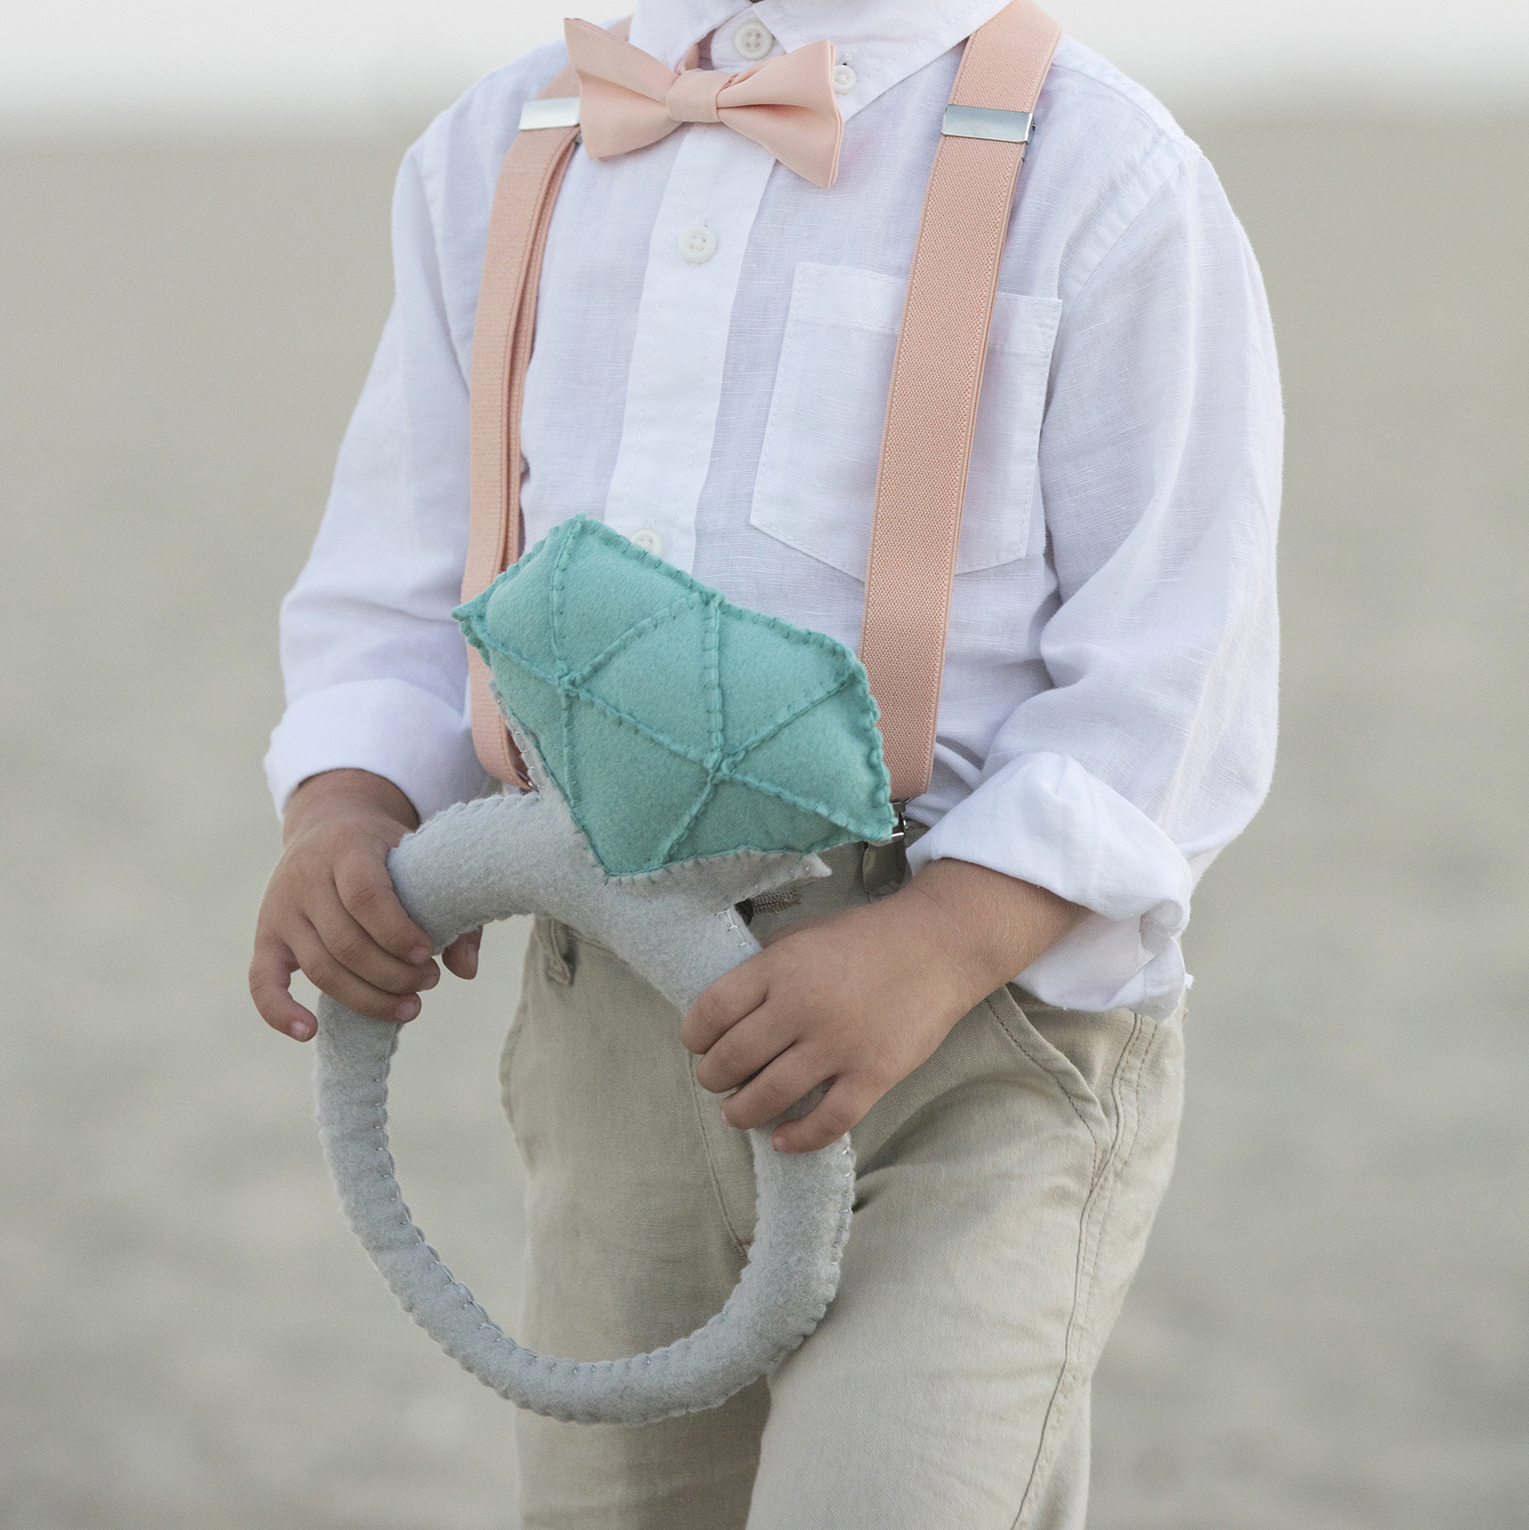
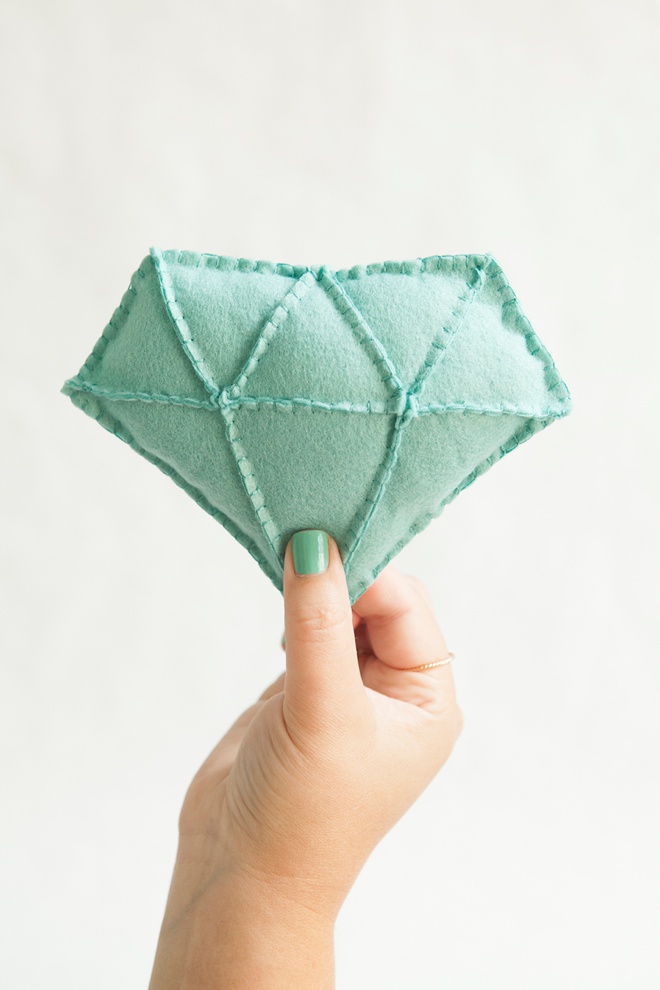
There is nothing sweeter than having little cuties walk down the aisle at your wedding… but what if they are too little to actually “do their job” like toss petals or deliver a ring? Well, today’s DIY Giant Felt Diamond Ring is your answer for the ring bearer at least. Imagine your favorite baby, being carried down the aisle, pulled in a wagon or walking by themselves while carrying this adorable felt ring pillow! Your guests will get all heart-eyed emoji on you for sure. They will then be playing with it all night, which will make for some adorable pictures. Embrace the tiny attendant tradition but give new life to it with this fun handmade idea. If you like this project, you might love my DIY Felt Wedding Bouquet as well! Make sure to grab your free patterns at the end of the post. Today is all about the felt ring and tomorrow you will find the felt basket!

For the felt flower girl basket tutorial + free pattern please visit this post.


HUGE thanks to our friends the Belzer family for sharing their adorable twins with us!

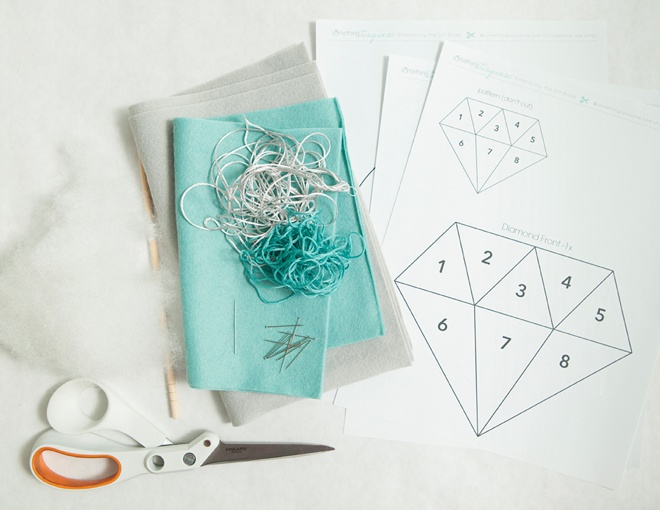
SUPPLIES:
- High quality wool felt, mine is from Benzie Design (exact amounts below)
- Embroidery floss to match the felt
- Embroidery needles
- Stuffing (aka. polyester fiberfill – one 12oz bag will easily fill both the ring and basket)
- Hot glue gun
- Scissors
- Sewing pins
- My free patterns at the end of the post!
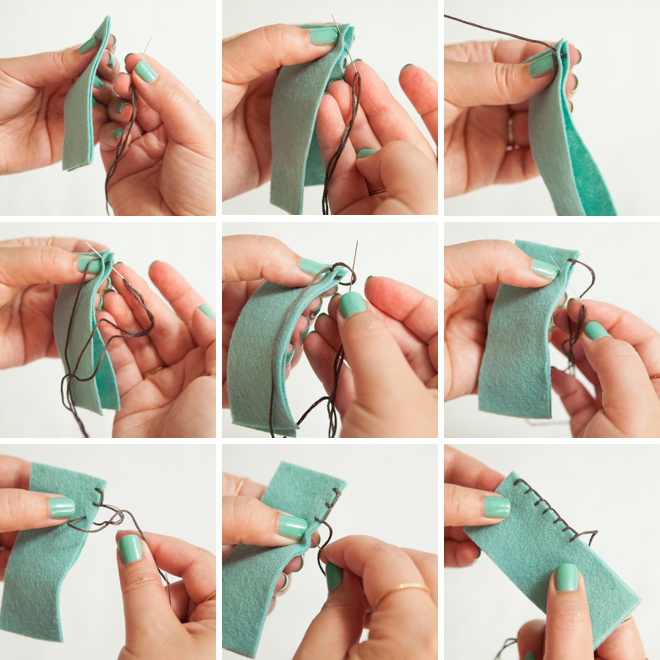
Blanket Stitch – How To:
I’m going to start by sharing how to do the blanket stitch – which is the only stitch I use in this tutorial. I love the blanket stitch; it makes things look fancy and it’s easy to do:
- Start with two pieces of felt (or any fabric) and your choice of thread. Here I’m using three strands of embroidery floss.
- Start your stitch between the two pieces of fabric to hide the knot.
- Then go back and make a real stitch across the top of that first hole.
- Before you pull that stitch tight, put your needle through the loop – then tighten.
- Do the same thing, over and over – just remember to keep looping the stitch.
This stitch makes a pretty little seam on the outside of any hand sewn project!
Cut Out Your Felt Pieces
Based on my pattern that you can print at the end of the post, you’ll need:
– Ring Base: 12″ x 18″ piece of felt (color: silver)
– Diamond: 9″ x 12″ piece of felt (color: swan)
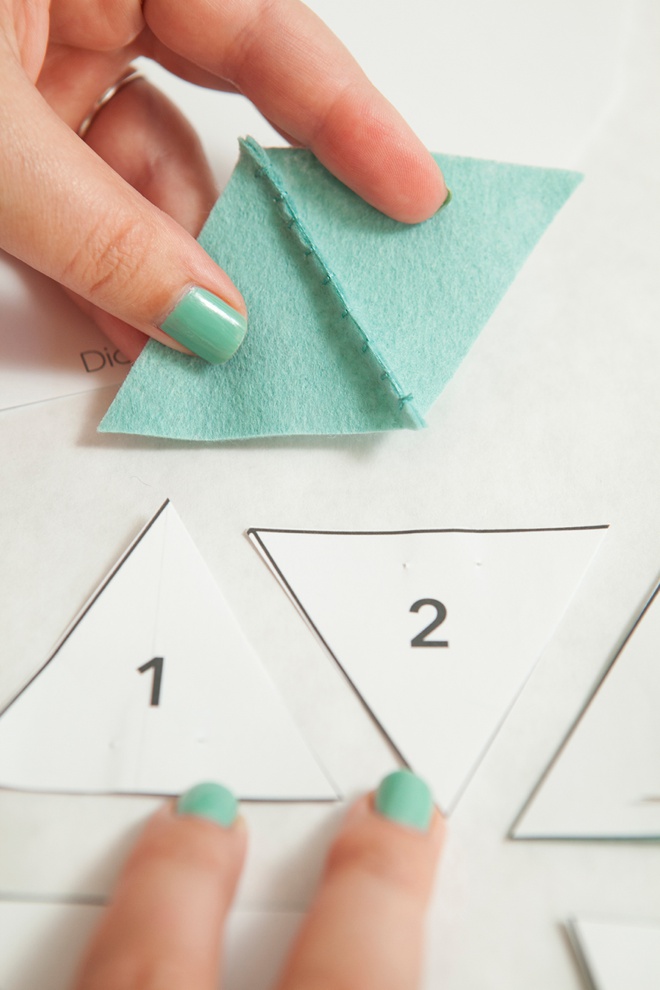
Cut out the ring base pattern, pin it onto the felt and cut out two pieces.
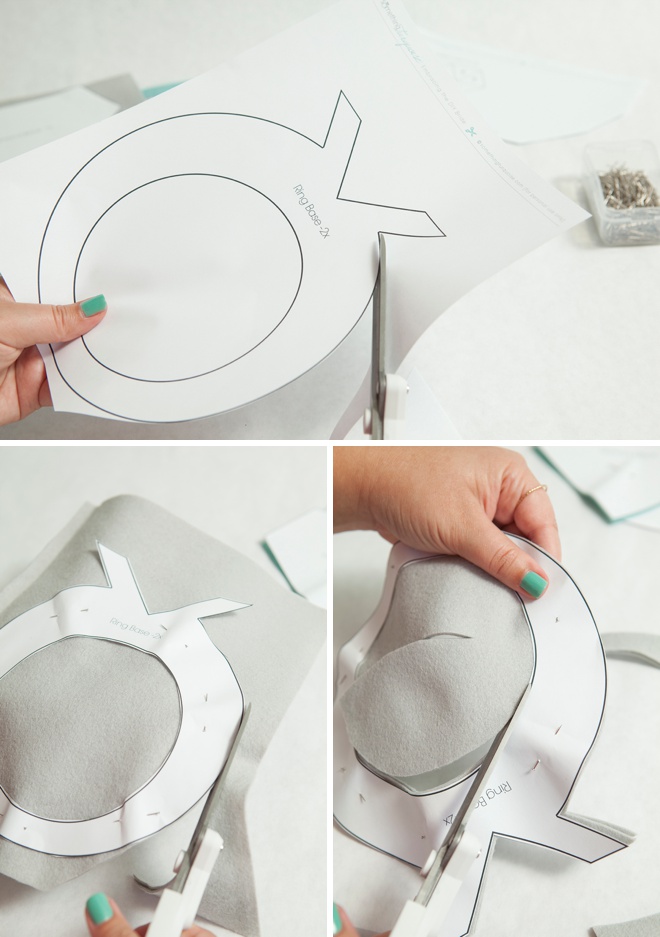
Do the same thing with the diamond back and front; cut along the lines provided to make the facets. On the printout there is also a guide for you to follow for the facets. Leave the facet pattern pieces pinned on each one until you sew!
This is what your felt pieces should look like. The facets are larger because the shape will be smaller after it’s sewn. The ring bases are the exact same size.
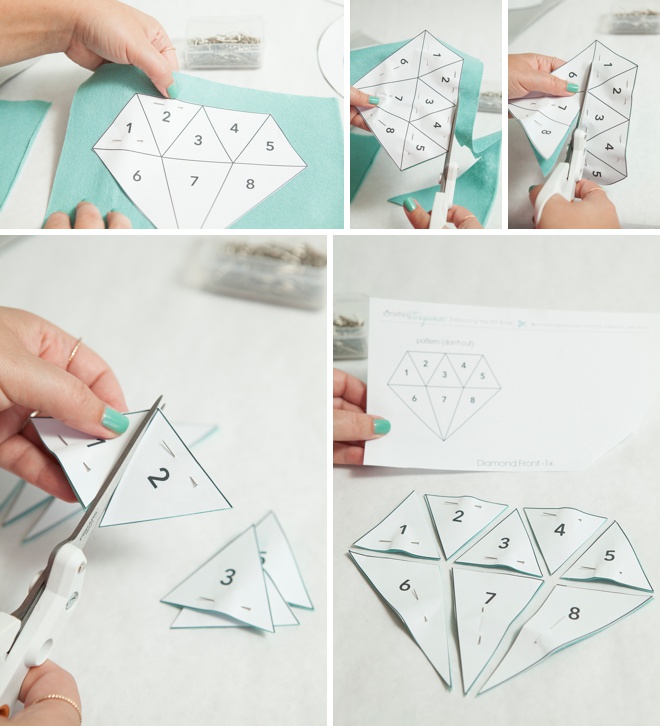
How To Sew Your Diamond:
We are going to start by creating the diamond front with facets. Taking piece #1 and piece #2 – blanket stitch the “touching” sides together using only 2 strands of embroidery floss – which means you’ll need to separate 2 strands from the 6. Refer to the guide on the printout for the layout.
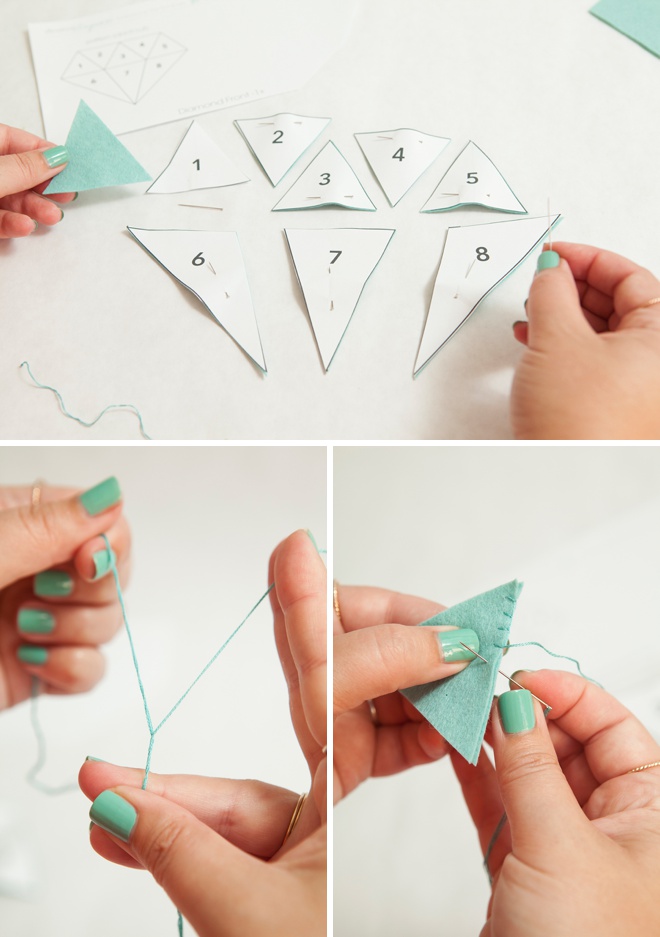
This is what the first two pieces will look like. Remember, you are making a seam on the outside of the fabric – not the inside.
Do this same technique with all the facet pieces!
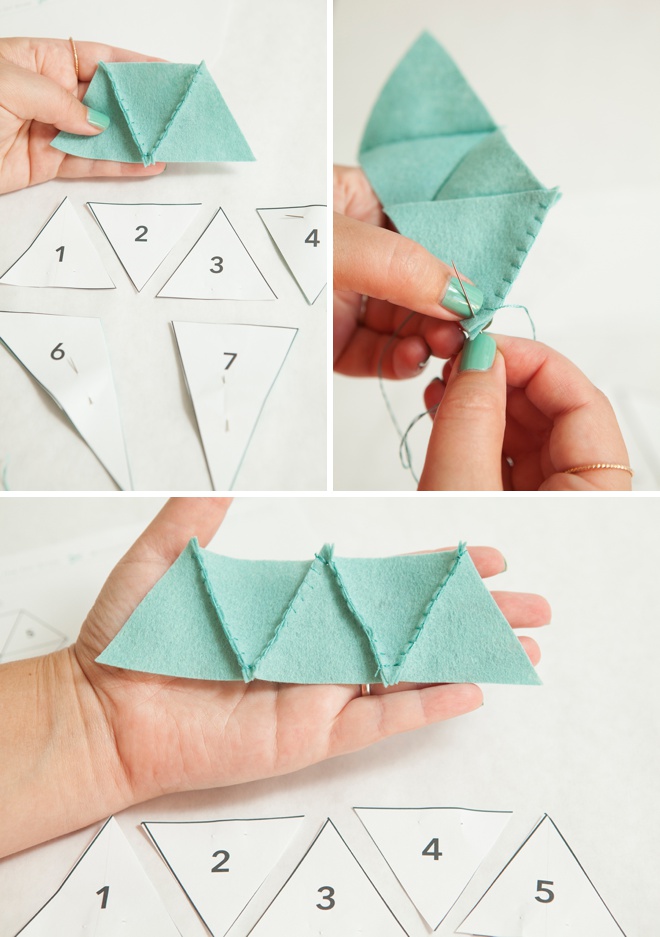
Once your top row and bottom row are complete – sew them together.

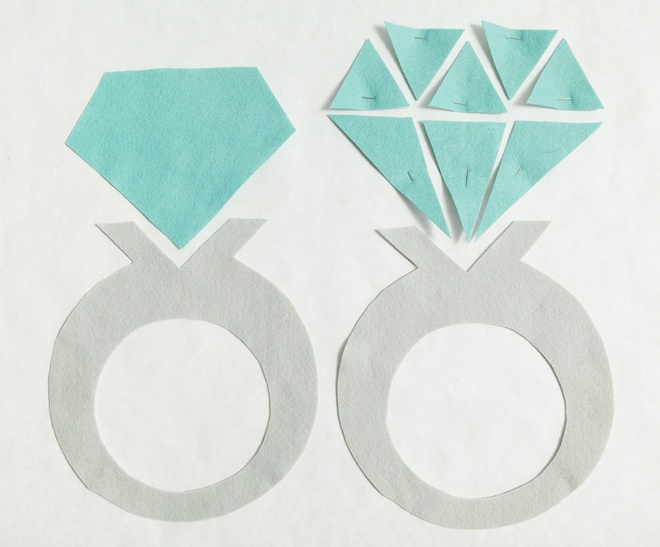
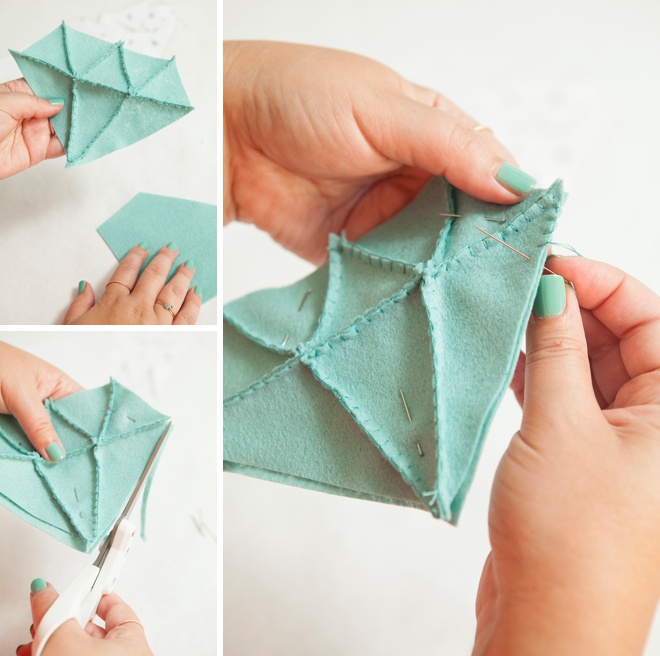
Now place your completed diamond front onto the diamond back and pin in place – trim any excess to fit. Everyone’s seam allowance will be different so it’s not wrong if your finished diamond front isn’t the exact size of the cut diamond back, just trim to fit.
Then blanket stitch around the entire diamond, leaving one side open to stuff.
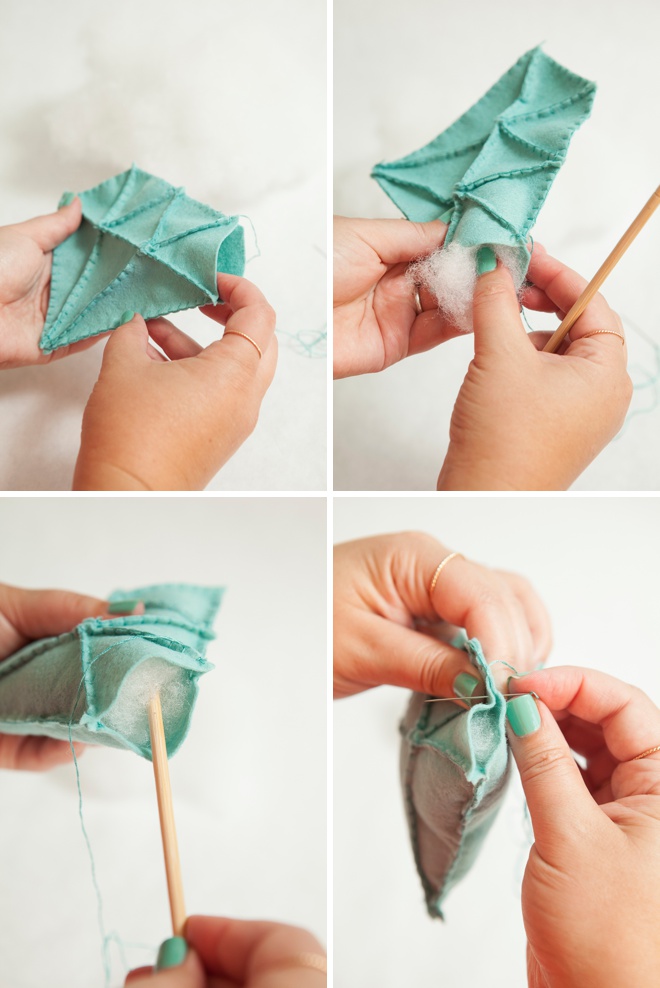
Fill your diamond with stuffing and sew it closed! **that stick came in my bag of stuffing, the same one that I linked to at the end of the post.
So cute!
How to Sew + Fill The Ring Base:
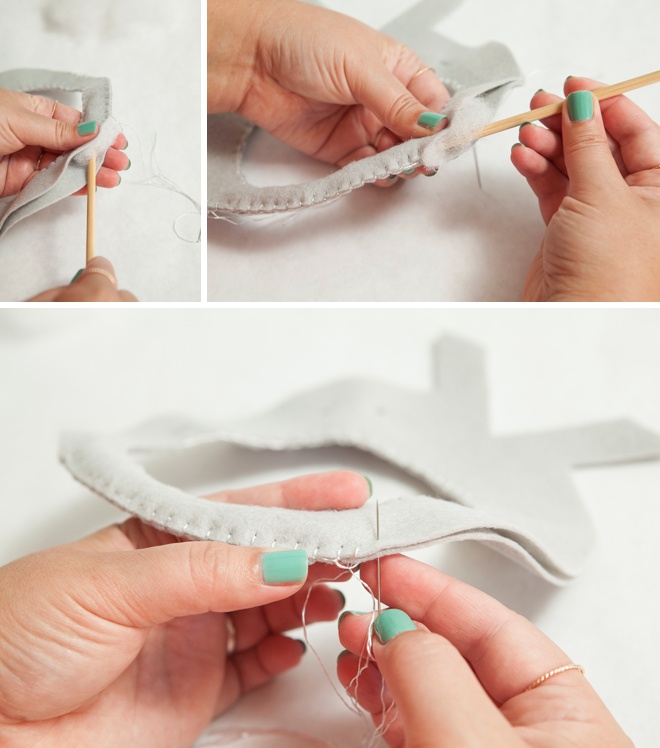
The ring base is a little tricky to sew and fill so just go slow. You need to stuff as you go, otherwise the ring itself is so skinny that you won’t be able to stuff the bottom from the top.
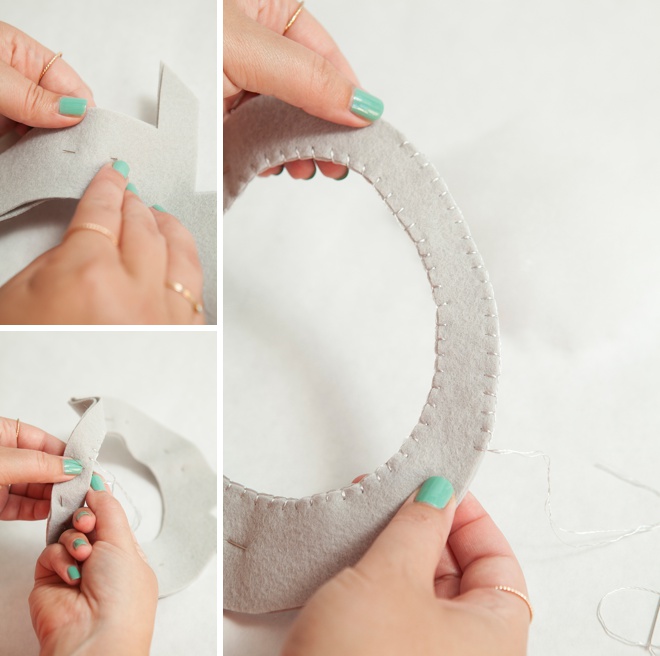
- Pin the ring pieces together.
- Blanket stitch the entire inside circle of the ring, again using only 2 strands of embroidery floss.
- Then stitch about 4″ of the bottom part of the ring and stuff.
- Sew a few inches and stuff as you go.
- Leave the “prong” areas open.
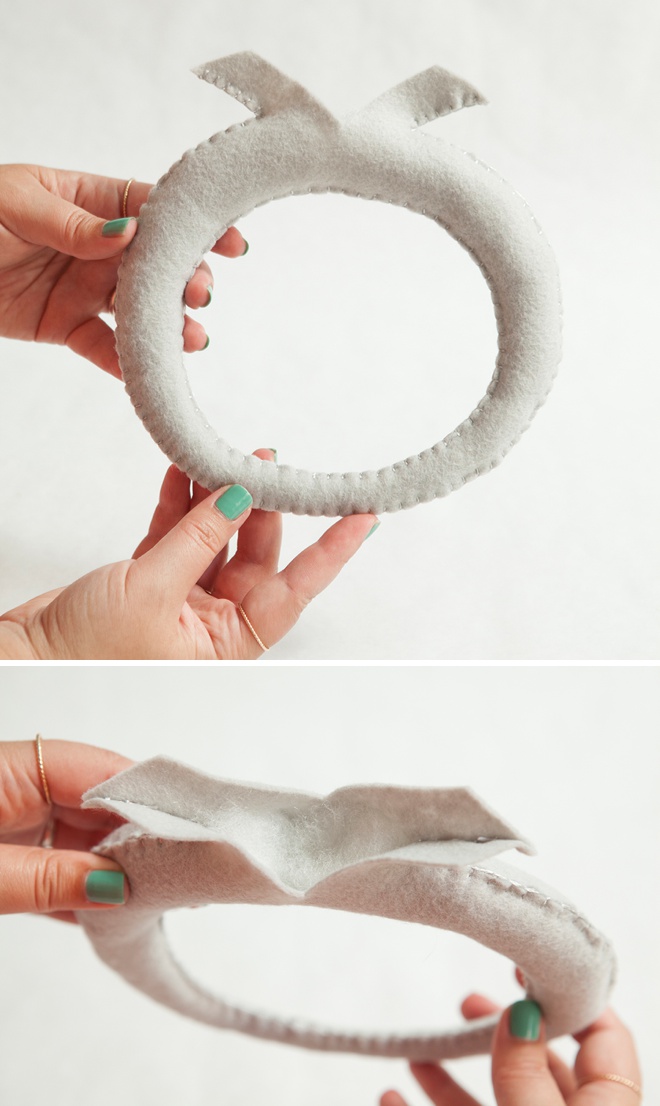
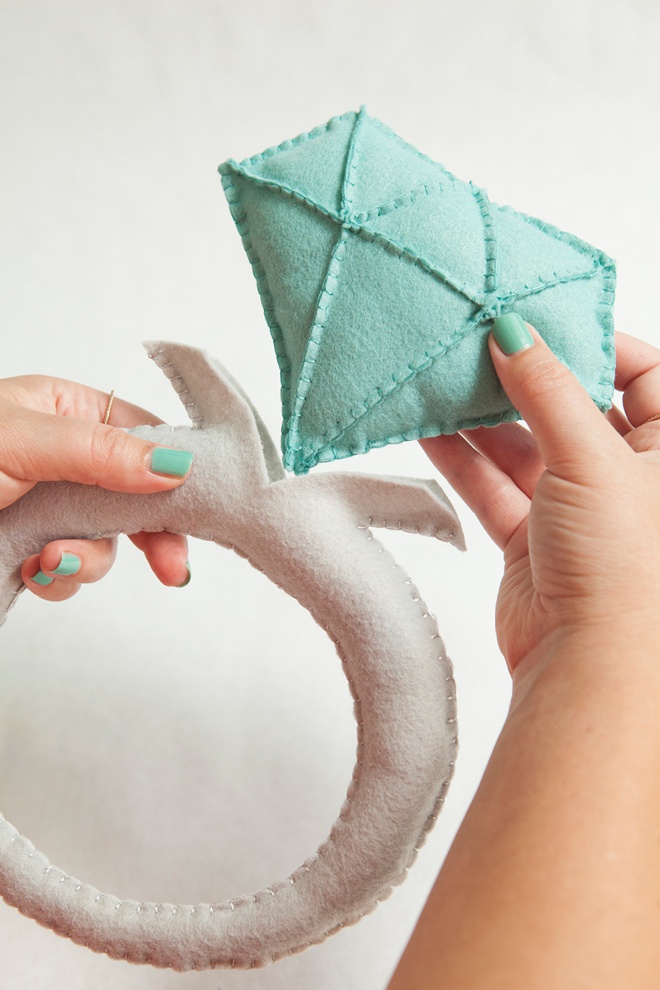
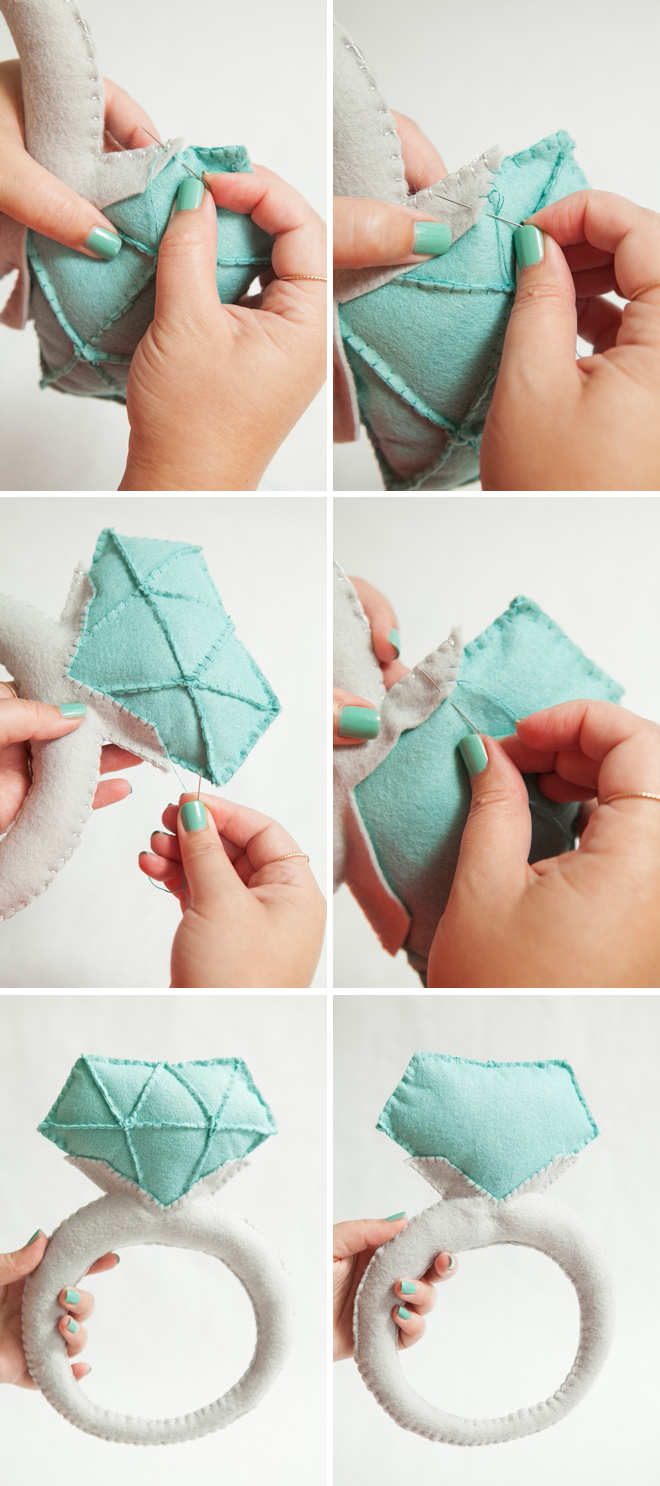
The last step is to sew the diamond into the ring base!
Add hot glue to the inside of the ring base and press the diamond into it. **This step is optional, but I found it easier to sew the diamond onto the base when I did this.
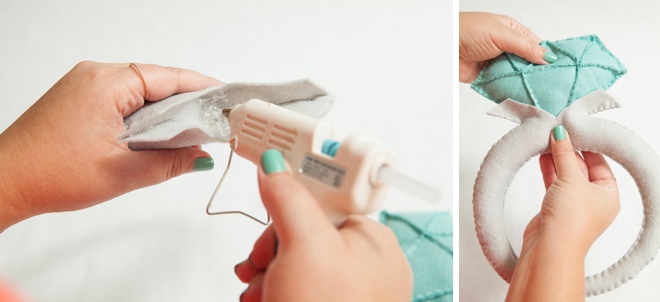
Sew the Diamond to the Ring Base:
Carefully blanket stitch around the entire “prong” area while grabbing felt from the diamond. That’s all there is to it – now your giant, felt diamond ring is complete!
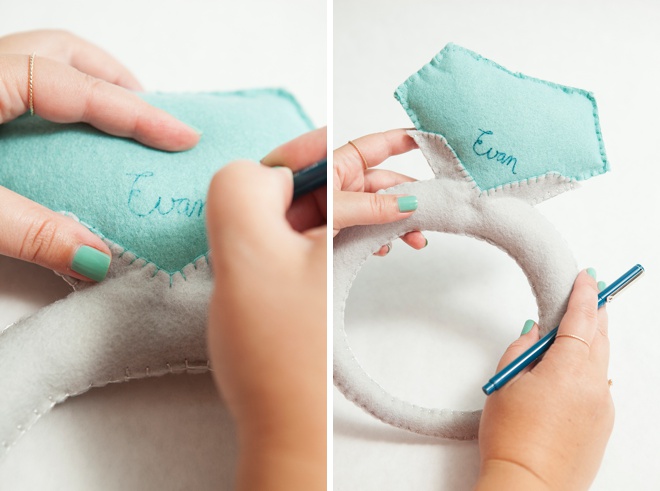
Since my little ring bearer was going to be keeping this stuffed pillow, I wrote his name on the back in permanent ink.
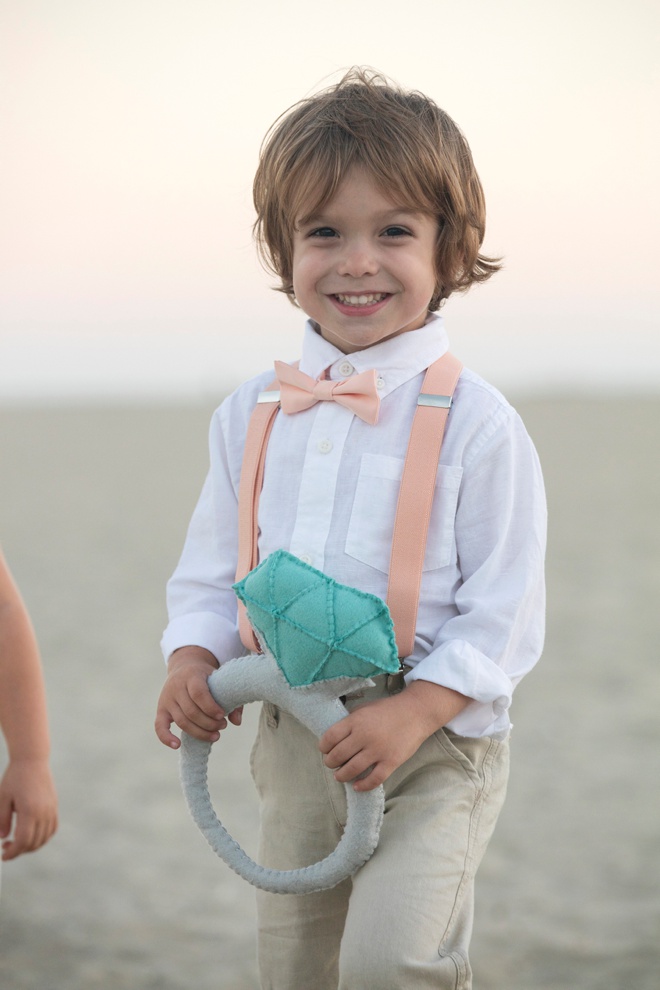

To see these little cuties playing with these pillows was an absolute treat for me… and let me tell you, this little ring bearer put my sewing skills to the test as he pulled, tossed and played with the diamond ring – lol. He was having a great time and the pillow survived!

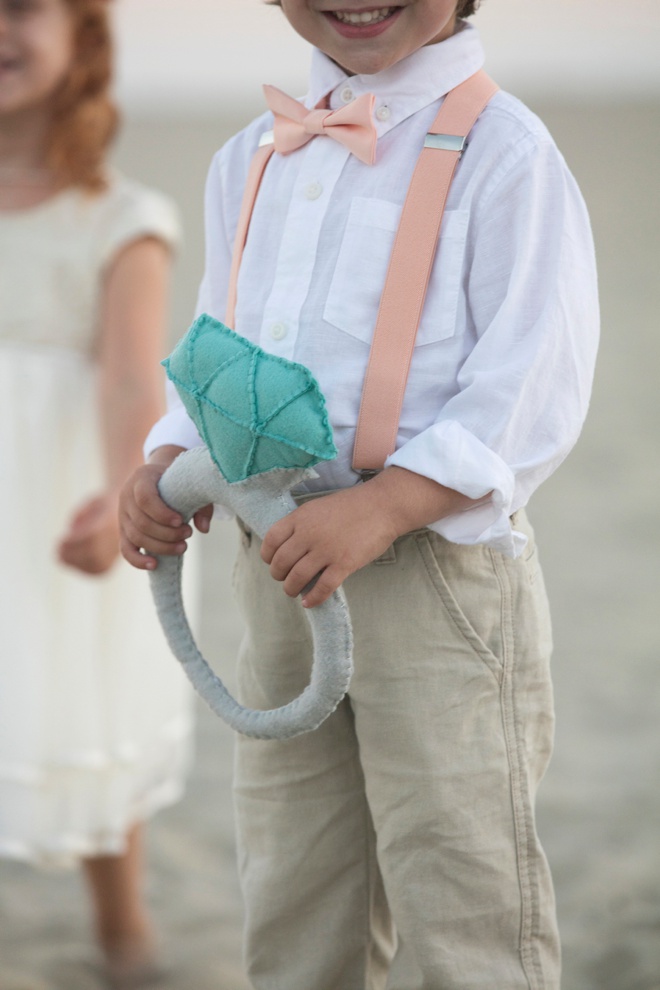

Seriously, are these two to die for or what!?!?!

For the felt flower girl basket tutorial + free pattern please visit this post. ***won’t be live until 8/28/15!


As with all our DIY tutorials, if you create one of our projects please send us a picture – We Love Seeing Your Creativity! If you use Instagram or Twitter please use the hashtag #SomethingTurquoiseDIY and it will show up on our Get Social page. Happy Crafting!
DIY Tutorial Credits
Photography: Something Turquoise Photography for SomethingTurquoise.com // DIY tutorial + free patterns: Jen | Something Turquoise // All felt + embroidery floss (ring colors: silver + swan) courtesy of: Benzie Design // Scissors: Fiskars // Stuffing: Amazon // Embroidery Needles: Amazon // Ring Bearer Pants and Shirt: Gymboree // Peach Bow Tie + Suspenders: Suspenderstore.com // nail polish: OPI – Withstands the Test of Thyme
Shop The Supplies:
Find the supplies you’ll need for this project from our affiliate links below:

Comments