
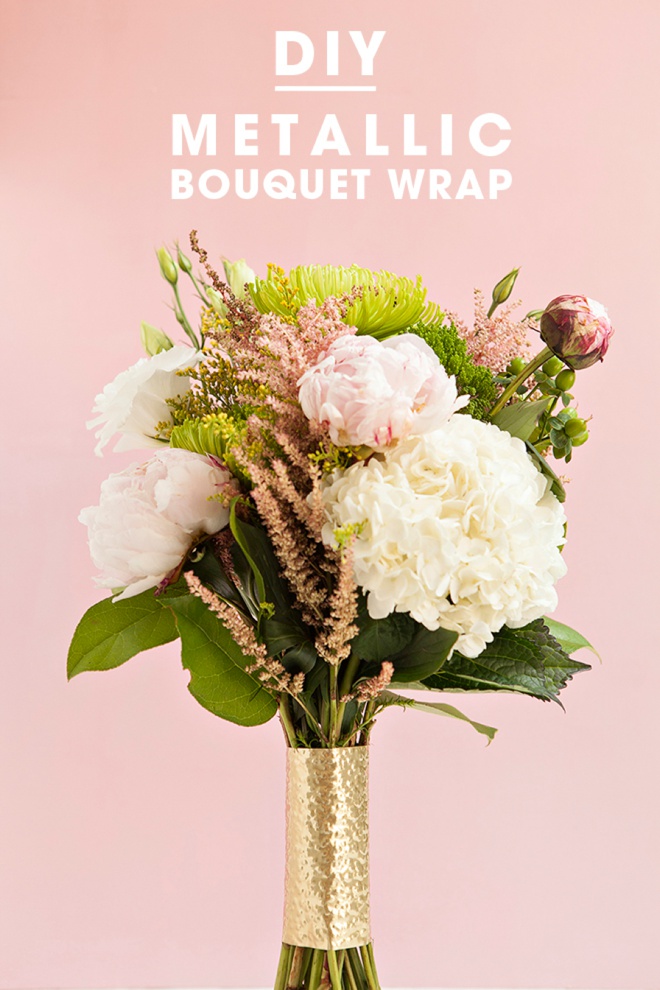
DIY | Metallic Bouquet Wraps
Metallic everything is super hot right now… from wedding colors to bridesmaids dresses and even invitations – everyone is crazy for shades of metal. Today’s DIY metallic bouquet wraps are a super fun way to not only bring metallic color into your bouquet but also metal itself! I’m sharing three different and unique ways that you can embellish these super cool Martha Stewart Crafts metal sheets to make them fit your wedding style. While making them, I totally thought “this one is my favorite” for every single design… but then I settled on the hammered look being #1. I know that Michelle, one of our featured brides, would have gone crazy for this DIY idea based on her stunning belt choice. What do you think… are you into metallics?
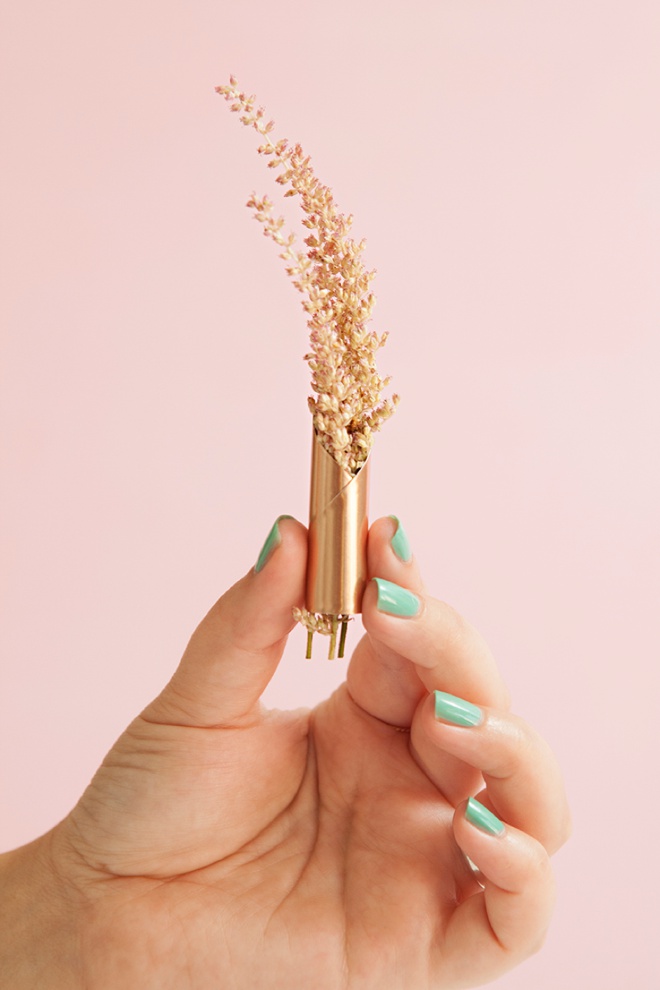
…and the cutest little boutonniere wraps too!
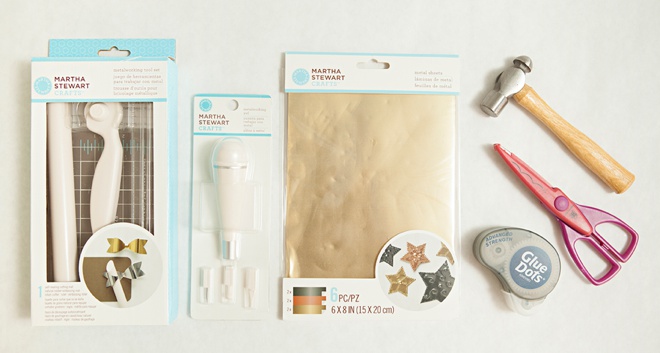
SUPPLIES:
- Martha Stewart Crafts Metalworking Tool Set
- Martha Stewart Crafts Metallic Sheets
- Glue Dots Advanced Strength
- Martha Stewart Crafts Metal Awl (vow wrap)
- Mini-craft hammer (hammered gold wrap)
- Scalloped Scissor (copper scallop wrap)
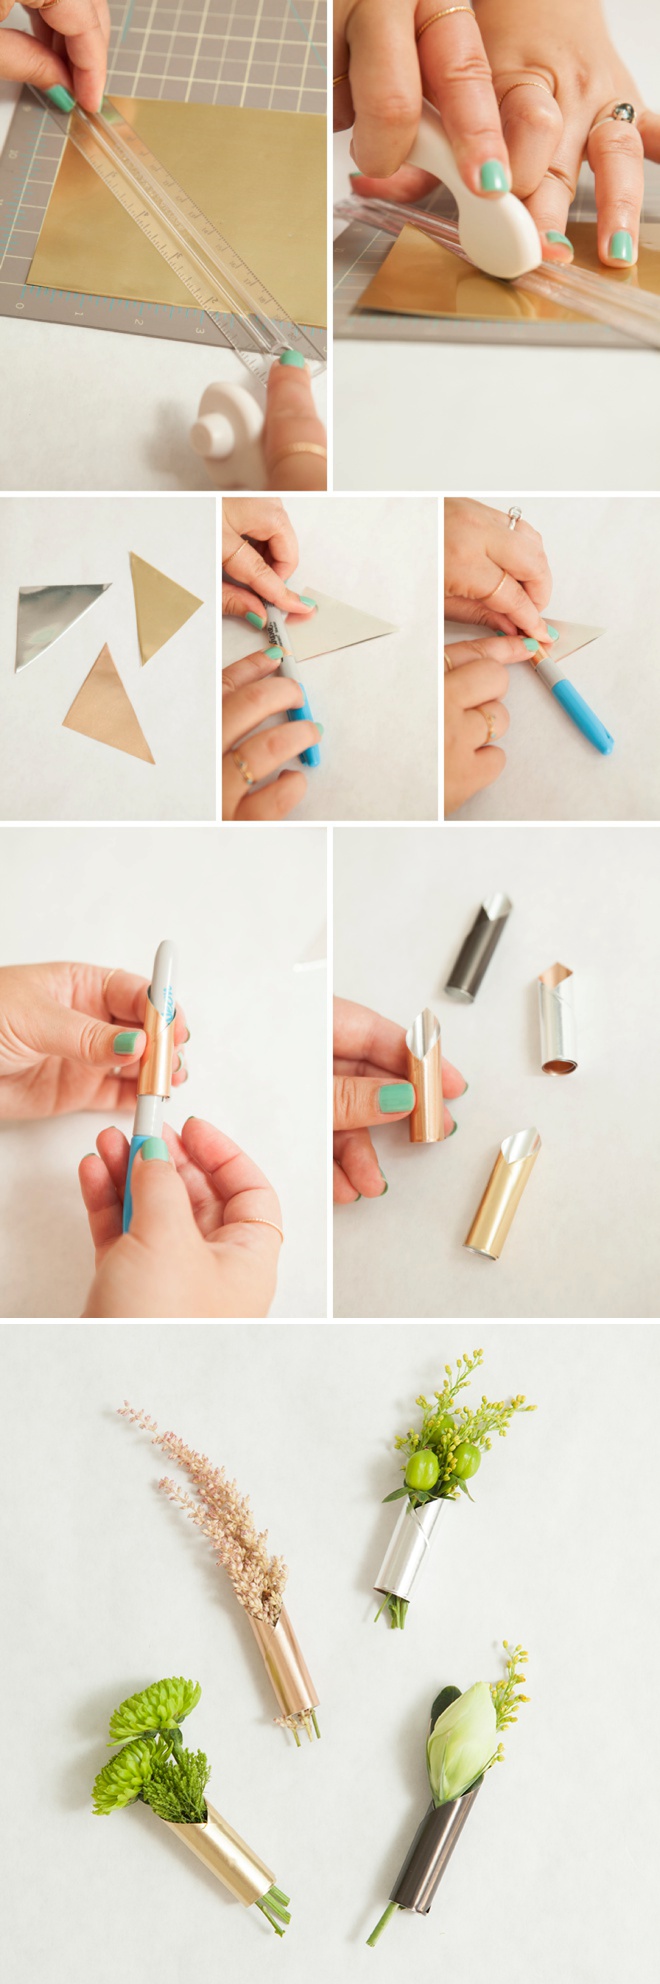
Cut Your Wrap
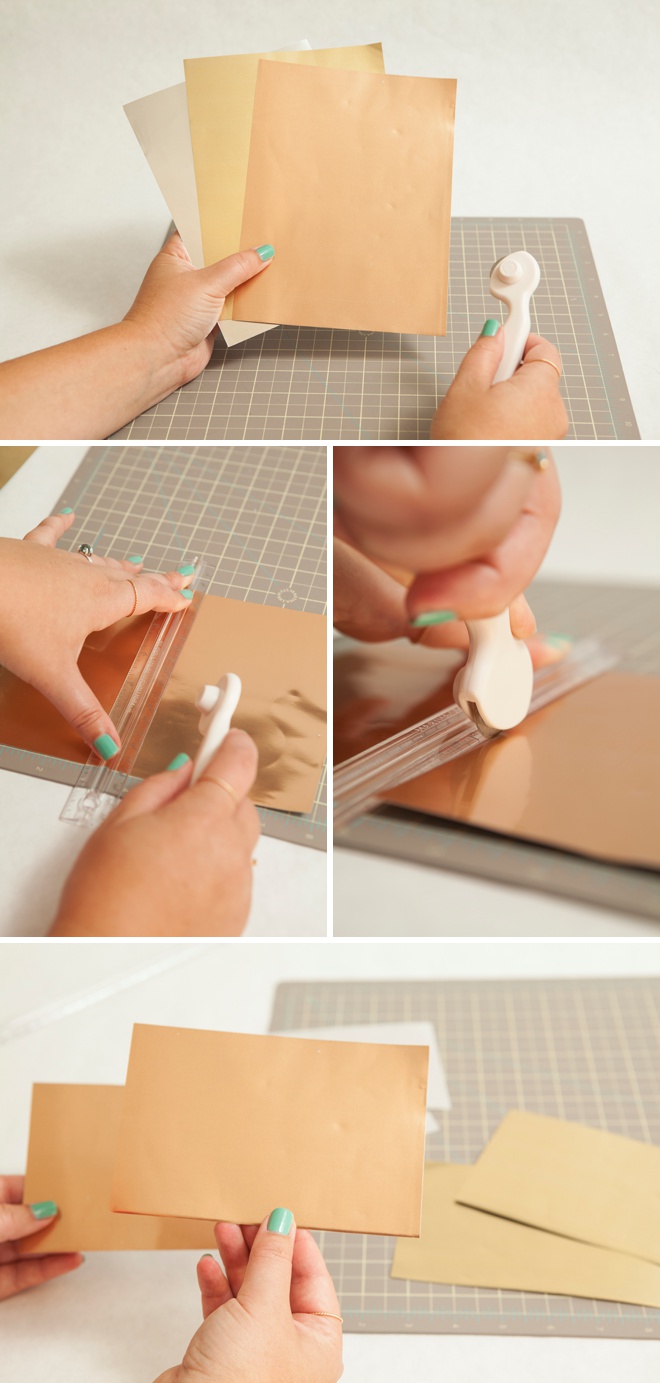
Each bouquet wrap is exactly half of the sheet that comes in the package. There are 6 sheets in each package, meaning as long as you don’t mess up – you can get 12 wraps from each package. One for the bride and all the bridesmaids! Using the rotary cutter and ruler, trim the metal sheet in half to 4″ x 6″. Here I’m cutting on top of my 12″ x 12″ cutting mat, but you can use the one that comes in the tool kit. There are 3 shades of metal sheets in each pack; copper, gold and gunmetal black. I chose to flip the gunmetal over and use the silver side.
The Copper Scallop Wrap
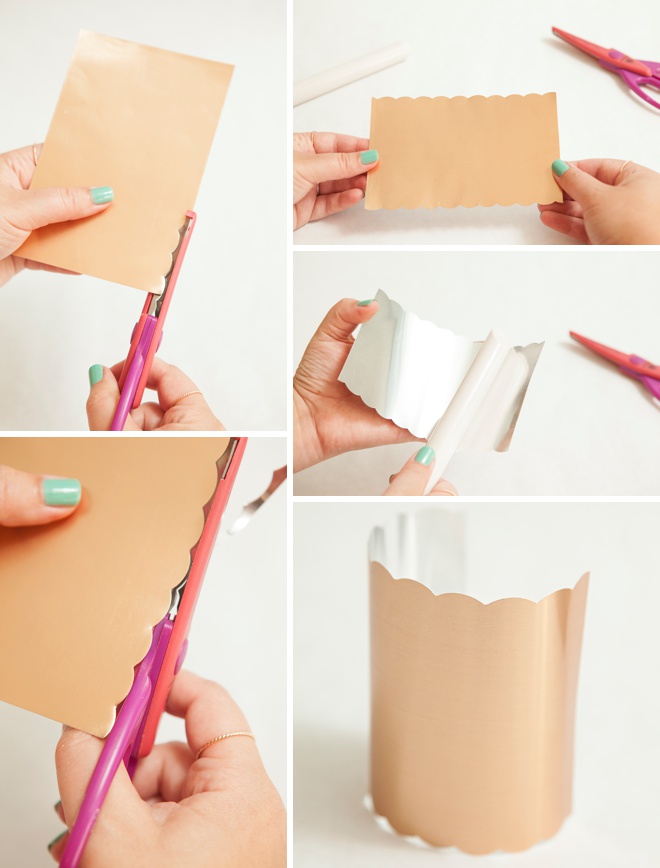
There is not much to this design, but it sure is gorgeous… simply cut the edges with a scalloped pair of scissors and your done! Any decorative scissor will work for this idea. Gently pressing the metal into your hand with the embossing roller in a sweeping motion gives the metal the rounded effect, ready to wrap around your bouquet stems!

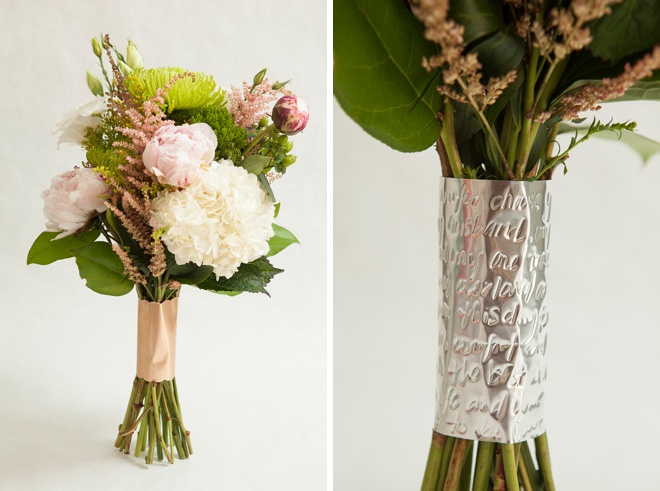
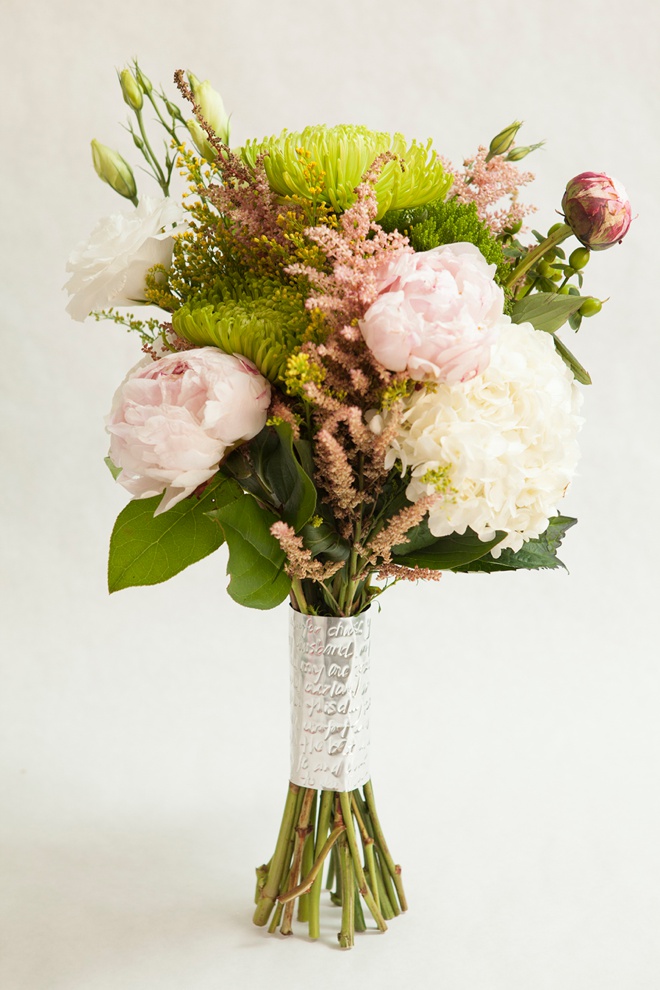
The Silver Vow Wrap
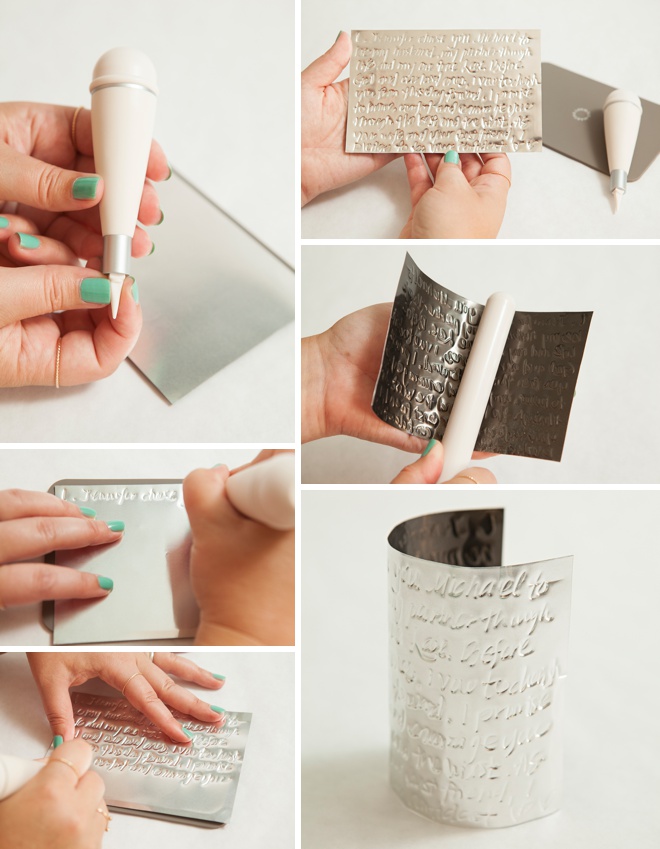
So romantic! Using the metalworking awl and the soft embossing mat, handwrite a snippet of your vows onto the metal for an incredibly unique texture and special sentiment. You can also use your favorite song or maybe even a bible passage. I love how this looks, you can read the words up close but from far away it just looks like a cool design. Gently pressing the metal into your hand with the embossing roller in a sweeping motion gives the metal the rounded effect, ready to wrap around your bouquet stems!

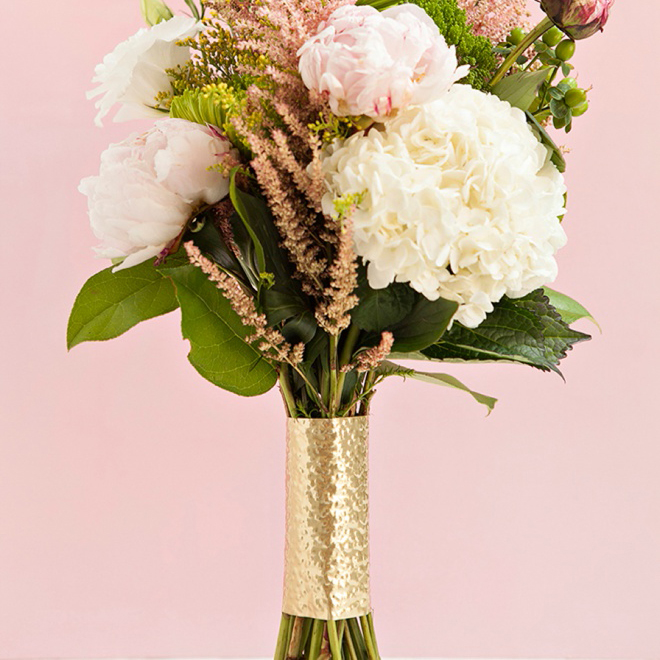
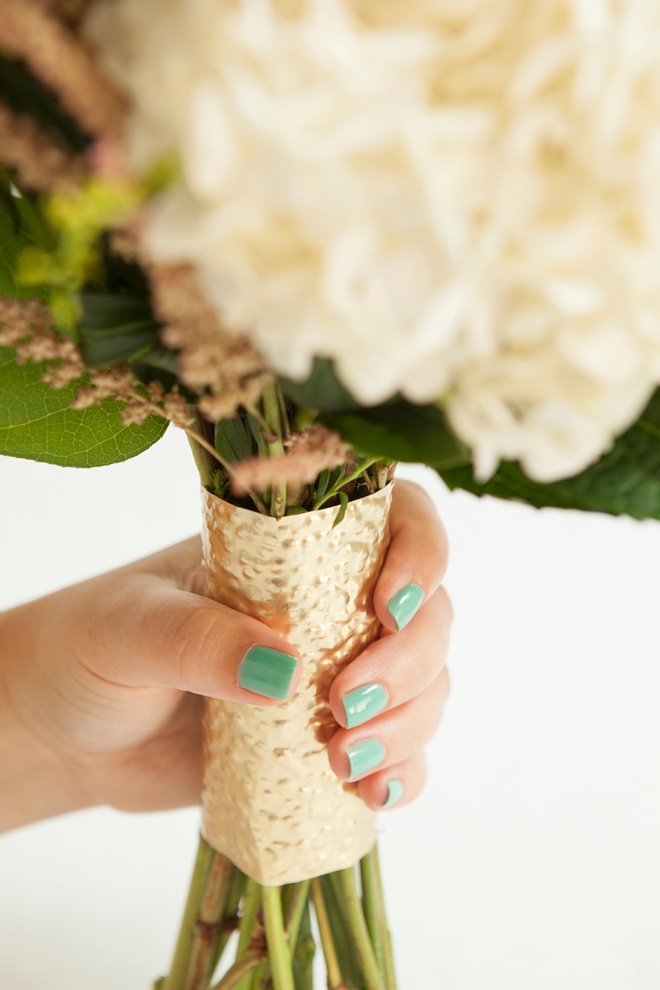
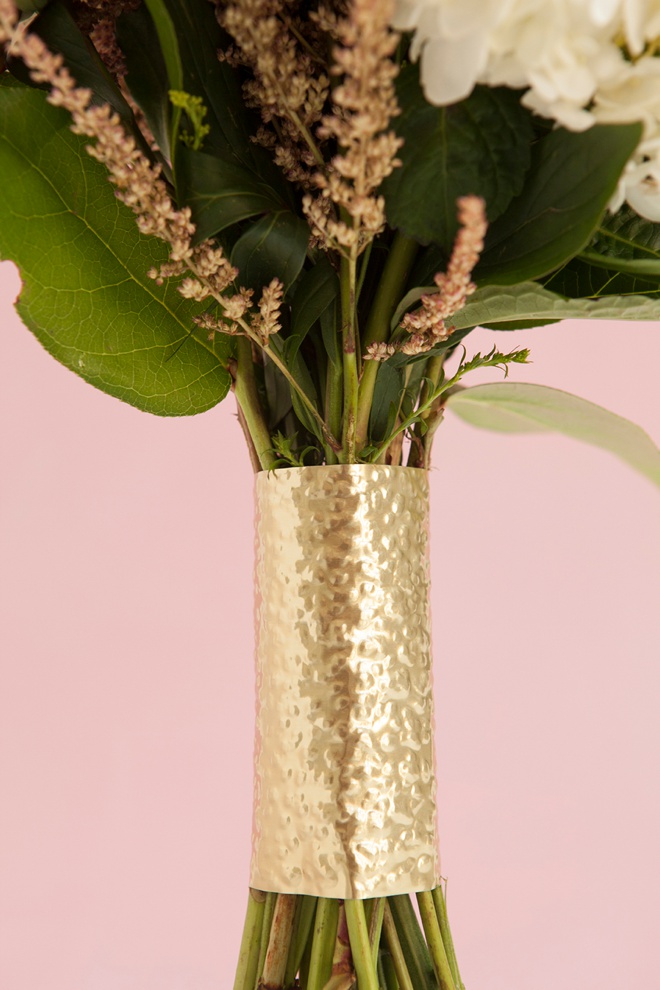
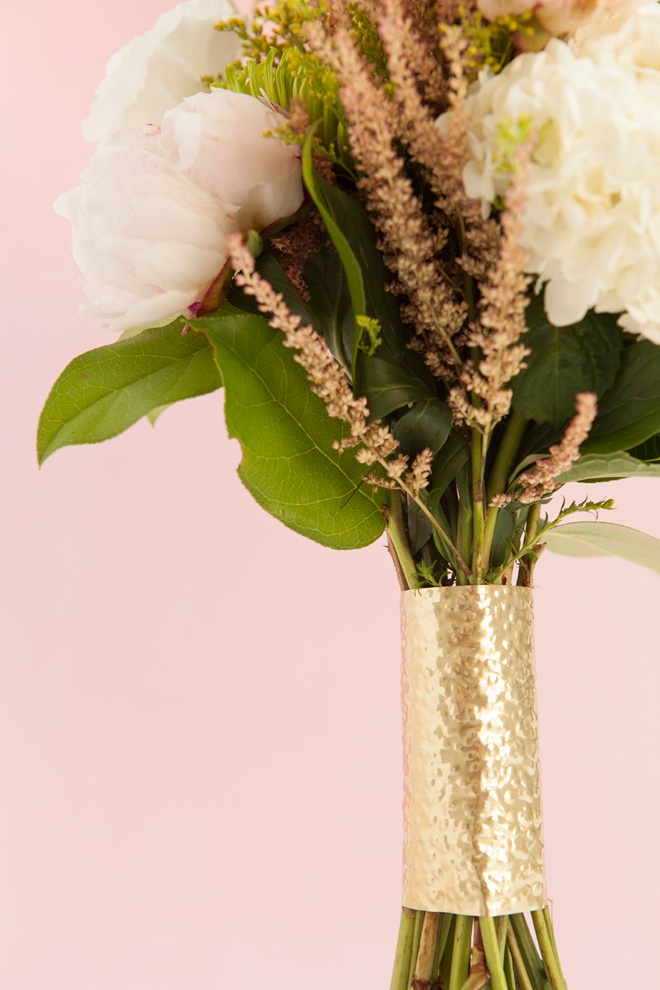
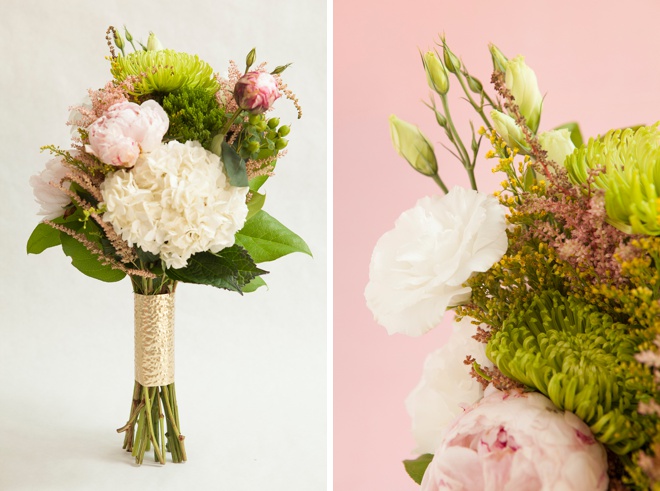
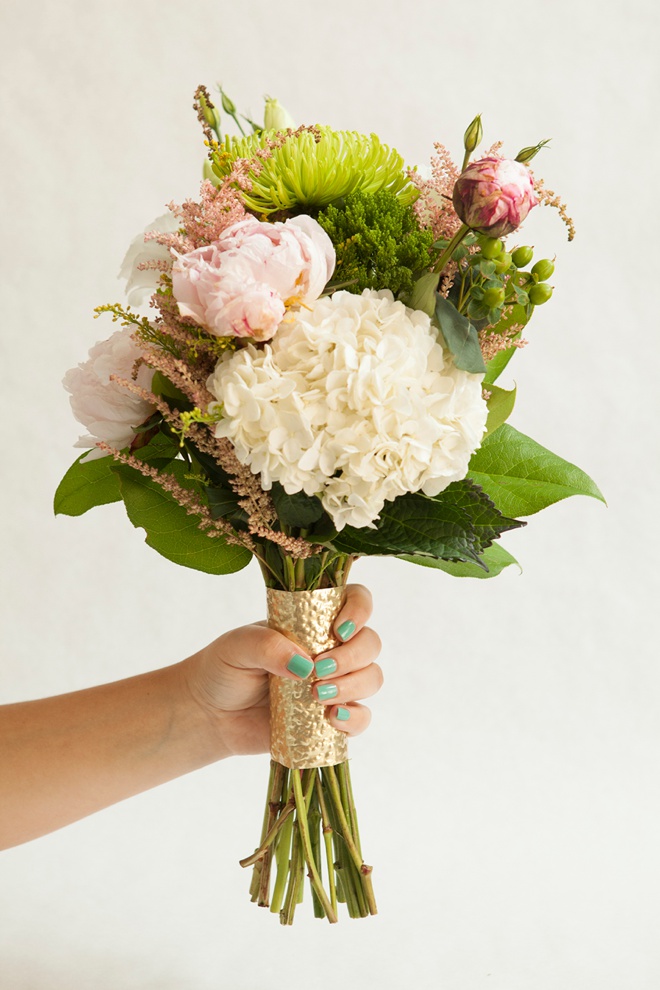
The Hammered Gold Wrap
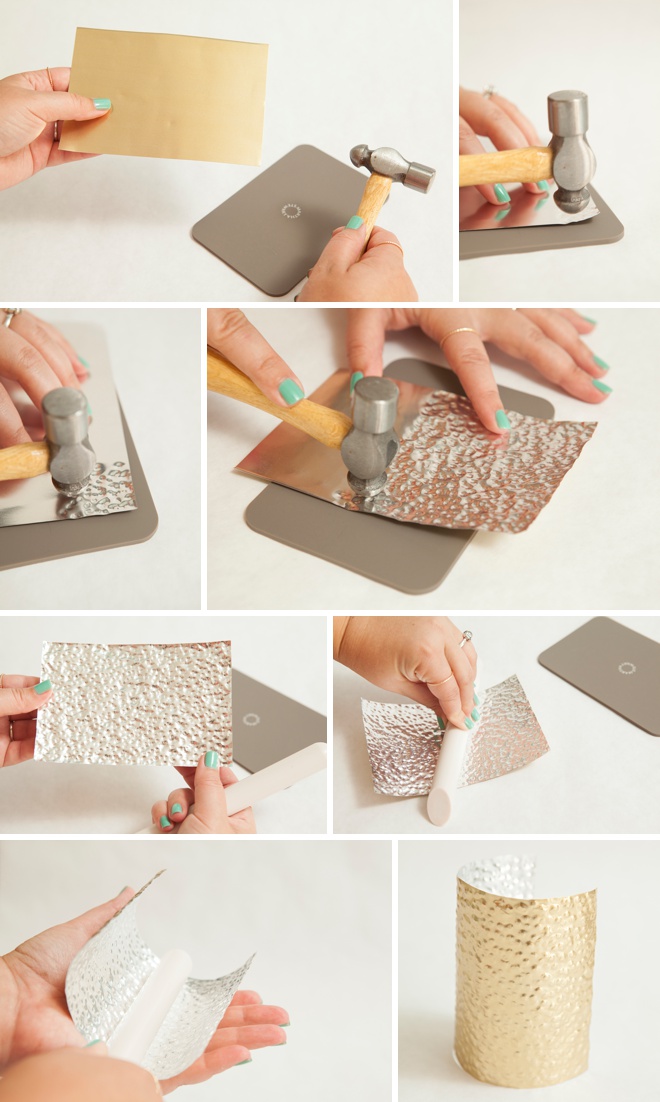
This one is my favorite! This hammered texture is so awesome and super simple to achieve. Using a small craft hammer (or the like) with the metal sheet upside down on top of the soft embossing mat, hammer away until the entire sheet is covered. I liked the texture better when hammered from the backside, but you can do either. Gently pressing the metal into your hand with the embossing roller in a sweeping motion gives the metal the rounded effect, ready to wrap around your bouquet stems!
How to Wrap Around Your Bouquet Stems:
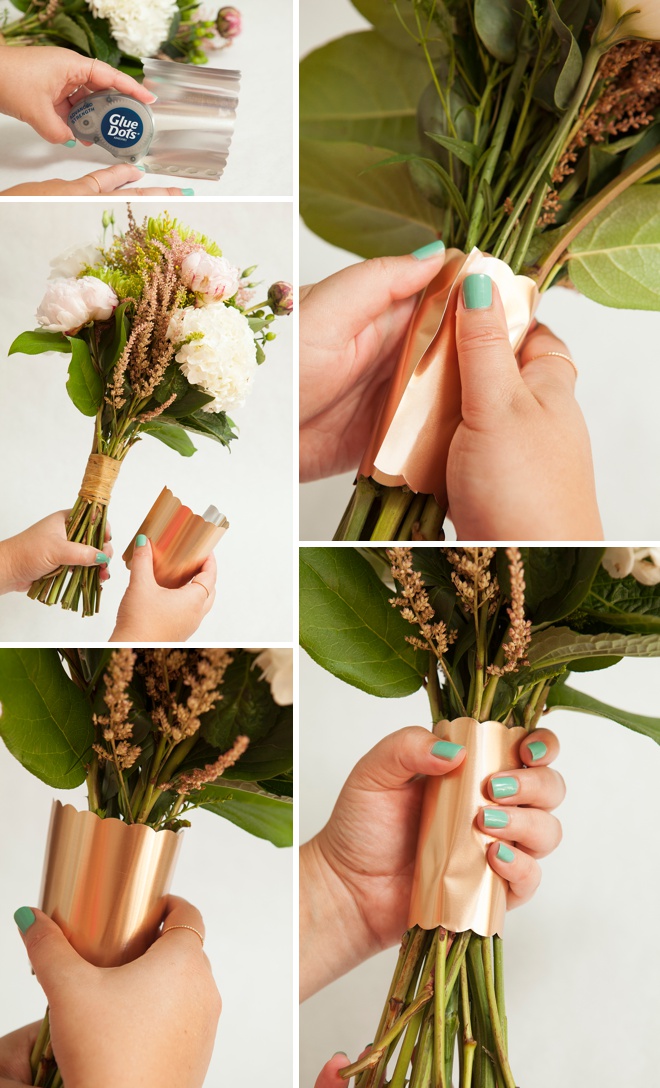
First, make sure to tell your florist that you want to do this so she/he can make sure to leave you enough stem room for the wrap. You might even be able to bring it to her and have her add it to your bouquet for you.
Add 4-5 advanced strength Glue Dots to one edge of the metal sheet and carefully wrap it around the stems, gently adhere the sheet + dots to the opposite side. …and voila!
I just can’t get enough of these!
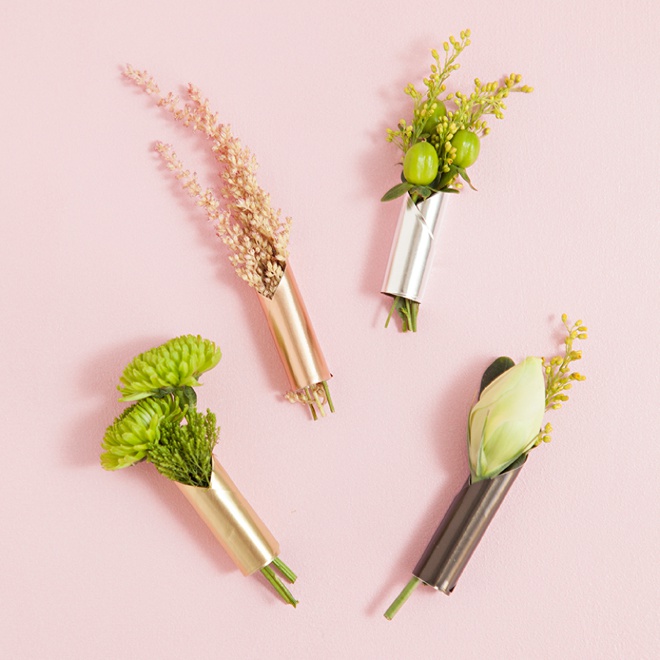
The Little Boutonniere Wraps
Since we are using metal, we definitely can’t leave the guys out! For these little boutonniere wraps, I cut 3″ long triangles and wrapped one end around a Sharpie, that’s it! You can use hot glue to secure the flowers or just leave the task to your florist. The metal sheets are soft enough to pin through.
Such an awesome way to include the new metallic trend into your flowers!

As with all our DIY tutorials, if you create one of our projects please send us a picture – We Love Seeing Your Creativity! If you use Instagram or Twitter please use the hashtag #SomethingTurquoiseDIY and it will show up on our Get Social page. Happy Crafting!
DIY Tutorial Credits
Photography: Something Turquoise Photography for SomethingTurquoise.com // DIY tutorial + bouquet design: Jen | Something Turquoise // All Martha Stewart Metalworking tools and supplies: courtesy of the Editors at Martha Stewart Living // Glue Dots Advanced Strength, mini-craft hammer, and scallop scissors: Amazon // nail polish: OPI – Withstands the Test of Thyme
Shop The Supplies:
Find the supplies you’ll need for this project from our affiliate links below:

Comments