
Simple DIY | Today I Have Loved You For… Card
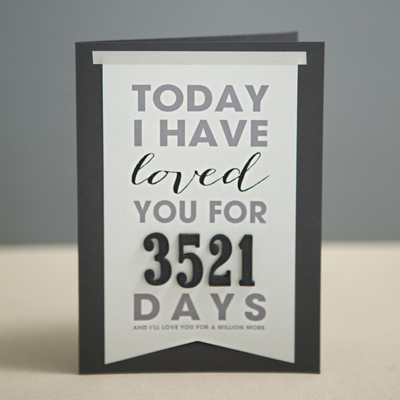
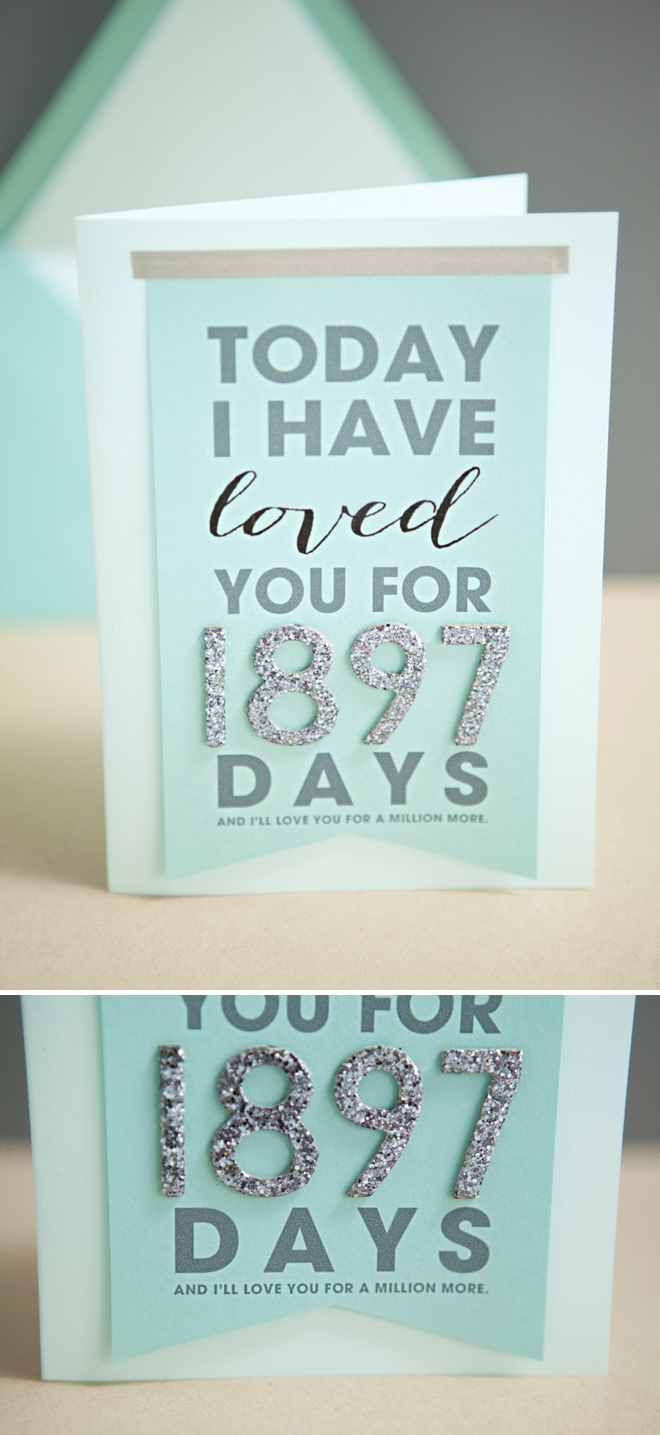
I don’t remember when I first saw this wonderful card trend, but I was instantly enamored with the idea. I’ve been thinking hard about the best way to bring you a fully customizable DIY card like this and it finally hit me – use adorable number stickers instead of an editable pdf! So today I’m thrilled to be sharing my do-it-yourself, “Today I Have Loved You For…” Card. The free printable I designed can be embellished in so many different styles and I’ve created two cards as examples. The supplies are simple, but the stand out item is the 3D number stickers – which are available at all major crafting stores. To really see the time we have spent loving each other can be powerful, so add up your numbers and get to crafting. I think this is the absolute perfect card to give your fiancé on the morning of your wedding, but it would also make a wonderful Anniversary or Valentines Day card!
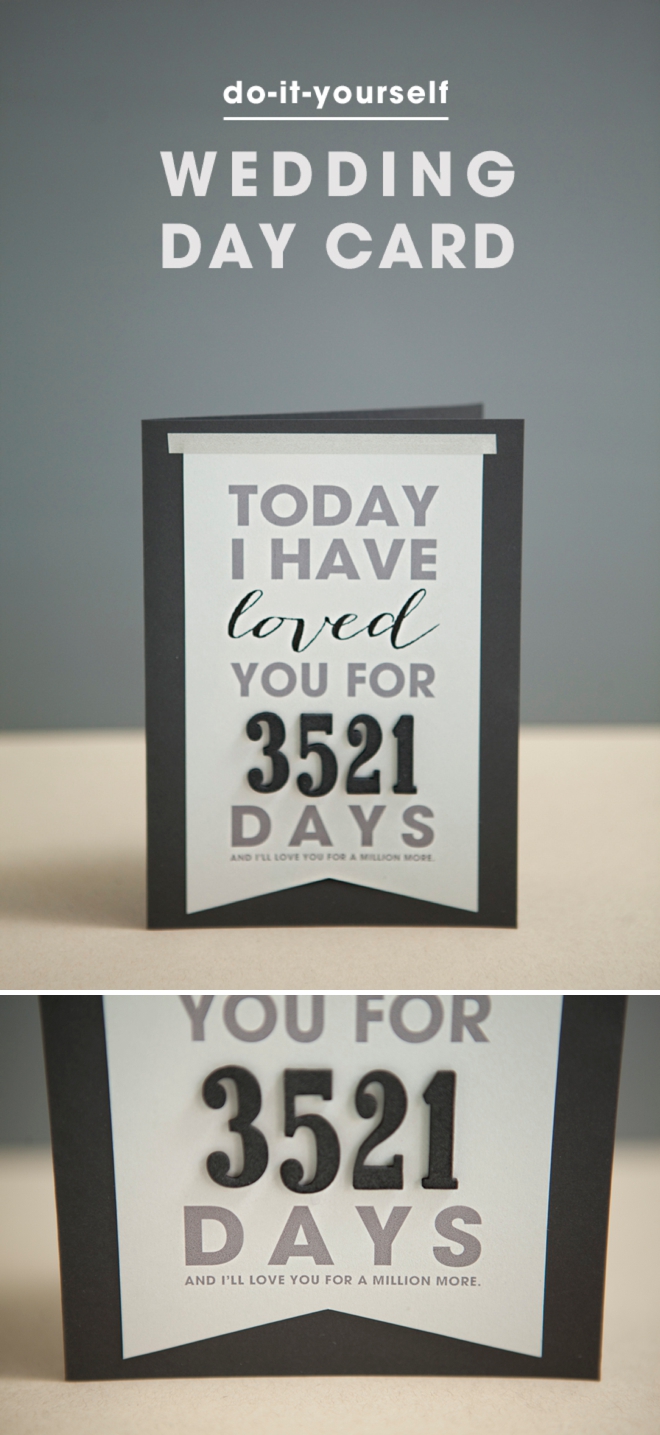
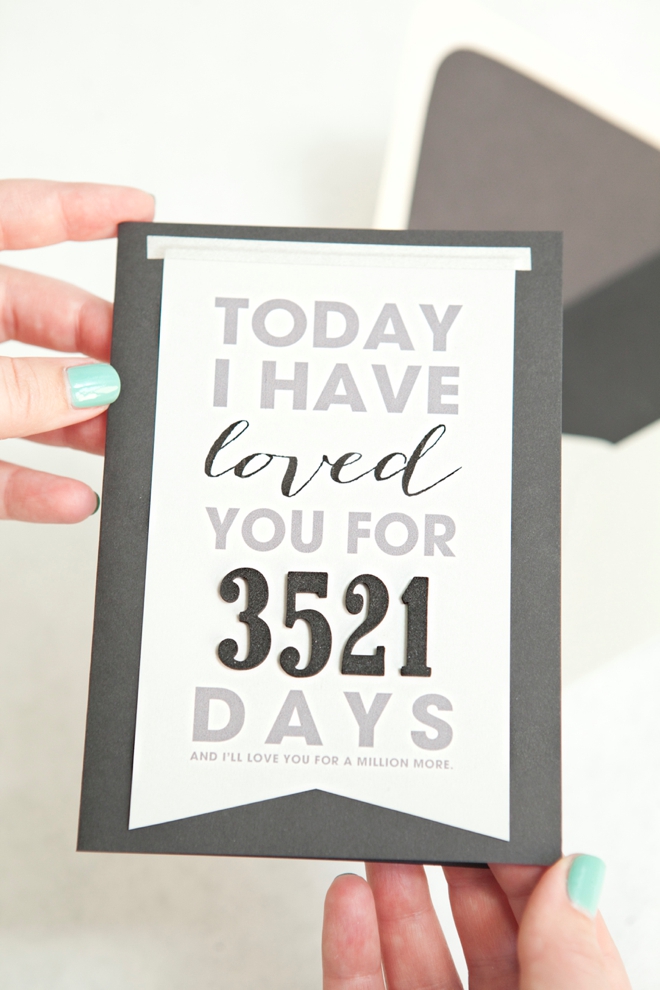
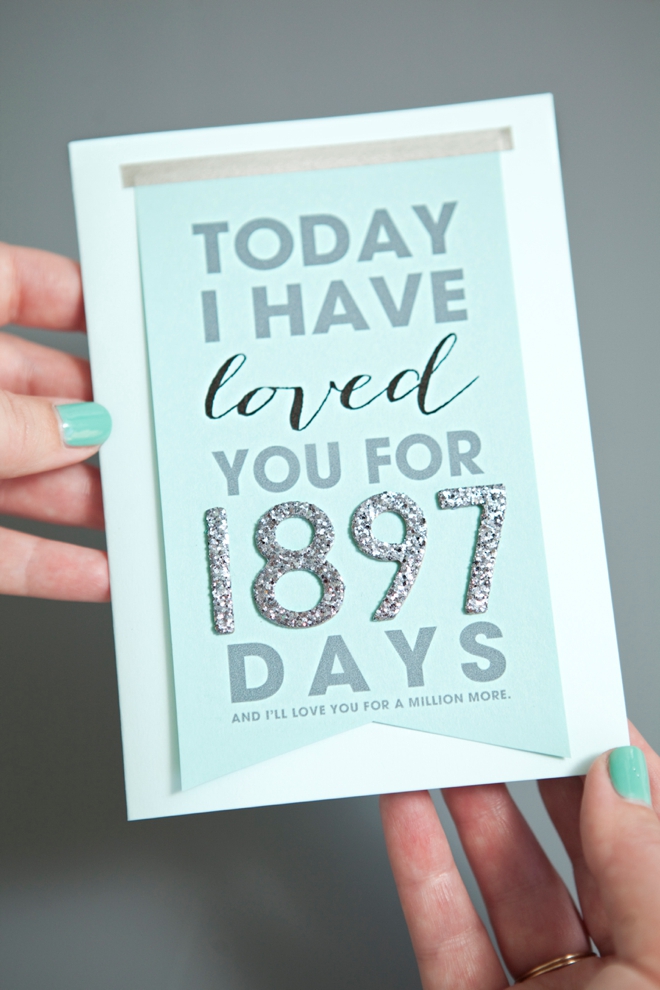
This adorable card reads, “Today I have loved you for (insert number) days, and I’ll love you for a million more.” Make sure to grab your free download at the bottom of the post!
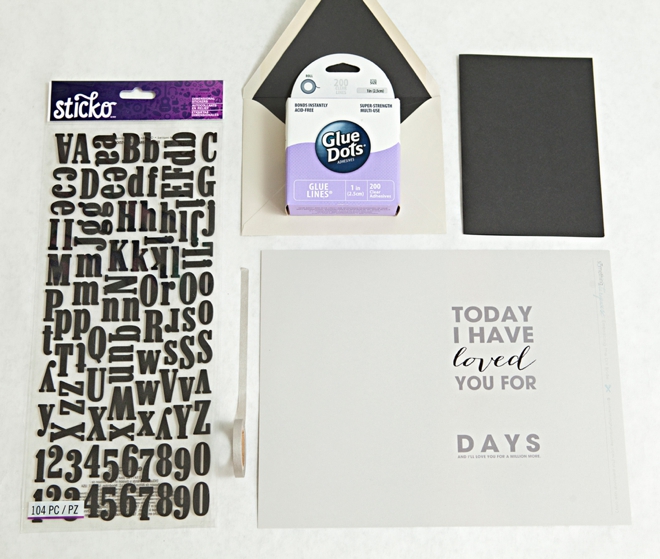
SUPPLIES:
- 8.5″ x 11″ cardstock in your choice of color
- 3D Letter stickers that are 1-1/8″ tall or less
- A6 Sized Card + Envelope
- Glue Dots
- Paper Trimmer + Scissors
- Washi tape or other embellishments
- Our free printable design
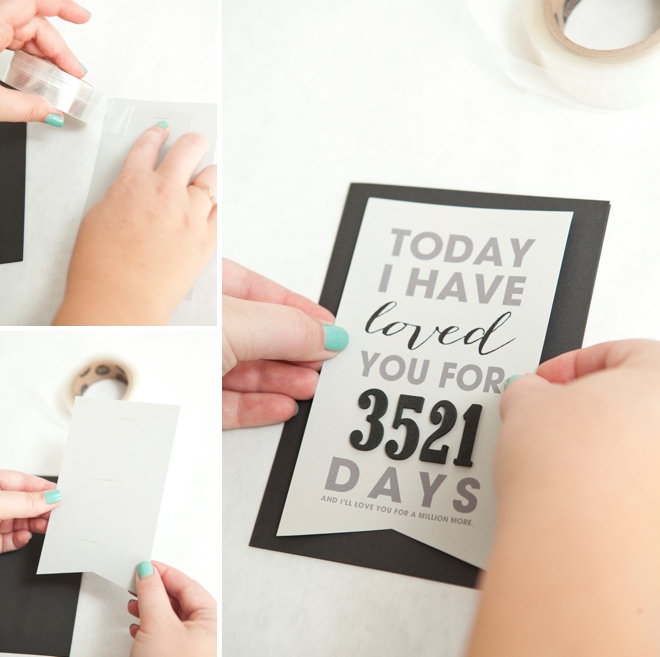
Grab our free design at the bottom of the post and print onto 8.5″ x 11″ cardstock. Then trim.
I created the design with enough space so that you could cut and trim it to almost any size or shape. You can use fancy edged scissors, punches and etc. to embellish. It’s spaced off to the right so that if you’d like, you can actually print it out and fold the cardstock into the card itself. It’s all up to you!
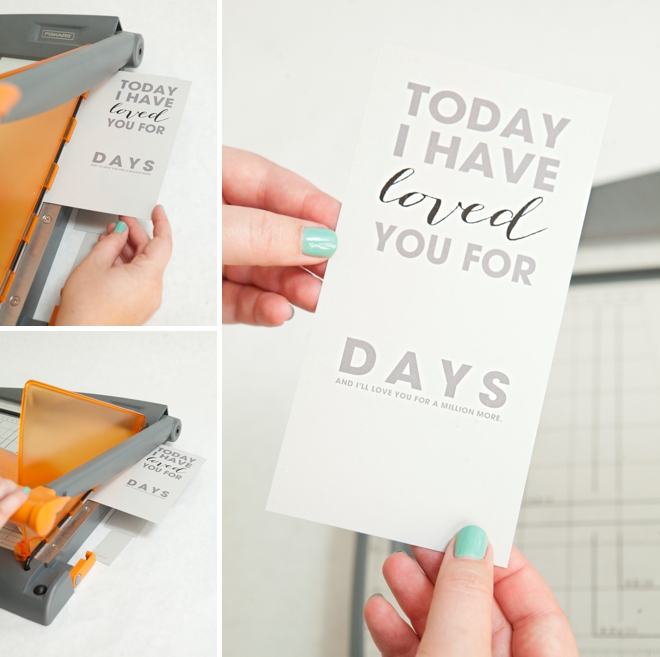
I cut a little ribbon tail at the end of my design… but your embellishment is up to you. My final trim of this card was to 3-1/2″ x 5-3/4″.
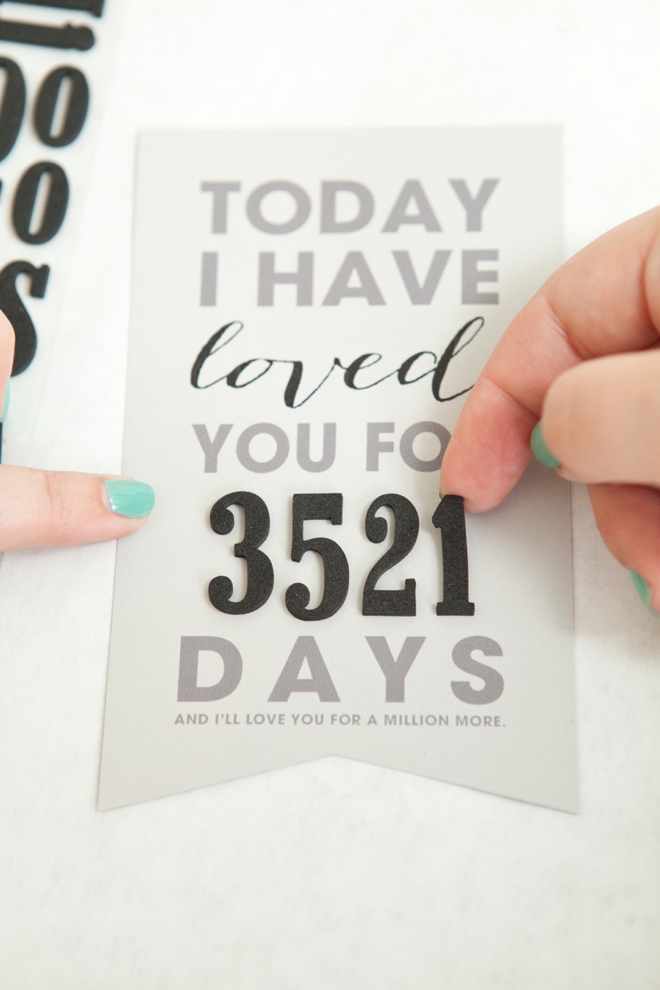
Now add your number stickers!
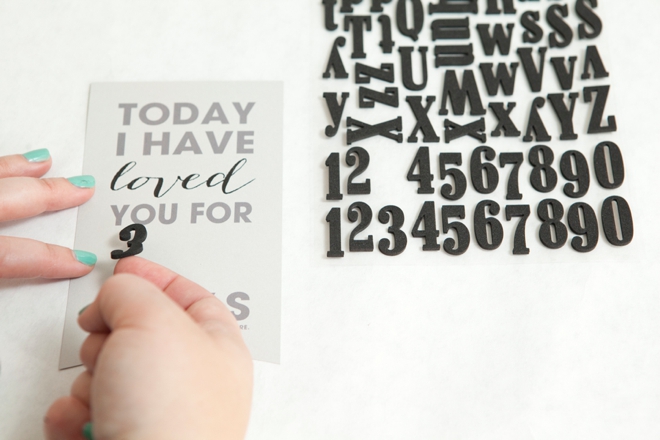
Both of the 3D style number stickers I used here are from Michaels and the links to their online listings are shared below. When buying, just make sure that your numbers are less than 1-1/4″ tall – otherwise they won’t fit within the space provided.
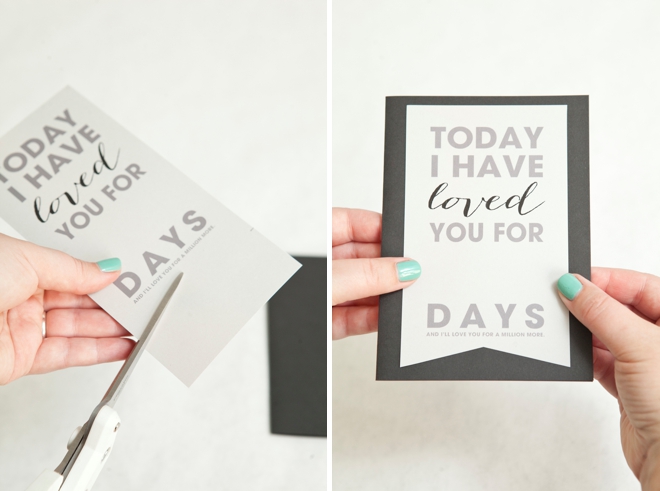
Add a few Glue Dots lines (or your favorite scrapbooking adhesive) to the back of your printable and adhere to the A6 sized card.
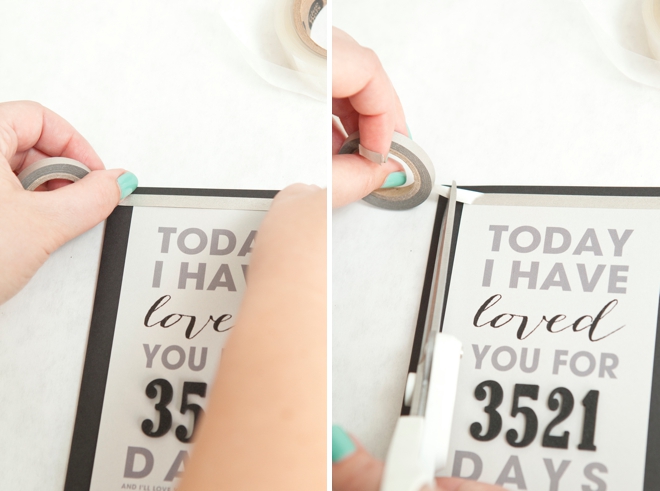
Embellish the top with washi tape if you’d like!
There you have it. A lovely, heartfelt way to tell your favorite person how much you love them! I know that you all are going to get super creative with this idea and I can’t wait to see what you come up with!

As with all our DIY tutorials, if you create one of our projects please send us a picture – We Love Seeing Your Creativity! If you use Instagram or Twitter please use the hashtag #SomethingTurquoiseDIY and it will show up on our Get Social page. Happy Crafting!
DIY Tutorial Credits
Photography: Something Turquoise Photography for SomethingTurquoise.com // DIY tutorial + free download design: Jen | Something Turquoise // 1 1/8″ Glitter Chipboard Letter Stickers: Michaels.com // 1″ Black Foam Letter Stickers: Michaels.com // 1/4″ Washi Tape (purchased in a set): Michaels.com // Glue Dots, Glue Lines: courtesy of Glue Dots // 8.5″ x 11″ cardstock: Michaels.com // A6 Envelopes (in Pool + Cement): Paper-Source // scissors + paper trimmer: Fiskars // nail polish: OPI – Withstands the Test of Thyme
Shop The Supplies:
Find the supplies you’ll need for this project from our affiliate links below:

Comments