
DIY | Watercolor Wedding Invitations and more
To end one of the best weeks ever… I decided to decode the art of watercolor for you. Watercoloring stationary has become a huge trend (I’m even doing it with my business cards!) yet there is little out there in terms of detailed step by step tutorials. Watercoloring is raw, romantic and always different – so this project is not for you ocd brides. If you want to add an incredibly personal touch to one piece or maybe all of your wedding day stationary – here’s the easy way to do it.
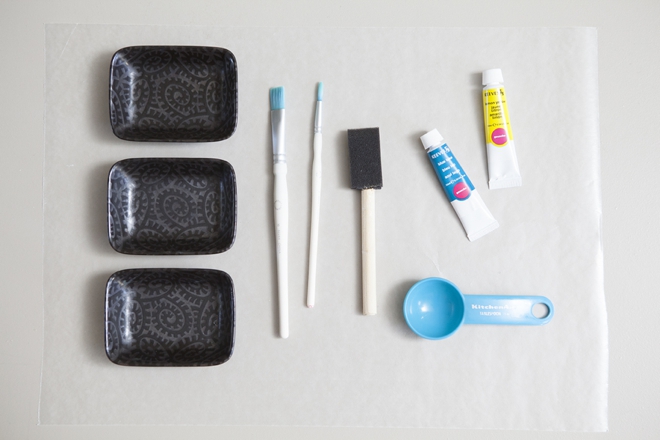
SUPPLIES:
- your choice of watercolor tube paints
- couple paint brushes
- little dishes
- watercolor paper
- water
- wax paper
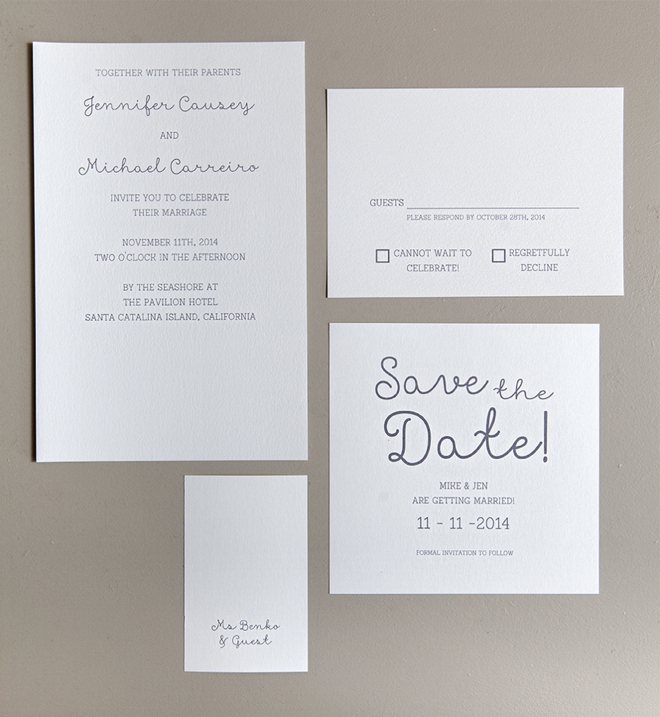
First, I started by designing my own stationary – leaving room for the watercolor designs. I chose a super simple font and kept the design simple as well. The watercolor is going to make this stationary sing, so keep your overall design super, super simple. This can be done using any word processing software.
I cut pieces of watercolor paper to fit each stationary design – then printed.
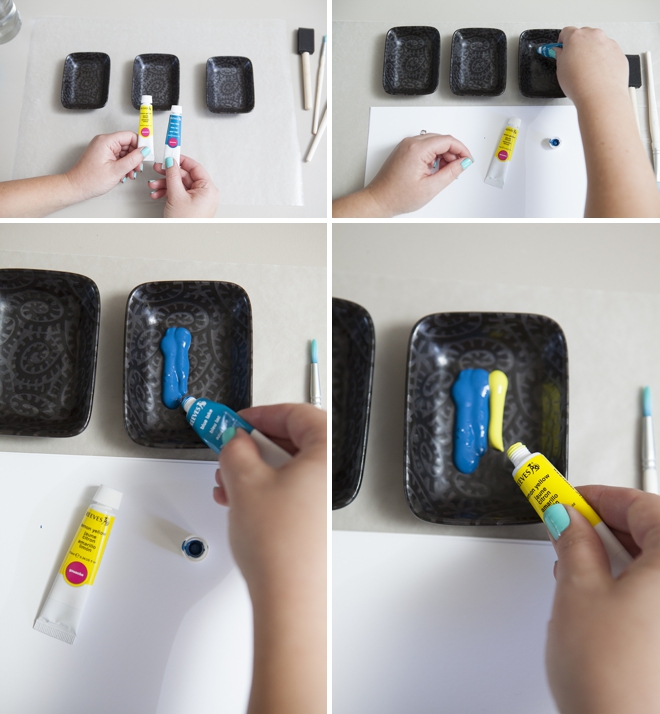
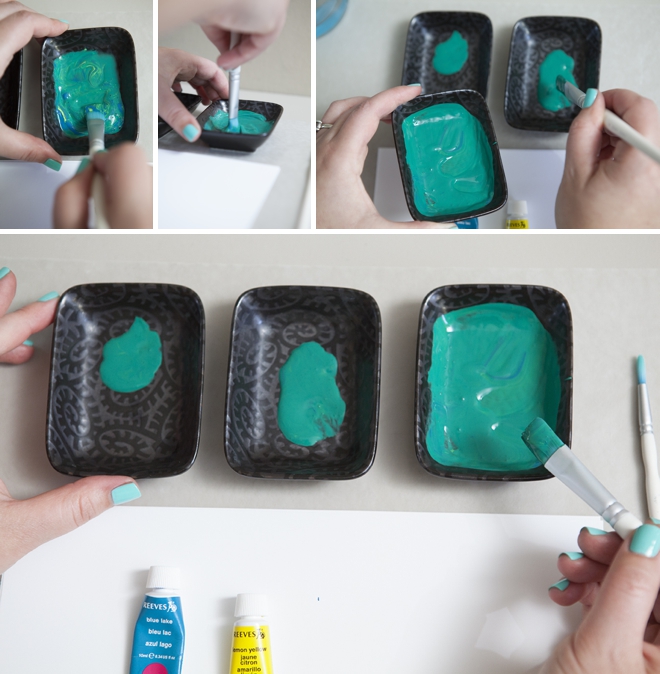
Ok… let’s talk about mixing paint – there was no turquoise or teal so I had to make my own. I used 2 parts blue and almost 1 part yellow. You might not have to mix paints to get your favorite color… #lucky
Now let’s talk about an easy ombre. There are many ways you can ombre watercolor but here’s the easiest way: using three small dishes, ration out the paint – one dish getting the most paint, one getting a medium amount and one getting a small amount. ***Since I had to mix my paint, the dish on the right looks like there’s a ton of paint in it – but there isn’t.
Next add water + mix. This is where the ombre magic happens. You are going to add the SAME amount of water to each dish – I did 2 tablespoons. The amount doesn’t really matter, what matters is that it’s the exact same amount for each dish – be it 1 tablespoon or 10. Varying amounts of paint + the same amount of water = the perfect watercolor ombre.
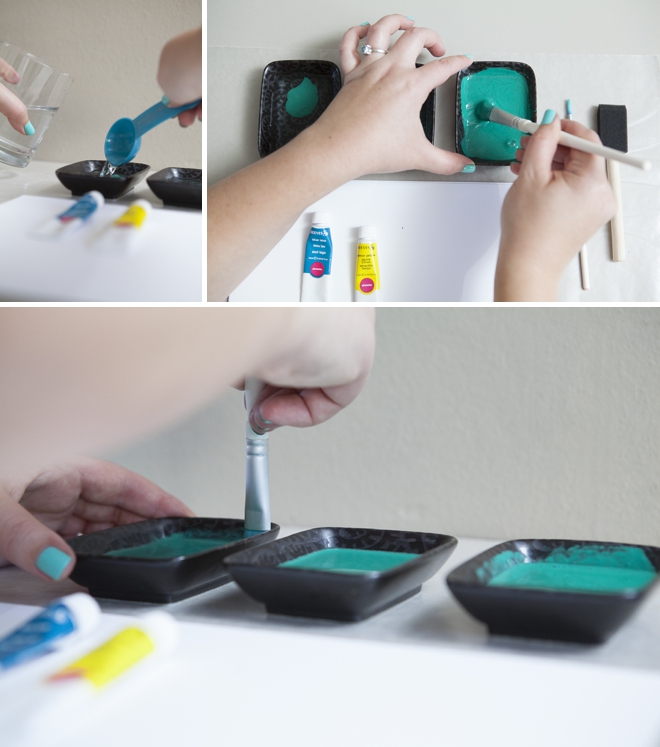
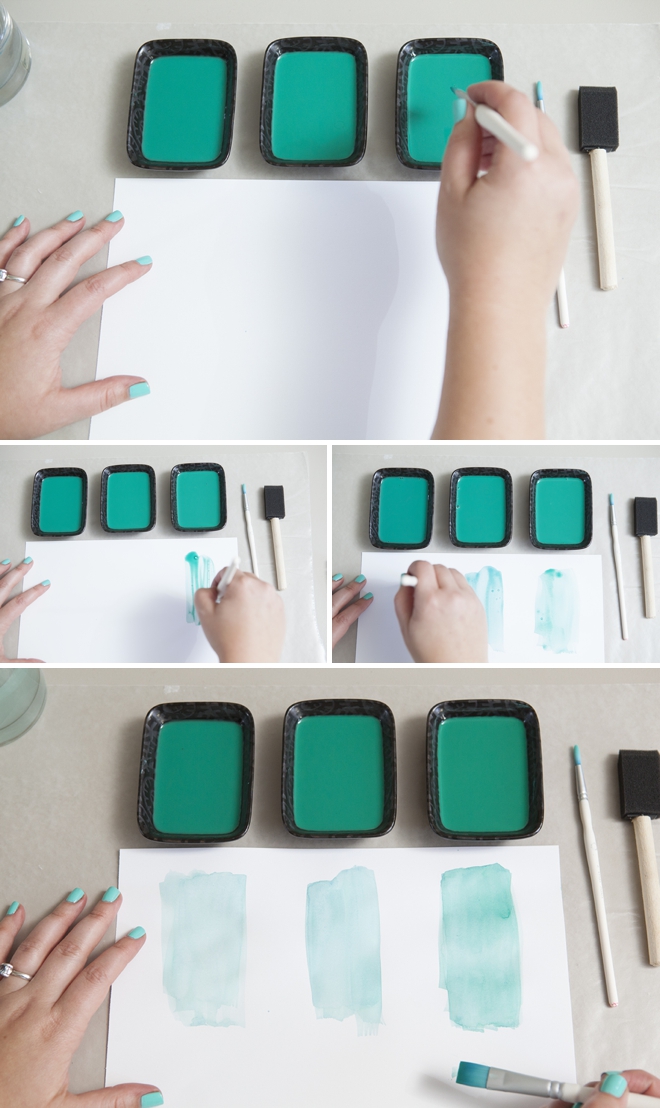
Now test out your ombre. Paint swatches of each color on a test sheet of paper. Let it dry completely to see if you are happy with the difference in shades. If you aren’t happy – add more water to lighten the shade – or add more paint to darken.
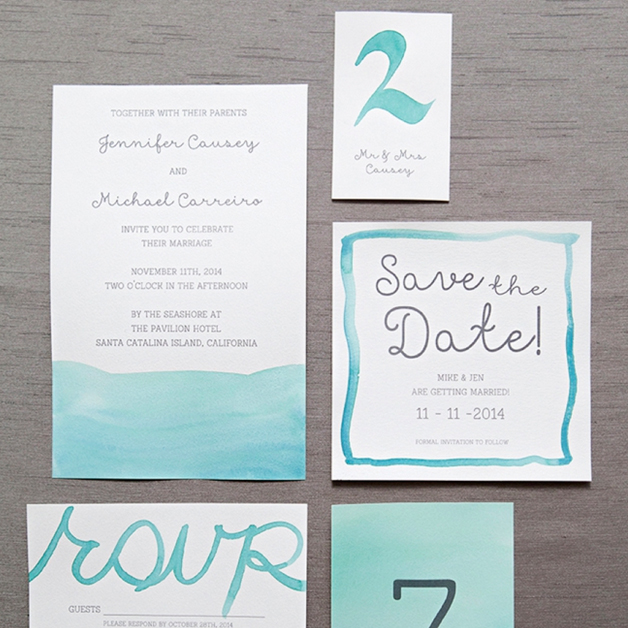
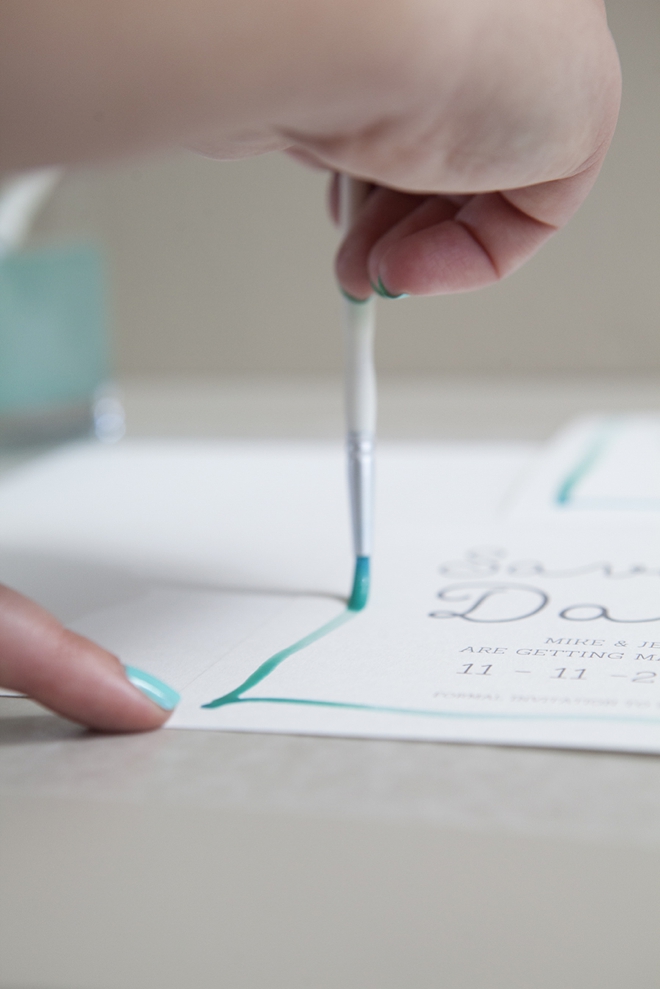
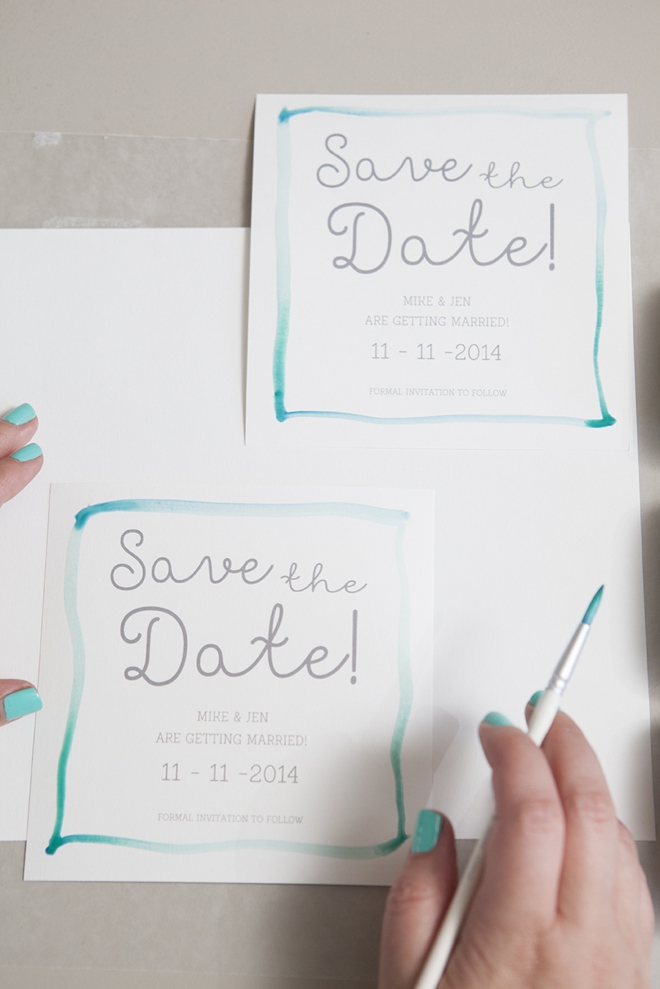
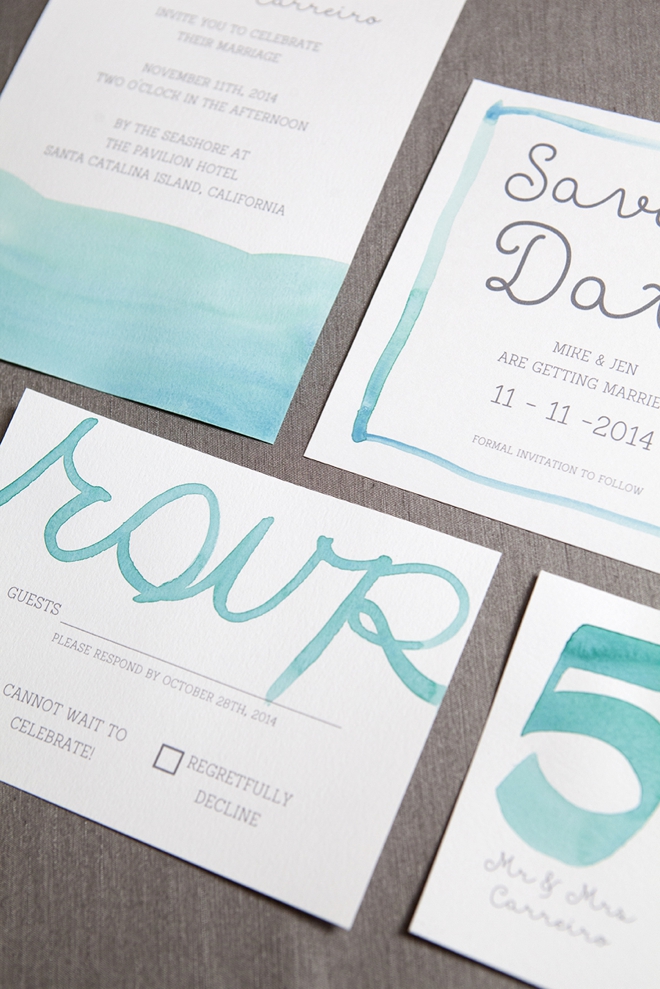
Let’s start with a super simple design… the Save the Date invitation. Paint lines around your text design with a little movement. I used the darkest shade for the bottom line, the middle shade for both side lines and the lightest shade for the top line. ***Sometimes watercolor can be deceiving when it’s wet – so don’t judge until it’s dry.
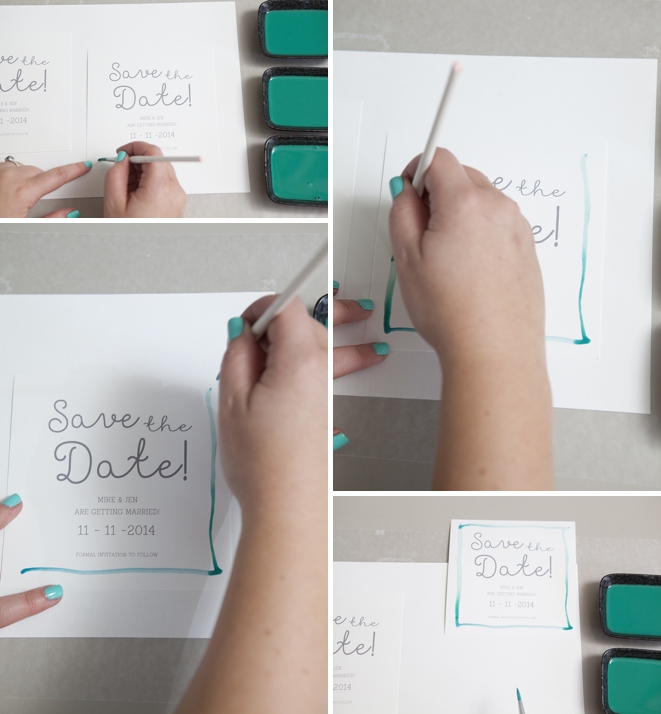
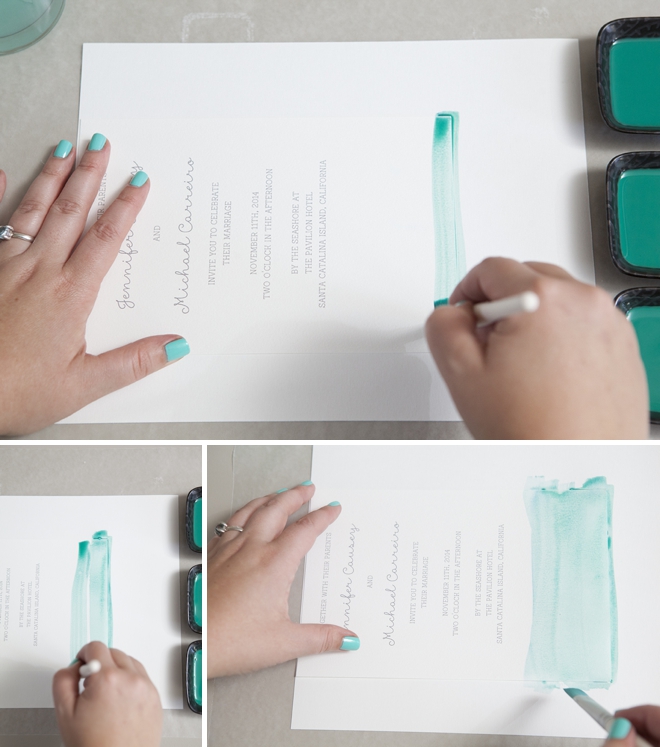
Tap the brush on the edge of the dish, releasing extra paint before you start – less is more with watercolor.
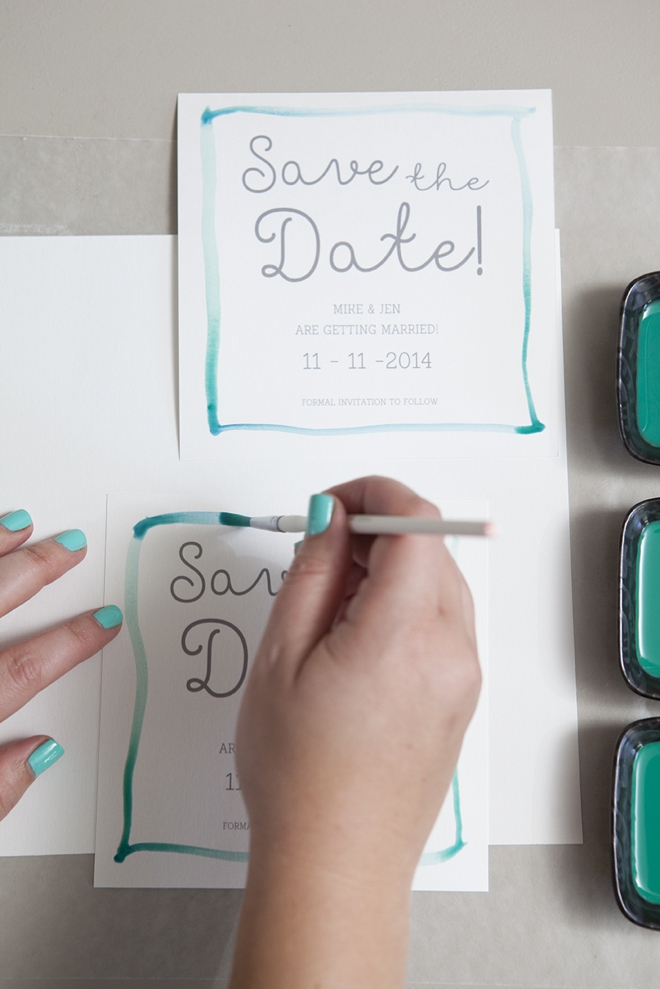
How amazing do these look! Each invitation literally took seconds to complete and they look so fancy!
On to the invitations…
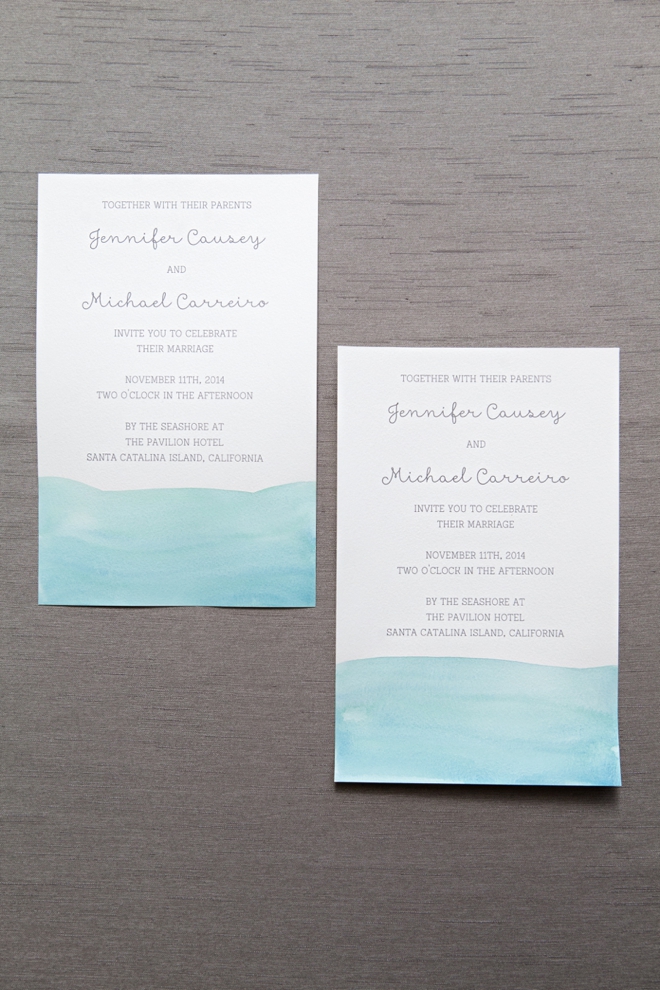
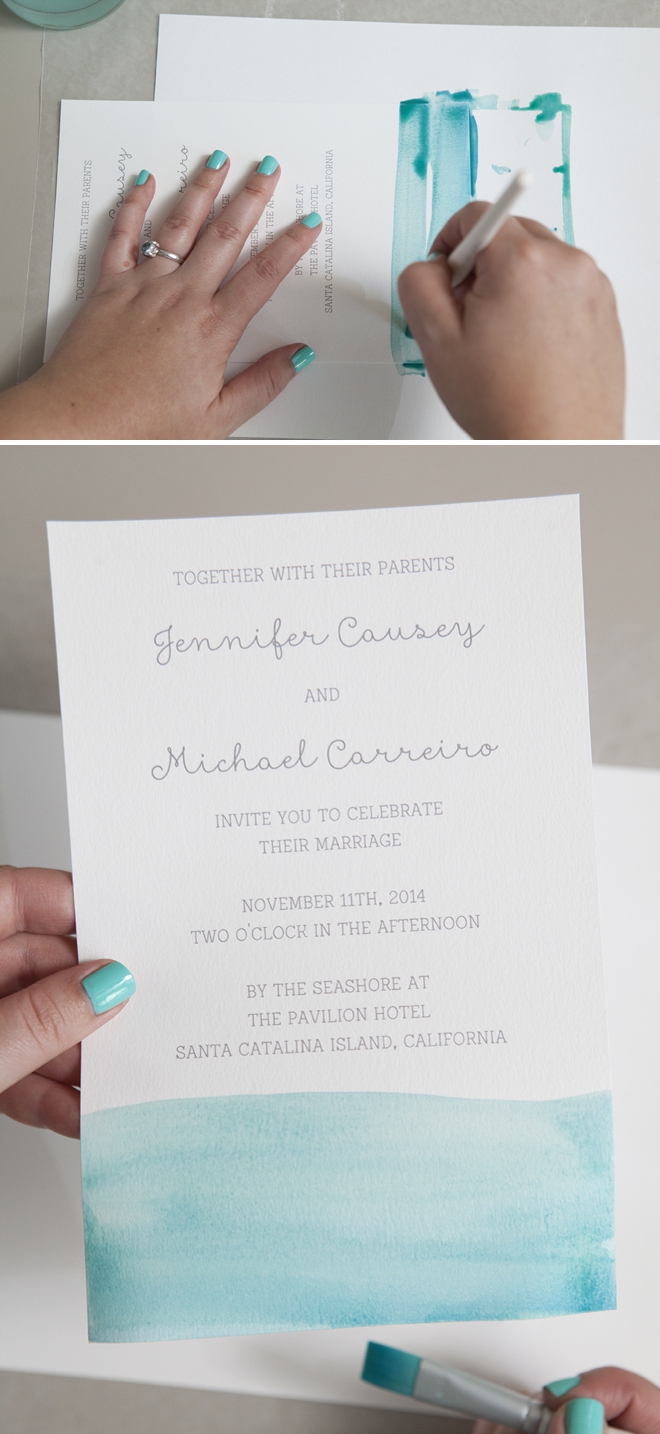
To get this stunning ombre, water effect – start with the darkest shade on the bottom, then middle shade, then lightest shade – painting them all at the same time. Don’t touch or bug – just set each one off to the side and embrace the subtle, beautiful differences.
I know, gorgeous right. So cheap and so easy!
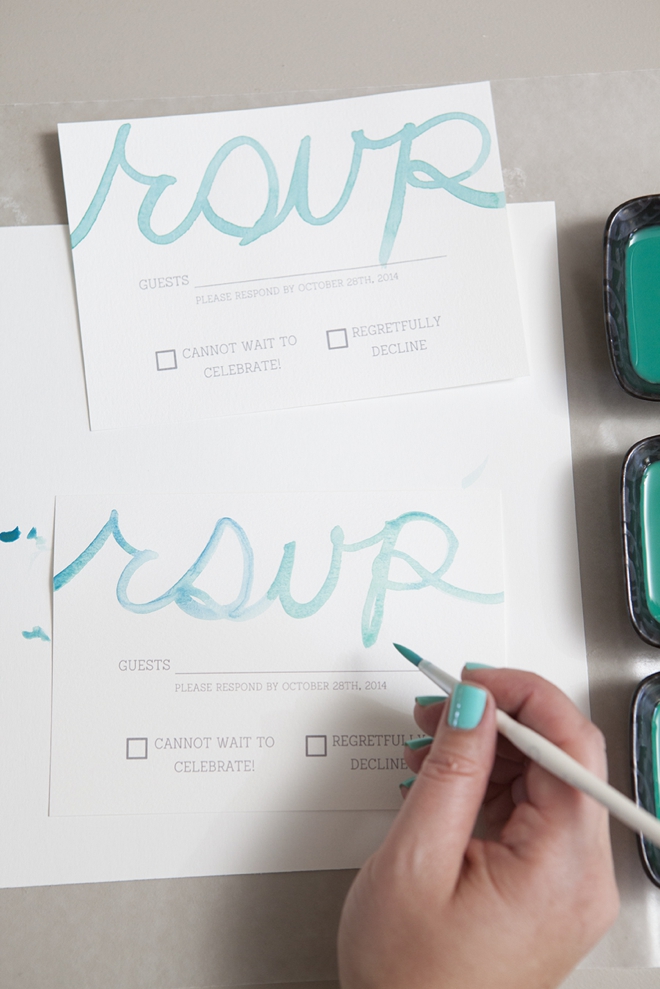
Now let’s get fancy with the RSVP card.

Simply paint the letters “rsvp” using the medium shade of watercolor only… or mix it up if you want!
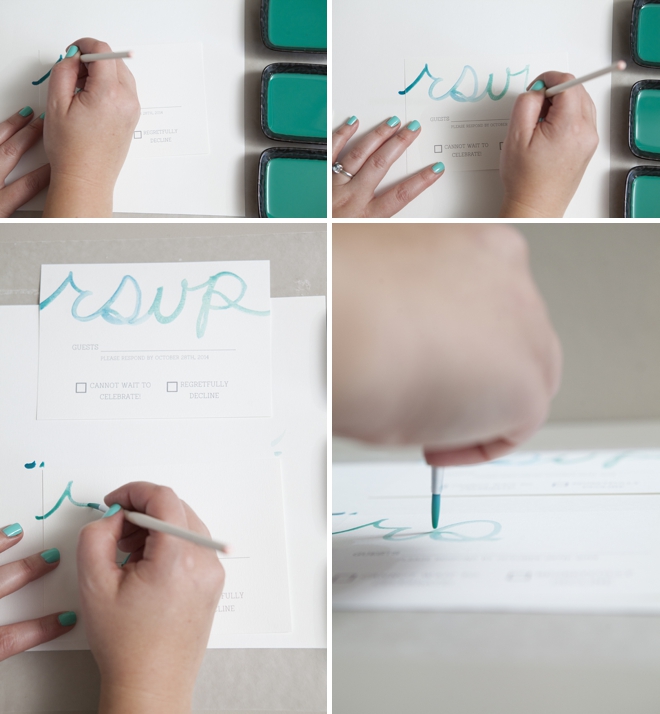
Stunning and simple. Your guests will be incredibly impressed.
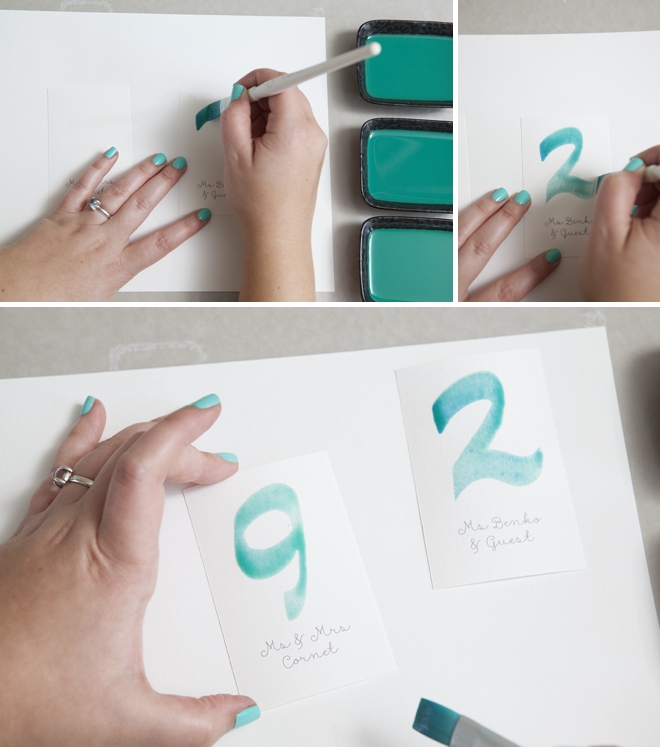
Are you ready to have some fun!?! Onto the table numbers…
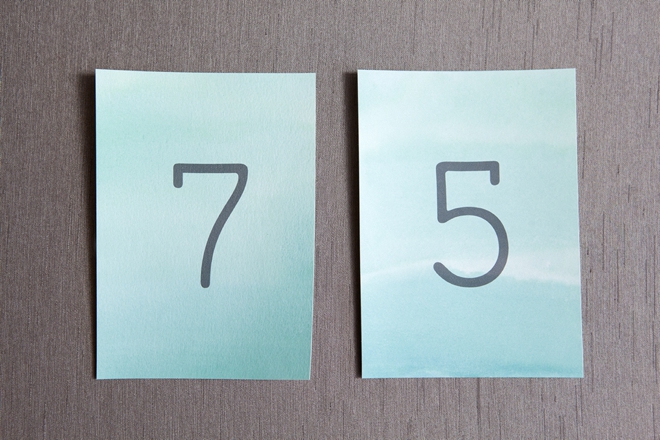
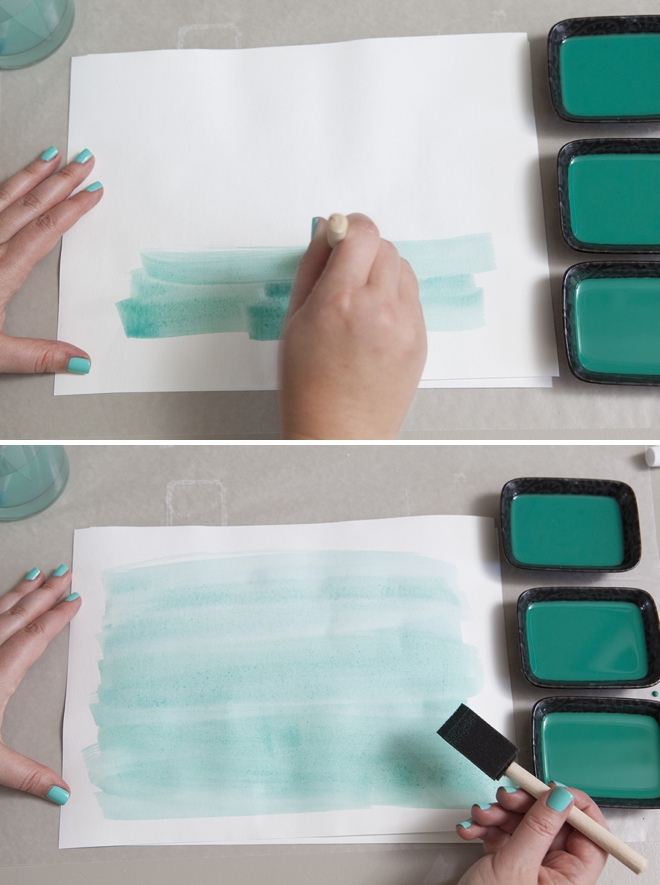
For this unique detail, first paint an entire sheet of water color paper – just like you did the bottom of the invitations. Dark, medium, then light. Let dry. Then cut down and print large table numbers onto your gorgeous solid watercolor sheets.
Ok – my favorite – watercolor escort cards!!
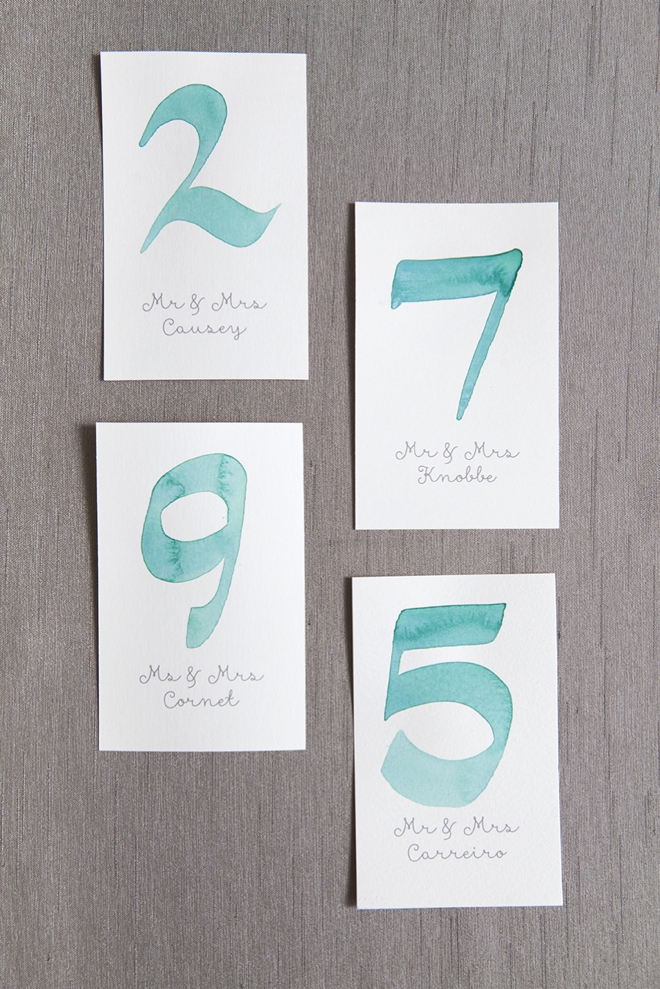
Print out cards for each of your guests… then simply paint their table number onto their card. I just used the medium shade of paint here, but you could do some in dark, some in medium and some cards in light!
I’m super jazzed to share these ombre watercolor wedding invitation designs with you… if you have any questions leave them below.
CRAFTERS TIP: when watercoloring your paper can curl! If you have time leading up to your event – stack all papers under really heavy books/bricks for like a week to flatten them out. If you don’t have time – iron them!!
As with all our DIY tutorials, if you create one of our projects please send us a picture or a trackback – We Love Seeing Your Creativity! If you use Instagram or Twitter please use the hashtag #SomethingTurquoiseDIY. Happy Crafting!
DIY Tutorial Credits
Photography: Studio Eleven Weddings // DIY Tutorial: Jen | Something Turquoise // watercolor paper and paint brushes: Michaels // watercolor tubes: Amazon // $ font: Showcase

Comments