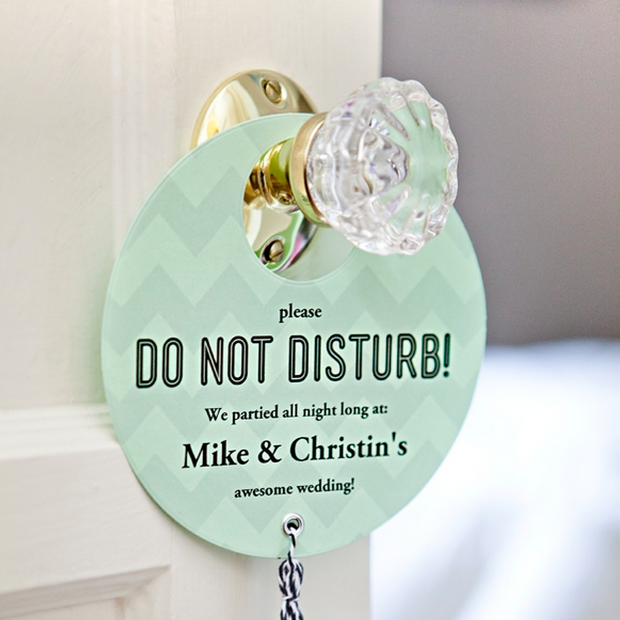

DIY | Do Not Disturb Door Sign
I love little details. I live for the little details. The things that make people say… “she thinks of everything”. Which is exactly what your guests will say when they see (and get to use) these darling “Do Not Disturb” door signs! If your wedding plans are leaving you and your guests at a hotel the night of your wedding – this project will be a thoughtful and funny detail that will encourage a well rested morning for all. The best part – since I learned how to make ‘editable’ downloads you can personalize these bad boys for FREE below!

SUPPLIES:
- Lifestyle Crafts Evolution Machine
- Lifestyle Crafts ‘Nesting Circles‘ die cut templates
- your choice of colored cardstock (cut to 6″ wide and at least 6″ long)
- scissors
- tape
- twine
- Crop-A-Dile hole punch
- scrapbooking eyelets
- the FREE design download below

Guess what!?! I learned how to create ‘editable’ pdf’s!!! So.. download the file below, double click on the name text box and input yours, then save and print onto your choice of cardstock! Sorry the font is kinda lame – it has to be one that’s universal.

Using your circle nesting die cuts, carefully tape them down to the paper so they won’t move while cutting – making sure not to tape to any design areas.

Then crank through your Evolution cutting machine.

In under 30 seconds you’ll have a perfectly cut and embossed sign!

Ok – let’s be real. Obviously if you do not posses the awesome machine above – you can cut this design out by hand. Not my first choice – but do what you gotta do.

To add a fun little tassel to your sign, hole punch and add a scrapbooking eyelet to the bottom of your sign.

Cut two 3″ strands of twine to tie and hang your tassel with.

Wrap at least 6 lengths of twine around three fingers, tie off the top 1/2″ with one cut piece of twine, cut the ends free and place the second piece of cut twine through the top loops. *CRAFTERS TIP: If your twine looks crazy and kinked from it’s package, simply run your fingers under water and wet the twine a bit – lay flat to dry and the ends will be perfectly straight.

Tie your new tassel onto each sign!

Aren’t they adorable!?! …there’s only 1 important step left…

Cutting the slit so you can slip it over a door handle! And now you’re done!

![]()
To save 20% off any Lifestyle Crafts or We R Memory Keepers products please use the code TURQUOISE during checkout at www.shopwer.com.

As with all our DIY tutorials, if you create one of our projects please send us a picture – We Love Seeing Your Creativity! If you use Instagram or Twitter please use the hashtag #SomethingTurquoiseDIY and it will show up on our Get Social page. Happy Crafting!
DIY Tutorial Credits
Photography: Studio 11 Photography // DIY tutorial + free download by: Jen | Something Turquoise // Lifestyle Crafts Evolution, Nesting Circles Die Templates, and Crop-A-Dile: courtesy of We R Memory Keepers // scissors: Fiskars // scrapbooking paper, eyelets, and twine: Michaels // nail polish: Essie – Turquoise & Caicos![]()

Comments