
DIY | hand punched save-the-date invitations
Last week I shared our big, crafty ‘12 Months of Martha‘ news and today I’m sharing my second project with you – I was so inspired by the products I received that I just couldn’t help myself! This project shows how you can easily create a matching invitation and address label set using one simple craft punch… obviously these would make amazing Save-the-Date invitations but they would also make fabulous Valentine’s or even lovely stationary!
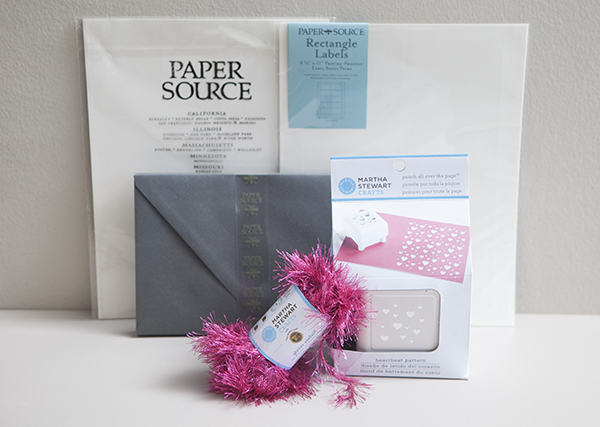
SUPPLIES // Martha Stewart Crafts Heartbeat Pattern “punch all over the paper”, Martha Stewart Crafts Glitter Eyelash yarn, 8.5″ x 11″ cardstock, rectangle address labels, A9 size envelopes, paper trimmer and scissors.
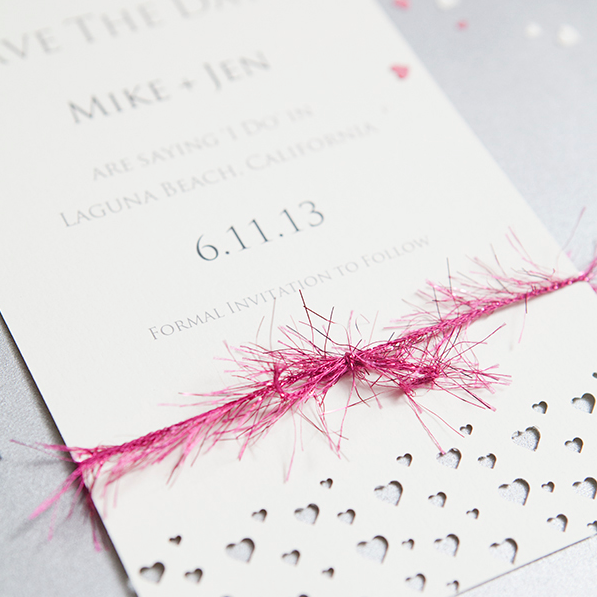
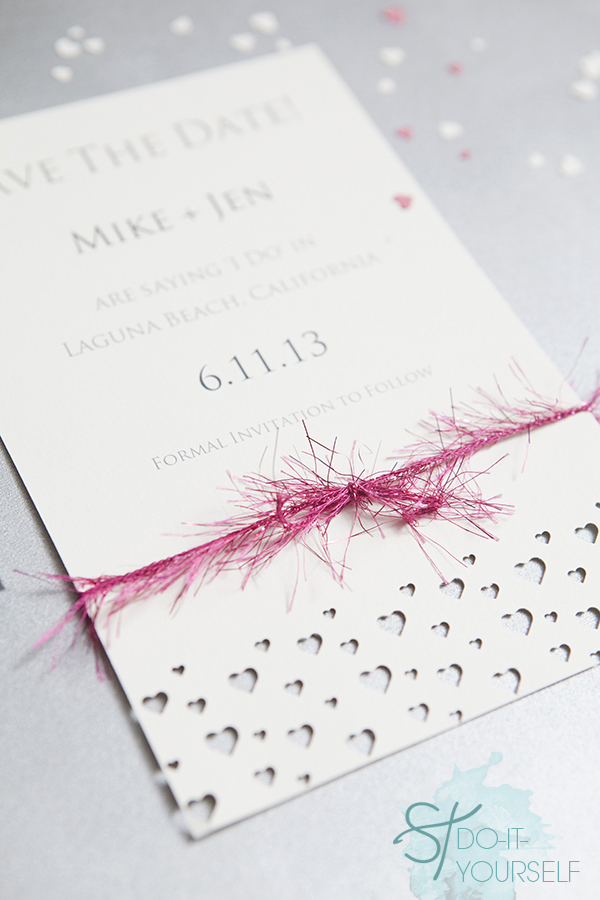
Start by designing your own simple save-the-date invitation using any word processing program. All you need to include on a save-the-date invitation is the words ‘save the date’, your names, the date and the city that you will be getting married in. You might also like to include ‘formal invitation to follow’ to remind your guests that more information is to come. For this design you will need to leave about three inches of blank space towards the bottom of the paper.
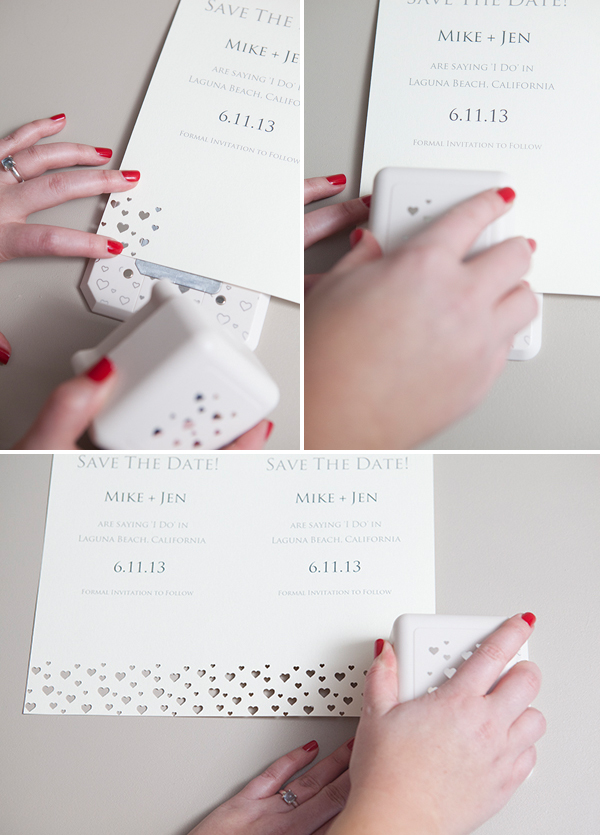
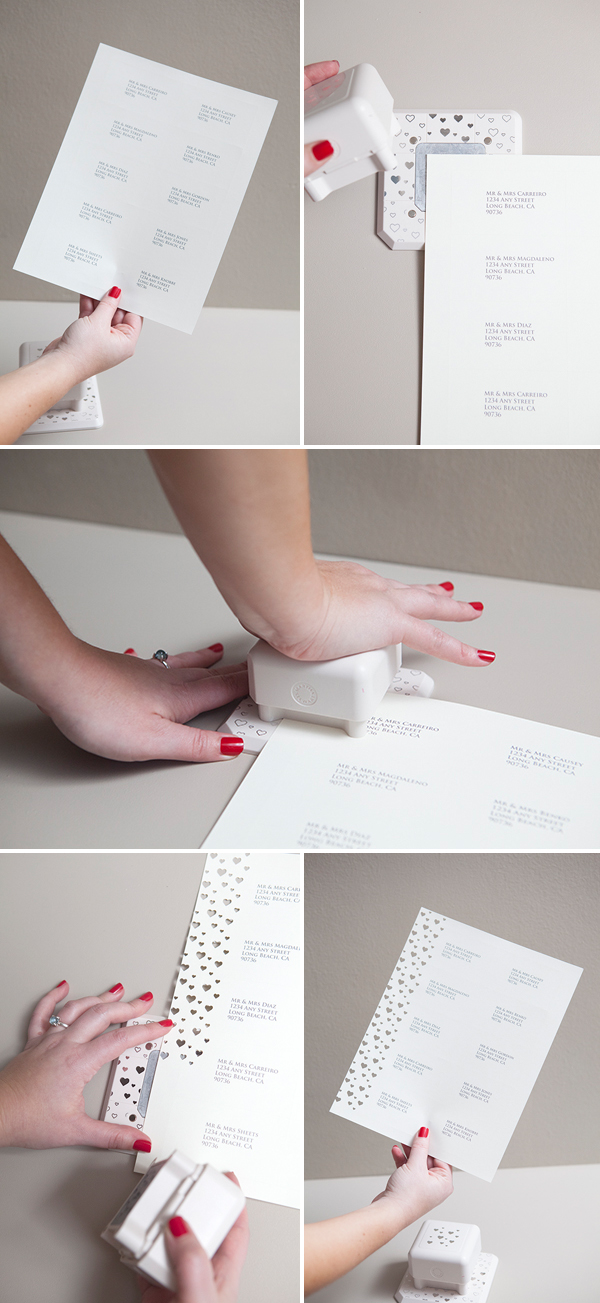
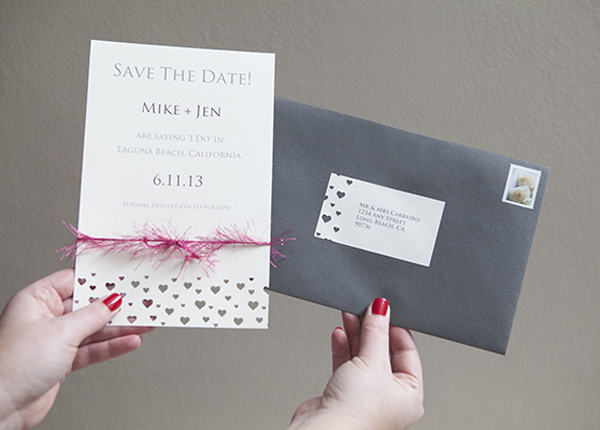
Today I am highlighting the uses of Martha Stewart Crafts new ‘punch all over the page’ craft punch… you are no longer confined to the outer edges of your scrapbooking paper – now you can punch anywhere you want! These punches come apart completely so that you can place them anywhere on the page. After you have printed your invitations, start punching across the bottom of each page – but if you want you can punch through the center!
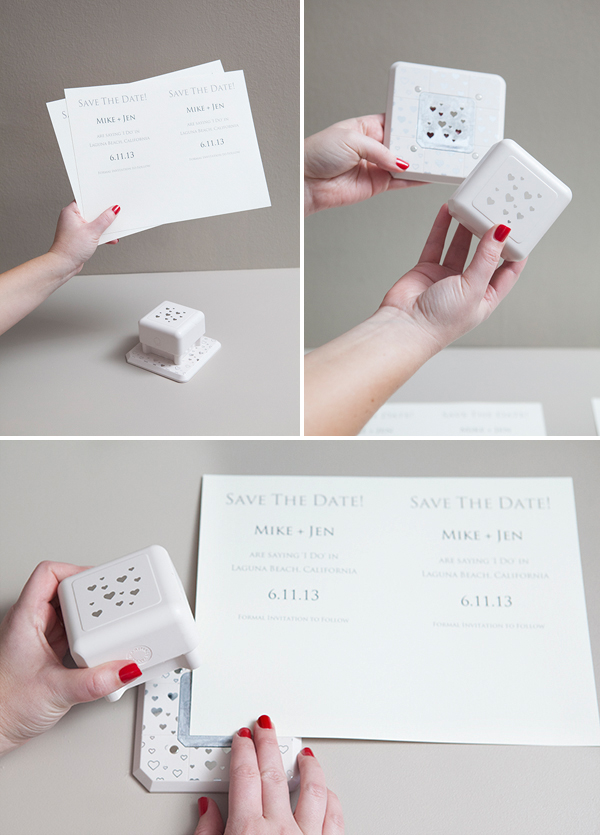

Simply align your freshly punched hearts with the heart designs on the punch base to know that you are in the correct area to continue punching…
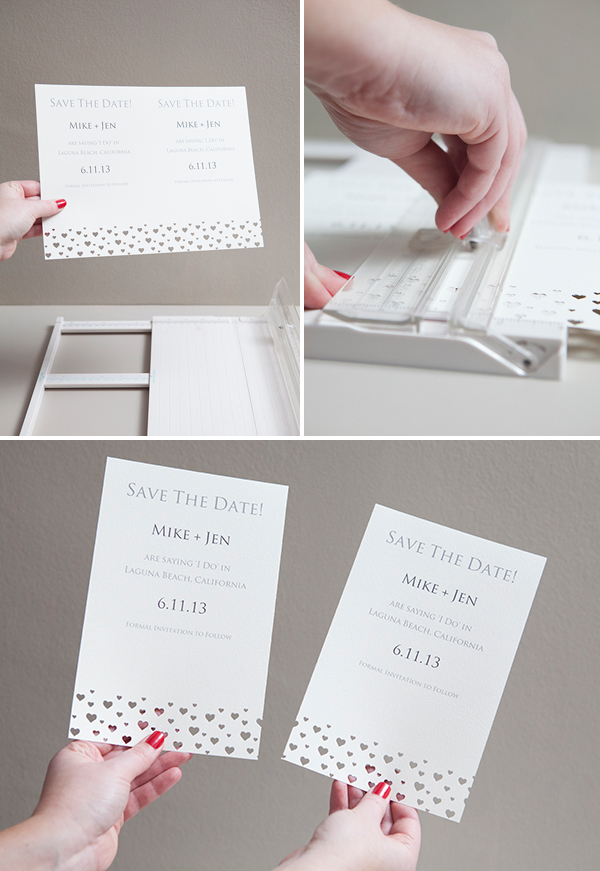
Once complete, cut the page in two creating two invitations.
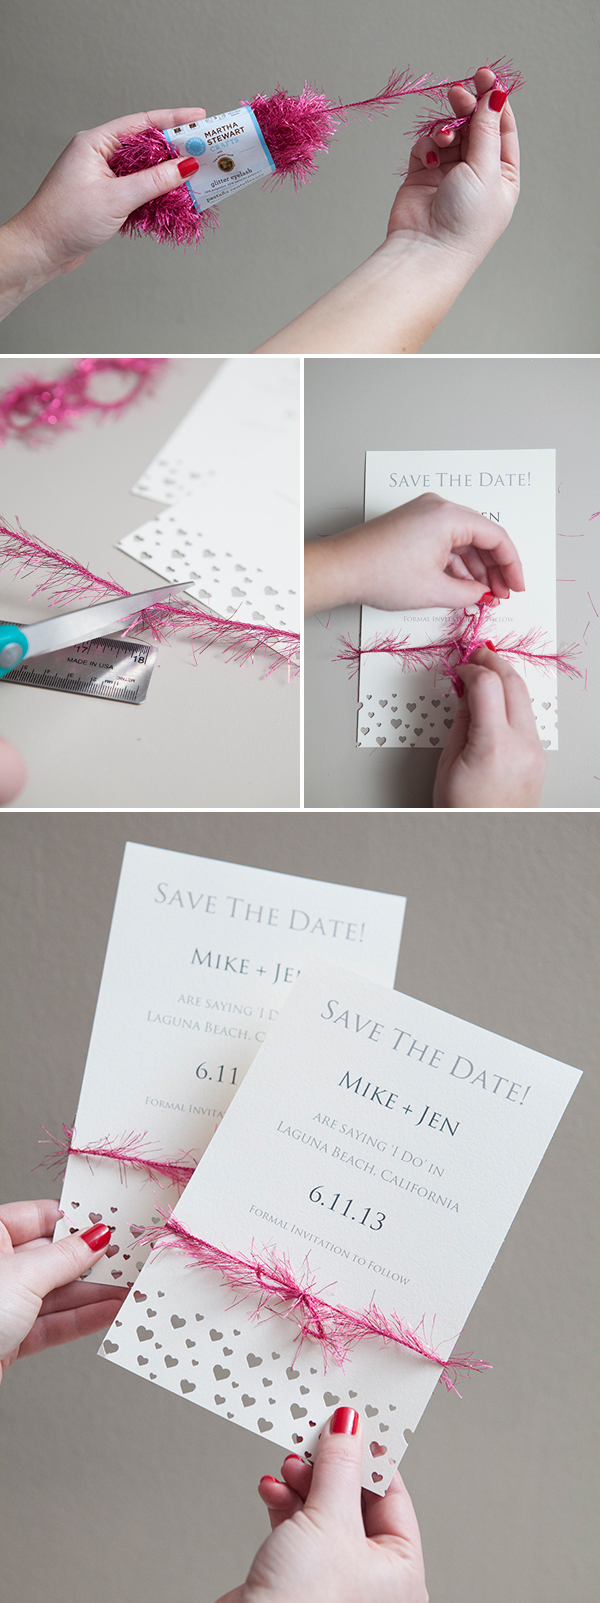
Now using this darling Martha Stewart Crafts glitter eyelash yarn – that doubles as fabulous ribbon… tie a little knot around each invitation.
If your punch feels like it’s getting a bit dull after punching lots of invitations, you can give it a quick sharpen by punching a piece of tin foil a couple times.

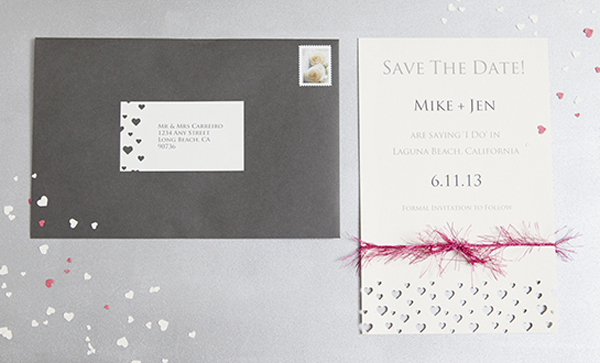
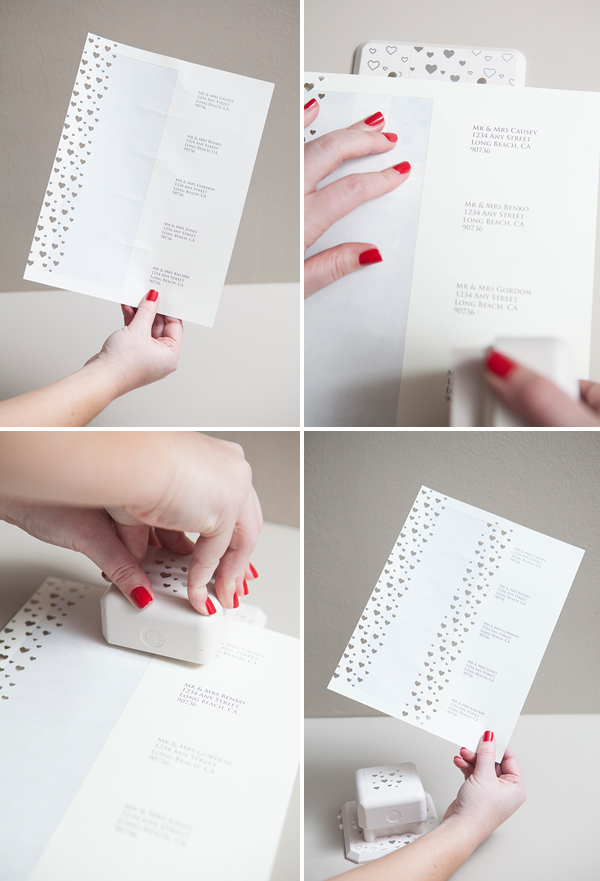
Print your guests addresses on address labels and get ready to punch! Punch all the way down one side of your address labels…
Then remove and place the entire first row of address labels onto their envelopes.
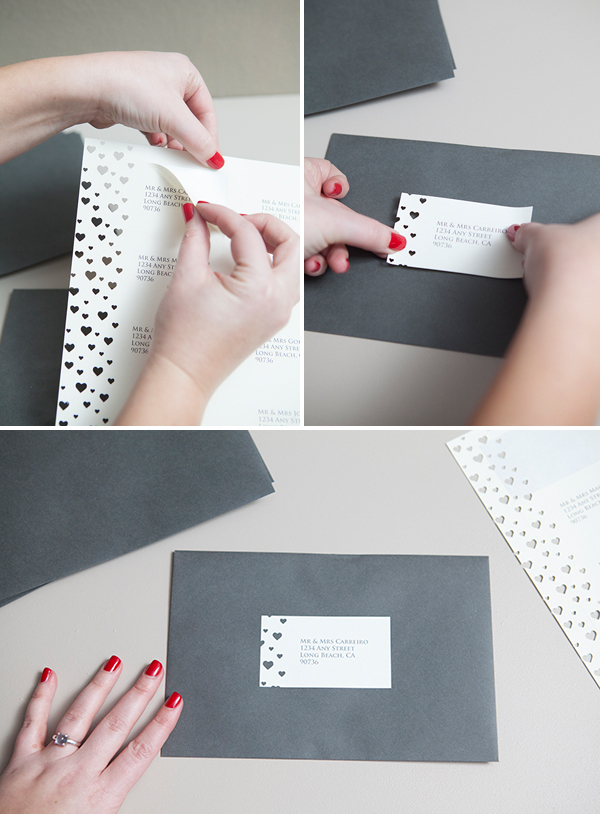
Now you can punch the second row of labels! If you punch the second row while the first row of labels is still on the sheet, the punch will most likely go through your guests addresses in the first row. It’s very handy to be able to punch all over the paper for this part of the project!
![]()
{ this project is part of the ’12 Months of Martha’ Campaign }
As with all our DIY tutorials, if you create one of our projects please send us a picture or a trackback – We Love Seeing Your Creativity! If you use Instagram or Twitter please use the hashtag #SomethingTurquoiseDIY. Happy Crafting!
![]()
Photography: Studio 11 Weddings // DIY tutorial by: Jen | Something Turquoise // Martha Stewart Crafts Heartbeat Pattern Punch All Over the Page, Martha Stewart Crafts Glitter Eyelash Yarn in Tourmaline, Martha Stewart Paper Trimmer: Martha Stewart Crafts // large rectangle address labels in Superfine Soft White, cover weight (cardstock) 8.5″ x 11″ paper in Superfine Soft White, and A9 size envelopes in Slate from: Paper-Source // font: Trajan Pro // nail polish: Sally Hansen Salon Effects Nail stickers

Comments