
Easily embellished save the dates with Wedding Paper Divas
HAPPY DIY-FRIDAY!!! Doing-it-yourself doesn’t always need to be an intense crafting experience, it can be as simple as embellishing store bought save-the-date invitations. Today I am sharing three simple techniques that you can use to jazz up any type of invitation. These adorable save-the-date invites below are from our fav ~ Wedding Paper Divas!
Technique #1
Adding a thin ribbon or twine bow to Save-the-Date Magnets. Using a super sharp hole punch like my favorite Crop-a-dile below, simply punch a hole in your magnet. This is absolutely no problem for the Crop-a-dile, it punches through magnets like butter. Then add a thin ribbon or twine bow to the edge of your magnet. It will still fit in the envelope and looks just darling when hanging on your guests fridge! Invitation: Picture This Save The Date

Technique #2
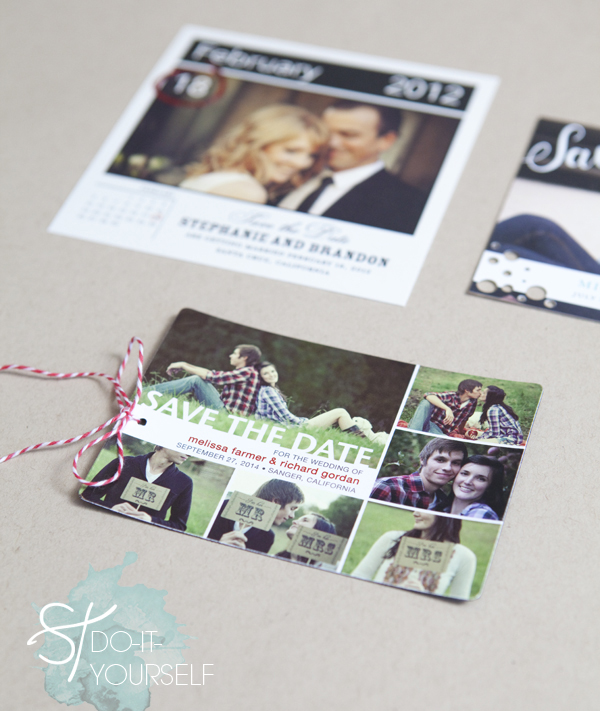
Corner punching Save-the-Date Postcards. There isn’t much you can do to a postcard since they have to go through the mail without the protection of an envelope, so embellishing by punching is the perfect addition! Find a punch that won’t cut into your design, picture, or mailing information on the back of the card – and punch away! So cute! Invitation: Sophisticated Hand Save The Date

Technique #3
Adding glitter glue to an existing design in Save-the-Date Cards. I absolutely love the design below but the red circle needed a little something extra! Simply outline the red area using Martha Stewarts wonderful glitter glue and you will have a glamourous addition to an already gorgeous card. This can work for many different card designs; pick an area that you want to accentuate and add glitter! Invitation: Circle It Save The Date

As with all our DIY tutorials, if you create one of our projects please send us a picture or a trackback – We Love Seeing Your Creativity! If you use Instagram or Twitter please use the hashtag #SomethingTurquoiseDIY. Happy Crafting!
DIY Tutorial Credits
Photography + DIY tutorial by: Jen | Something Turquoise // all three adorable Save-the-Date Invitations courtesy of: Wedding Paper Divas // Crop-a-dile hole punch, Martha Stewart Glitter Glue in Carnelian, and the EK Success Corner Punch: Michaels // red twine: Paper-Source // nail polish: OPI Ski Teal We Drop + Fly

Comments