
DIY | easy batting frame
It has become very popular to have material frames like these on display at receptions… adorned with all kinds of different items. From menus and seating cards to pictures of the bride and groom… this super easy DIY batting frame can be accomplished in less than an hour and can be completely customized to your color and purpose!

SUPPLIES // large frame, 1″ thick batting wide enough to cover your frame, thin material that matches your frame, Duck Tape, Tacky Glue, fabric shears and a regular pair of scissors. I also included the fabric pins because you will need them to pin something cute to this frame!

Start by cutting your thick batting down to fit within the frame, it will help to have a really nice pair of shears for this. Let’s talk about batting! There are SO many different kinds; polyester, fiberfil, pillow batting, foam batting, quilt batting… batting is essentially thick cotton wadding prepared in sheets for use in quilting. Here we are covering this fluffy substance with material so that we can create a base that you can pin something to. As long as you have a large sheet of puffy batting about 1″ thick… it does not matter what type you get.

After your piece of batting is cut down to your frame size, remove the cardboard insert that comes inside the frame. If your frame didn’t come with a piece of cardboard, purchase one or find some around the house.

Your cut piece of batting should fit perfectly within the cardboard, with about 1/2″ border all the way around. Using Tacky Glue, glue your batting to the piece of cardboard. Let dry.

Cut your matching fabric about 10″ larger than your frame; example: if your frame is 16″ x 20″ like mine – add 10″ on both sides to make it 26″ x 30″. This will give about 5″ slack of material on each side of the cardboard for taping. Now about your choice of material… make it as thin as possible. By removing the glass from the frame we gain some room within the frame, but if you choose a bulky material like burlap for example – this set might not fit within your frame along with the frame backing. Choose wisely.

Carefully wrap each side of the material around the cardboard and batting, securing with pieces of Duck Tape… just like wrapping a present! You want to pull the material snug, but not too tight.

Tape all four sides of the material to the cardboard…

Now for the corners. Pull the material taught and then separate each side of the corner almost making a square, tape the corners down.

That’s it! Your batting frame is done!

Remove the glass from the frame {and find a safe home for it} and insert your new creation.

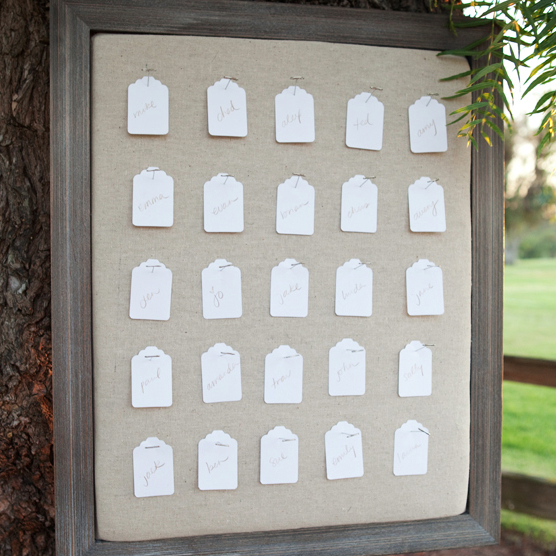
Done and ready for pinning!!! Perfect for seating cards… or pictures… or a menu…

As with all our DIY tutorials, if you create one of our projects please send us a picture or a trackback – We Love Seeing Your Creativity! Happy Crafting!
DIY CREDITS // Photography: Studio 11 // DIY tutorial by: Jen | Something Turquoise // Studio Decor Frame in Barnwood, fabric pins, Tacky Glue, Duck Tape: Michaels // beige cotton material, Fiskars Fabric Shears, polyester batting by Fairfield: JoAnn’s Fabrics // nail polish: I have a herring problem OPI

Comments